Zucchini Bread

IMG_2442

I love trying to find the best recipe there is for any given item. I performed a Zucchini Bread Battle last year. Both recipes were good but they weren’t good enough. As I had just received some giant zucchini from a co-worker again, I knew another zucchini bread was a necessity. This recipe is perfection. I borrowed the base of the recipe from a friend. Thanks lovely.

Zucchini Bread (adapted from Apple Sparkle Cake)

  • 1 cup shredded zucchini
  • 1/2 cup vegetable oil
  • 1 cup sugar
  • 2 eggs
  • 1 tsp vanilla
  • 1 1/3 cup flour
  • 1 tsp baking soda
  • 1/2 tsp salt
  • 1 tsp cinnamon
  • dash or two nutmeg
  • 1/2 cup chopped walnuts
  • 2 individual packets Sugar in the Raw

Preheat the oven to 350 degrees. Grease a loaf pan.

Add the shredded zucchini to a large mixing bowl. Add the oil, cup of sugar, eggs and vanilla and mix well to combine. Add the flour, baking soda, salt, cinnamon, and nutmeg. Fold the dry ingredients into the wet until just combined. Fold in the walnuts. Pour into the prepared loaf pan. Sprinkle the top of the cake with the Sugar in the Raw.

Bake for 50-60minutes until a toothpick inserted comes out clean. Cool for 10 minutes in pan. Remove from pan and let cool completely before slicing.

IMG_2442

Baked Grouse, two ways

On the last day of My First Deer Hunt I ended up going grouse hunting and managed to come home with 4 grouse which was totally amazing! I had recently made Apricot Glazed Grouse which was delicious but was in the mood for more of a warming fall/winter type dish. I made a casserole the first night which is very easy & comforting. The next night I made an easy breaded grouse & served it with roasted carrots and creamy goat cheese rice. Neither are fancy but both are delicious.

Grouse Casserole (serves 2)

  • 2 grouse, cleaned and cut into bite-sized chunks
  • 1/2 cup rice
  • 1 can cream mushroom soup
  • 10 oz milk
  • 1/2 bag frozen vegetables (I used a broccoli & cauliflower blend)
  • 1/2 dry onion soup packet
  • water, as needed

Mix all ingredients in a medium bowl. Pour into a greased casserole dish. Bake for 75-90 minutes until rice is cooked through stirring every 15 minutes. Add water as necessary.

IMG_1716


Crispy Onion Breaded Grouse (serves 2)

  • 2 grouse, cleaned (keep breasts intact or cut into tender sized strips)
  • 1 egg, beaten
  • frenchs onions
  • 3 large carrots, chopped into bite sized pieces
  • olive oil
  • salt & pepper
  • 1/2 cup rice
  • 1 cup chicken stock
  • 1oz goat cheese

Line two baking sheets with foil. Lightly grease one with cooking spray and set aside. Drizzle 2-3 tsp olive oil over the other baking sheet and also add pinch or two salt & pepper. Add carrots to olive oil tray and gently toss. Place in 400F oven for 20-25minutes.

Place stock and rice into small pot. Bring to a boil & then cover and simmer for 20 minutes until rice is tender. Stir in goat cheese.

Meanwhile, coat grouse in egg and dip into onions. Bake on lightly greased foil lined sheet for 12-17minutes until cooked through.

IMG_1719

Zucchini Bread Battle


IMG_1561


I received a giant zucchini from a co-worker. You know how it is, everyone gets sick of their zucchini crop and gives them away. Even though I grew my own for the first time this year, I didn’t get as much as I wanted, so I was happy to take everyone else’s surplus zucchini.

I decided to try two different breads. I cannot help myself. Making two different versions of food items has become a habit. One has twice as much eggs & oil as the other and uses almonds instead of walnuts & pecans. It also uses just baking soda instead of a baking soda & powder combo.

Depending on who you ask you get different results as to a favorite. It is a 50-50 tie more or less. In the future, I will use a combination of both depending on the ingredients I have on hand. I liked the look of version one in terms of rising so will most likely go with the baking soda only but liked the walnuts & pecan blend over the almonds. In terms of eggs & oil, the extra oil didn’t make too much of a difference in moisture but the extra egg might have affected the rising of the bread so maybe I will play around with that some more. With that being said, both are delicious & I encourage you to make them or play around with your own recipes.

Zucchini Bread trial 1 (Right side of picture)

  • 1 1/2 cups flour
  • 1 tsp cinnamon
  • dash (or two) nutmeg & clove
  • 1/2 tsp salt
  • 1 tsp baking soda
  • 1 cup sugar
  • 1/2 cup oil
  • 2 eggs
  • 1 cup shredded zucchini
  • 1/3 cup sliced almonds

Preheat oven to 350F. Grease a loaf pan with butter. Mix the first 5 ingredients in a medium bowl. Mix the rest of the ingredients in another bowl. Add the wet ingredients to the dry. Fold in the almonds. Bake for 50-60 minutes or until a toothpick inserted near the center comes out clean. Cool on a wire rack for 10 minutes in the pan. Remove from the pan and let cool completely before slicing.

IMG_1581

 Zucchini Bread trial 2 (Left side of picture)

  • 1 1/2 cups flour
  • 1 tsp cinnamon
  • dash (or two) nutmeg & clove
  • 1/2 tsp salt
  • 1/2 tsp baking soda
  • 1/4 tsp baking powder
  • 1 cup sugar
  • 1/4 cup cooking oil
  • 1 egg
  • 1 cup shredded zucchini
  • 1/3 cup chopped walnuts or pecans (I did a blend)

Preheat oven to 350F. Grease a loaf pan with butter. Mix the ingredients from the flour through the baking powder in a medium bowl. Mix the rest of the ingredients in another bowl. Add the wet ingredients to the dry. Fold in the nuts. Bake for 50-60 minutes or until a toothpick inserted near the center comes out clean. Cool on a wire rack for 10 minutes in the pan. Remove from the pan and let cool completely before slicing.

IMG_1582


Roasted Beets & Goat Cheese

I am a beet lover but I was not into beets as a child. As soon as I had real roasted beets, and none of that Thanksgiving canned junk, I was converted. I think they taste like earthy corn but in a good way if that makes sense.

Almost everyone who eats beets enjoys them with goat cheese. I couldn’t tell you how many beet & goat cheese salads and dishes I have had in the past few years. I even made a dish not that long ago Beet Millet Salad with Goat Cheese that used that cliche combo.

This time around I decided to make some dips. A battle of beets & goat cheese if you will. One which is a blend of beets & goat cheese and one is a goat cheese dip for beet chips. Both are delicious. When summer comes around and you have a garden of beets, or they are just readily available, feel free to add these to your list to make.

Let’s begin with the roasted beet & goat cheese dip.

Roasted Beet *&* Goat Cheese Dip (serves 2 but can easily be doubled)

  • 1 beet
  • 2 oz goat cheese
  • 1/2-1tsp olive oil
  • 2-4 tsp lemon juice
  • few dashes garlic salt, thyme, & oregano
  1. Preheat the oven to 400F. Chop off the ends of the beet & wrap in foil. Bake for 60min or until tender. Remove skins & let cool.
  2. Chop the beat in quarters & puree  in a food processor.
  3. Add the rest of the ingredients & blend to desired consistency (I left mine a bit chunky).
  4. Enjoy with crackers, bread, or veggies.

IMG_1278


The next beet & goat cheese combo is beet chips with a goat cheese dip. Be forewarned, I have not perfected the beet chip. You do really need a mandolin unless you have serious knife skills which I do not. I tried my best to cut them thinly & in a uniform fashion but ended up with some too thick and some in half moon type shapes. The ones that turned out are below. It might not be perfect but it was good enough & the dip will go great with regular potato chips, bread, or fresh veggies of your choice if you are not making beet chips.

Roasted Beet Chips *with* Goat Cheese Dip

  • beets
  • olive oil
  • salt & pepper
  • goat cheese
  • sour cream
  • milk
  • balsamic vinegar
  • garlic salt
  • dill

Preheat oven to 375F. Slice the beets thinly. Coat lightly with olive oil and sprinkle with salt & pepper. Place on a parchment lined baking sheet & place another baking sheet on top. Roast for 20 minutes. Remove top baking sheet and roast for 15-30 minutes longer until beets crisp up & edges curl.

IMG_1524


Mix equal parts goat cheese & sour cream ( I used 1-2 tbsp of each). Add a splash of milk and balsamic vinegar to reach desired dip consistency. Add a pinch of garlic salt & as much dill as desired.

IMG_1526


Serve chips with dip & watch them disappear.

IMG_1528


Be liberal with the dip as it is delightful to your taste buds.

IMG_1527


In terms of a winner, even though my chips did not turn out exactly perfect, the ones that did work were so tasty & the dip is now my new favorite go-to recipe that the beets *with* goat cheese dip is far superior.

Chicken or Cheese Rellenos

IMG_1091

Do you have a plan for dinner?

A question that I have become quite familiar with. The answer is yes & no. I am normally the one to make dinners. Every week I take some time to vaguely plan out a dinner menu. I write down a few ideas that I might do throughout the week & cross-check it with my fridge, freezer, & pantry.

As we had just run a commuting errand to get some food items, I knew I had poblano peppers to be used. I also knew I had cheese & salsa in the fridge, green bell peppers & jalapenos in the freezer, and rice, canned tomatoes, & taco seasoning in the pantry.

I said that I would make chile rellenos. I said it would be vegetarian. I received a look of disapproval or skepticism. Maybe a combination of the two. As I was pulling my ingredients together, I noticed that there was a leftover chicken thigh in the fridge. I said I could put in the rellenos & received a nonchalant reply but knew that this would be much preferred.

I decided to make half of the rellenos with chicken & half without. While the chicken had more substance, the cheese variation was much creamier & tasted more rich. They were both delicious & depending on your mood or taste preferences, either will satisfy your needs.

IMG_1093


While these may not be traditional, they are very good.

Chicken or Cheese Rellenos (serves 2)

  • 4 poblano peppers
  • 1 onion, chopped
  • 1 green pepper, chopped
  • 1 jalapeno, diced
  • 1 can diced, stewed, or peeled tomatoes with sauce (if you use whole or stewed tomatoes, give them a rough chop)
  • 1 cup instant rice
  • 1 cup water
  • 2-3 tsp taco seasoning (use prepared or make your own…see below)
  • 1/2 cup reduced fat cheddar cheese
  • 3-4 oz Neufchatel cream cheese
  • pulled or shredded cooked chicken (equivalent to 1 thigh or small breast)
  • salsa
  • sour cream, optional

If you are making your own taco seasoning mix together the following in a small dish…

  • 1 tbsp. chili powder
  • 1 tsp cumin
  • 1 tsp paprika
  • 1/2 tsp salt
  • 1/2 tsp pepper
  • 1/4 tsp garlic powder
  • 1/4 tsp onion powder
  • 1/4 tsp crushed red pepper or cayenne
  • 1/4 tsp oregano
  1.  Place poblano peppers on a cooking sheet & place under broiler. Broil for 3-5 minutes per side until skins are blistered. Place peppers into a bowl & cover with pastic wrap or place in a gallon sized plastic bag. Let sit for 10 minutes & remove skins. Slice open on one side & remove seeds. Add 2 tbsp. cheddar cheese to each pepper. Add 1-2 tbsp. cream cheese. Add salsa as desired. Add pulled chicken to two of the peppers. Close peppers.
  2. Meanwhile, chop the onion, green pepper, & jalapeno. Sauté in a small amount of olive oil over medium heat until caramelized. Add the tomatoes & the water. Bring this to a boil & stir in the rice & taco seasoning. Cover & remove from heat. Let sit for 5-8 minutes until rice absorbs liquid.
  3. Pour rice into a 9×13 in casserole dish. Top with peppers. Bake in a 400F oven for 20-30 minutes until cheese is melted. Serve with additional salsa & sour cream if desired.


Raisin Bread: To Yeast or not to Yeast

I have never liked raisins. Not even as a child. I would rather eat nothing than eat raisins. A while back I did a battle of Oatmeal Raisin Cookies and I have been sitting on a bag of raisins ever since. I don’t like them in salads or cookies but on occasion I have eaten Cinnamon Raisin Bread and enjoyed them that way. I decided to try a few different recipes to see if I could begin to use up my supply. I made one bread recipe with yeast & a quick bread recipe (with no yeast).

raisin both

I went with the no yeast recipe first. I love making quick breads. They are so “quick” & easy as the name implies. They almost always turn out delicious & moist which are the two basic criteria for a successful quick bread.

Cinnamon Raisin Quick Bread

  • 2 cups all-purpose flour
  • 1 ½ cups granulated sugar, divided
  • 1 tbsp cinnamon
  • 1 tsp baking soda
  • ½ tsp salt
  • 1 egg
  • 1 cup buttermilk or sour milk (I used 1tbsp lemon juice and enough milk to make 1  cup & let stand for 5 minutes)
  • ¼ cup vegetable oil
  •  1/3  cup raisins
  1. Preheat oven to 350°F. In a medium bowl combine flour, 1 cup sugar, baking soda, and salt.
  2. In a small bowl whisk egg, buttermilk, and oil. Add the wet ingredients to the dry & stir until just combined. Fold in raisins.
  3. Combine cinnamon and remaining sugar; set aside.
  4. Spoon half the batter into a greased loaf pan. Sprinkle with half of the reserved cinnamon-sugar; repeat layers. Cut through batter with a knife to swirl.
  5. Bake 55-65 minutes or until a toothpick inserted in center comes out clean. Cool in pan 10 minutes before removing from pans to wire racks. Let cool completely.

raisin no yeast_2

Cinnamon Raisin Bread

  • ½ cup milk
  • 1/3 cup warm water, approximately 110F
  • 2 ¼ tsp active dry yeast
  • 1 egg
  • ¼ cup butter, softened
  • ¼ cup granulated sugar
  • ¼ tsp salt
  • 1/3 cup raisins
  • 2 cups all-purpose flour plus a few tablespoons (to reach desired consistency)
  • ½ cup granulated sugar
  • 1 tbsp cinnamon
  1. Add warm water to a medium bowl. Stir yeast in water and set aside, about 5-10 minutes.
  2. Meanwhile, warm milk in a small saucepan or microwave until it just starts to bubble. Let cool until lukewarm.
  3. Mix in egg, 1/4 cup sugar, butter, salt and raisins to yeast mixture. Stir in the cooled milk slowly.
  4. Add the flour gradually to make a stiff dough. Knead the dough on a lightly floured surface for a few minutes until smooth.
  5. Grease a large bowl and place the dough inside turning to lightly grease all sides of the dough. Cover loosely with a warm, damp cloth.
  6. Let rise until doubled in size (approximately 2 hrs).
  7. Roll dough out on a lightly floured surface into a large rectangle, approximately 1/2 inch thick.
  8. Moisten the surface of the dough with 1 tablespoon milk.
  9. Mix together ½  cup of sugar & 1 tbsp cinnamon and sprinkle mixture evenly on top of the moistened dough.
  10. Roll the dough tightly (the long way). Tuck under ends and pinch bottom together.
  11. Place a piece of parchment paper inside the loaf pan (for easy removal), grease with butter, and add the loaf. Let rise uncovered for about an hour.
  12. Place in cold oven and set to 350F. Bake for 60minutes until lightly browned and the loaf sounds hollow when tapped.
  13. Cool for 10 minutes in pan.
  14. Remove from the pan and let cool completely.

raisin yeast


Results:

Both breads were scrumptious. However…the yeasted bread was exceptional! The texture was what one would expect from a Cinnamon Raisin Bread & it looked more pleasing to the eye as the swirls were very pronounced. The cinnamon swirls were also more sticky compared to the quick bread. When you bit in to the quick bread, it had a sugar-cinnamon crust on top and in the middle, whereas the swirls in the other were slightly crispy & slightly gooey & sticky all at the same time.

Definitely take the time to make the bread with yeast. Also, the recipe can easily be doubled or tripled so you can make many loaves at once and place some in the fridge to bake at a later date. If this is done, once the dough is rolled out and rolled back up with the cinnamon-sugar mixture, cut in half or into thirds depending on how many loaves you are making. Place in the loaf pan with parchment paper and cover loosely. Place in the fridge and use within 1 week. When ready to bake, let stand on the counter or in a cold oven for 1 hour. Proceed to bake as previously directed.


Peach Muffins & Peach Bread

It has been a long time since I have been able to bake. I moved up north and had temporary living arrangements where I did not have my kitchen or pantry items available to me for 2 months. I finally closed on my new home and have started the slow process of unpacking. The kitchen, however, was put together almost immediately.

My new kitchen has a wall oven. I have always wanted a wall oven. It’s so easy to put things in and take them out without ever having to bend over. I finally got to put it to good use these past few days. Baking Sunday occurred for the first time in a long time. For those of you who don’t know “Baking Sunday” is where I bake & do other things I enjoy while my other half watches football – a sport which I completely detest.

As I was looking through my cookbooks trying to figure out what to make, my sweetie saw a photo of fudgie brownies and said that it looked yummy. So I decided to make them. They turned out very dense and fudge-like as the name implied. I decided that the next day I would make muffins as I saw a recipe for “Muffin Monday” that looked yummy which called for canned apricots.

Seeing as how I have no can opener (it’s a long story) I needed something that had a tab on the lid or those fruit in syrup packs. I ended up buying peaches in syrup.

Peach Muffins adapted from Apricot Muffins

  • 1 3/4 cups flour
  • 1 /2 cup sugar
  • 2 tsp baking powder
  • 1/2 tsp salt
  • 1/4 cup vegetable oil
  • 1/4 cup milk
  • 1 (4) pack of diced peaches in syrup (4-4oz containers)
  • 1/4 cup syrup from the drained dice peaches
  • 1 tsp vanilla
  • 1 egg

Preheat the oven to 350F & line a muffin pan with liners. Drain the peaches but retain the syrup. Mix the first 4 ingredients together in a large bowl and mix the rest of the ingredients (except the diced peaches) in a medium bowl. Add the wet ingredients to the dry and mix until just combined. Fold in the diced peaches leaving 1/2 to 2/3 cup to use in another recipe. Bake for 25-30 minutes or until a toothpick comes out clean. Cool for 5 minutes on a wire rack. Remove muffins from pan and cool completely.

IMG_0917

As I had leftover peaches and syrup I decided to make a quick bread to use them up.

Peach Bread

  • 2 cups flour
  • 2/3 cup sugar
  • 1 tsp baking powder
  • 1/2 tsp baking soda
  • 1/2 tsp salt
  • 1/3 cup vegetable oil
  • 2 eggs
  • 1/2 cup fruit syrup
  • 1/2 cup milk
  • 1/2 cup to 2/3 cup diced peaches
  • 1/2 cup chopped walnuts

Preheat oven to 350F and grease a loaf pan with butter. Mix the first 5 ingredients in a large bowl. Mix the oil, eggs, syrup, & milk in a medium bowl. Add the wet ingredients to the dry and mix until just combined. Fold in the peaches and walnuts and pour into greased loaf pan. Bake for 50-60minutes or until a toothpick near the center comes out clean. Cool for 10 minutes in a wire rack and remove from pan to cool completely before slicing.

IMG_0921


Both were delicious. The muffins had a light peach flavor throughout with bits of diced peaches, but they were a little dense and not as moist as they could have been. The bread also had peach flavor throughout and bits of diced peaches but was very moist. It had a great texture with the walnuts as well. Thus, the bread wins this battle.

Oatmeal Raisin Cookies

I often ask people what their favorite___________ is. This time I asked people at work about cookies. One person said Oatmeal Raisin to which I gave a slight look of horror. “Not oatmeal chocolate chip?” I asked. Nope. She wanted oatmeal raisin. Other people said different types of cookies but as I had an abundance of oats I decided to try two different oatmeal raisin cookie recipes.

IMG_0706

The recipes couldn’t be any more different from eachother but in terms of a winner, I am at a loss. At first I thought it was the one with the coconut (left cookie). Then I thought it was the other cookie. They both have different qualities to them which make them appealing in different ways. The one with the coconut is much hardier and has a nice texture. It is sweet and a has a slight spice to it. The other cookie has much more spice and a bit more sweetness to give it a very well-rounded flavor. After asking numerous people, it is a tie. When the person who loves these cookies was asked, she picked the coconut one. Take your pick.

…from Martha                                                   …from Better Homes and Gardens

Oven: 325F                                                      Oven: 375F

1 1/2 C all-purpose flour                                  1 3/4 C all-purpose flour

1 tsp ground cinnamon                                    1/2 tsp ground cinnamon & 1/4 tsp cloves

1 tsp baking soda                                             1 tsp baking powder & 1/4 tsp baking soda

1 tsp salt

1 C sweetened, shredded coconut

1/3 C pure maple syrup*

1 C butter, softened                                           3/4 C butter, softened

1 C packed brown sugar                                   1 C packed brown sugar, 1/2 granulated sugar

1 egg                                                                  2 eggs

2 tsp vanilla                                                        1 tsp vanilla

3 C old-fashioned rolled oats                             2 C rolled oats

1 C raisins                                                          1 C raisins

*Martha says to use a grade B syrup instead of a grade A, as it has a deeper flavor. I just used what I had in my pantry.

Either way, Enjoy these Oatmeal Raisin cookies (if you like raisins in your cookies that is, I have always preferred chocolate instead)


Pumpkin Bread Revisited

After my last post on pumpkin bread I received a question from a dear friend asking if I wanted another recipe. Of course I said. She then proceeded to send me two recipes. If you don’t know, this friend is Emiglia. We met in France while studying abroad. We managed to become friends (and stay friends) even though we rarely see each other. More on that later perhaps. For now, more pumpkin bread.

She sent me a pumpkin bread recipe that called for dark chocolate chunks in it and one with a cream cheese topping. My other two breads that I had previously made were just classic, plain pumpkin breads. These are embellished, but by no means any more difficult to prepare. In fact, quite the opposite. These are much easier to prepare than my other recipes as you only need one bowl (well you do need a second bowl for the cream cheese topping, but only one for the bread itself) and you do not need a mixer of any sort. Emiglia is very good about keeping quickbreads quick and easy as the name implies.

When my other half came home and saw there was something in the oven, again I had the question, “What’s in the oven?” Again I responded, “Pumpkin bread.” The reply was, “Of course.” I just cannot seem to leave well enough alone. I think I would bake just about anything with pumpkin in it. Anyhow, I tried to explain that these were Emiglia’s recipes and I had to try them. I received an, “Uh Huh.”

Well, the verdict is in. They were both delicious. When it comes down to it, the chocolate chunk bread is the favorite of the two new recipes. It is so moist & filled with pumpkin flavor that is accented by dark chocolate. Need I say more? I urge you all to try them both (see recipes below).


Pumpkin & Chocolate Loaf: http://www.tomatokumato.com/pumpkin-and-chocolate-loaf/

Pumpkin Cream Cheese Quickbread: http://www.tomatokumato.com/pumpkin-cream-cheese-quickbread/

Pumpkin Bread

What’s in the oven? Pumpkin bread.

What’s on the counter? Pumpkin bread.

I received a head nod of acceptance and a simple “ok” for a reply. I bake different recipes for the same item quite frequently in order to try and find the best version. This time it was pumpkin bread. It is September after all.

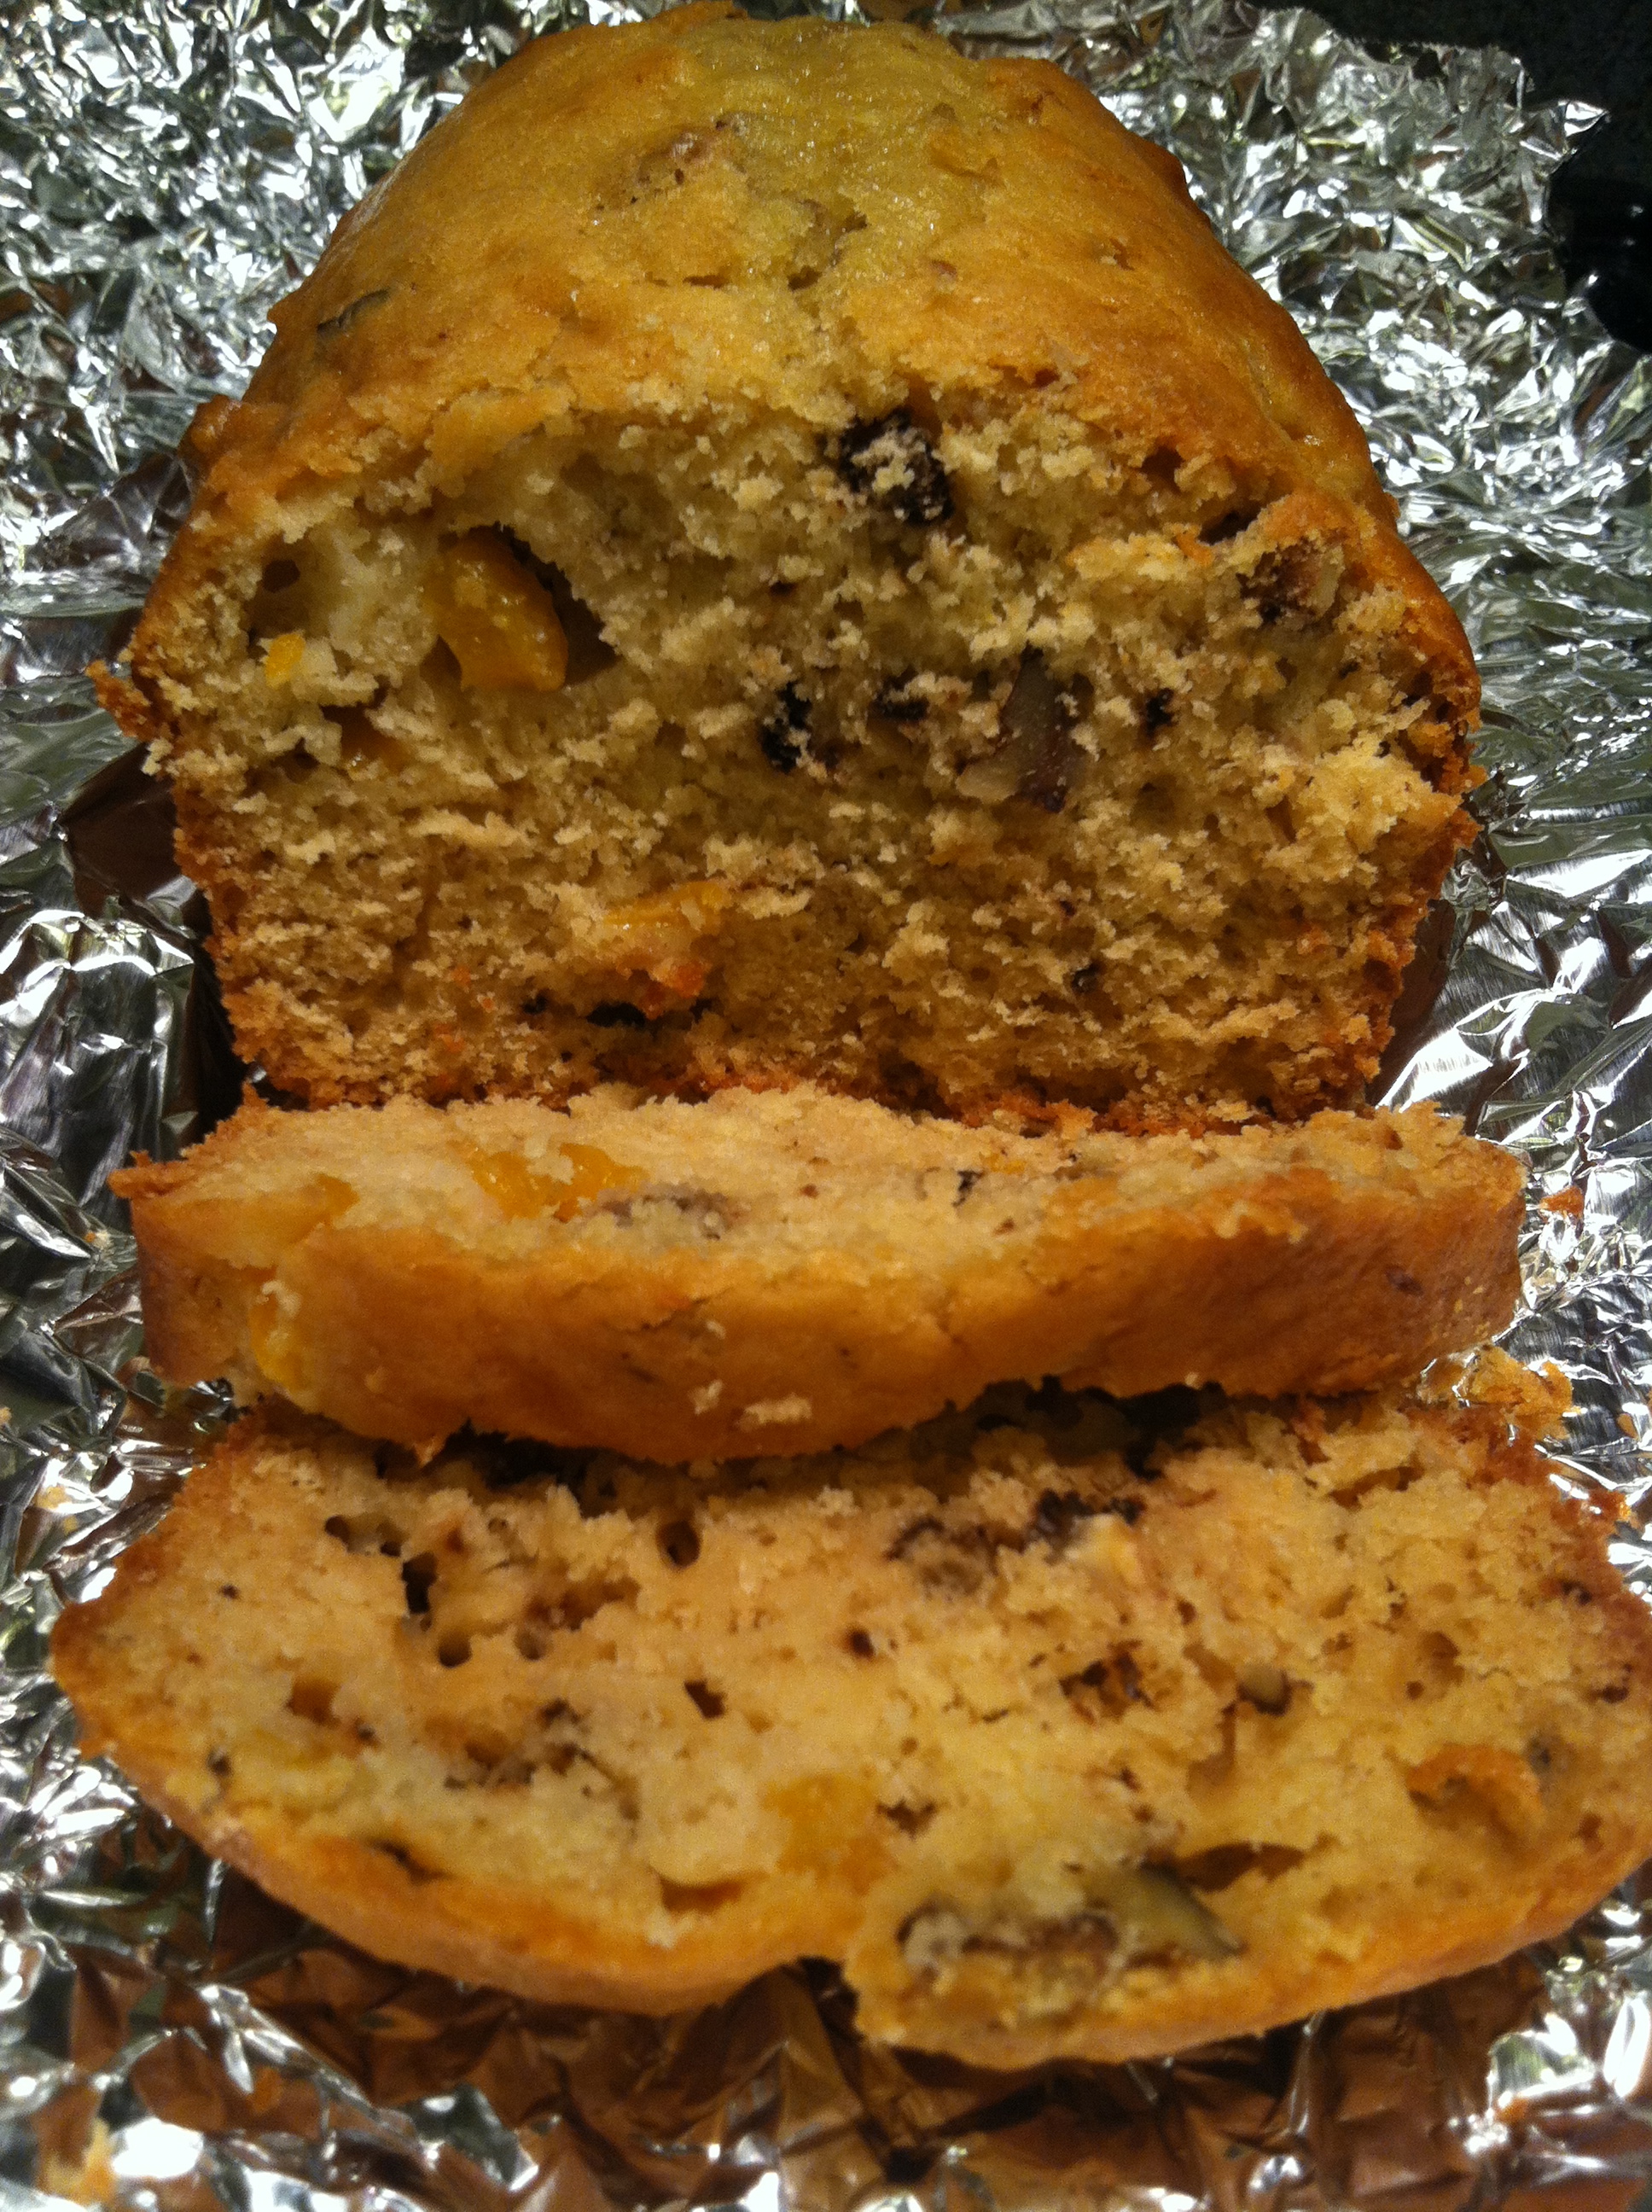
Once this time of year hits I go pumpkin crazy. I love pumpkin. You tell me it has pumpkin and immediatetly my ears perk up and my stomach gurgles. The only pumpkin item I do not like is pumpkin beer. I’ve tried many and have not liked any of them. Anyhow, I have been making a certain pumpkin bread for years. It is delicious, moist, flavorful, and I have never had any complaints. I happened to come across another pumpkin bread recipe that looked appealing, so I decided to try it out against my go-to bread.

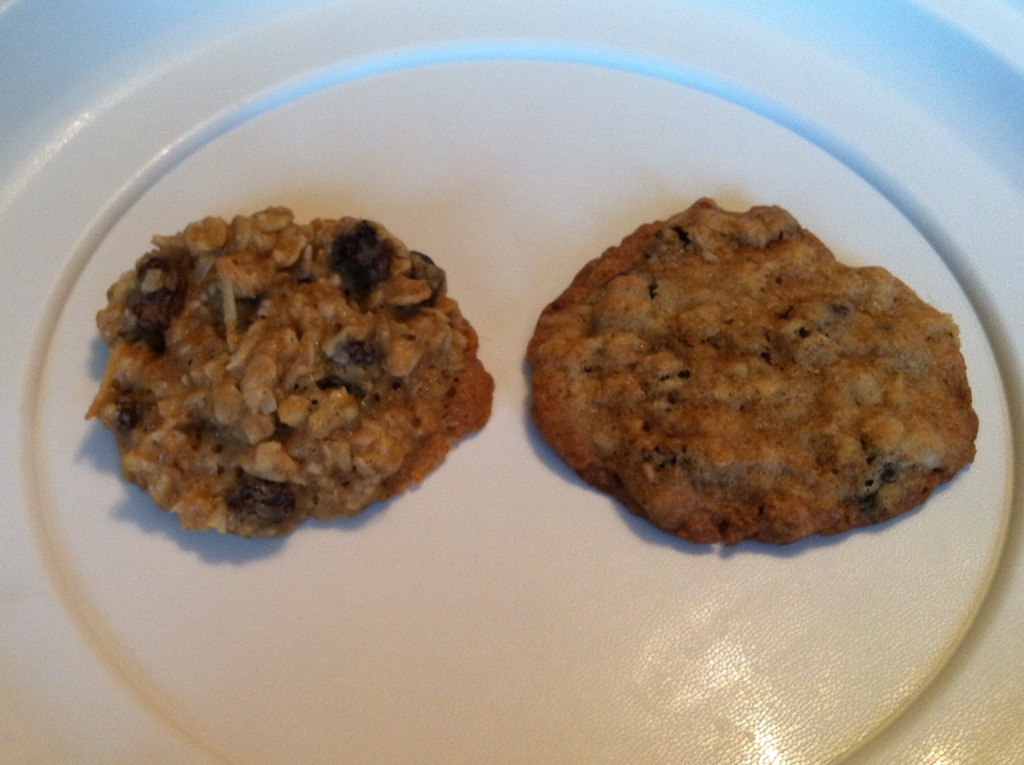
The recipes are completely different from each other but both result in yummy pumpkin bread. I have had numerous people try them and I have an almost tied vote. Some people cannot choose and only two more people has chose my classic pumpkin bread over the newcomer. I honestly don’t know which I like better.

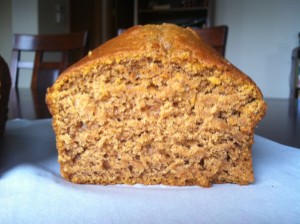
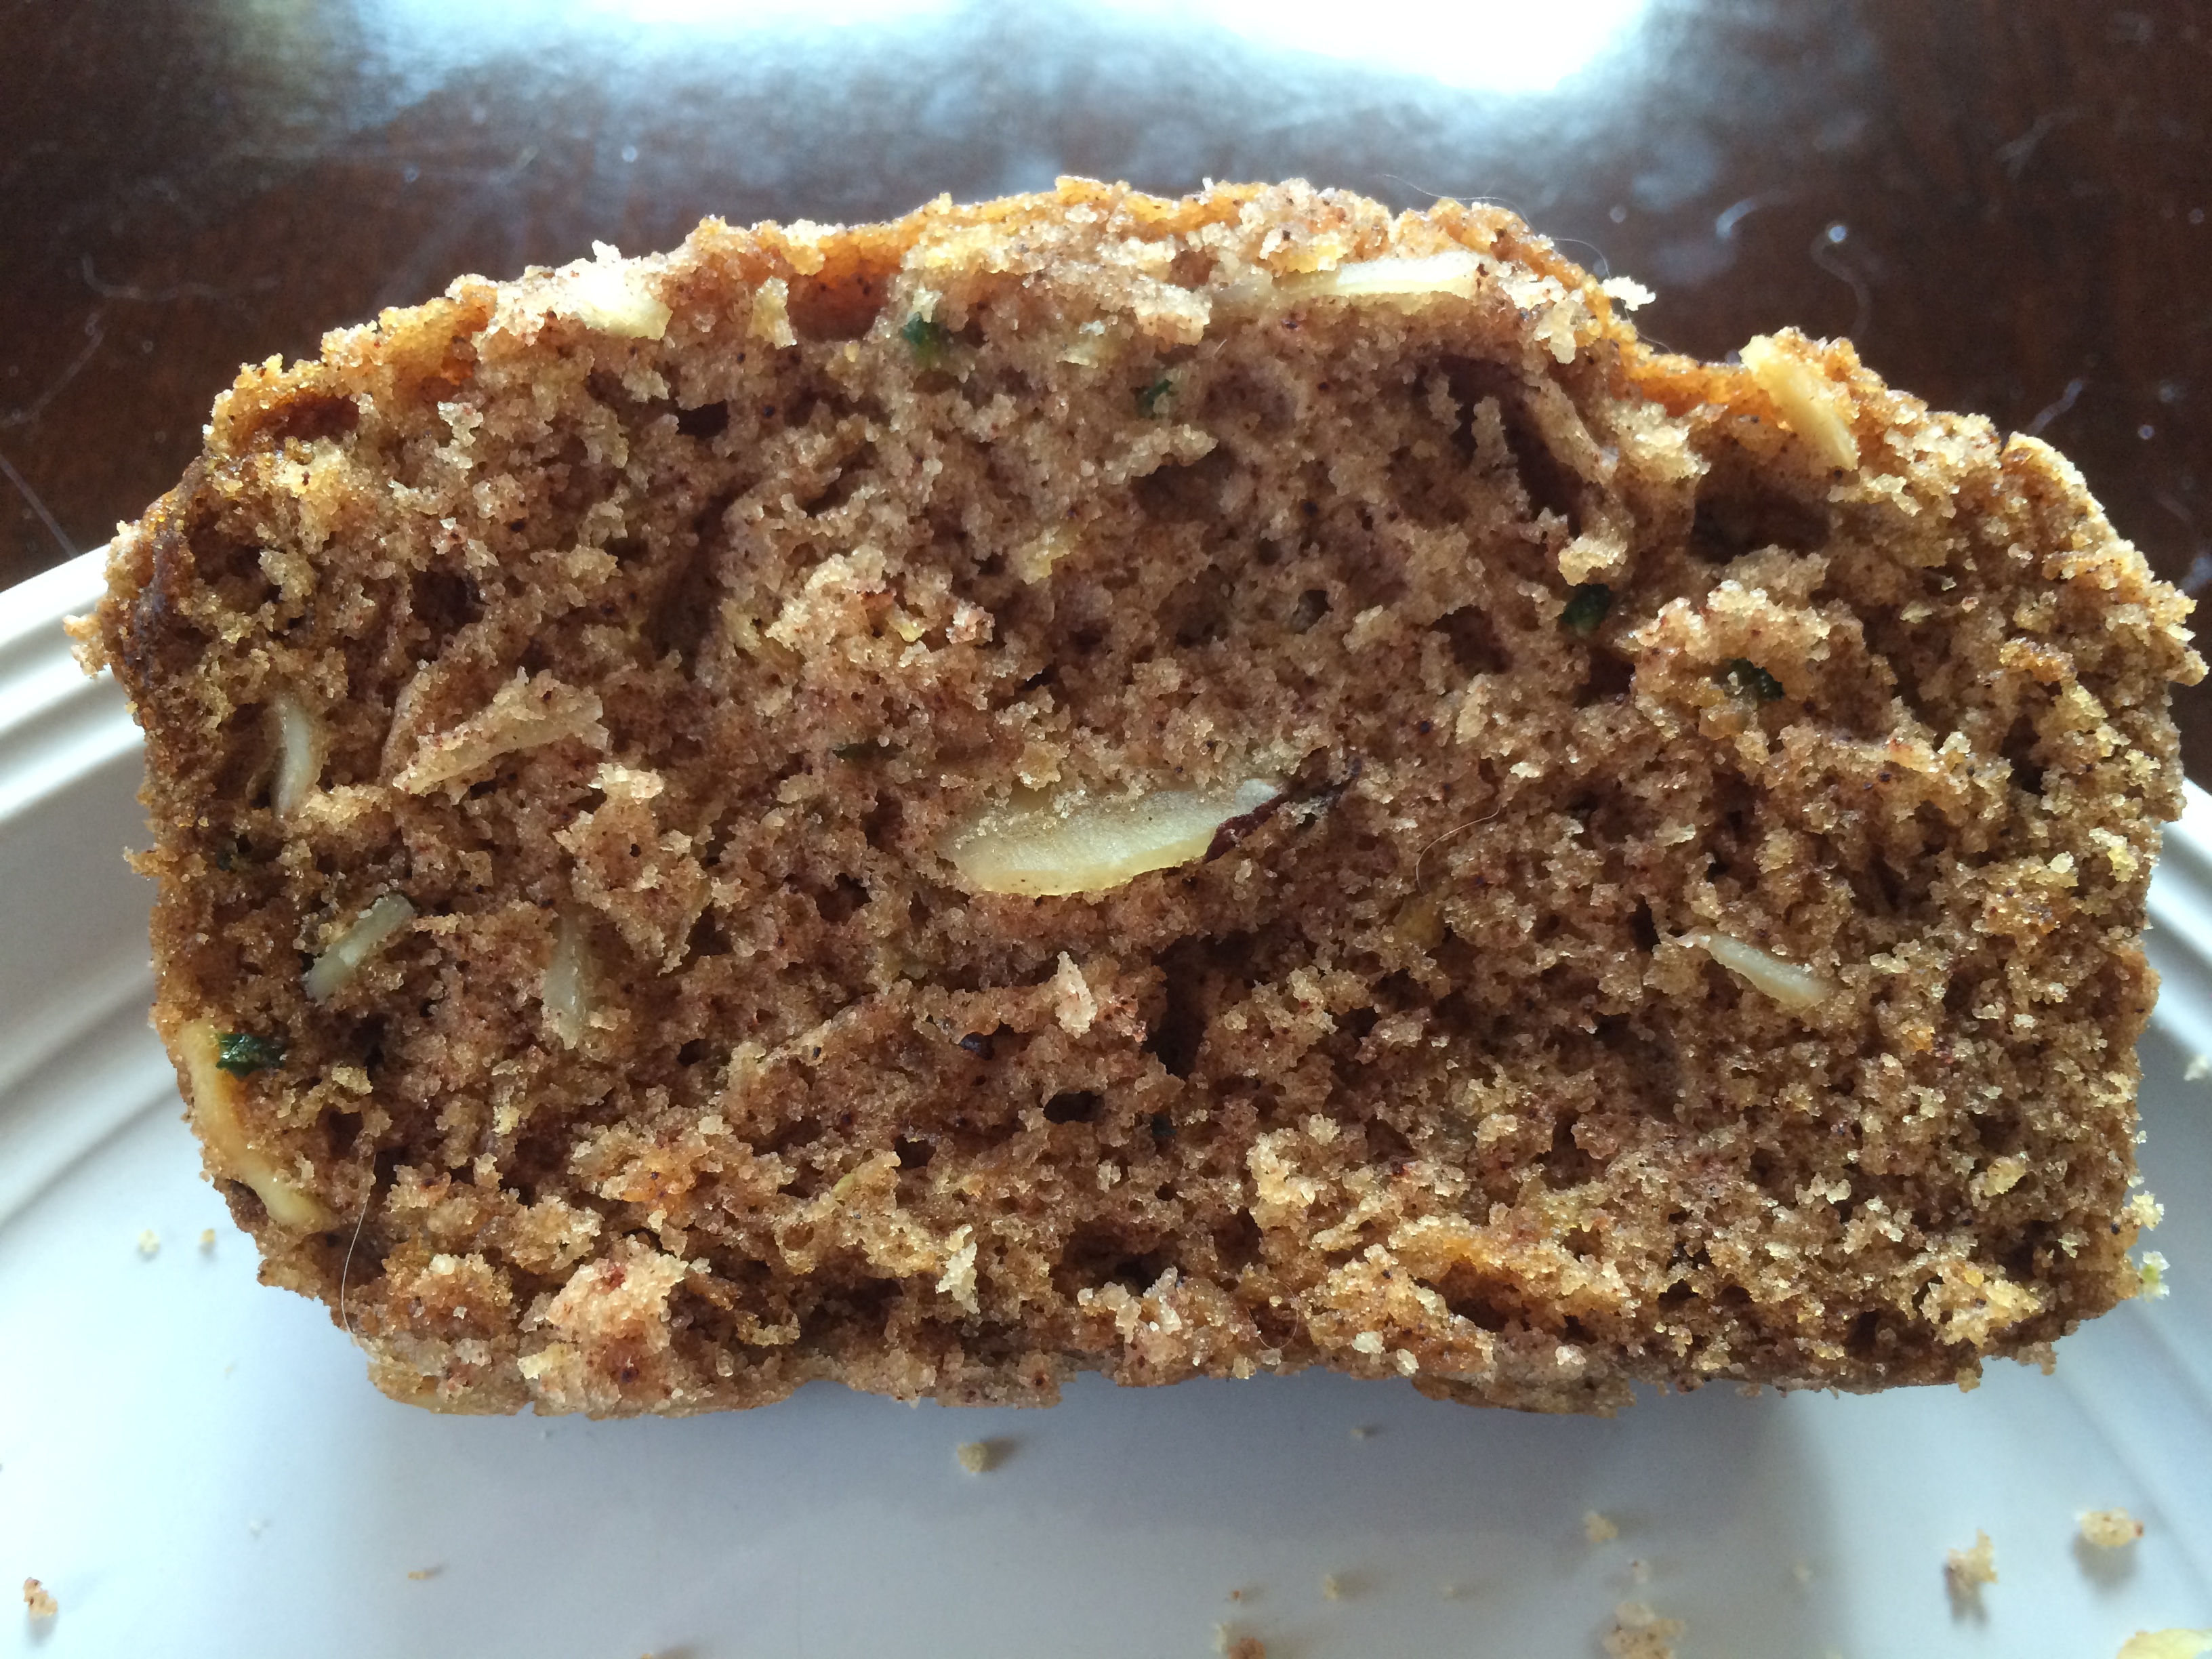
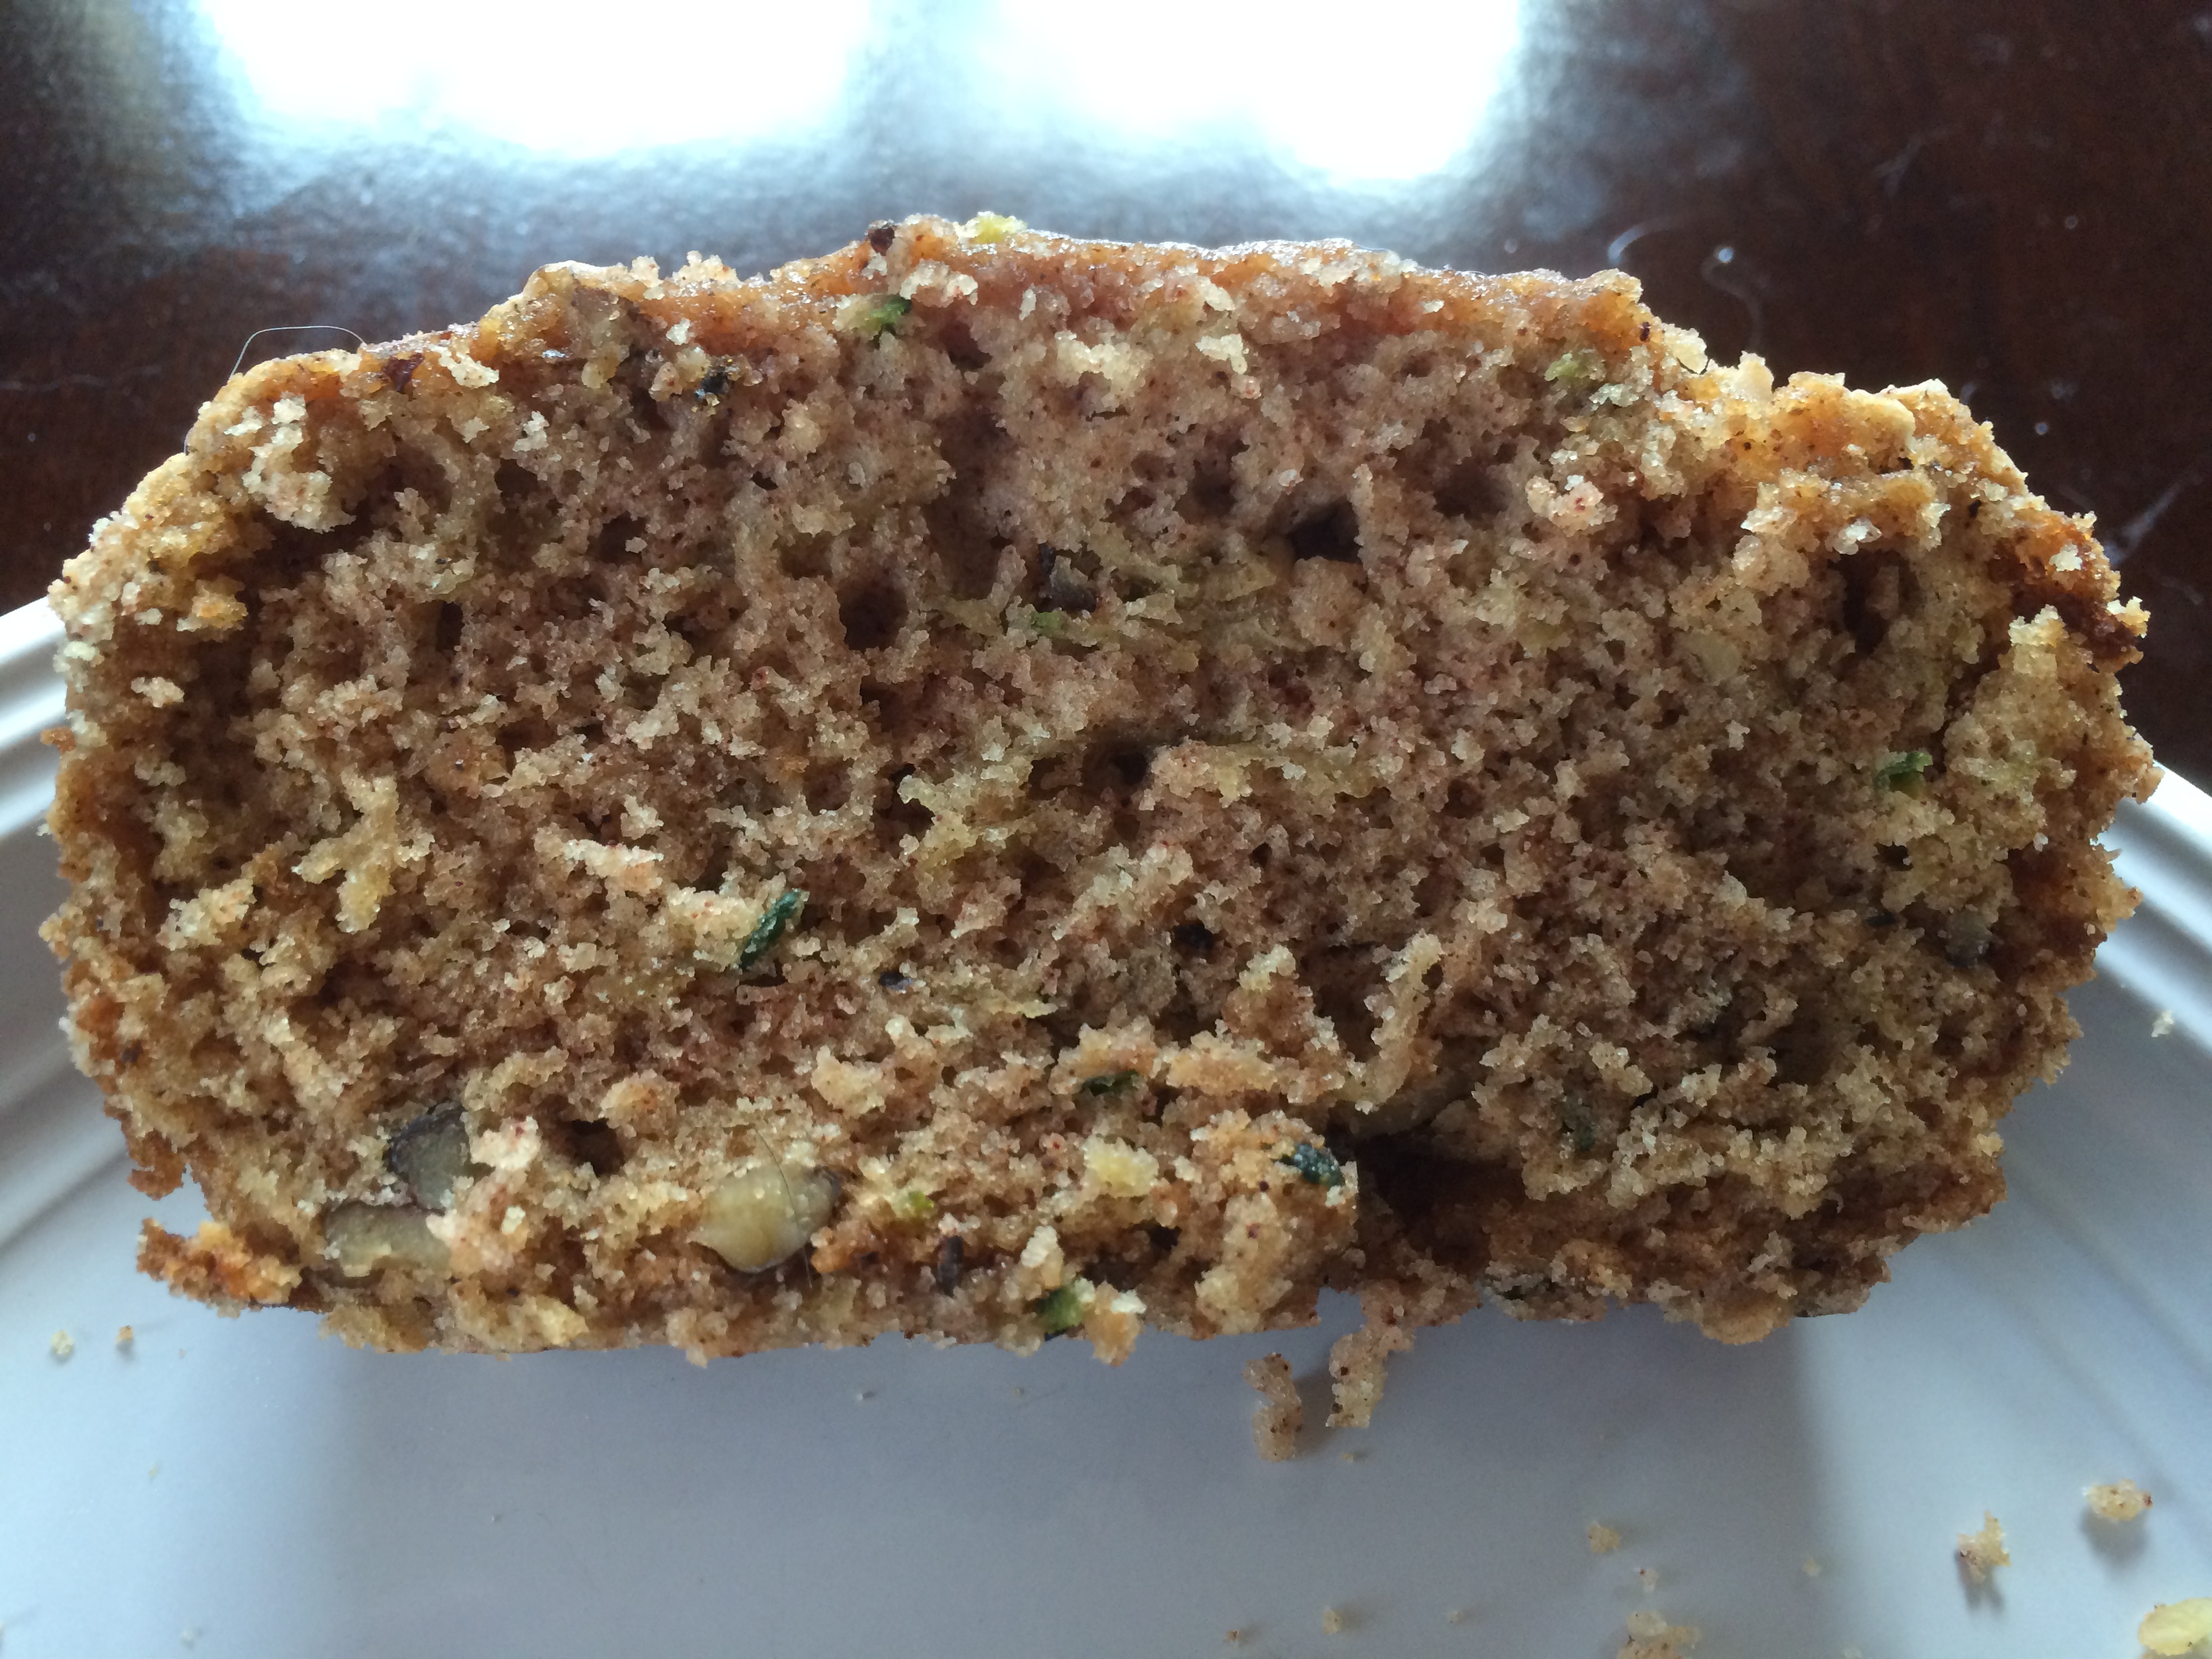
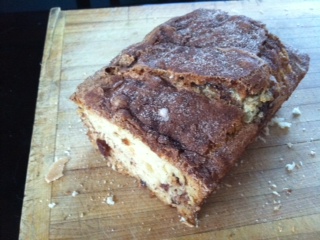
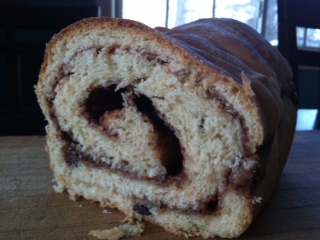
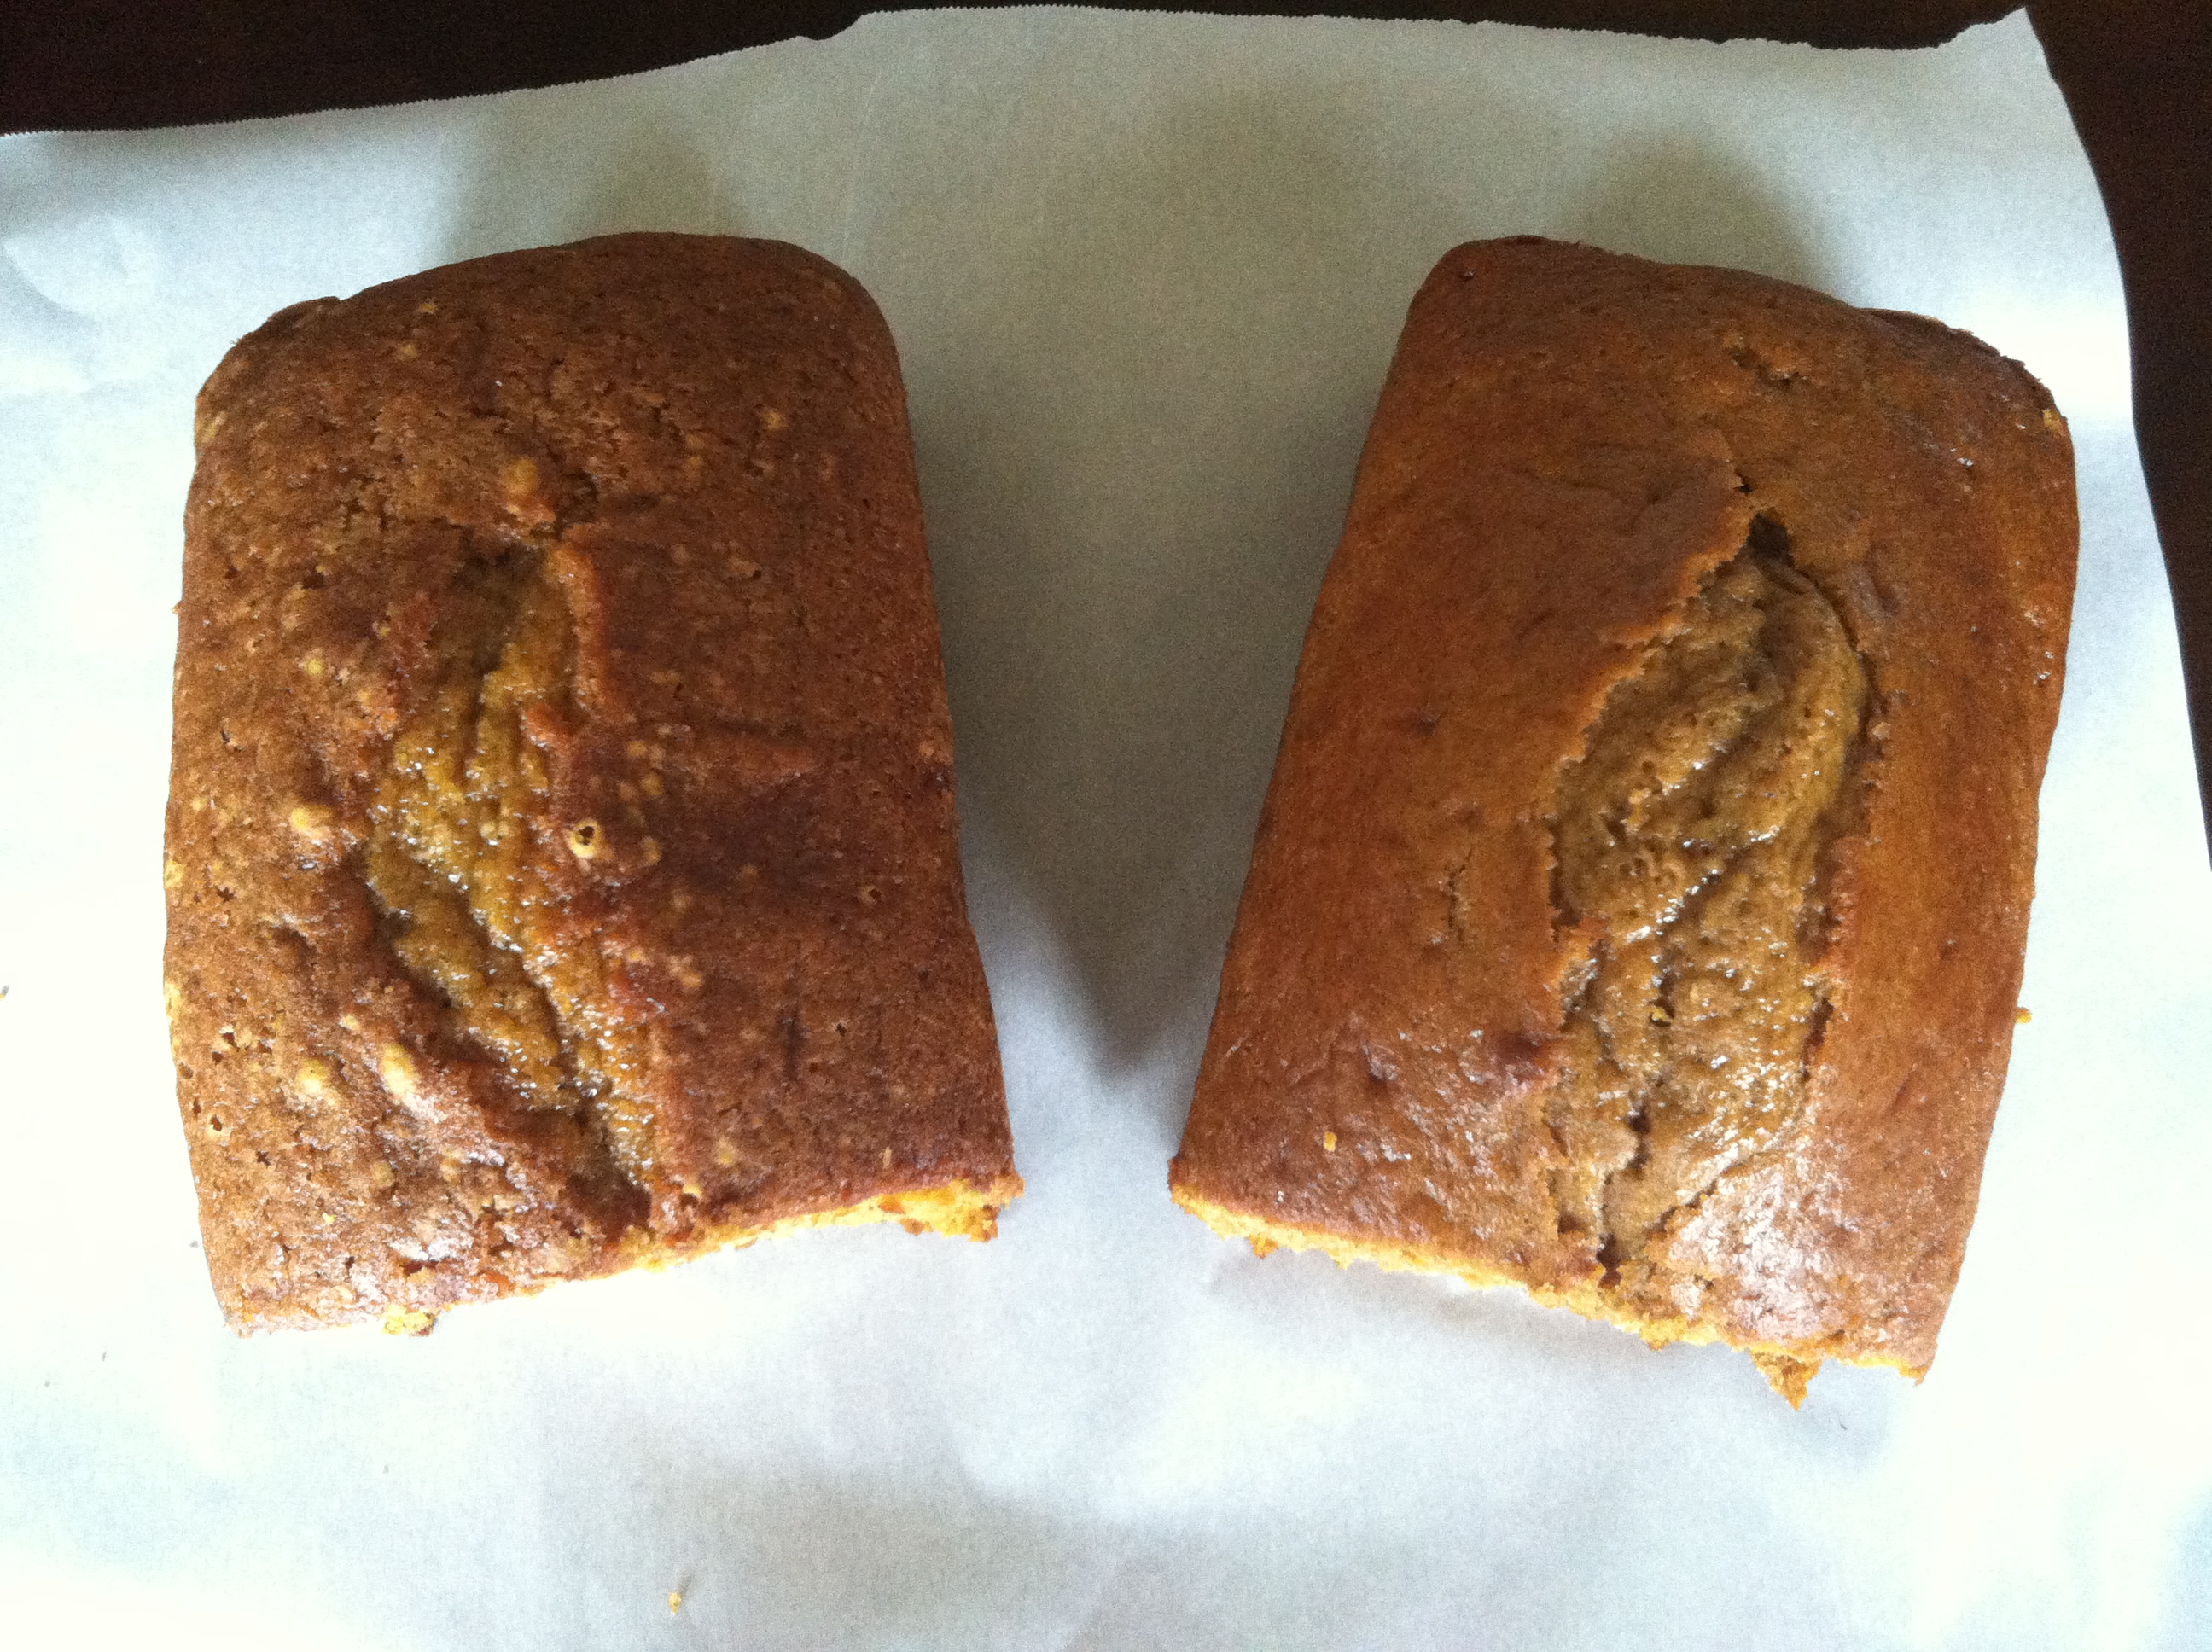
My classic recipe is slightly sweeter and is a bit fluffier. The new recipe is slightly more dense but the spices are a bit more fragrant. The new recipe definitely looks prettier shape wise for breads. All in all, I like them both. Since the person I bake for most often prefers my classic, that is what I will stick with.

IMG_0642 
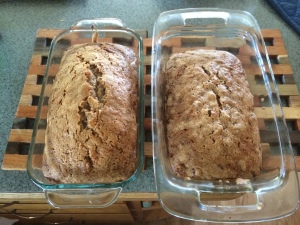
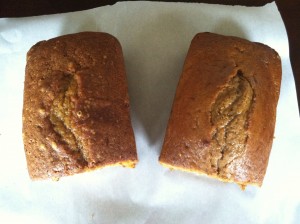
(Both Breads side by side. My classic on the left and the newcomer on the right)IMG_0648IMG_0649

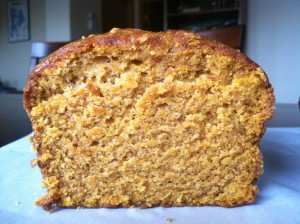
(My classic on the left and the newcomer on the right)

In case you were wondering about recipes, they are as follows.

Pumpkin Bread

…Better Homes and Gardens:                                         …Martha Stewart:

3 cups sugar                                                                    1 cup sugar, 1 cup brown sugar

1 cup cooking oil                                                              1/4 cup vegetable oil

4 eggs                                                                               4 eggs

2/3 cup water                                                                   1 2/3 cup buttermilk

3 1/3 cups all-purpose flour                                             3 cups all-purpose flour

2 tsp baking soda                                                            2 tsp baking soda & 2 tsp baking powder

1.5 tsp salt (I just do 1)                                                    1/4 tsp salt

1 tsp cinnamon                                                                 2.5 tsp cinnamon

1 tsp nutmeg                                                                    1/2 tsp nutmeg

(I add a dash of clove & allspice)                                      1/4 tsp all spice

1 15 oz can pumpkin puree                                               2 cups canned pumpkin puree

For both recipes:

  • two loaves are made. Grease the loaf pans and set aside.
  • Preheat the oven to 350F.
  • Mix dry ingredients in a large bowl and set aside
  • In another large bowl beat sugar and oil and then add eggs

For the Better Homes & Gardens recipe:

At this point…

Alternately add the flour and water beating on low until just combined. When finished, beat in the pumpkin. Spoon into prepared pans. Bake for 55-65 minutes or until a wooden toothpick near the center comes out clean. Cool in pans on wire racks for 10 minutes. Remove from pans. Allow to cool completely. Wrap and store overnight before slicing.

For the Martha Stewart recipe:

At this point:

Add the pumpkin and beat until combined. Alternately add the flour and buttermilk, (ending with the flour) beating on low until just combined. Spoon into prepared pans. Place pans on baking sheet. Bake for 55-60 minutes (rotating pans half-way through) or until a wooden toothpick near the center comes out clean. Cool in pans on wire racks for 10 minutes. Remove from pans. Allow to cool completely.


Enjoy delicious pumpkin bread as a end result!