Venison Cheesesteak


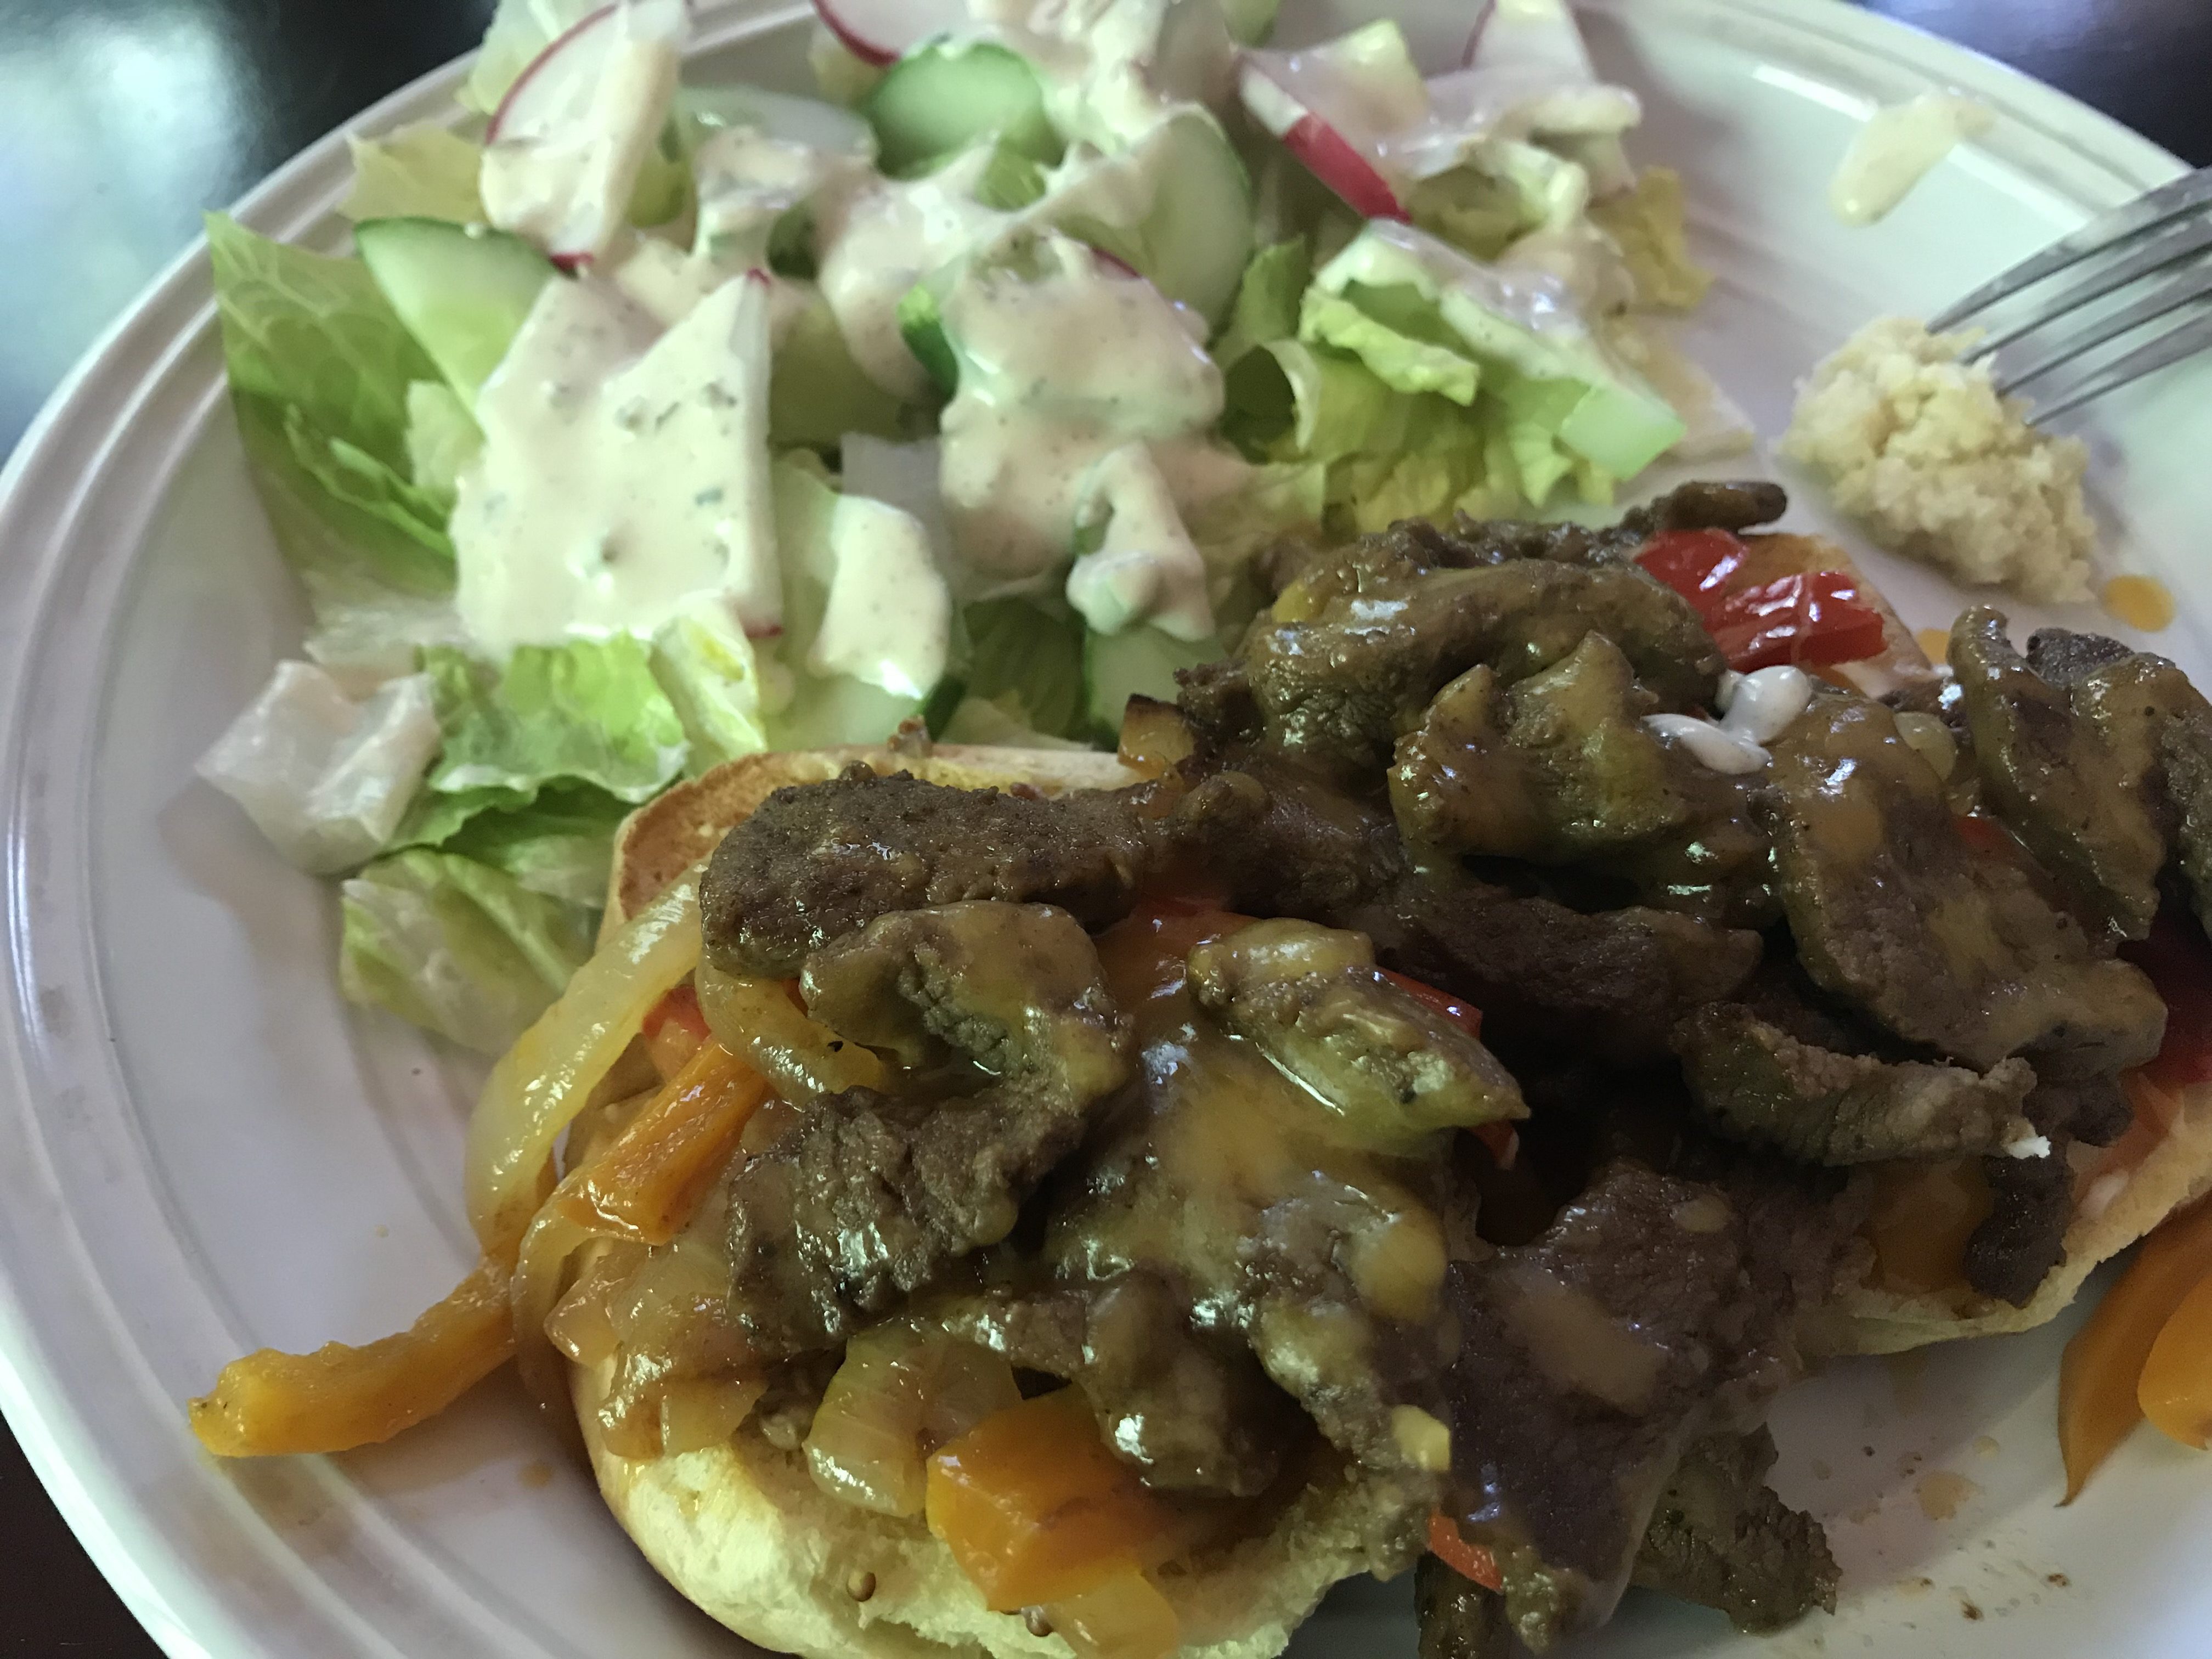
It’s rare for us to eat steak in our house. I certainly would never buy it to make cheesesteaks. Not that we cannot afford it (although the price has gone up),  but I honestly find it’s so tender and delicious with venison steak instead.  We are fortunate enough to have harvested deer and to be able to go outside to our freezer and pull out some venison steaks to make dishes such as this.

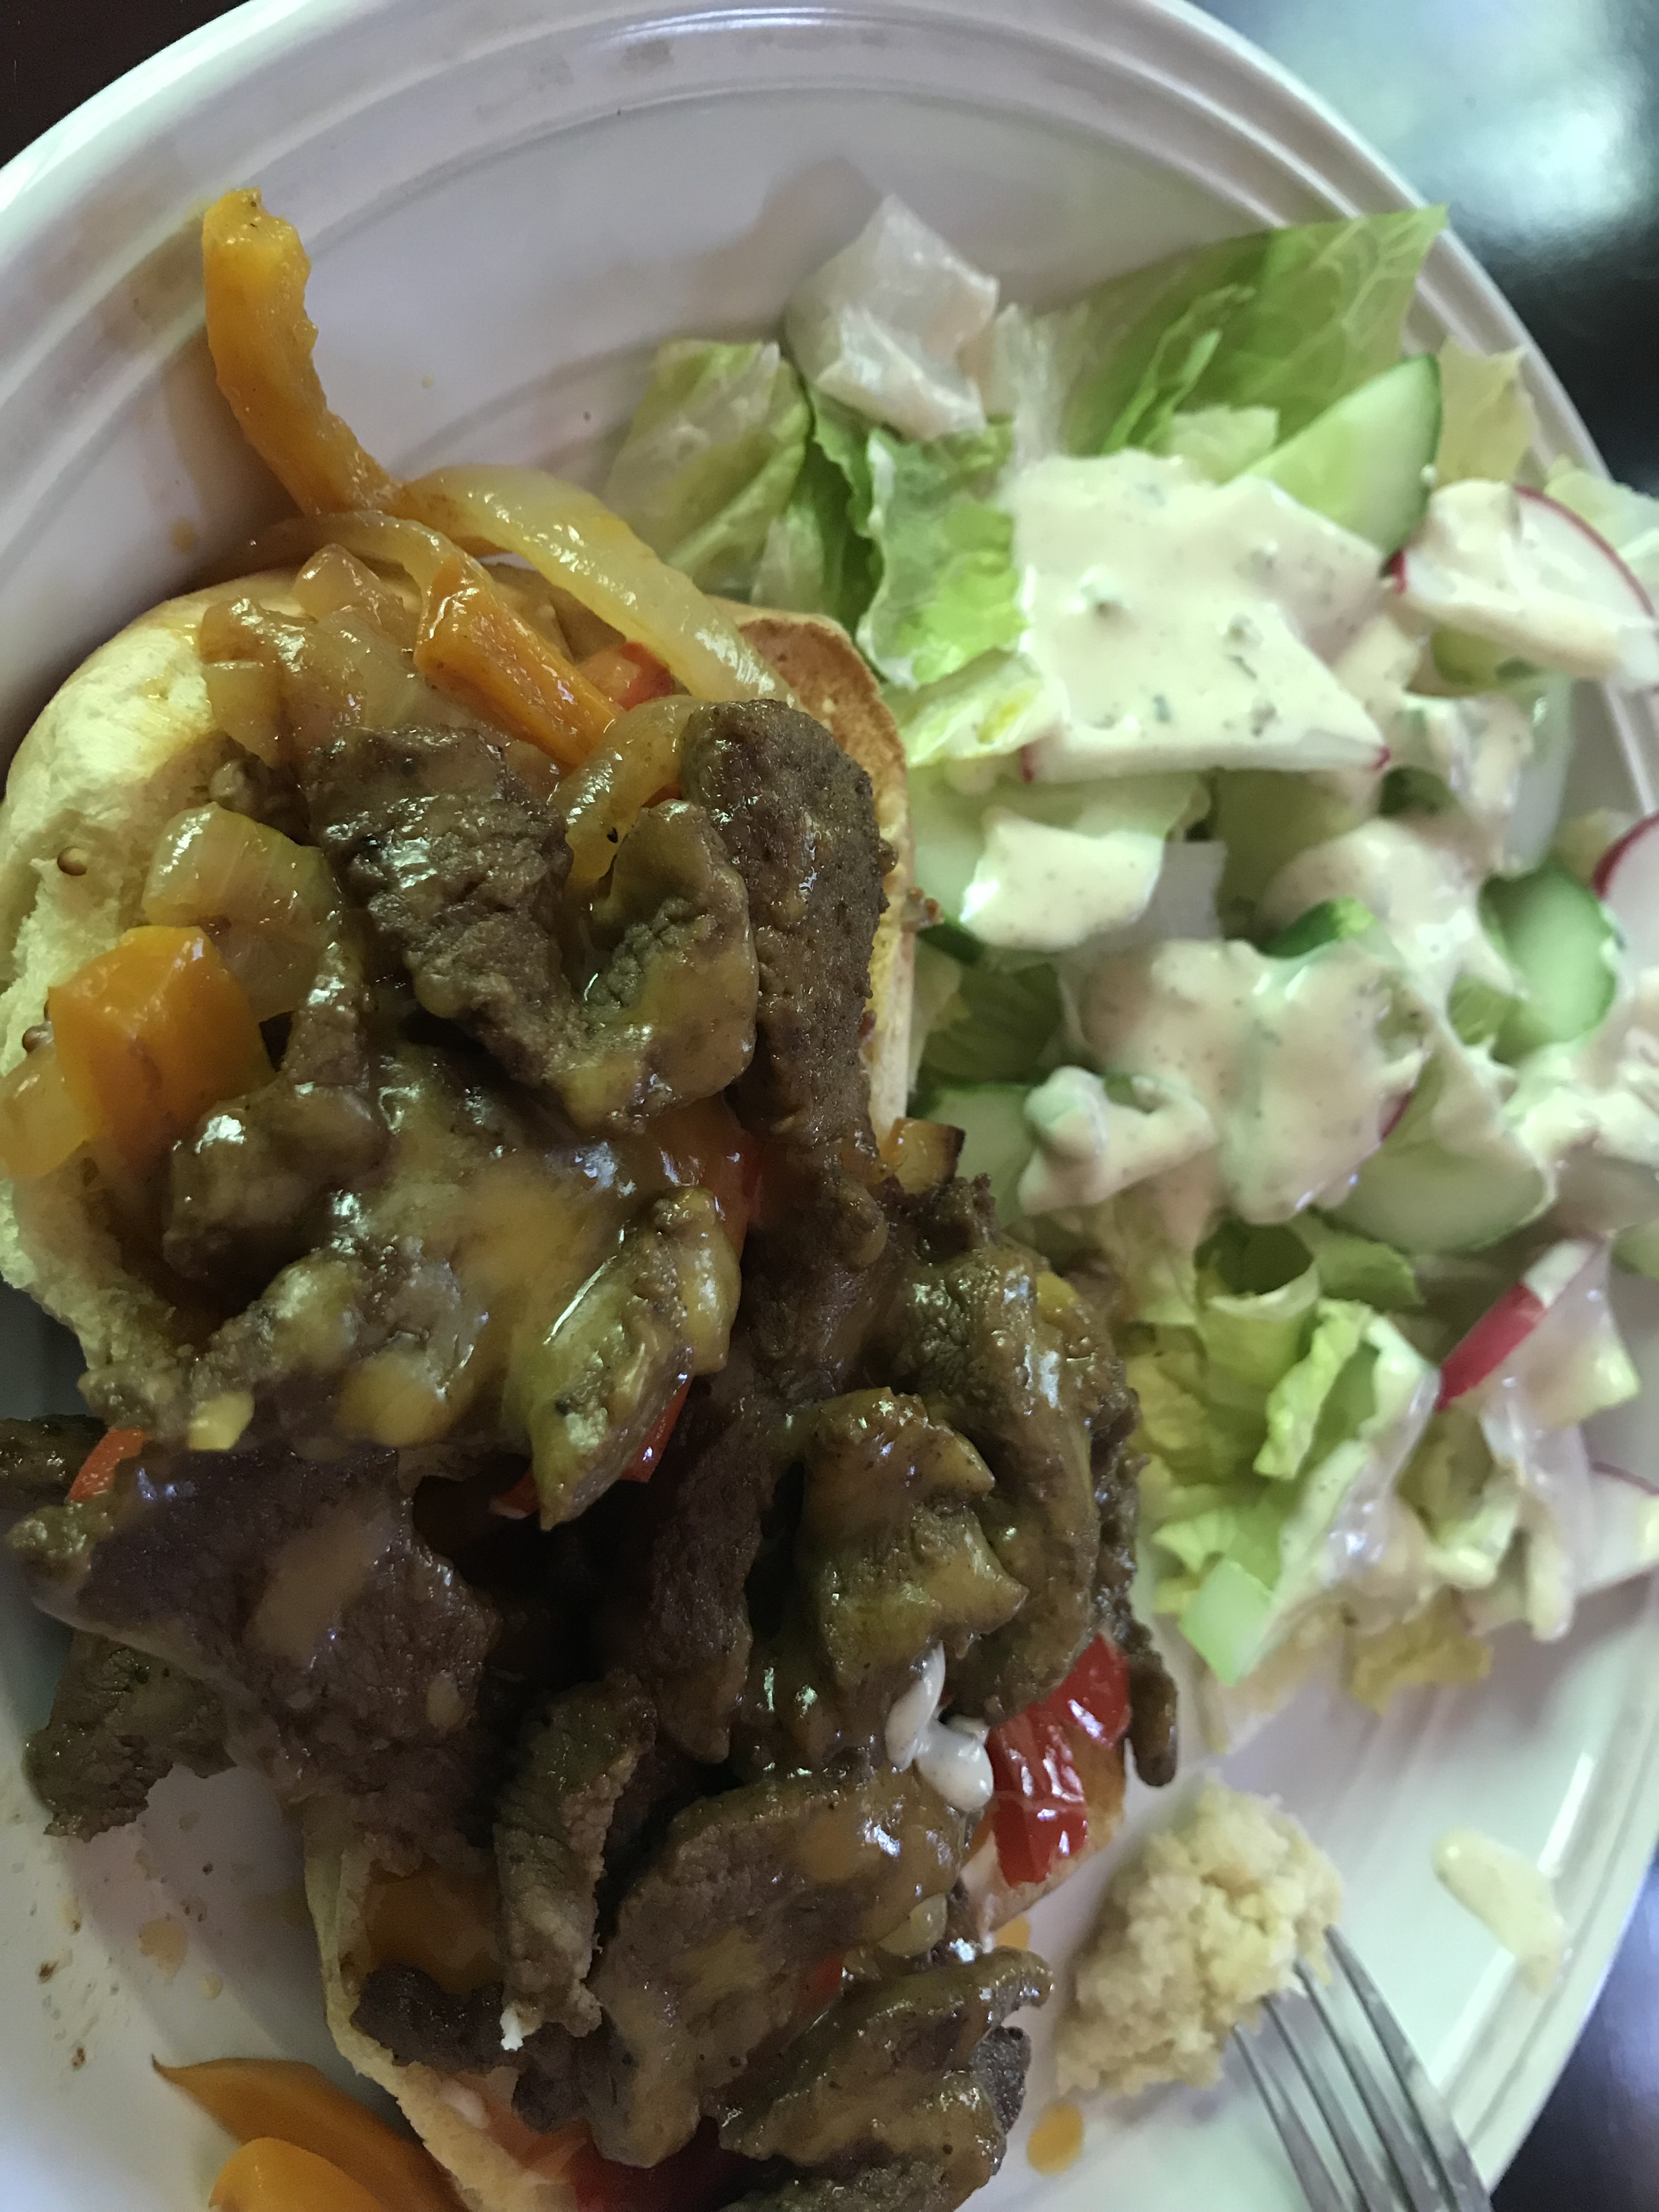
Venison Cheesesteak (serves 2)

Ingredients

  • 1 tbsp olive oil, plus more for the pan
  • 1/2 onion thinly sliced
  • 1/2 bell pepper thinly sliced (color of your choice)
  • 2 venison steaks
  • worcestershire sauce
  • jalapeno salsa
  • Mrs Dash Table Blend seasoning
  • salt
  • 1/2 cup plus more to taste shredded gouda cheese (or cheddar) (I used a combo of both)
  • choice of bread (I used hotdog buns in my pantry), toasted
  • whole grain mustard
  • horseradish sauce
  • horseradish (optional on the side for extra zing)

Directions

  • Thinly slice the steak into thin strips. Place in a medium bowl and sprinkle generously with salt and seasoning. Add the oil, numerous dashes of worcestershire sauce, and 1-2 tbsp on salsa and mix well. Let sit for 60 minutes.
  • Heat a small amount of olive oil in a skillet. Sauté the onions and bell pepper until soft and caramelized. Remove from pan. Add the meat and cook over medium high to high heat for 1-2 minutes each side. Add the peppers and cheese on top and cover to allow cheese to melt
  • Coat the toasted bread with mustard and horseradish sauce. Place meat over bread and serve with side of your choice

Summer of Rhubarb: Rhubarb Custard Pie

Rhubarb Custard Pie (Recipe & Photo from Food Network Kitchen)

Rhubarb Custard Pie
As previously discussed I am not a huge cake fan. For most of my life I either had dairy queen ice cream cakes or cheesecake as my birthday cakes. It should come as no surprise that I decided to not bake a cake for my birthday. Instead I decided to bake a pie.
Specifically a rhubarb custard pie since I had exactly 4.5 cups of rhubarb left in my fridge to use up from my first harvest. I find that using rhubarb fresh is much easier than previously frozen as you don’t have to deal with draining excess fluid or adding more flour or corn starch to thicken it.
This pie is delish and super easy to make. I ended up eating 1/4 of the pie for my birthday.
 Ingredients

Directions

  • Preheat the oven to 350 degrees F.
  • Fit the pie dough into a 9-inch pie plate, fluting the edges, and chill until set, about 15 minutes. Prick the bottom and sides with a fork, and then line the crust with aluminum foil.
  • Fill with pie weights or dried beans and bake until the edges of the crust are just golden, 20 minutes.
  • Remove the foil with the pie weights and continue to bake until the bottom of the crust is dry and lightly browned, another 10 to 15 minutes. Cool completely.
  • Toss the rhubarb with 1/4 cup granulated sugar and the lemon juice until well combined. Transfer to the crust and spread to form an even layer. Place the pie on a rimmed baking sheet.
  • Whisk the eggs with the evaporated milk, flour and remaining 1/2 cup granulated sugar until smooth, and then pour over the rhubarb.
  • Line with edges of the pie with aluminum foil to prevent over browning.
  • Bake until the pie is lightly browned, puffed and no longer wet in the center, about 1 hour 15 minutes. Cool completely on a wire rack. Before serving, lightly dust with confectioners’ sugar.

Summer of Rhubarb: Rhubarb Pudding Cake


I am very picky about cake. I will almost always pass on a store bought cake or even a cake baked by someone and brought into work. You’d think I would bake a lot of cakes but I don’t do that either. Most cakes are only good for a day or two (at most 4 days), so then I am stuck with a large amount of cake not eaten or I have to bring it to work.

With it being summer and my rhubarb in full swing, I decided to try a rhubarb pudding cake. I actually enjoyed it although I preferred the rhubarb blondies I made previously. I did end up bringing 1/2 the cake to work and it disappeared. Everyone loved it so give this recipe a try.


Rhubarb Pudding Cake (recipe from common sense home)

Ingredients
  • 2 cups chopped rhubarb
  • 1 3/4 cup sugar, divided
  • 3 tablespoons butter, softened
  • 1 teaspoon baking powder
  • 1/4 teaspoon salt
  • 1/2 cup milk (I used evaporated milk)
  • 1/2 teaspoon vanilla extract
  • 1/2 teaspoon almond extract
  • 1 cup sifted flour
  • 1 tablespoon cornstarch
  • 2/3 cup boiling water

Instructions

  1. Cover the bottom of an 8 or 9 inch square pan with fruit. (I used a glass pie plate.)
  2. Mix 3/4 cup sugar, butter, baking powder, salt, extracts, milk and flour together (add a little more milk if it is too thick to pour); pour over fruit. Mix remaining sugar and cornstarch; sprinkle over mixture in pan. Pour boiling water over the top.
  3. Bake at 375°F for 45 minutes


Summer of Rhubarb: Rhubarb Blondies


One thing you can always count on is your rhubarb coming to life in the summer. It’s a short window when everyone in Minnesota bakes their hearts out with this beloved vegetable. Most people call it a fruit due to the way it is used in desserts but it’s actually a vegetable.

It is one of my favorites in the summer season. I love being able to bake or cook with what is fresh during the seasons so harvesting and baking up my rhubarb is no exception. I try to make new dishes every year (as well as the classic ones we love), so I decided to give a blondie recipe a try. These bars are delicious. So buttery and caramel-like in flavor from all the brown sugar. I’ve already made two batches of these bars this year so it’s quickly become a new favorite rhubarb recipe of mine.

Rhubarb & White Chocolate Blondies (recipe from goodness gracious)

INGREDIENTS
  • 8 tablespoons melted butter
  • 1 cup light brown sugar
  • 1 large egg
  • 1 1/2 teaspoons vanilla extract
  • 1 cup all purpose flour
  • 1 1/4 cups diced rhubarb
  • 1/2 cup white chocolate chips
INSTRUCTIONS
  1. Preheat the oven to 350 degrees F. Line an 8×8 baking dish with parchment paper. Spray with cooking spray or grease with butter.
  2. Pour the melted butter into a large bowl.
  3. Whisk in brown sugar until smooth.
  4. Add the egg and vanilla extract, whisk again until combined.
  5. Add the flour and mix until no lumps are visible.
  6. Fold in the diced rhubarb and chocolate chips.
  7. Transfer the mixture to the prepared pan and spread it out to make even.
  8. Bake in the oven for 30-35 minutes.
  9. Let cool for at least 20 minutes before slicing.

Walleye Cakes

This ice fishing season my guy hasn’t had a full weekend off of work. A few weeks ago he actually had 5 days off in a row and two of those days happened to be a Saturday & Sunday. We decided to take the sleds up to the reefs to go fishing. We are planning a trip up to Flag Island which is a 55mile snowmobile trip so it was also a good way to get ready for that trip as well.

This year the lake did not freeze the best. It’s very jagged. The trail snakes around all over the place due to the jacked up ice. Fortunately it means that not many people are going to these reefs to go fishing. The resorts can’t get up there so it is limited to basically snowmobiles which means it hasn’t been (and most likely won’t be) fished out.

We ended up having one of the best fishing days of our lives. They weren’t giant fish but they were all perfect sized for eating. Actually, a few were too big for our eating preferences. We ended up catching out limit (16 for two people) in 2 hours and threw a ton back as well. It was a great day of  fishing and a great reminder of why we love where we live.

I ended up making fish tacos that first night from our catch but forgot to take photos so will have to make it again in the future. I also made walleye cakes the next day for dinner. It’s one of my many fave ways to eat walleye.


Walleye Cakes (serves 2)

  • 2 large walleye fillets (or use 4 small fillets) I used the fillets from an 18 inch walleye.
  • salt, pepper, and seasoning of your choice (I used Mrs. Dash table blend which is a great generic seasoning with great flavor)
  • 1 egg
  • 1 tsp mustard
  • chopped onion (2-4tbsp)
  • 1/2 cup dry breadcrumbs (plain or Italian seasoned)
  • vegetable oil

Salt & pepper & season the walleyes to taste (I just sprinkle each over both sides of the fish). Bake in a 400F oven for 12 minutes or until walleye is cooked through. Let cool slightly.

Flake the walleye in a medium sized bowl & add the egg, mustard, onion, and breadcrumbs. Add a bit more salt & pepper & seasoning (if using Italian seasoned you can just add salt & pepper). Mix until combined. Form into patties.

Place enough oil in a medium skillet to coat the bottom about 1/4 to 1/2 inch high. Heat over medium heat. Place walleye cakes in skillet and cook for a few minutes each side until golden brown. Flip and repeat. Serve with side of your choice.

Poached Walleye with White Wine Sauce


Here in Almost Canada we live in the walleye capitol of the world. Needless to say that is one of the only fish we have easy access to. It is very hard to get other fish even at the grocery store as we live so far away from any ocean (unless you want to spend a small fortune).

With a surplus of walleye I often try to find new recipes. Recipes that might be done on a “fancier” white fish if you will. I thought of what might be served in a restaurant and one of the first things that popped in my head was serving it with a white wine sauce.

It turned out to be very easy to make & super delicious. While I still would like to have more variety in the fish I eat, trying new recipes like this definitely help keep us satisfied on different flavors.

Poached Walleye with White Wine Sauce

Ingredients

  • 2 tablespoons butter, divided
  • 2 tsp all-purpose flour
  • 1/4 cup diced shallot or onion
  • 1/2 cup dry white wine
  •  dried thyme (sprinkle over sauté pan)
  • 2 walleye fillets,  skin removed, seasoned with salt & pepper and dried thyme
  •  salt to taste
  • lemon juice to taste

Directions

Add 1 tablespoon of the butter and the flour to a small bowl, and knead together until the flour is completely incorporated.

Add the remaining butter to a large sauté pan set over medium heat. When the butter melts, add the minced shallot or onion and cook until translucent. Add the wine, 1/4 cup of water, and the thyme. Bring the liquid to a simmer, and then lay the fillets in the pan. Cover the pan, and adjust the temperature to keep liquid at a simmer. Continue to simmer until the fillets are cooked, three to four minutes. Remove the fish and set aside on a platter.

Turn the heat to high, add the flour and butter mixture, and cook until the sauce thickens. Season the sauce to taste with salt and lemon.

Transfer each fish fillet to a plate, coat with the sauce, and serve with sides of choice.

Venison Helper


One of the many benefits of deer hunting is getting to eat your harvested animal until the next deer hunting season. We always process our deer so that we have steaks & roasts on hand. We’ve learned through trial and error though that we are not fans of certain cuts of meat. I turn my front quarters into jerky and this year my guy turned his deer’s front quarters into brats. He got jalapeño cheddar brats as well as kielbasa brats. The kielbasa ones are fine but the jalapeño cheddar brats are amazing!! There was some extra filling that wasn’t enough to make a pack of brats so the guys at the meat market just wrapped it up for us. I figured it would be good for some skillet dishes.

Many of us grew up eating hamburger helper but it is so easy & much better for you to just make it on your own. You can use any ground meat you like or even make it meatless if that’s your thing. I’ve made this dish before with regular ground venison as well as a ground venison/ground bacon blend and it is delicious. The jalapeño cheddar gives it a nice depth of flavor though so I imagine I’ll be making this again in the future. Bonus…it’s super quick & easy to make with ingredients you already have in your pantry and you can doctor it up any way you desire.

Venison Helper (serves 2)

  • 1/2 lb ground venison (I used the filling from jalapeño cheddar brats)
  • 1.5 cups dry shell pasta
  • 1.25 cups beef broth
  • 1 cup milk
  • salt, pepper, onion & garlic powder, paprika to taste (I just sprinkle a bit of each over the skillet)
  • 1/2 cup drained whole kernel canned corn
  • 1/2 cup cheddar cheese
  • 1/2 tbsp flour mixed with small amount of water.

Brown the ground venison until cooked through in a large skillet. Add the pasta, broth, milk, seasonings, and corn. Stir gently. Bring to a boil. Cover and reduce heat to a simmer. Simmer covered for 10-20 minutes depending on size of noodles until most of the liquid is absorbed and the noodles are al dente. Depending on how much liquid is left in skillet add small amount of flour mixed with water to the skillet and stir until sauce is thickened. Stir in cheese and serve immediately.


50 States, 50 Cookies: Minnesota

If you grew up in Minnesota than you know what a spritz cookie is. They are at every holiday get-together. I’ve always been a fan. I mean they are full of butter and many of them have sprinkles. Enough said. If you haven’t made these or even tried them I urge you to do so. You do need a cookie press (cookie gun) but otherwise they are supper easy. The trick is to have an ungreased or unlined cookie sheet. When you press the cookie onto the baking sheet it needs something to stick to or it becomes a blob. Everyone has there favorite shapes too. My only regret is I din’t have enough sprinkles to add.

Spritz Cookies from Bob’s Red Mill United States of Cookies

Ingredients
  • 1 cup Butter room temperature
  • 1/2 cup Granulated Sugar
  • 1 Egg
  • 1 tsp Vanilla Extract
  • 1/4 tsp Almond Extract
  • 1/4 tsp Salt
  • 2-1/4 cups Organic Unbleached White All-Purpose Flour
Instructions
  1. Preheat oven to 400.
  2. In the bowl of a stand mixer, or with an electric mixer, cream together butter and sugar. Beat in egg, vanilla extract, almond extract, and salt until creamy.
  3. With the mixer on low, or with a wooden spoon, slowly beat in flour until just combined.
  4. Place dough in cookie press fitted with desired template. Pipe dough onto an ungreased cookie sheet. Decorate with desired sprinkles, candies, etc.
  5. Bake for 6-8 minutes, or until edges of cookies just start to turn light golden brown. Remove to a wire rack to cool for 5 minutes before removing from cookie sheet.

Summer of Rhubarb: Rhubarb Meringue Dessert

I made this awhile ago with my first harvest of rhubarb from this summer. Summer came & went super quickly. I won’t complain. Fall is my favorite time of year. The majority of people in Minnesota would agree with me. Fall is the best season with the cooler weather, leaves changing, pumpkins, Halloween, etc. Other people would add football to the list and I suppose I will too. Not because I like watching it but because I like making food for other people and using that Sunday time to bake. A time for me to relax in the kitchen & try new things. While I am exited for the pumpkins, squash, & root veggies to take over, I have to say I will miss being able to go pick fresh rhubarb from the garden. Gardening is the main thing I enjoy about summer. At least I have a little stockpile in the freezer which I will probably use to make this dish again. It may just be my new favorite rhubarb recipe.

Rhubarb Meringue Dessert (from Betty Crocker)

  • 1/2 cup butter or margarine, softened
  • 1 cup Gold Medal™ all-purpose flour
  • 1 tbsp sugar
  • 3 eggs, separated
  • 1 cup sugar
  • 2 tbsp flour
  • 1/4 tsp salt
  • 1/2 cup half & half or whipping cream
  • 2 1/2 cups chopped rhubarb
  • 1/3 cup sugar
  • 1 tsp vanilla
  • 1/4 cup flaked coconut

Heat oven to 350ºF. Mix butter, 1 cup flour and 1 tablespoon sugar. Press evenly in ungreased square pan, 9x9x2 inches. Bake 10 minutes.

Mix egg yolks, 1 cup sugar, 2 tablespoons flour, the salt and half-and-half in large bowl. Stir in rhubarb. Pour over hot crust. Bake 45 minutes.

Beat egg whites in medium bowl with electric mixer on high speed until foamy. Beat in 1/3 cup sugar, 1 tablespoon at a time; continue beating until stiff and glossy. Beat in vanilla. Spread over rhubarb mixture; sprinkle with coconut. Bake about 10 minutes or until light brown; cool about 30 minutes. Cut into about 3-inch squares.

Breaded & Baked Walleye


IMG_2362


My guy likes to joke that all we eat is walleye and venison. This is far from the truth but for a good portion of the year we eat them roughly once a week but for sure every other week. I don’t mind. I love them both. They are nice to rotate with your standard chicken, pork, beef, etc. It’s also a nice feeling to be able to say that you caught your own dinner or harvested it during hunting season. To make it even better it’s a great feeling to add in fresh veggies from the garden. Roasted green beans & tomatoes are one of my favorite side dishes and they go perfectly with baked walleye. We might not be living off the grid but I’d say we are fairly self-sufficient and that makes cooking dinner extra enjoyable and satisfying.


Breaded & Baked Walleye (serves 2)

  • 2-4 fillets walleye
  • 1 tbsp mayonnaise
  • 1 tbsp whole grain mustard
  • 1/2 cup fine dry bread crumbs
  • 1-2 tsp Blackened Seasoning
  • salt to taste
  • cooking spray, olive oil, or melted butter

Mix mayonnaise & mustard on a plate. Mix breadcrumbs & seasonings on a plate. Coat the walleye on both sides with the mayo/mustard mixture. Dip in the seasoned breadcrumbs to coat & shake to get rid of excess crumbs.

Place on a lightly greased baking sheet & spray with cooking spray or drizzle with olive oil or melted butter. Bake for 10-15 minutes. Broil for 2-3 minutes. Serve with sides of choice (I chose creamy rice and roasted green beans & tomatoes fresh from the garden).

IMG_2362