Venison Helper


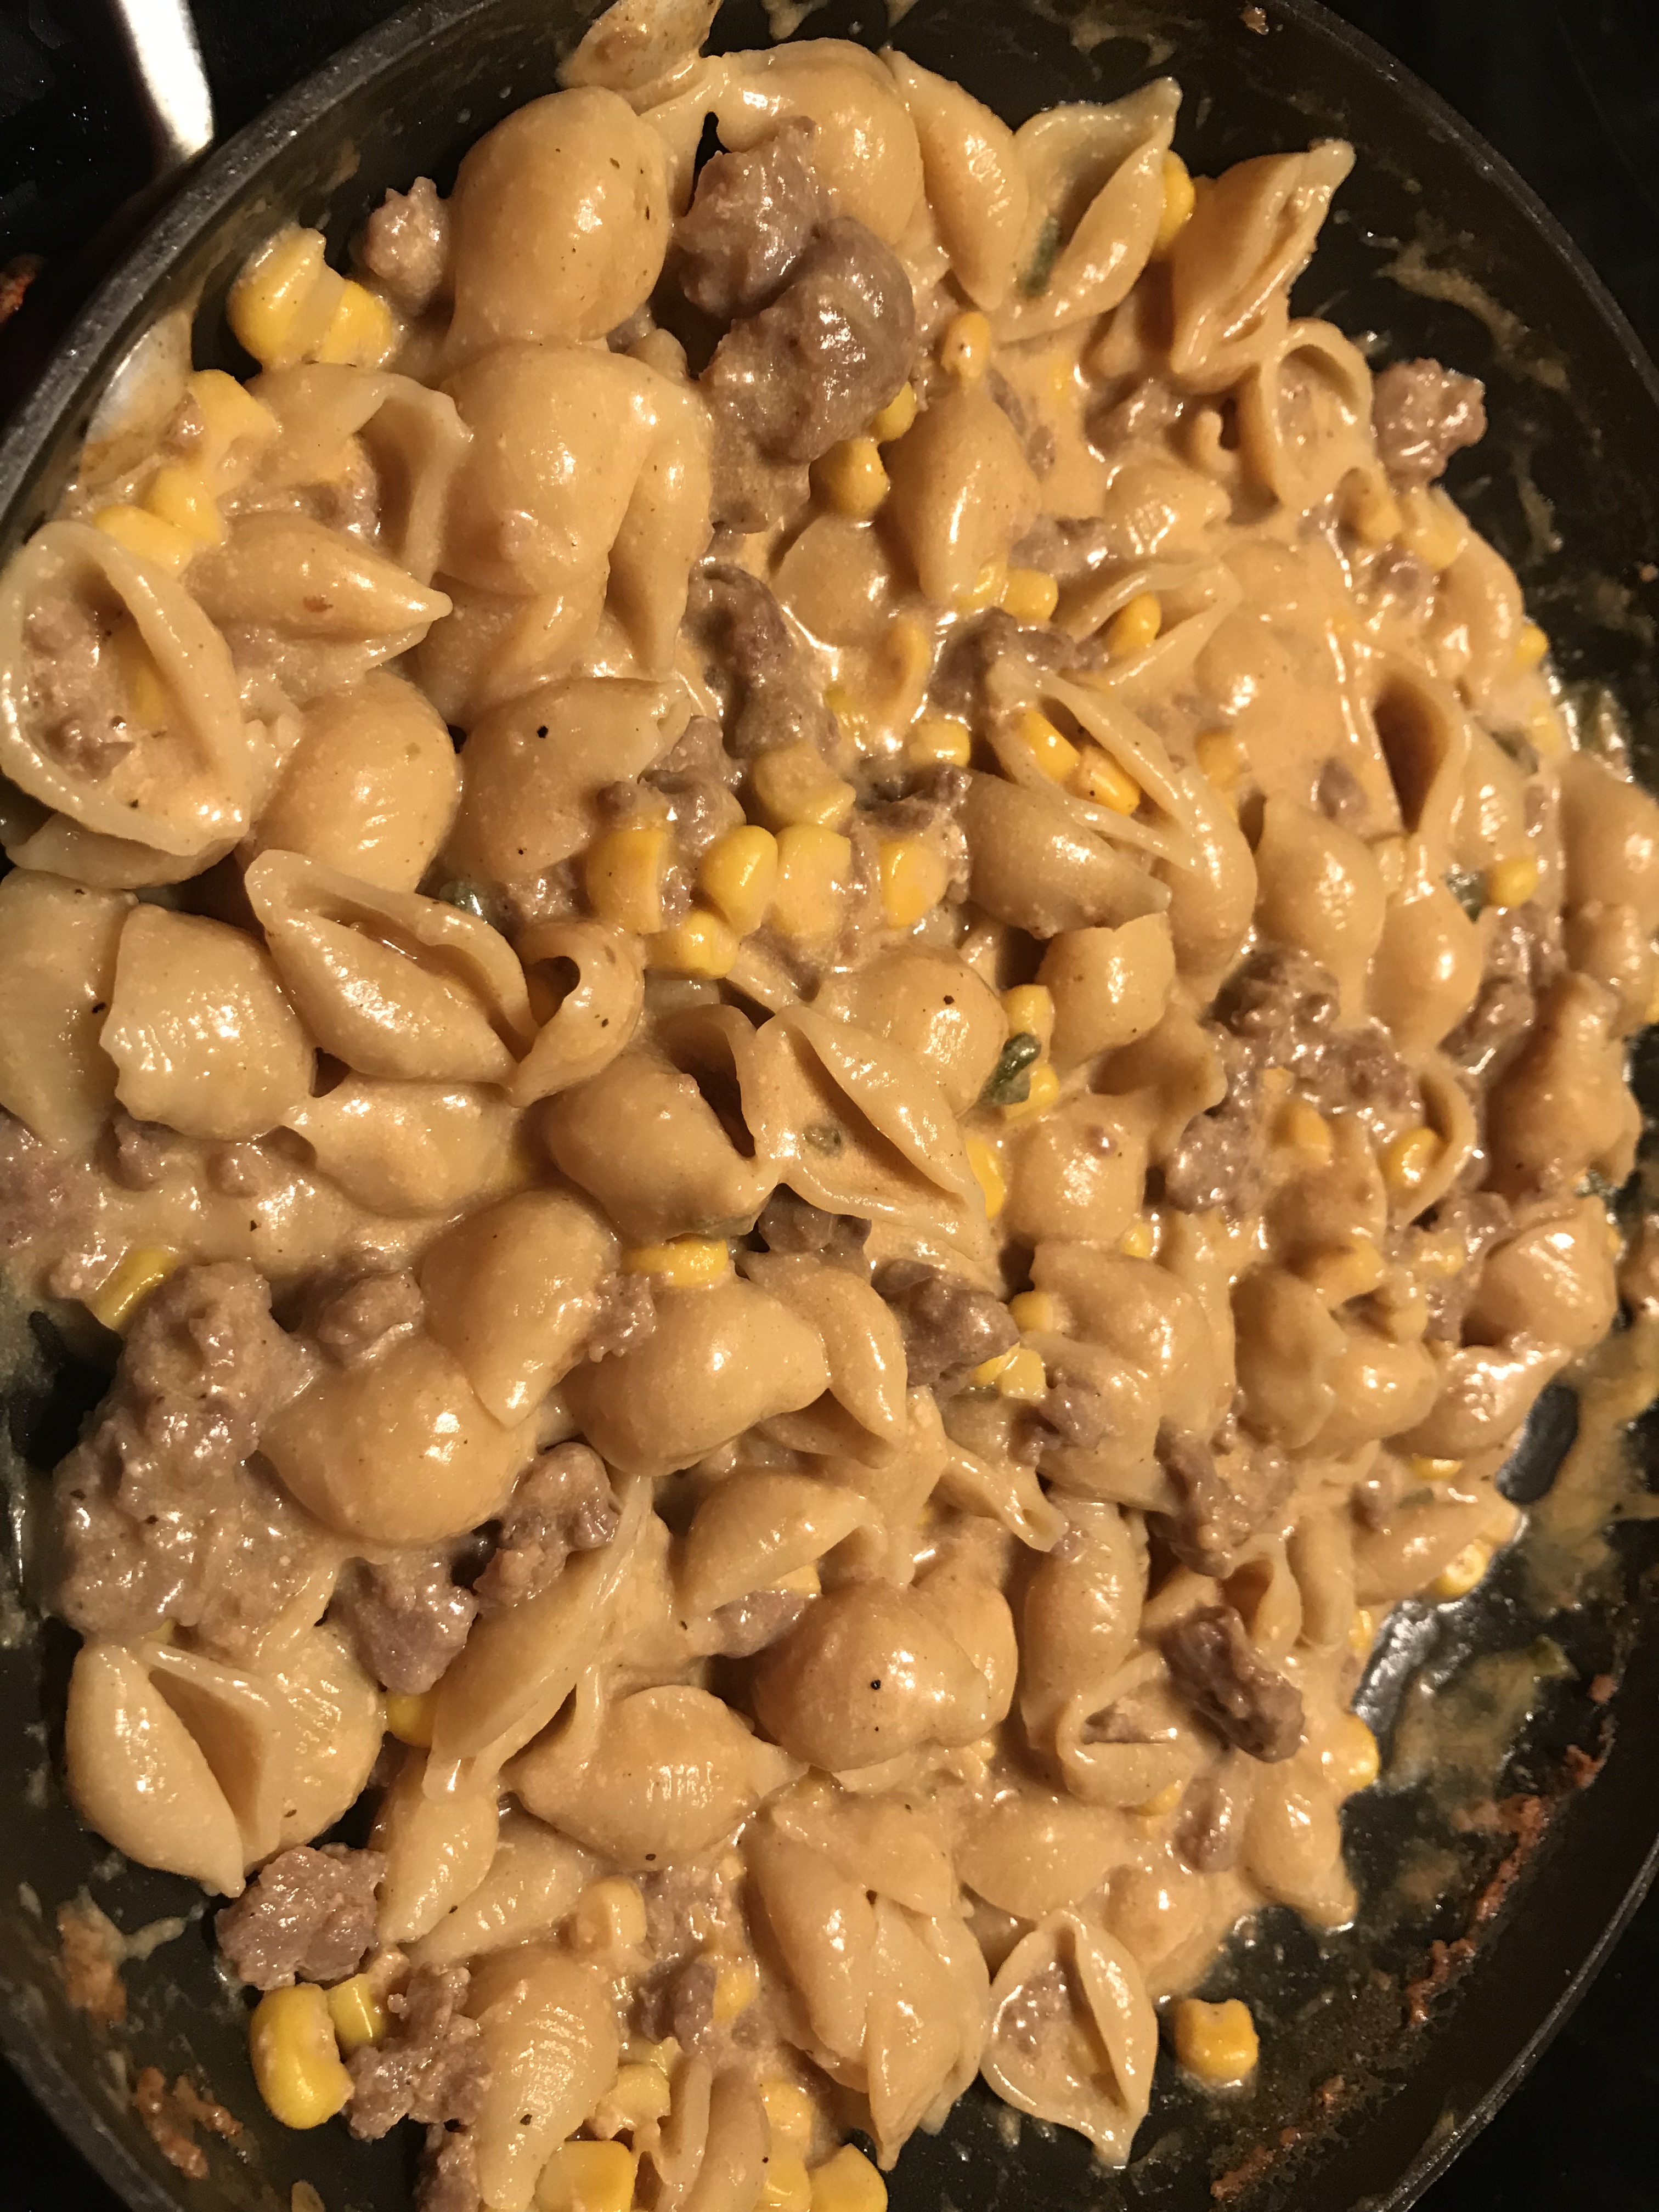
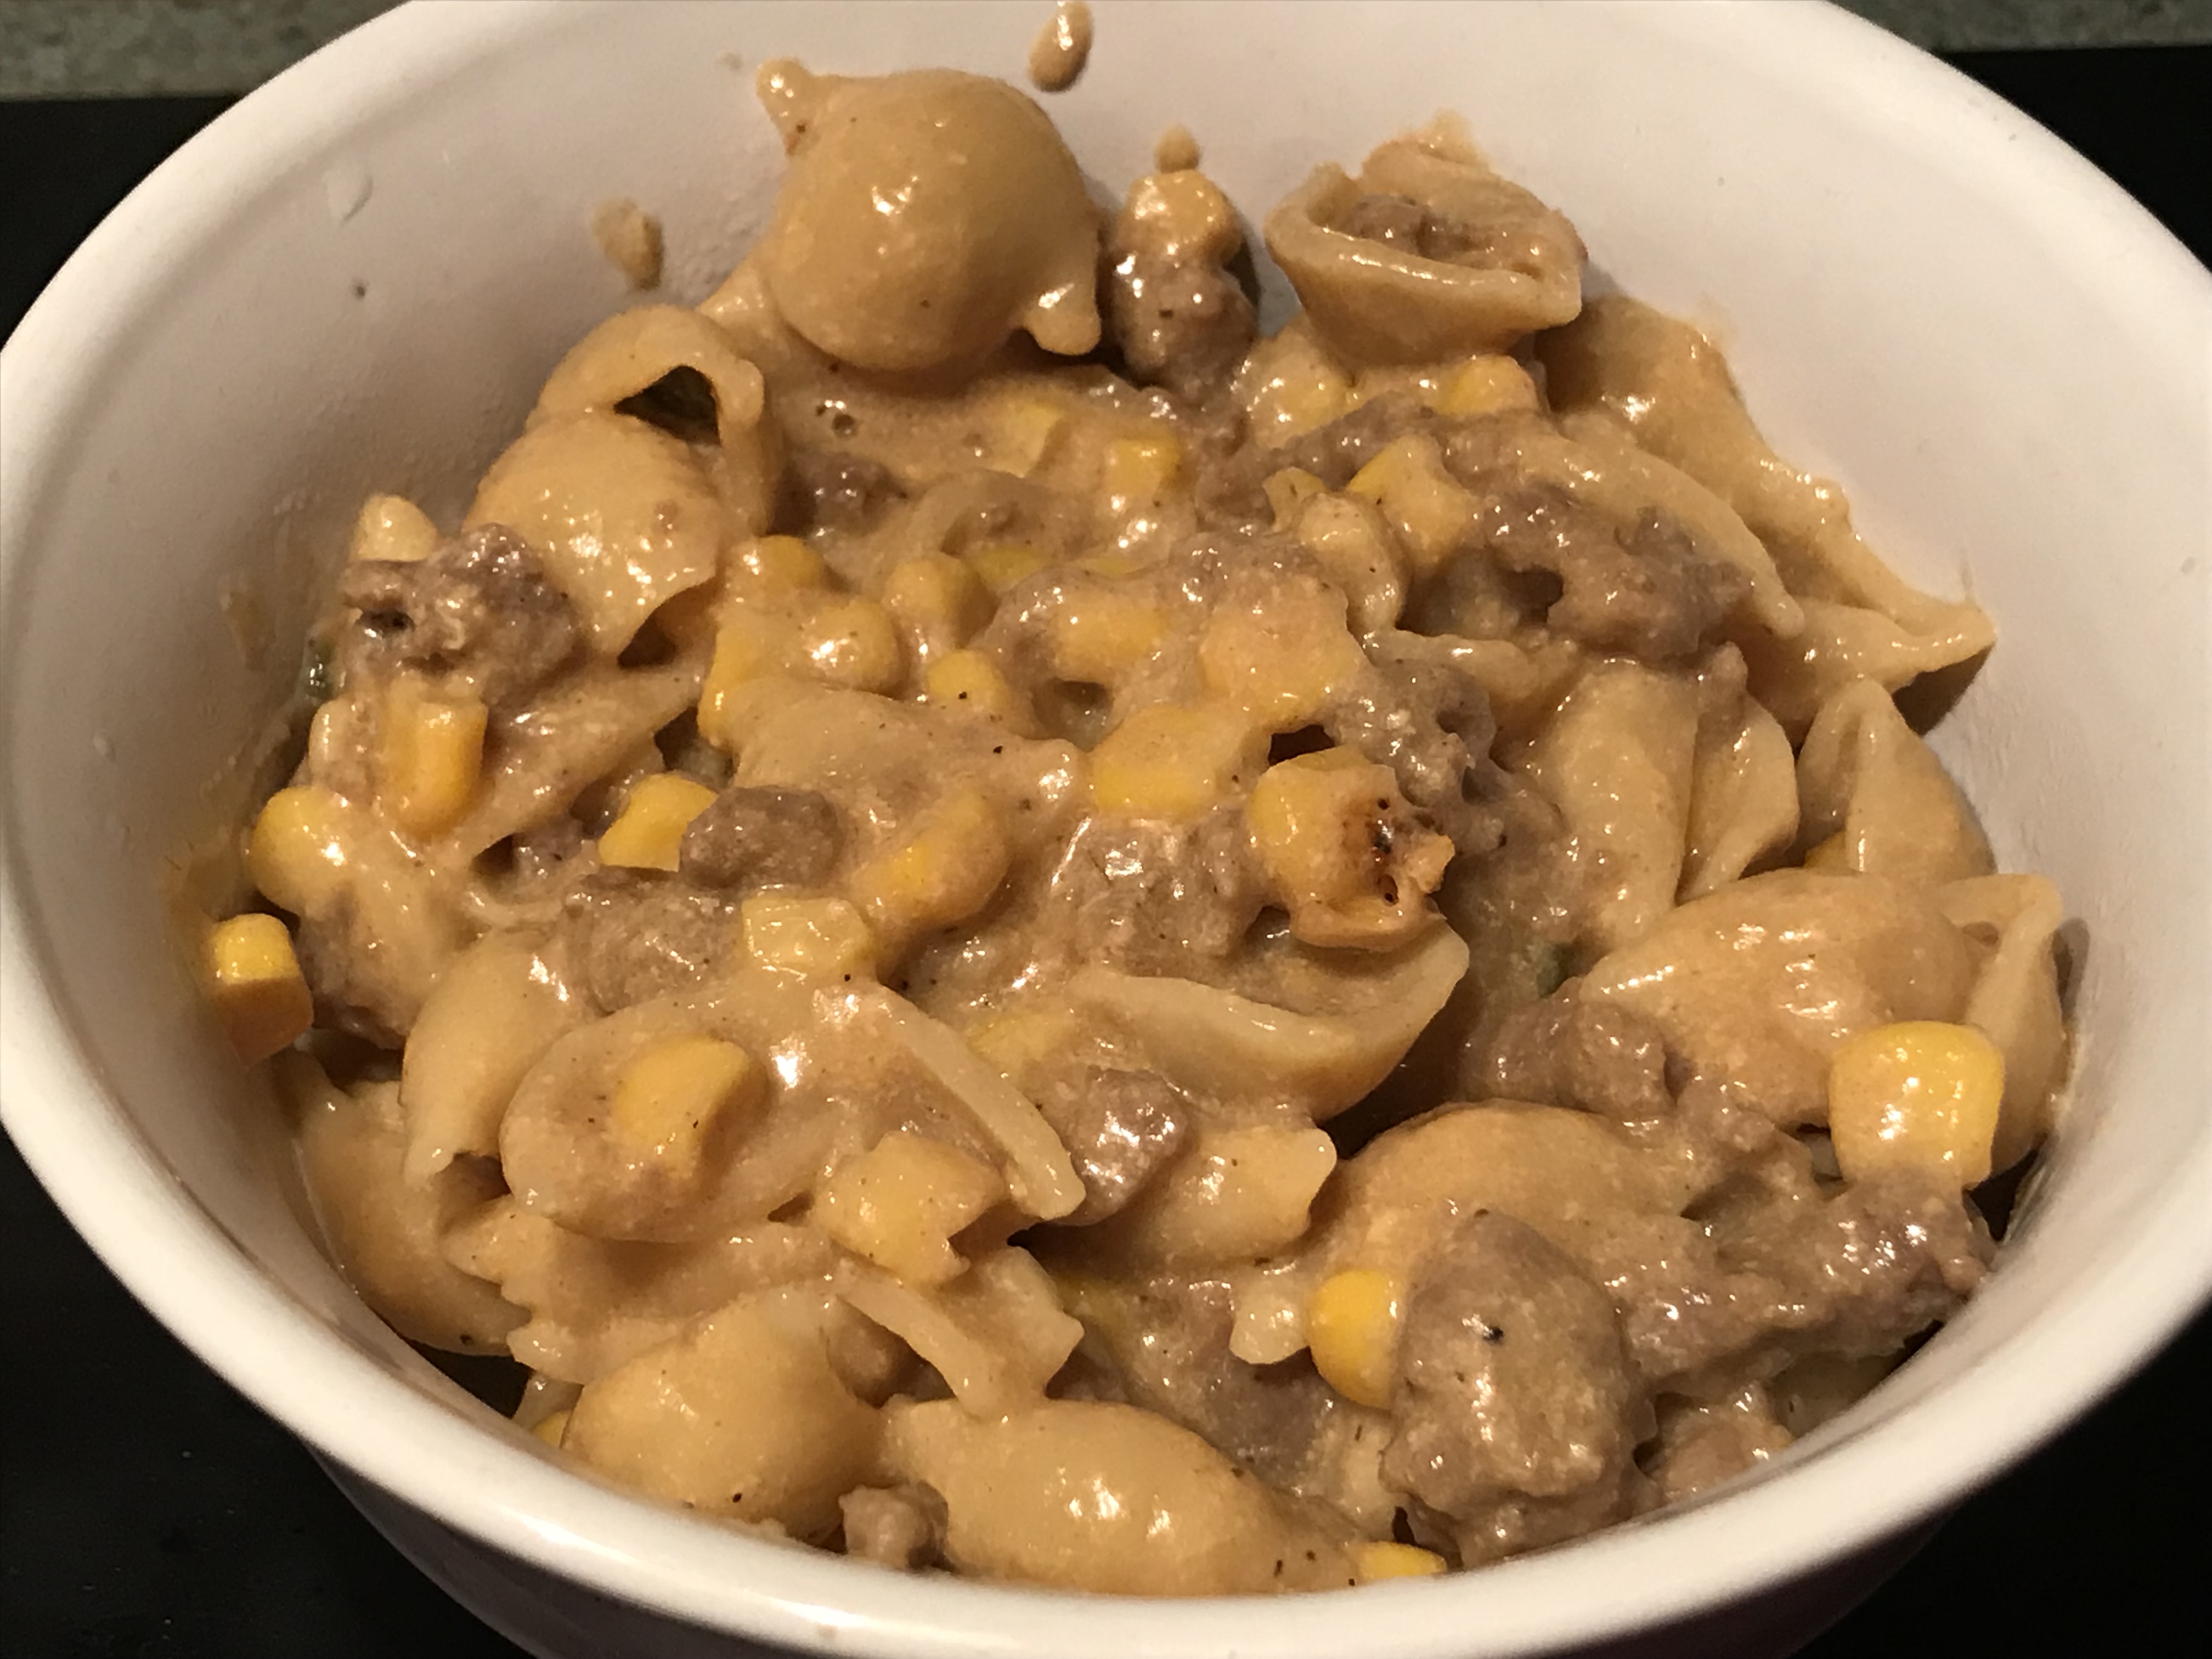
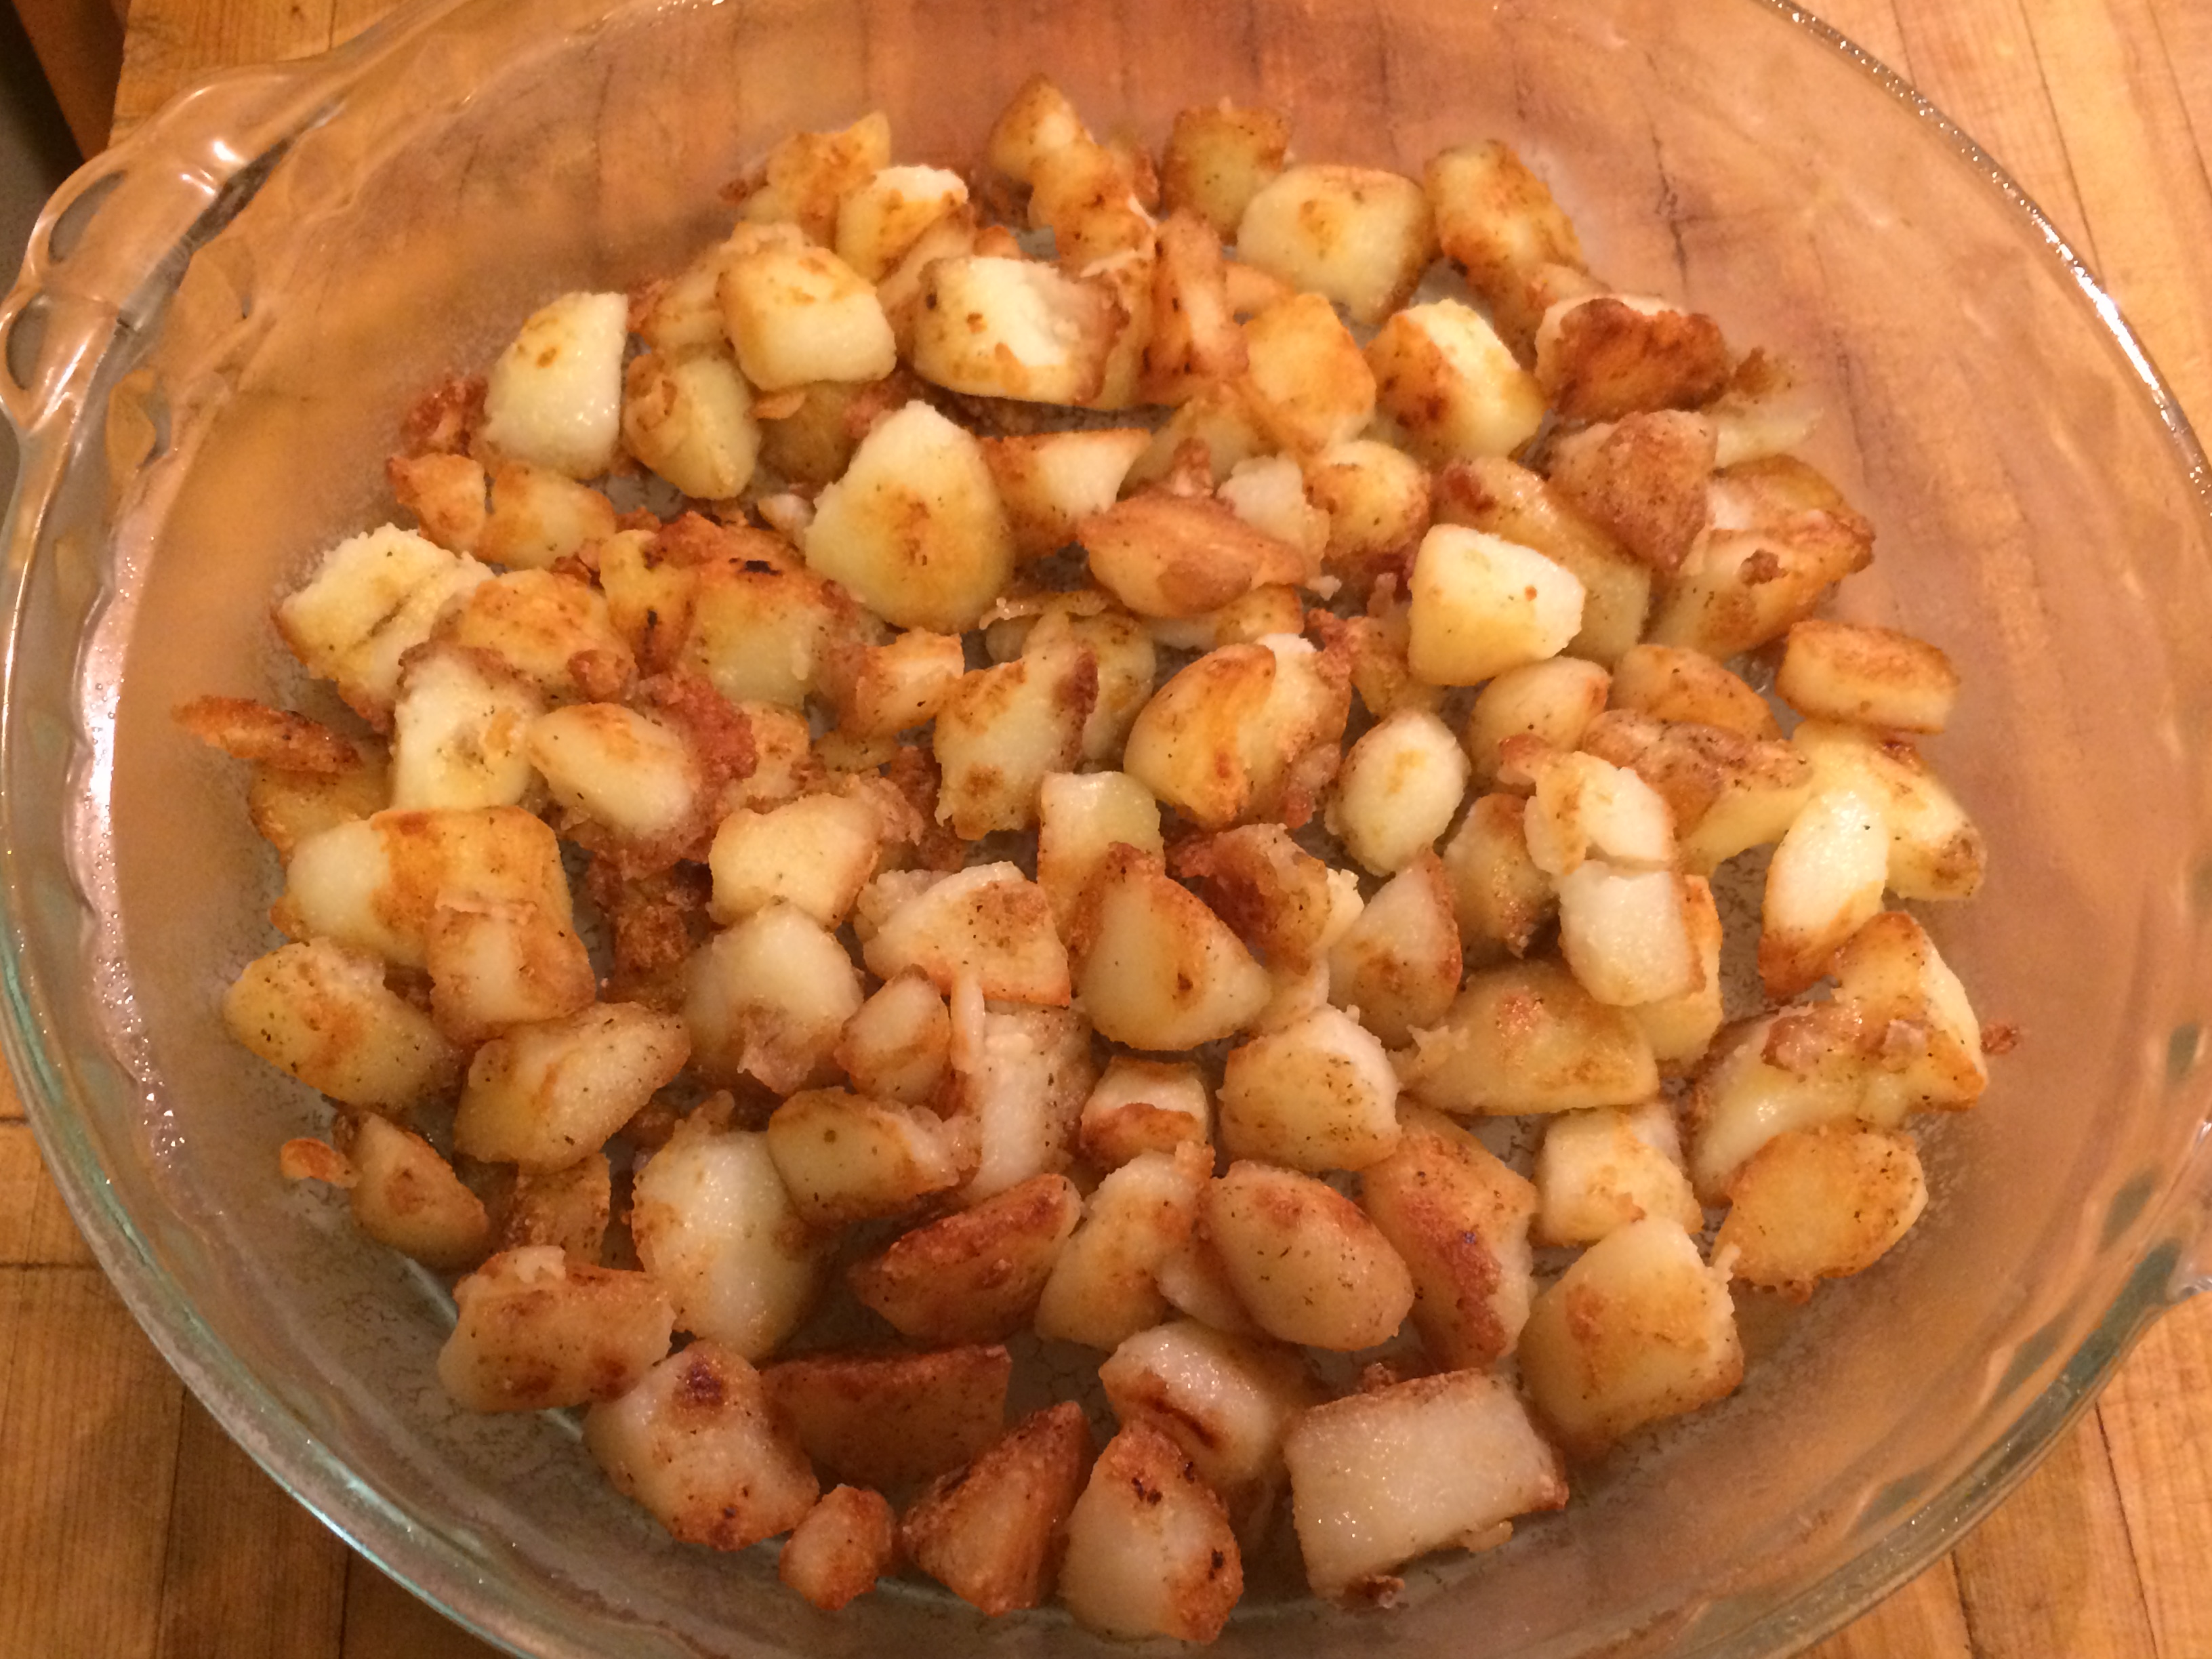
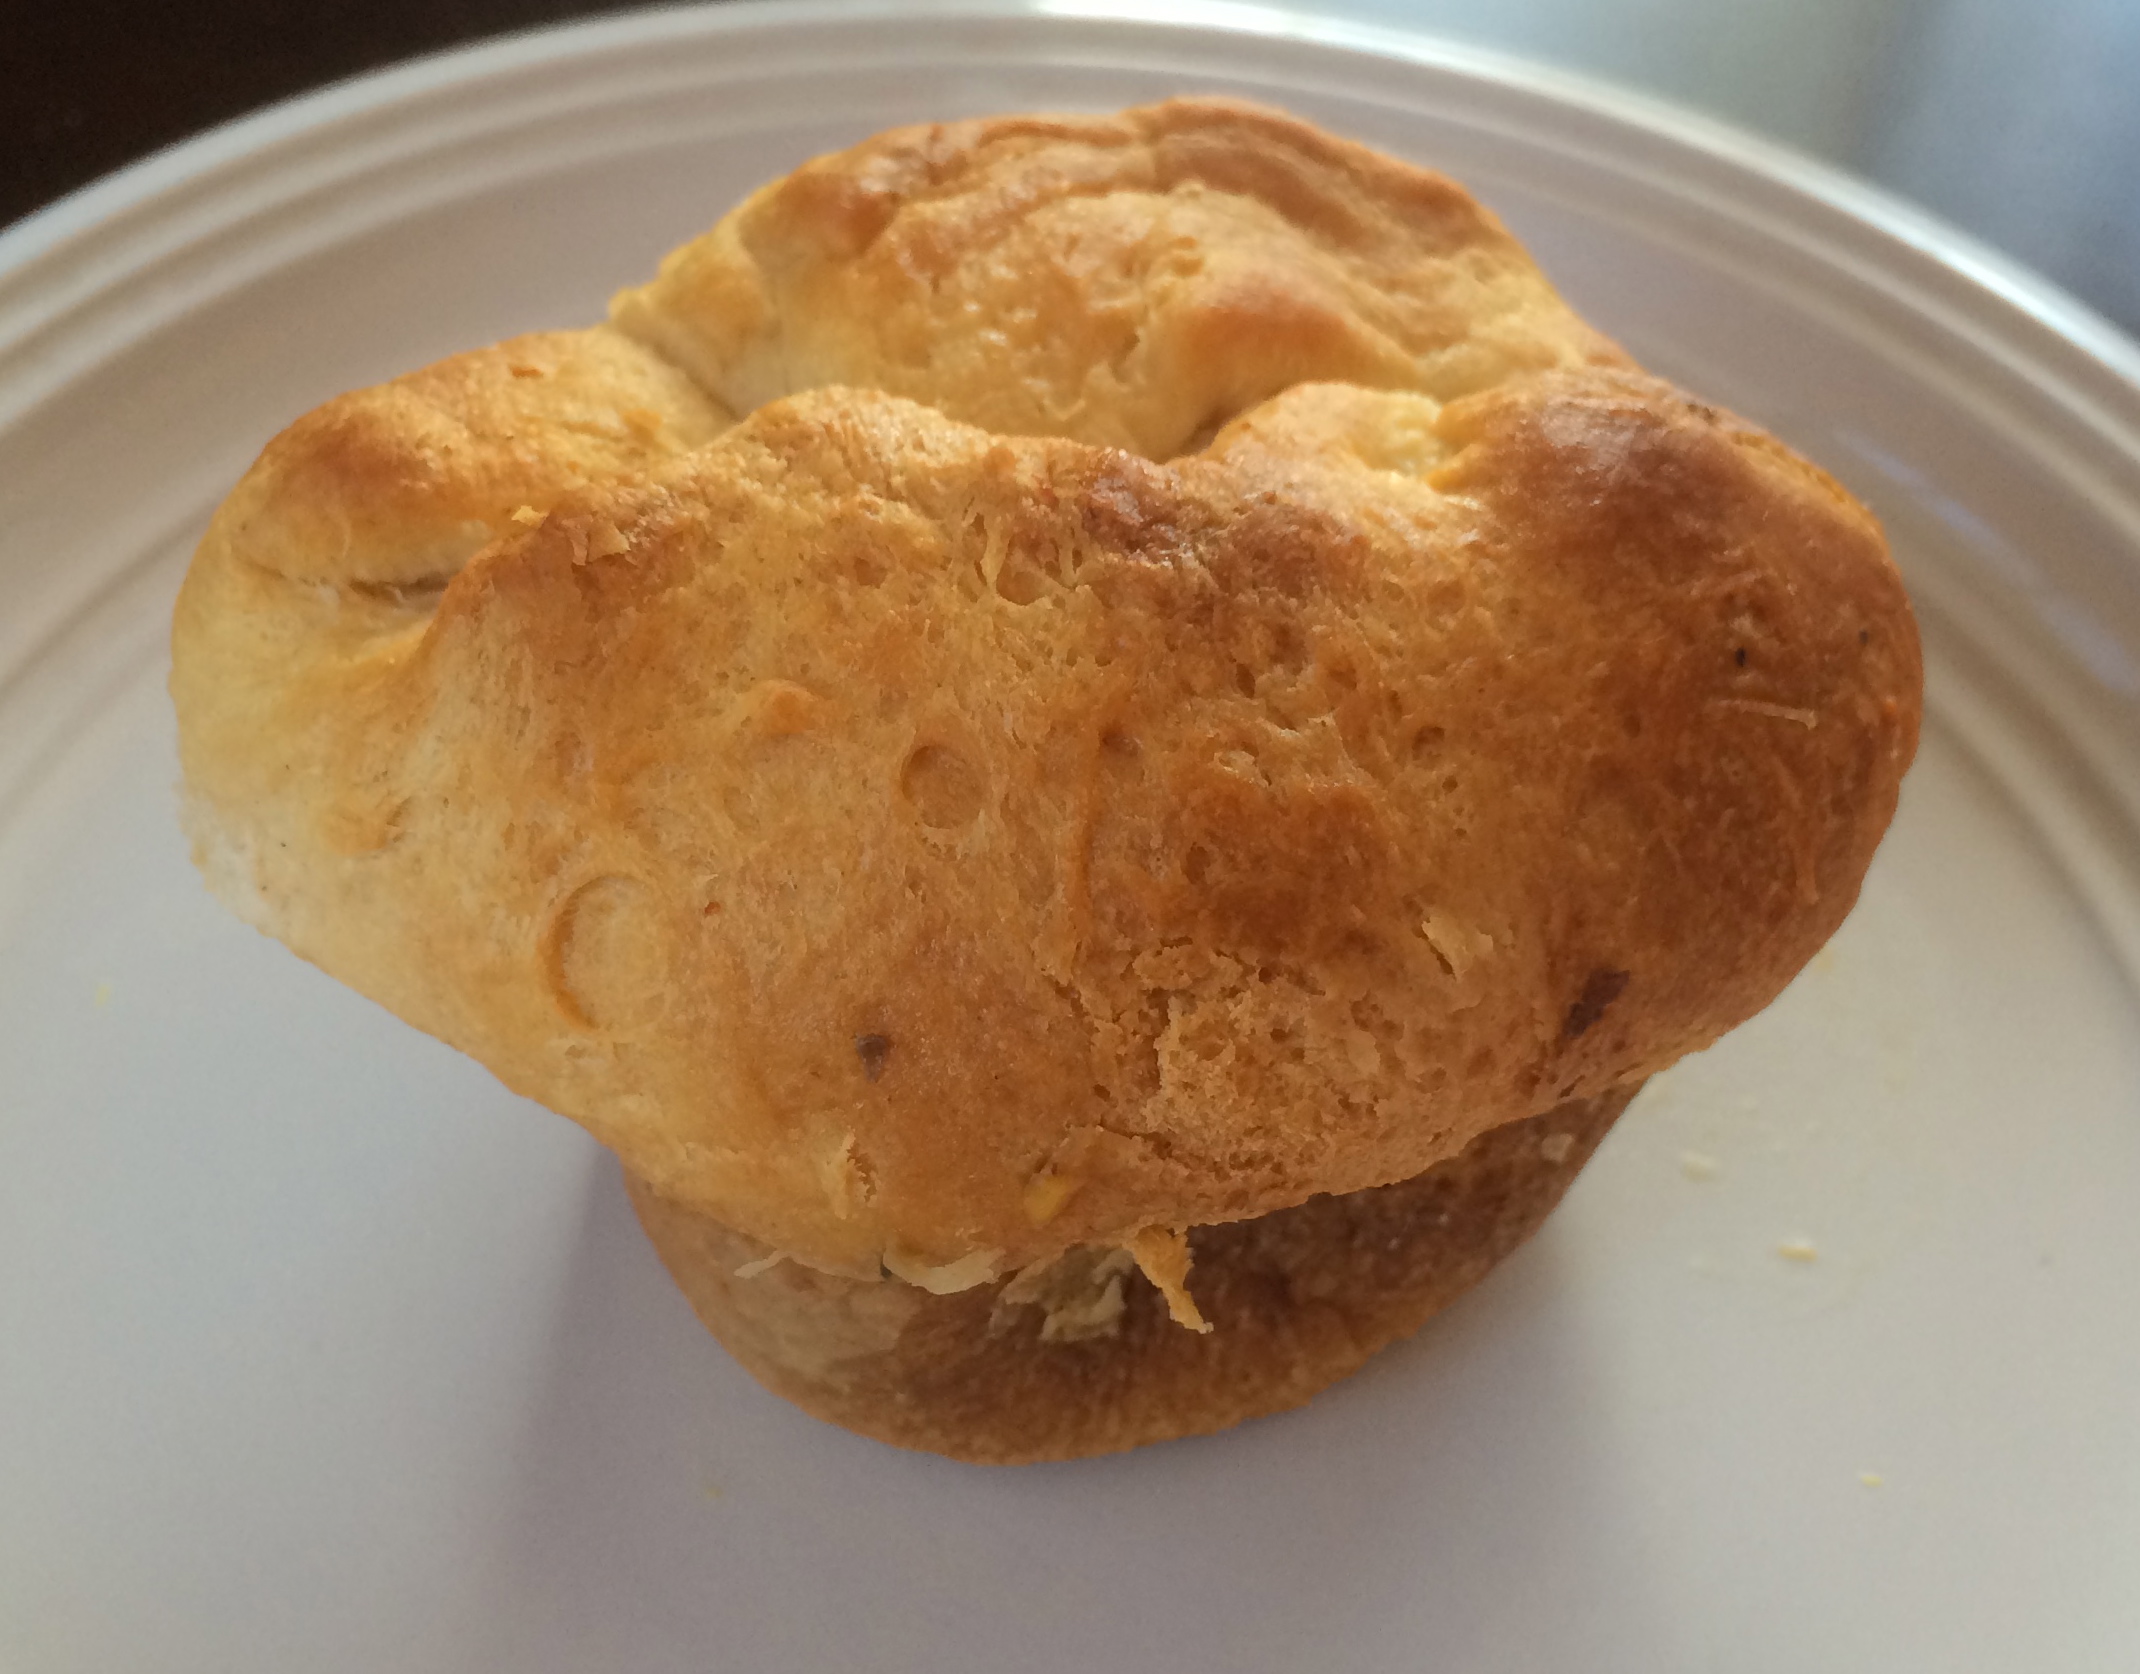
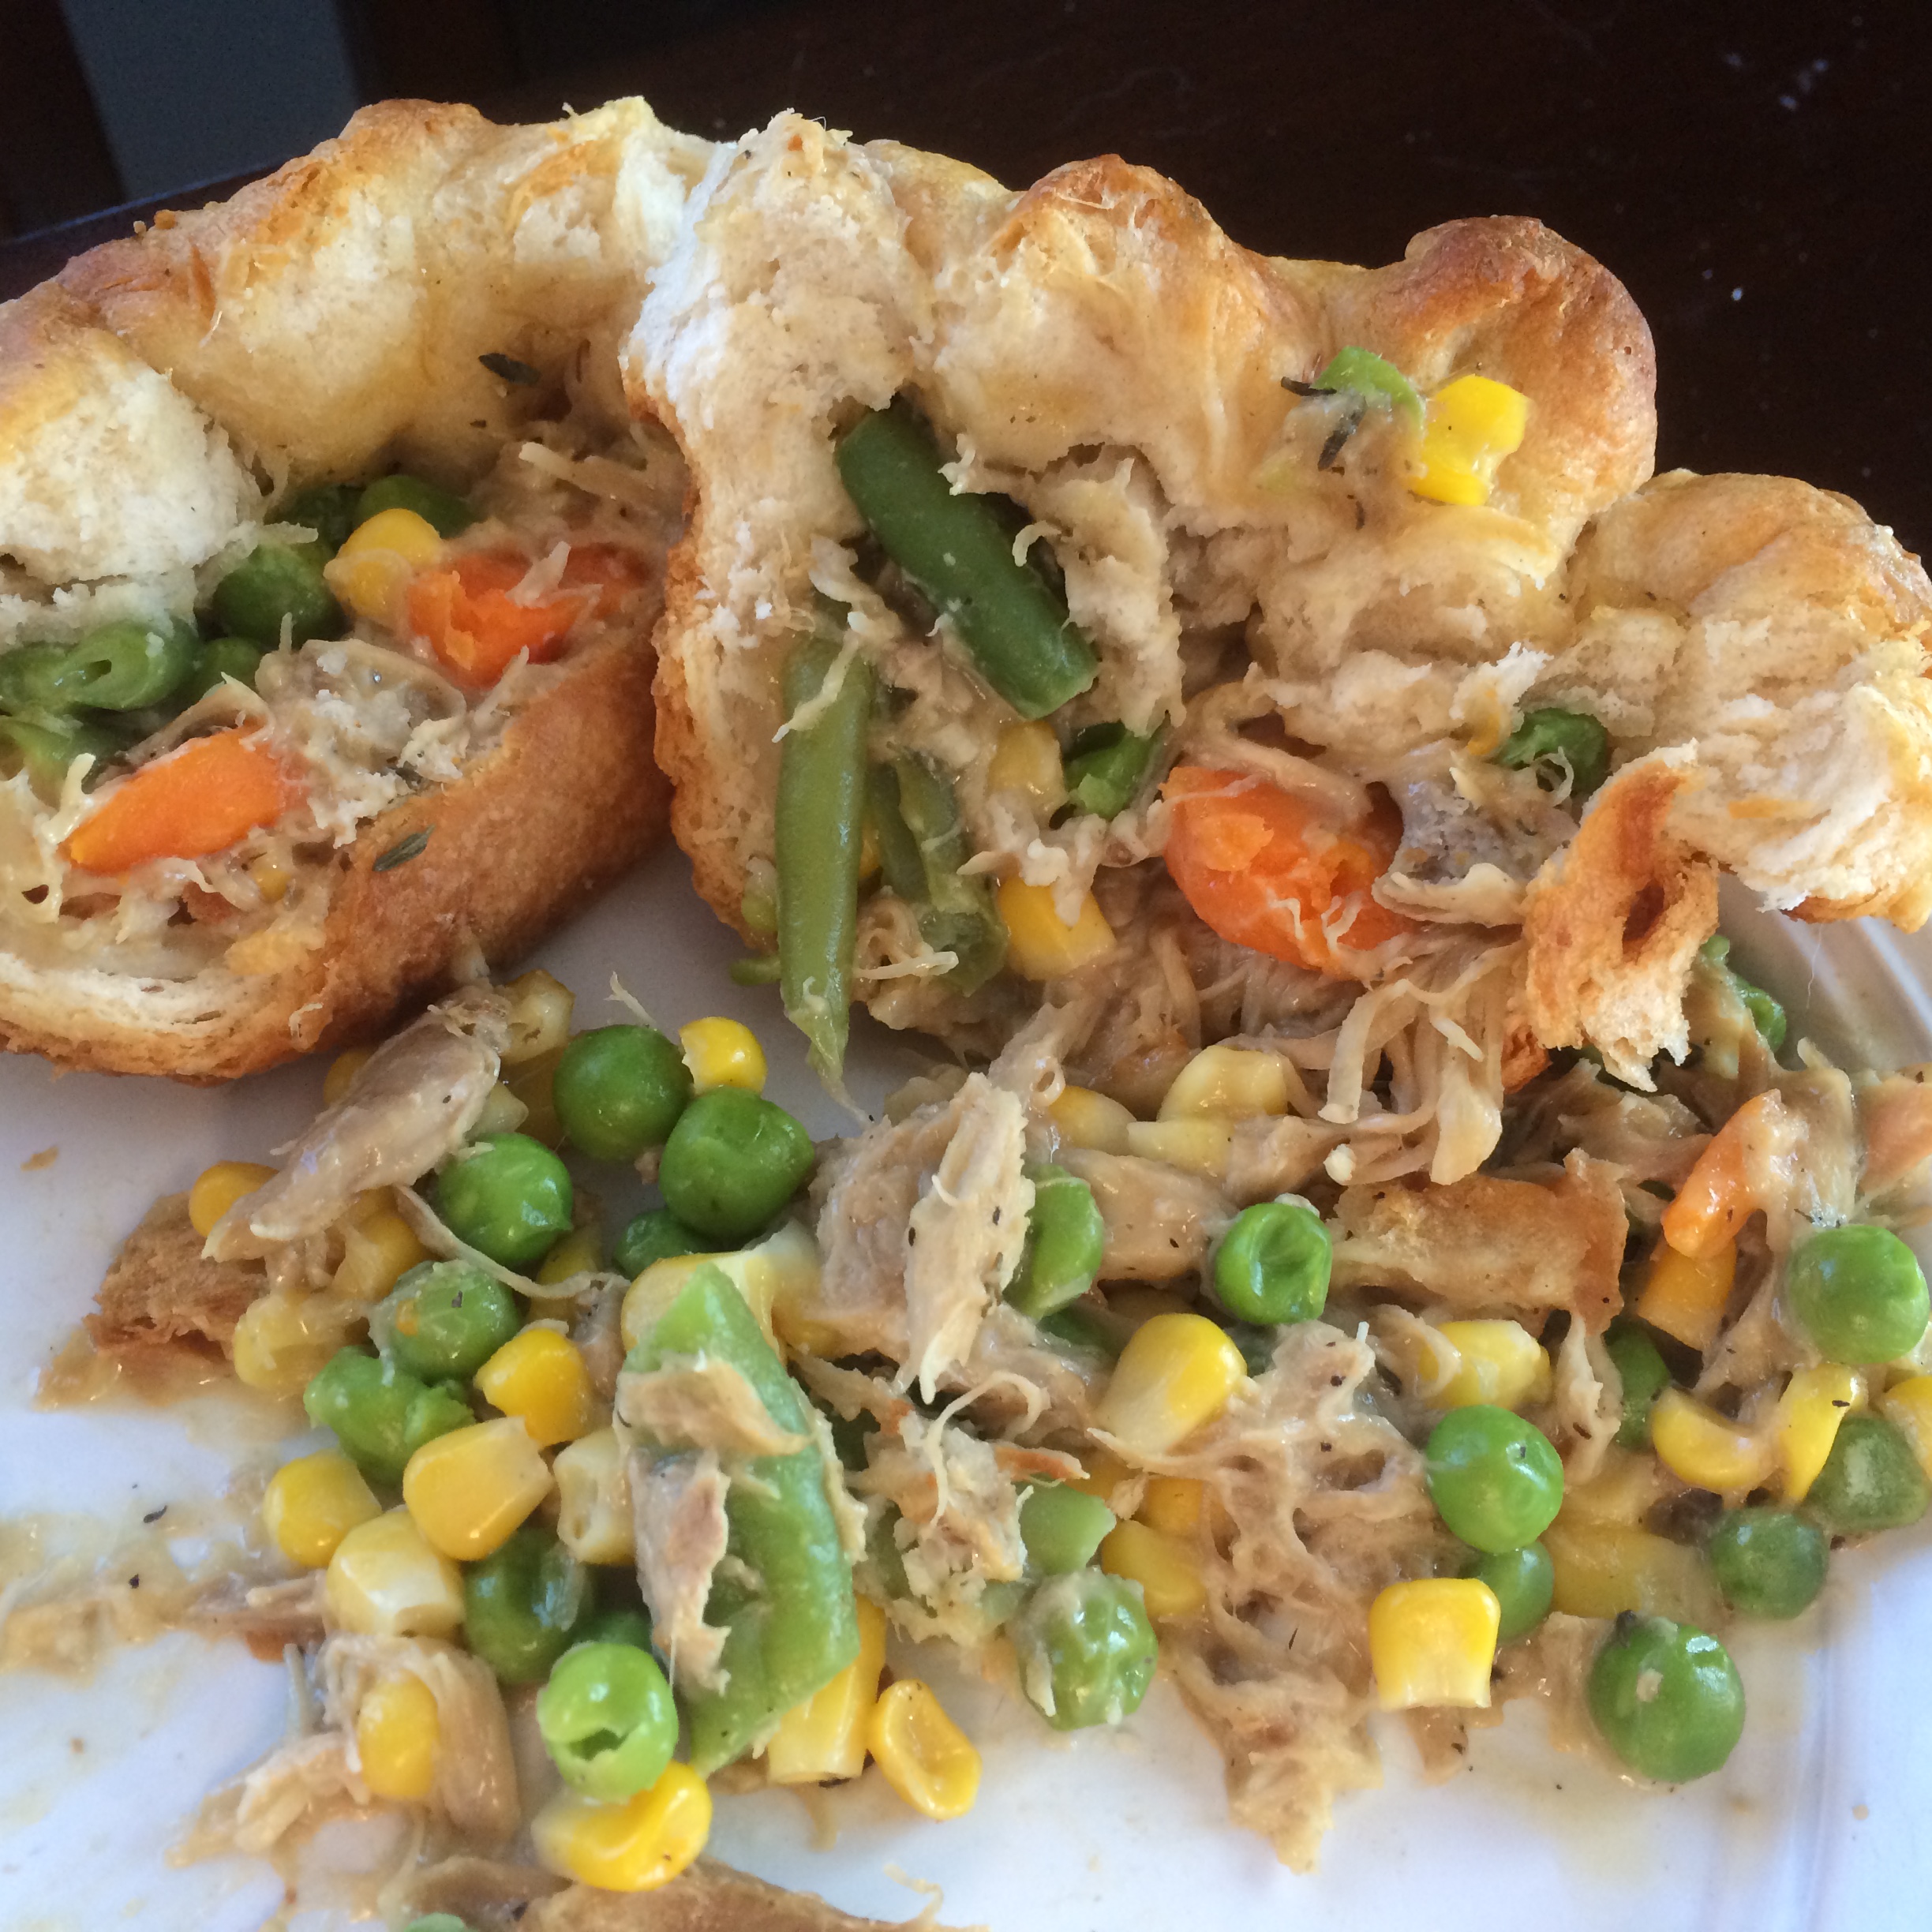
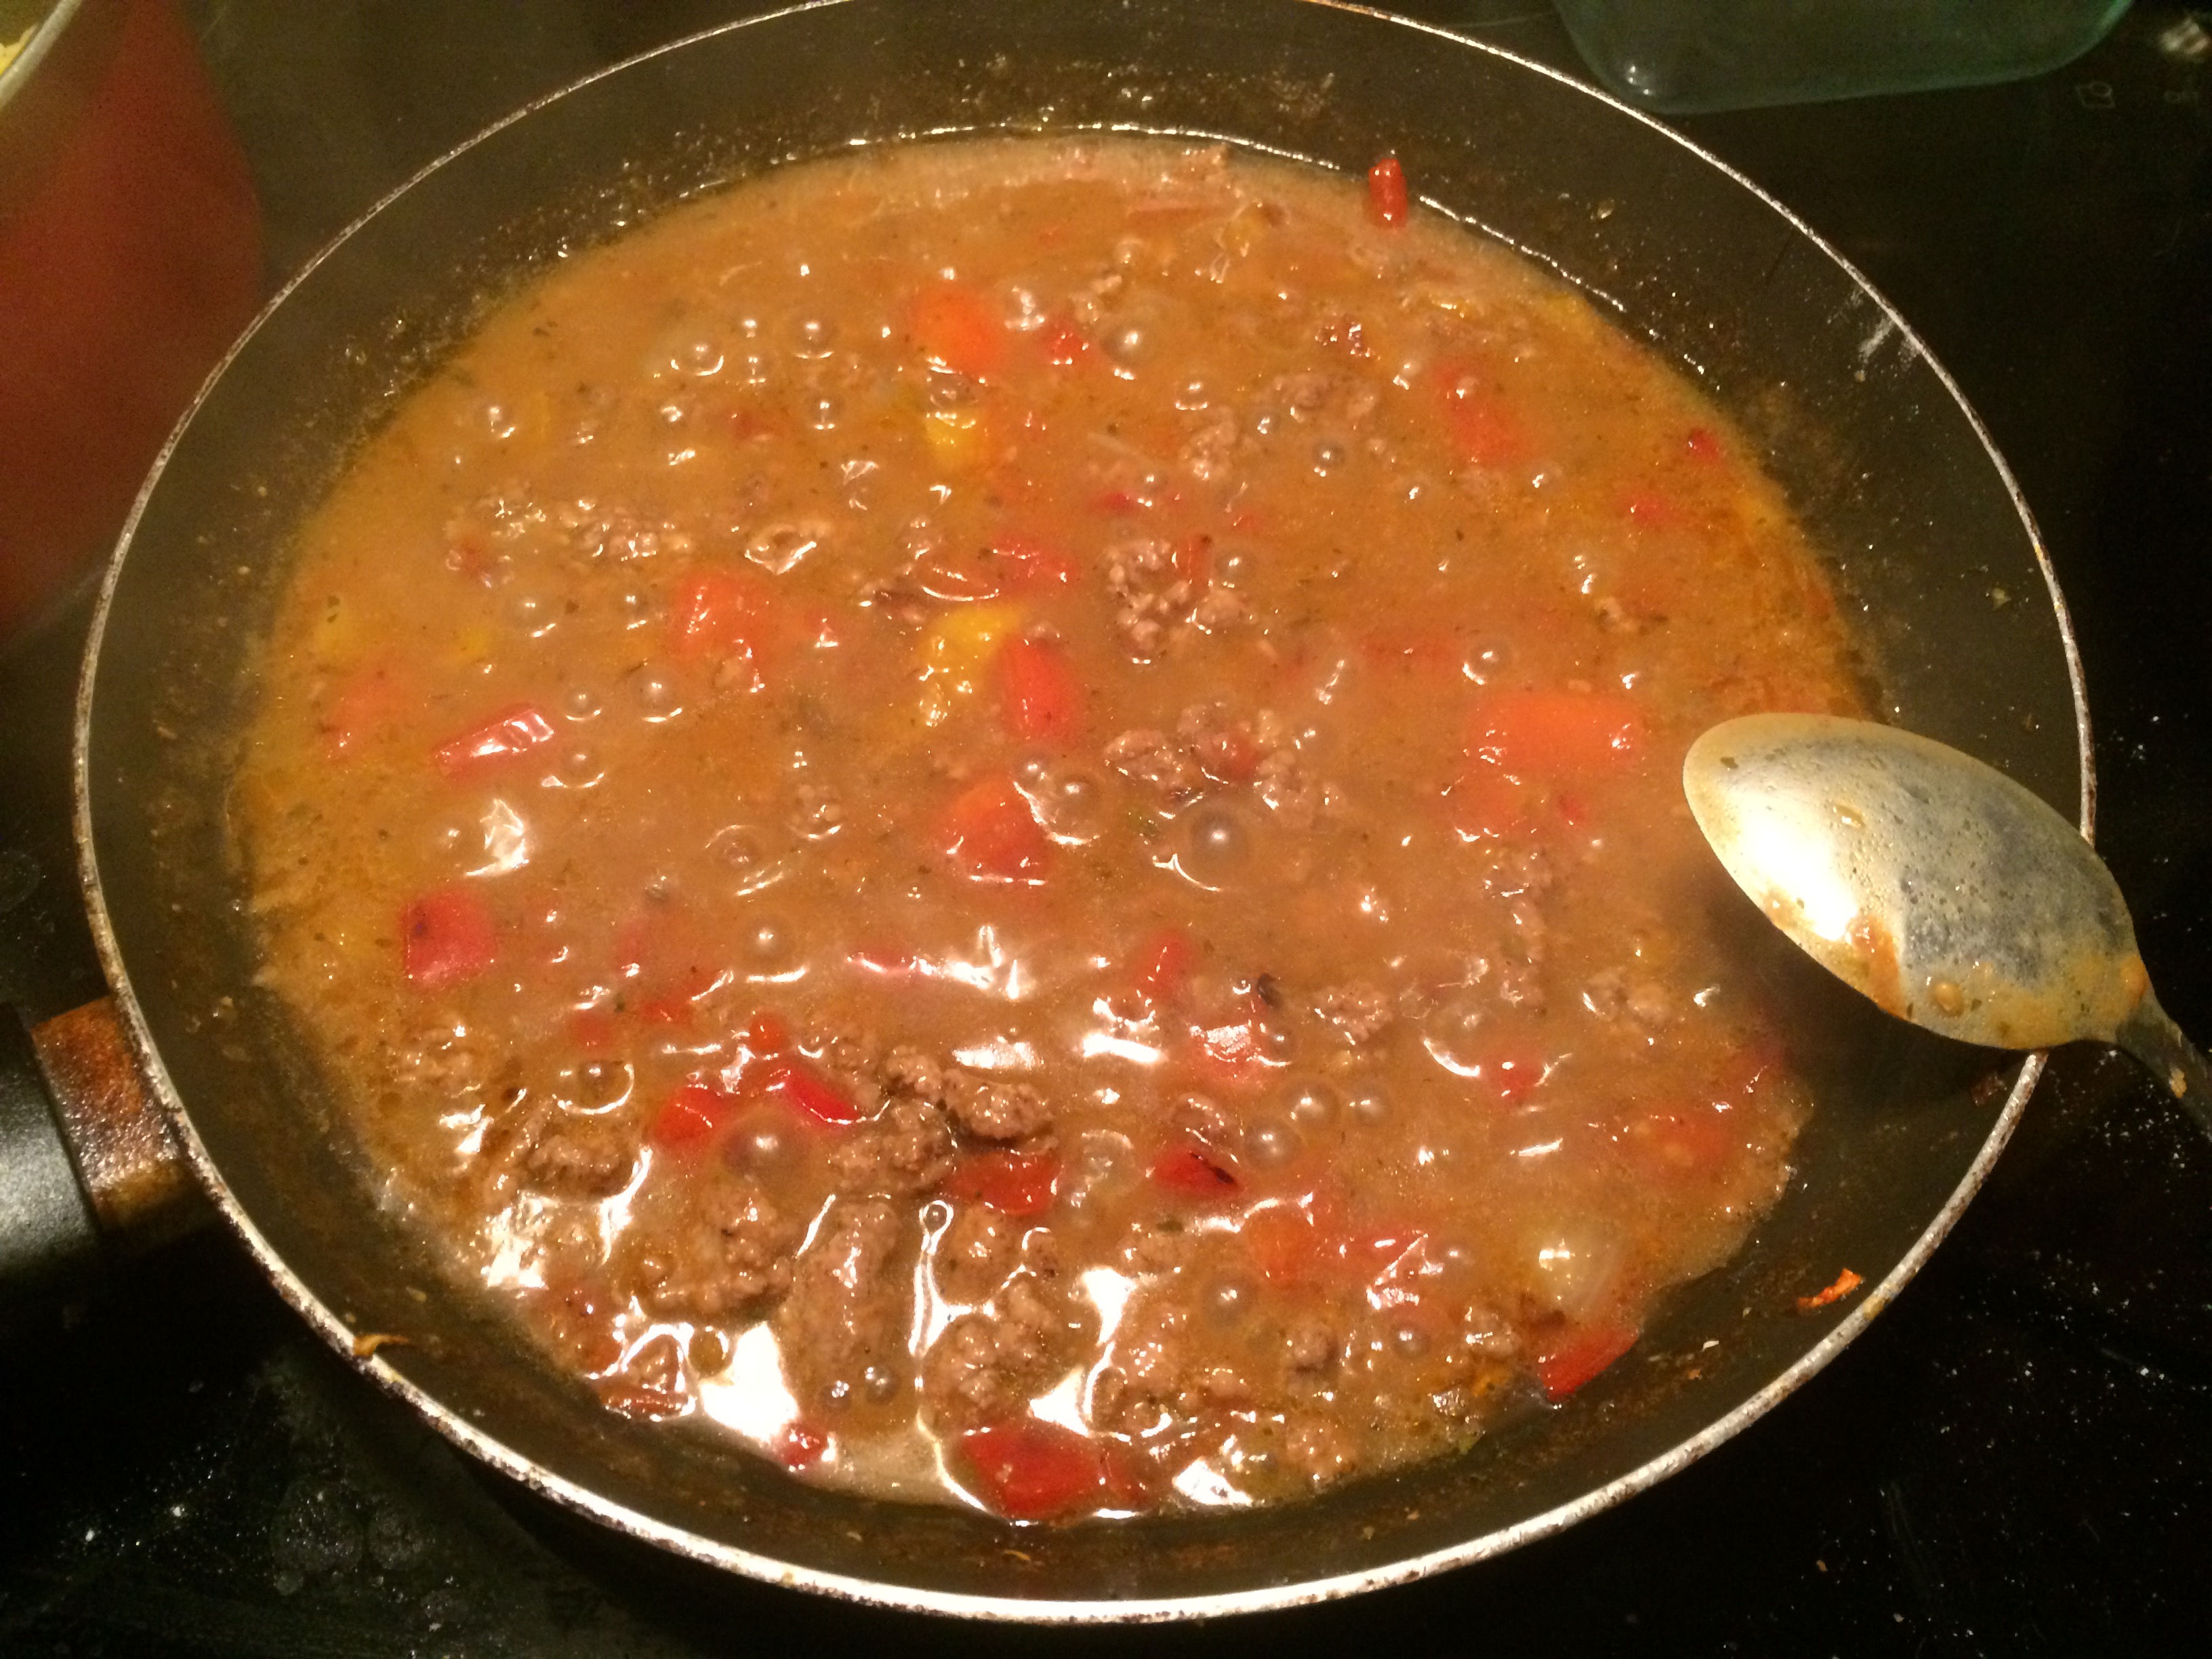
One of the many benefits of deer hunting is getting to eat your harvested animal until the next deer hunting season. We always process our deer so that we have steaks & roasts on hand. We’ve learned through trial and error though that we are not fans of certain cuts of meat. I turn my front quarters into jerky and this year my guy turned his deer’s front quarters into brats. He got jalapeño cheddar brats as well as kielbasa brats. The kielbasa ones are fine but the jalapeño cheddar brats are amazing!! There was some extra filling that wasn’t enough to make a pack of brats so the guys at the meat market just wrapped it up for us. I figured it would be good for some skillet dishes.

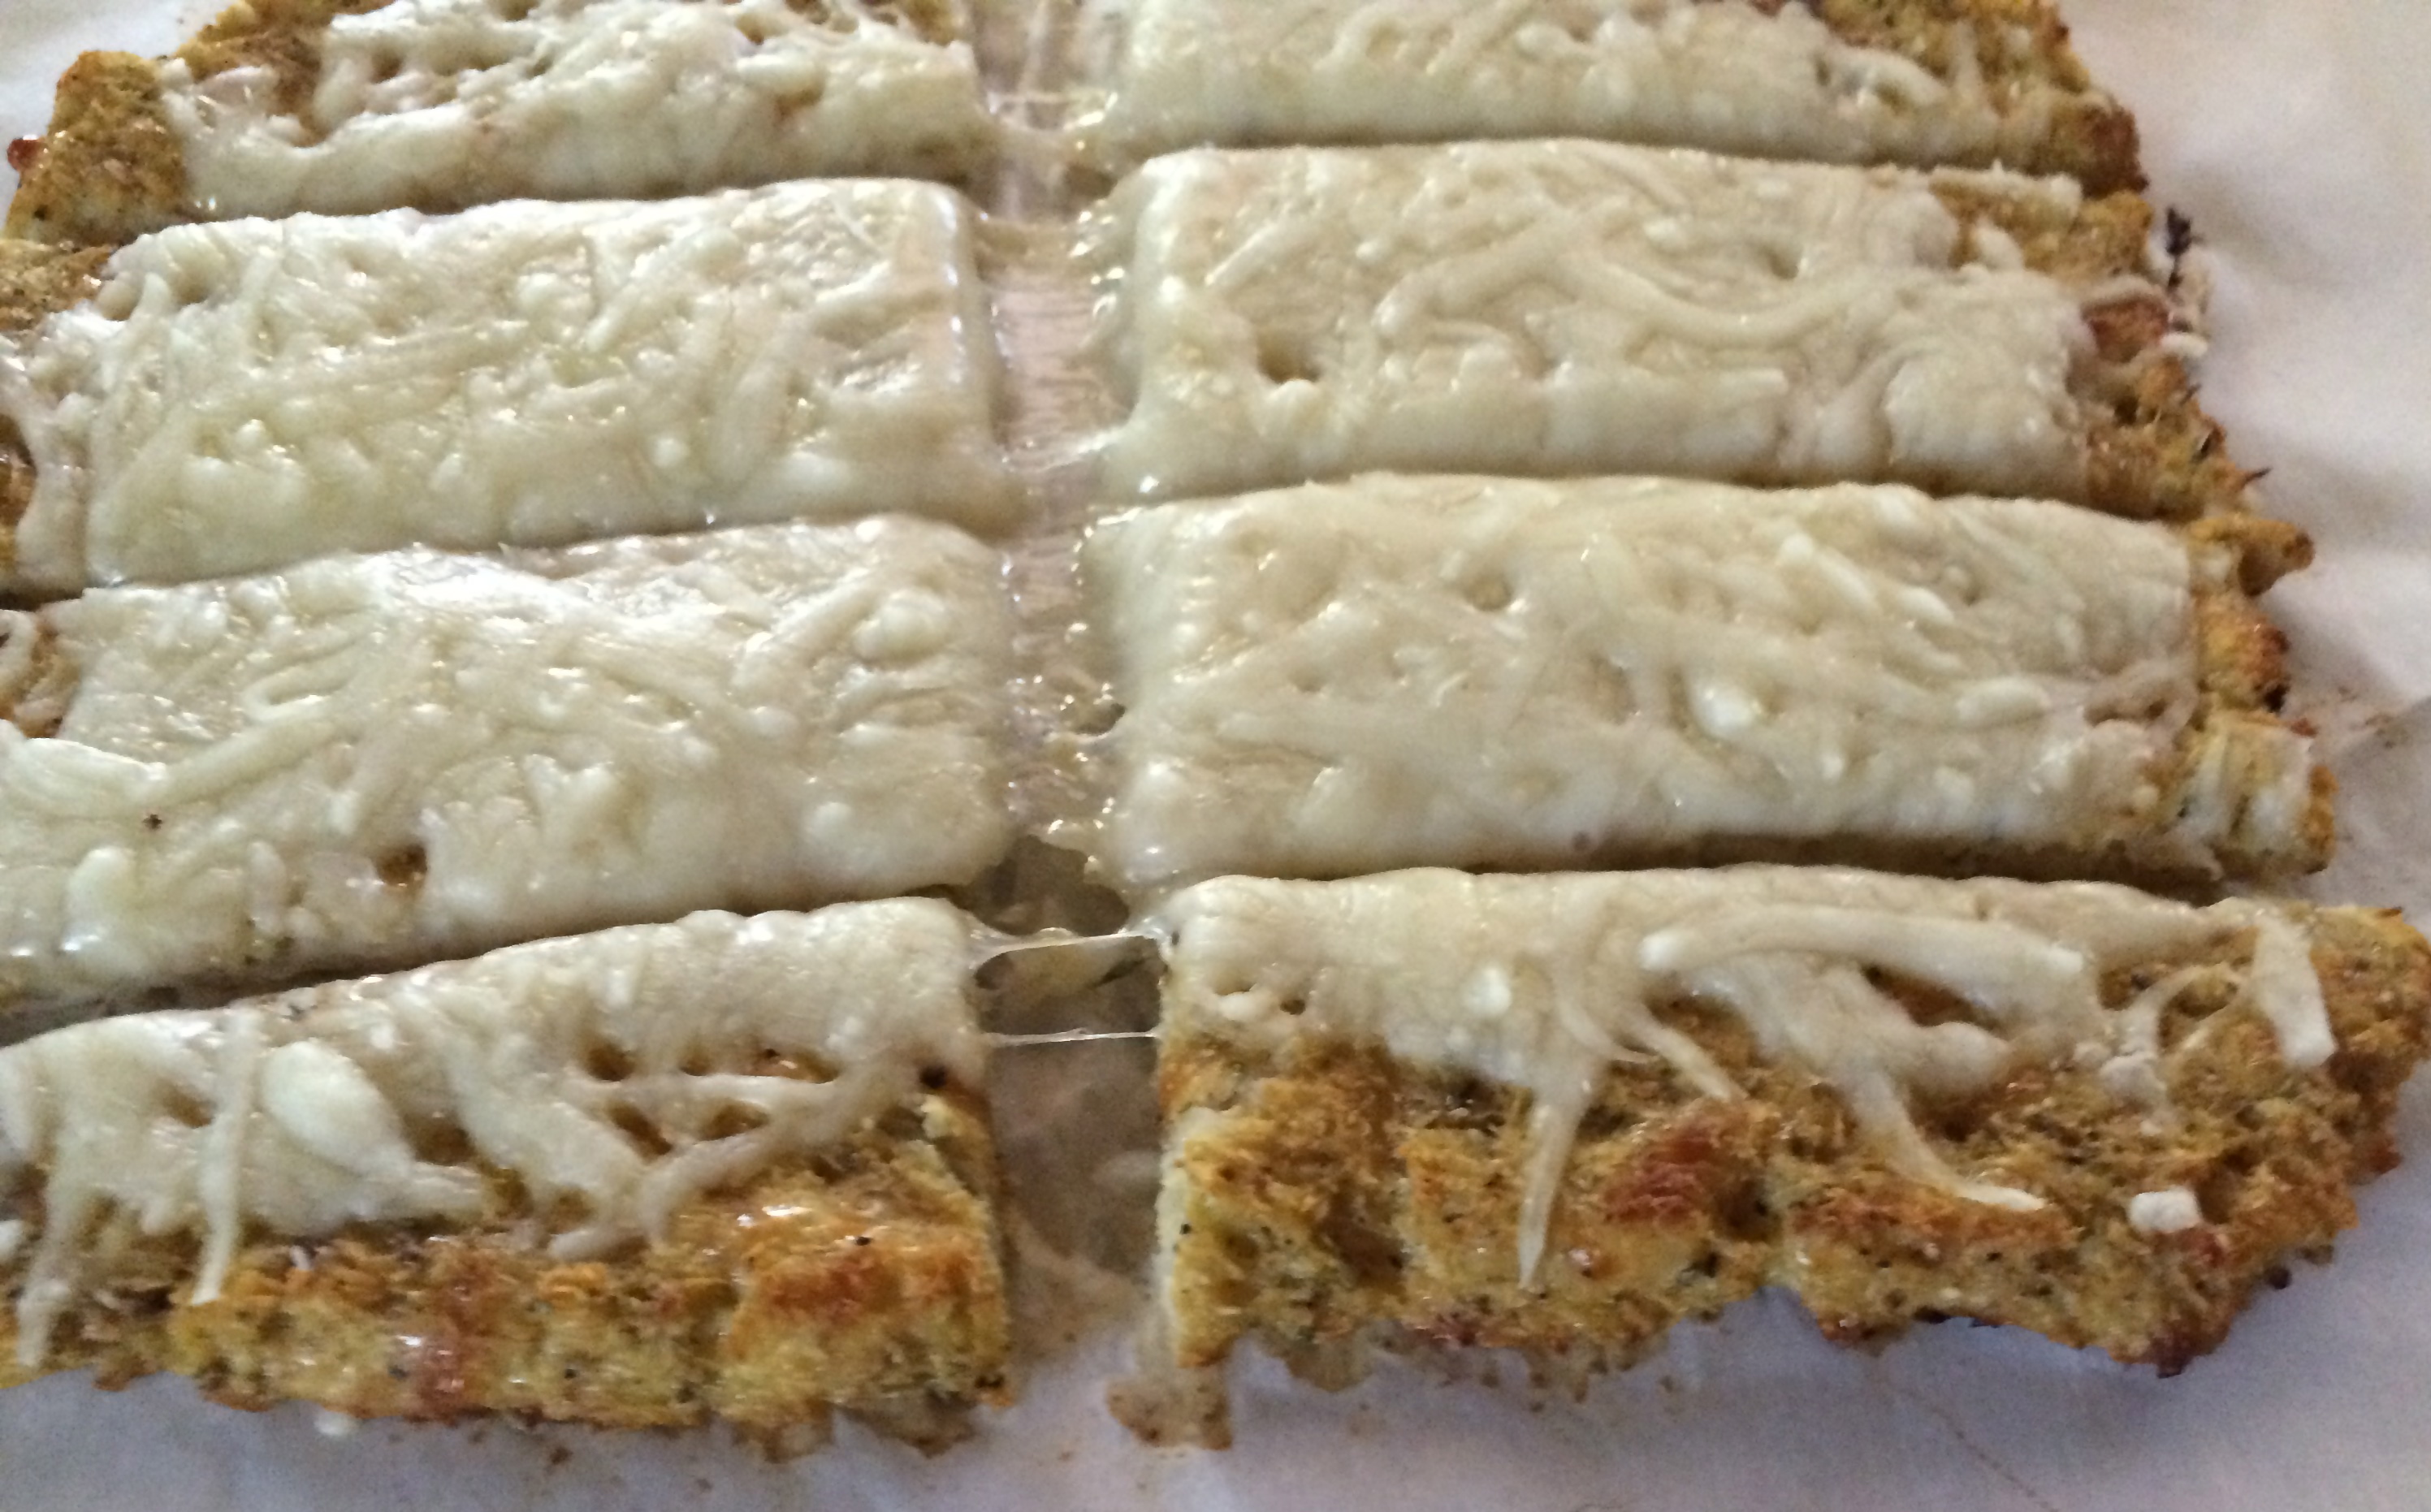
Many of us grew up eating hamburger helper but it is so easy & much better for you to just make it on your own. You can use any ground meat you like or even make it meatless if that’s your thing. I’ve made this dish before with regular ground venison as well as a ground venison/ground bacon blend and it is delicious. The jalapeño cheddar gives it a nice depth of flavor though so I imagine I’ll be making this again in the future. Bonus…it’s super quick & easy to make with ingredients you already have in your pantry and you can doctor it up any way you desire.

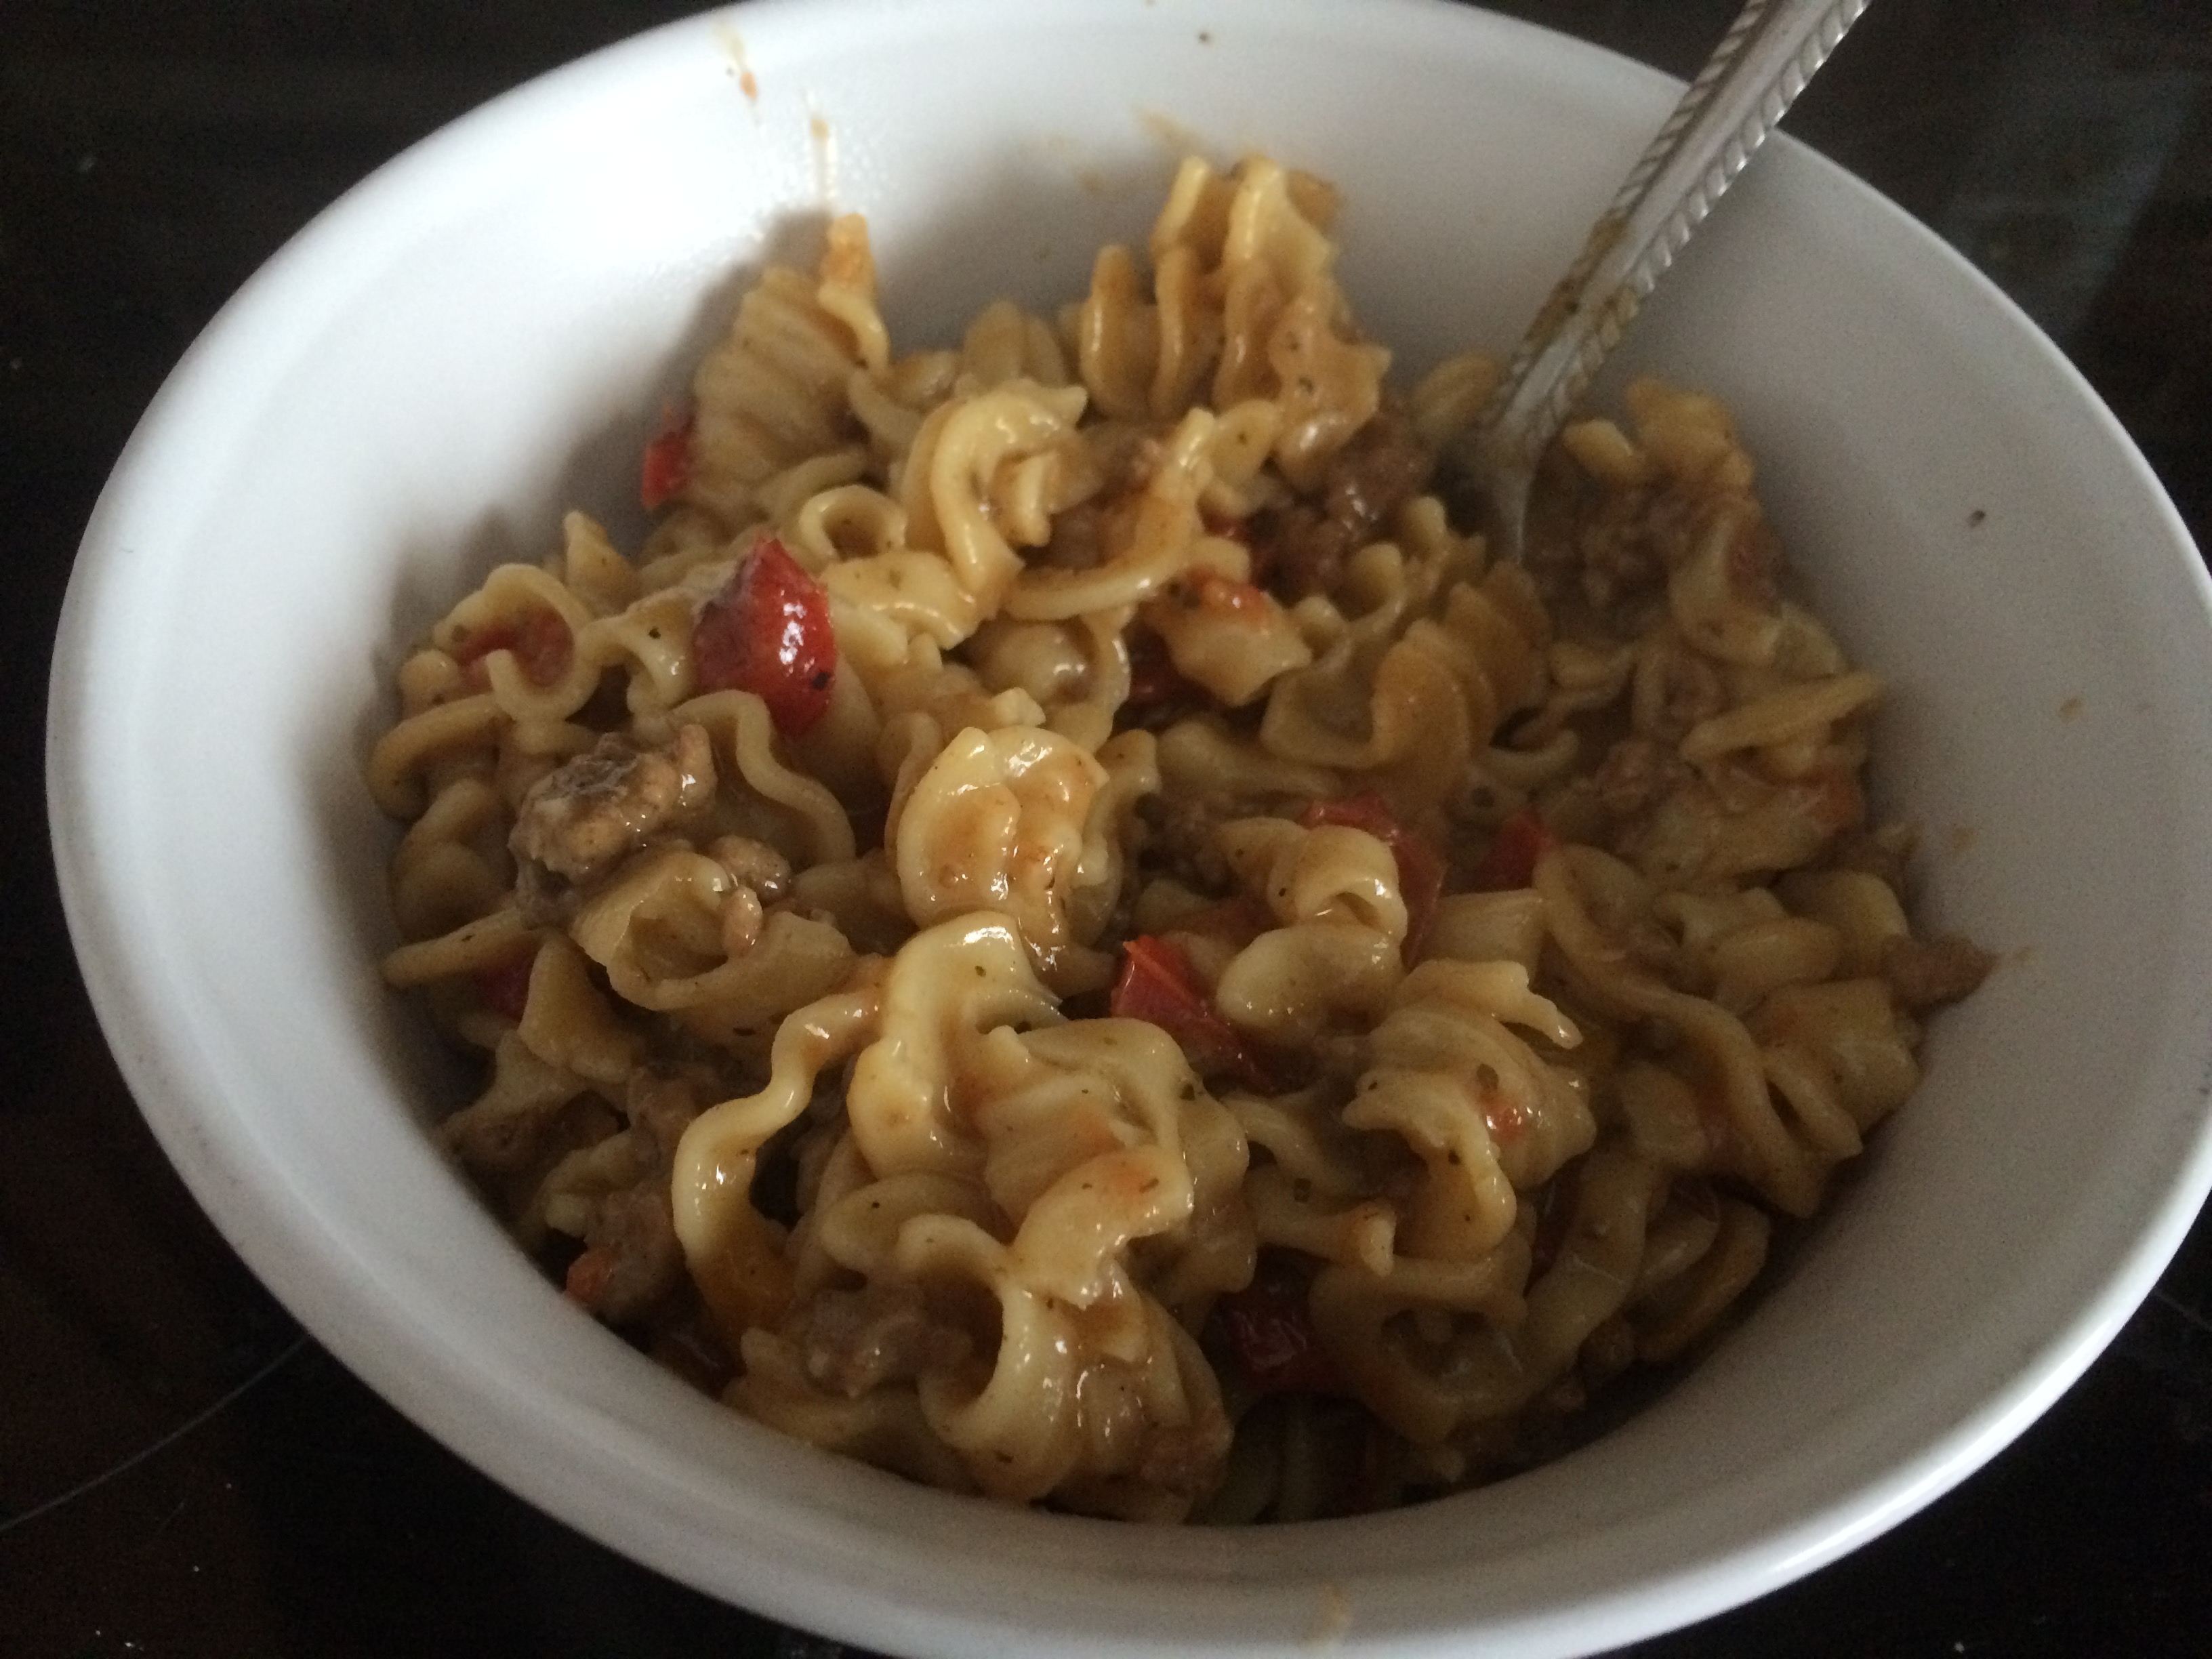
Venison Helper (serves 2)

  • 1/2 lb ground venison (I used the filling from jalapeño cheddar brats)
  • 1.5 cups dry shell pasta
  • 1.25 cups beef broth
  • 1 cup milk
  • salt, pepper, onion & garlic powder, paprika to taste (I just sprinkle a bit of each over the skillet)
  • 1/2 cup drained whole kernel canned corn
  • 1/2 cup cheddar cheese
  • 1/2 tbsp flour mixed with small amount of water.

Brown the ground venison until cooked through in a large skillet. Add the pasta, broth, milk, seasonings, and corn. Stir gently. Bring to a boil. Cover and reduce heat to a simmer. Simmer covered for 10-20 minutes depending on size of noodles until most of the liquid is absorbed and the noodles are al dente. Depending on how much liquid is left in skillet add small amount of flour mixed with water to the skillet and stir until sauce is thickened. Stir in cheese and serve immediately.


Dinner Party Tiramisu

I really enjoy having friends over for dinner. I like being a hostess. I would prefer to have nicer plates & actually make a pretty table like they do on TV but have never invested in it. Regardless, I enjoy having company, planning a menu, making sure everyone has what they need, and that they are enjoying themselves.

A long time ago, in another life I like to say, I used to have friends over for dinner often. Roughly every other weekend I would have people over. One of those people was my guy. At that point in time though we were friends. We were on the verge of transitioning into where we are today.

One night I had an Italian themed dinner. I had planned a menu of parmesan encrusted chicken breasts with roasted red pepper sauce, some sort of side that I can no longer recall, and tiramisu for dessert.

I have always loved tiramisu but had never made it before that dinner party. My trusty cookbook had a recipe so I thought I would give it a go. It did not turn out pretty but tasted fantastic. As I was making it & reading the recipe, it said to cut it into thirds. I cut it into 3 pieces in the pan. Whoops. It meant cut the whole cake into thirds so that you’d have cake, filling, cake, filling, etc. I didn’t care too much. I found it more funny than anything else so decided to just keep it and have it be super tall. It would be an excellent conversation piece if anything else.

I was finishing as much prep as I could do before people arrived. They were running late which didn’t bother me cause I was running a bit behind too. I went into a cupboard to grab a mixing bowl and managed to knock out the bowl of my food processor onto the floor. I stepped back to get it & stepped on what I though was a rock. I looked and saw it was the blade of my food processor. I couldn’t believe how lucky I was. I had stepped on the plastic part that attaches it to the bowl or so I thought. I took a few steps to put it away and turned around & realized I was not as lucky as I thought. There was blood everywhere. The blade was so sharp (honestly it had never been used) that it had sliced my foot super clean so that I hadn’t known I had gotten cut.

I saw a roll of paper towels on the counter, grabbed it, & hit the floor putting pressure & the towels on my wound. In my head I was thinking that this couldn’t be happening. I was having friends over for dinner in a matter of minutes. This is all their fault. If they had been there they would have seen what had happened & yelled at me to not step back.

Of course I knew that it wouldn’t have really been that way. If anything I would have still stepped back & rolled on it from them trying to warn me & probably cut myself a lot worse. By the time they arrived it had been a few minutes. I was wanting to hold it tight for a bit to see if I could stop the bleeding. I didn’t know how deep it was & didn’t really want to look. I finally did & they joked that they wanted to see. I went in the bathroom & unwrapped my foot & knew that the dinner would have to go on without me as I needed to go to the ER.

I was such a good hostess though. As I was getting ready to leave I told everyone where I was in the dinner process. Where they could find all the ingredients, the recipes, & any miscellaneous items. I left. My guy (well not my guy at the time but you know what I mean) came out to watch me leave & I waived goodbye.

I ended up with 10 stitches. I had never had a stitch in my life. My first one (or ten) happened when I was almost 27 years old. I did not pay attention to my doctors advice to not drink. I actually took a shot of whiskey in the parking lot after being picked up. I lived in wright county at the time so I’m sure there was at least one other person doing the exact same thing. My friends had been having fun in the 3 hours that I spent in the ER. They managed to make dinner and saved me a plate. They waited to have the tiramisu until I got back. We hung out & I didn’t have to get up once.

That part of my life seems so long ago but it’s really only been 6 years. It’s amazing what can change in 6 years. In that time my guy and I figured out where we wanted to be in terms of our relationship. We moved to Almost Canada. We got married & just celebrated our one year anniversary. We have a whole new life.

We actually hosted an Italian night with friends we have made up here. Of course I offered to make the tiramisu. It made me remember my first tiramisu & how horribly ugly it looked. I wish I had a photo. When I told my guy I was making tiramisu for dessert all he said was… ‘make sure you cut it correctly this time.’ I guess he never forgot that evening either or at least the tiramisu.

I did make this one appropriately with the exception of doing 2 layers instead of 3 as I don’t think my knife skills are up to par to make thirds. That’s OK though. It was fun hosting. Everyone seemed to enjoy the tiramisu & I didn’t end up in the ER. I’d call that a success.


Poutine


IMG_3068


I have never had real Poutine. I don’t know how this is possible considering I live in Minnesota or Almost Canada. I had poutine at the MN State Fair but it wasn’t real Poutine. It was more like a fast food version. This recipe might not be traditional but it is delicious. Maybe one day I will have a traditional version but until I do this will suit me just fine.

Poutine (serves 2)

  • 1-1.5 cups shredded cooked duck
  • 1 cup duck gravy
  • 2 cups diced potatoes
  • 2 tbsp lard
  • salt & pepper to taste
  • shredded swiss cheese

Fry the potatoes in the lard with salt & pepper until crispy. Place in a pie plate.

IMG_3064

Top with shredded duck and then gravy. Bake for 15-20 minutes until duck is heated through. Top with swiss cheese. Bake for 5 minutes more until cheese is melted. Serve & enjoy

IMG_3068

Savory Oatmeal

IMG_3092


It’s finally here. Ice season is upon us. My guy is now an ice fishing guide once again. This gives me plenty of alone time. Time to do various things, one of which is making food for myself. Normally I go vegetarian as he frowns upon meals without meat, but today I decided to give savory oatmeal a try. I have to say…I am a fan. I plan on experimenting a lot more with savory oatmeal in the future.

Savory Oatmeal (serves 1)

  • 1/3 cup onion, chopped
  • 1 tsp olive oil
  • 2oz kielbasa, sliced
  • 1/2 – 1 tsp garlic juice (from jar of minced garlic)
  • 1/2 cup old-fashioned oatmeal
  • 1 cup water
  • pinch salt
  • 2 tbsp shredded cheddar cheese

Heat oil in a skillet. Add chopped onion & sauté for 3-5 minutes until softened. Add kielbasa & cook for 3-5 minutes more. Add garlic juice and sauté for one minute more. Meanwhile, combine oats, pinch salt, & water in a small pot. Heat to boiling & then reduce heat to a simmer & cook for 3-5 minutes until desired consistency. Stir in cheddar cheese and then top with onion & kielbasa.

IMG_3092

Cauliflower Cheesy Bread


IMG_2391


I’ve mentioned before how I am not allowed to make vegetarian dishes. My fishing guide is a meat & potatoes type of guy. I’ve made a few dishes but those vegetarian meals have to be at lunch. I think he would flip his lid if I tried to make a veggie meal for dinner.

I’ve actually made this cheesy bread for him but it was a side dish to something. He really enjoyed it. He said, “there is no bread in this?” Nope. Just cauliflower vegetable goodness. The best part is you don’t have to spend forever squeezing out the excess moisture from the “dough.”

Since he is driving a boat today, being a real fishing guide for others, I got to make this dish as an entree and eat it myself for lunch. Delicious.

Cauliflower Cheesy Bread (serves 2 as a side dish or 1 as a main dish)

  • 1/2 head cauliflower, cut into chunks
  • 2 eggs
  • 1/4 cup mozzarella cheese
  • 1 tsp basil
  • 1 tsp oregano
  • 1-2 tsp minced garlic
  • salt & pepper, to taste
  • 1/2 cup to 1 cup mozzarella cheese

Marinara Sauce: Make your favorite recipe, use store bought, or try this quick go-to…

  • 1/2 can stewed tomatoes
  • pepper to taste
  • 1/2-1 tsp italian seasoning (or equal parts basil & oregano if you prefer)
  • few dashes hot red pepper flakes

Marinara Sauce: Puree tomatoes lightly so that there are still some chunks. Add seasonings. Simmer all ingredients for 15-30minutes.

Cauliflower Cheesy Bread: Pick cauliflower from your garden (or just go to the store, but these guys are super easy to grow. I recommend you do so next year).

IMG_2398

Puree 1/2 head cauliflower that has been cut into chunks in a food processor.

IMG_2380

While oven preheats with a baking stone sauté cauliflower in a skillet over medium low to medium heat to release excess moisture and soften the cauliflower.

IMG_2383

Add to a medium bowl. Add the rest of the ingredients except for the 1/2- 1 cup mozzarella and mix well. Form into a square on a piece of parchment paper.


IMG_2384

Place paper on heat stone. Bake for 20 minutes. Top with cheese. Bake for 5 minutes more. Serve with marinara sauce.

IMG_2391

IMG_2387

Bulgur Vegetable Salad

I feel that people associate Minnesota only with heavy comfort foods. Hot dishes and meat & potatoes. In actuality, gardens are quite prevalent in Minnesota, resulting in many veggie based meals or at least veggie filled side dishes.

In my household, it’s rare to have a vegetarian meal. My guy is a meat & potatoes man & believes veggies are something to be used as a side dish. I, however, have never been a meat & potatoes girl. Don’t get me wrong, I love meat & potatoes. I love them together. But I love all food and vegetables have always been one of those foods. Since meeting me, my guy has probably eaten more vegetables with me than in his entire life before living with me.

I try to come up with tasty ways for him to eat them (as well as myself) even if it is just for side dishes. This isn’t a crazy vegetable dish by any means but it does incorporate the veggies from our garden this year in a way I haven’t made it in years. It’s sort of like a tab(b)ouli or tab(b)ouleh salad – pick your fave spelling – just modified for what I had on hand.

This can be eaten by itself or paired with some sort of meatball or yogurt chicken if you have a meat eater in your household as well.


IMG_1349


 Bulgur Vegetable Salad (makes 4 servings)

  • 1 cup bulgur
  • 2 cups water
  • olive oil
  • lemon juice
  • 1 onion, chopped
  • 1 zucchini, sliced into half moons
  • 1/2 tsp garlic, minced
  • 1 tsp each dried basil & oregano
  • salt & pepper to taste
  • dash onion powder
  • 1/2 a cucumber, chopped
  • 1 cup cherry or grape tomatoes, halved
  • 1/2 cup feta cheese
  1. Place bulgur & water in a small pot. Bring to a boil, reduce heat to a simmer & cover. Cook for 20 minutes or until water is absorbed.
  2. Meanwhile, in a skillet sauté zucchini & onion in a small amount of olive oil until tender & slightly caramelized. Add garlic & cook for 2 minutes more.
  3. Drizzle the cooked bulgur with olive oil & lemon juice. Add the cooked vegetables & spices & stir to combine. Top with the raw vegetables & feta cheese. Drizzle with more olive oil & lemon juice if desired.


Ricotta Cheese

I like to try new things. This is a true statement although sometimes it doesn’t appear as such. The reason being is that I am also tentative to try new things. It’s not that I am afraid, it is just easier to do things that I already know how to do. For example, I love to bake. I love to bake on Sundays in particular and yet, there are still many baked goods that I have yet to set out and conquer. The same thing is true for making cheese.

I received a cheese making kit for my birthday last year. I soon found out that making hard cheeses was going to be very time consuming. I made yogurt and that was super easy but knew I wanted to make an actual cheese.

I finally decided to make ricotta cheese as it is one of the easiest cheeses to make. You really only need a pot, a thermometer, and some cheesecloth so I didn’t have to worry about numerous steps. It was super easy. I ended up using it for lasagna.

IMG_1911

My next cheese I will attempt is mozzarella. It is another easy cheese to make and it will be a staple in my household with the fresh garden tomatoes that will be in season very soon.

I am trying to get better at baking or making new things. It is a constant work in progress, but as long as I continue to try my hand at new skills & be willing to fail, I think I will be ok.

Pesto Prosciutto Pizza with Cauliflower Crust


IMG_1974


I have a samurai living inside me. 

This is what I tell people when I say I have Hashimoto’s Disease. “I have a samurai living inside me.” Making a joke sounds better than when I say I have an autoimmune disease that it attacking my thyroid & causes many other health side effects.

Apparently the only way to cure it (maybe) is by going gluten free. Supposedly after 6 months to 2 yrs of being gluten free, my antibodies will go back down to a normal level. I have yet to do this. Why haven’t I? Well, it’s complicated.

For one, I have most of my symptoms under control. I feel much better than I did before. My hands only feel somewhat cold. I am not constantly fatigued. My headaches are under control. The list goes on.

Another reason is that I really don’t want to go gluten free. It is really hard. Gluten is everywhere. There are so many hidden sources of gluten it isn’t even funny. People with celiac’s disease will tell you a gluten free diet is no joke. Sure, it is easier today than it was 10 years ago with gluten free menu options or new & interesting food ideas, but it is still no walk in the park. I have done a massive gluten reduction but am by no means “gluten free”. For now my reduction plan is working for most of my symptoms.

I also love baking. I will not give that up. I don’t think I could afford to bake gluten free right now anyhow. And baking regular for the heck of it and gluten free for myself does not appeal to me. Maybe one day I will get there. Maybe one day I will have to. Until then I try to do the best I can and make better choices so that I feel well.

One thing I tried was a cauliflower crust for pizza. Cauliflower is on the internet everywhere in the food world as a healthy alternative to breads & pastas. This pizza is amazing and healthy. Give it a try for something different or maybe for your own health reasons.


Pesto Prosciutto Pizza with Cauliflower Crust (serves 1-2)

  • small bag cauliflower florets (or half head cauliflower)
  • 1 egg
  • 1/2 cup shredded asiago cheese
  • 1/4 tsp each oregano & basil
  • few dashes onion powder
  • 1 clove garlic, minced
  • pinch salt & pepper
  • olive oil (for brushing parchment paper)
  • 1/2 to 3/4 cup shredded parmesan cheese
  • 1/4 cup homemade or store bought pesto
  • 1.5 oz prosciutto, sliced into bite sized pieces


Preheat a pizza stone or clean baking sheet in an oven to 450 degrees F.

Add the cauliflower to a food processor and pulse until finely ground.

Transfer the cauliflower to a medium bowl. Add the Asiago, egg, garlic, and seasonings. Combine until the mixture holds together when pinched. Pour onto a cheesecloth and wring out as much moisture as you can.

Line a pizza peel with parchment paper & brush with some olive oil. Spread the cauliflower mixture into a circle about 1/4in thick. Slide the parchment onto the preheated pizza stone and bake until barely golden and darker at the edges, about 17-20 minutes.

Remove the crust from the oven, sprinkle with the mozzarella and spread the pesto over the top. Scatter the prosciutto on the pizza. Slide back onto the pizza stone and bake until bubbly with browned spots, about 4-6 minutes.

Serves one as an entree or serves two when paired with a side.

IMG_1974

Picked Pea Pot Pie

Do you ever just have bad days? Of course you do. Everyone does. My fishing guide had one the other day. This year he is not really my fishing guide. He became a real fishing guide as he needed a job. The job options up here in Almost Canada are rather bleak so he was more or less forced to work on the ice. He now brings others to fish, thus we do not get to fish. Something that is none too thrilling for our hobby of ice fishing which we are both quite passionate about. But what can you do? He needed a job.

This job is different from his previous accounting desk type jobs. He likes this job well enough but like all jobs, things set you off. You get grumpy. He called me on his way home with a grumpy & annoyed tone the other day. Our conversation was brief. He had a long day.

All his days are long actually. He gets up at 4:30 and working 12 hour days (or longer) is the norm. Consequently, I make dinner. I always made dinner before but now it is more of a necessity. I don’t mind. I love making dinner.

When he called me I had planned on making individual pot pies with biscuits. A comforting, warming dish common in Minnesota this time of year. This one would be super easy and all my ingredients were readily available. I had leftover duck already shredded, I had biscuits for the crust, and I had cream of chicken soup, cheddar cheese, herbs, and a bag of mixed veggies in the freezer for the filling.

The veggies consisted of corn, green beans, carrots, and peas. And here lied my dilemma…peas. He hates peas with a passion. I love peas and I love them in my pot pie. Needless to say he does not enjoy them at all in food. I knew today was not the day to be serving him peas. I actually burst out laughing in the kitchen imagining his reaction if I were to serve them to him. Funny to me but not to him most likely. So I set about removing the peas from my filling. It wasn’t that difficult. I just tried to scoop portions for his that didn’t contain many peas and then removed any stray peas.

When he came home and saw mini pot pies for dinner he looked pleased. When I served him his plate and put mine before me he said, “mine looks different”. I responded, “That’s because I picked out all the peas from yours.” A smile appeared on his face. And then a smile appeared on mine. We then enjoyed what little time we had left before he went to bed.

While I know that picking out peas did not cure his grumpiness completely it did lighten the mood. It is a reminder of how much I care for him. A small thing that reminds me that things aren’t as bad as one might think if all you have to do is take the time to remove some peas.

Individual Pot Pies* (serves 4) 

*Note that I do not know who came up with this recipe first. I know that biscuit companies have this almost exact recipe listed on their websites but I also know that I didn’t learn it from them. I’m not sure where I learned it. I think it is one of those recipes that everyone comes up with at some point.

  • pack of 8 refrigerated biscuits (or make your own)
  • 1 1/2-2 cups shredded meat (I used duck but chicken works just fine)
  • 1 can cream of chicken soup
  • 1/2 tsp each oregano & thyme
  • salt & pepper to taste
  • 1/4 cup shredded cheddar cheese (use more if desired)
  • 1 bag mixed vegetables or use what you have on hand (about 2- 2 1/2 cups veggies)

Preheat oven to 375F. Grease 8 muffin cups.

Cook veggies according to package directions. Place meat, veggies, soup, cheese, and seasonings in a large bowl. Mix well. Take biscuit dough and stretch each biscuit until about 1/4 in thin. The circle should be about 5-6in diameter. Place biscuits in greased muffin cups. Fill with filling until about the top of the muffin cup. Fold sides of biscuit over filling. Bake for 20 minutes until golden brown.

IMG_1867

Heat excess filling on the stove or in the microwave. Serve pot pies with the additonal filling.

IMG_1872

(Picture is of my pies, the ones with peas. My fishing guide’s pot pies looked the same but contained only corn, carrots, and green beans in terms of veggies)

Multiple Meals: Ground Beef & Pork

I was hoping to make one more giant grocery shop before the snow hit in Northern Minnesota (aka Almost Canada) but it seems I was too late. The snow & cold weather has infringed upon my ability to go get groceries this last weekend. Yes I can get food in town but it is drastically overpriced. I usually make a giant trip every 1-2 months and stock up on pantry items & frozen goods. I also buy meat in bulk and then portion it into 2-4 servings (enough for me & my fishing guide for dinner with leftovers if desired) and freeze it. Since I was not going shopping for a week or two I decided to work with what I had on hand. I made 4 meals using the same meat source. Meatloaf and casseroles are big in this state/climate so I included those in my food prep. Nothing fancy but all meals are different (an important concept in many households as people get sick of the same foods being served over & over). Most importantly, you can do all the prep in one day.

Before any of the meals can be made you must combine 1 lb of ground beef with 1 lb of ground pork. Divide the meat into two 1 lb portions. Take one portion and split in half again. Set both of these 1/2 lb portions aside (one will be for meatloaf and one will be for noodle casserole). Take the other 1 lb portion & add to a skillet and brown. Add taco seasoning to your liking with a small amount of water. Let cook off for a few minutes. Take this mixture and split into two portions. Use one immediately for tacos. Set one aside for stuffed poblanos.

Tacos (serves 2)

I will not put any information here for taco prep cause everyone knows what to do. Use your favorite fixings and sides of your preference. I made a spicy pepper creamed corn but refried beans or mexican rice are great as well.

Stuffed Chile Poblanos (serves 2)

  • half of the taco seasoned meat previously prepared
  • 2 poblano chiles
  • 1/2 cup cheddar cheese
  • 1/2 cup white rice
  • 2 tomatoes, diced
  • taco seasoning
  • salsa
  • sour cream
  1. Place poblano peppers on a cooking sheet & place under broiler. Broil for 3-5 minutes per side until skins are blistered. Place peppers into a bowl & cover with pastic wrap or place in a gallon sized plastic bag. Let sit for 10 minutes & remove skins. Slice open on one side & remove seeds.  Place ground meat and 1/4 cup cheese in each pepper. Close peppers.
  2. Meanwhile, cook rice according to package directions. Stir in diced tomatoes and 1-2 tsp taco seasoning & salsa to your liking (I only use a few tsp of very hot salsa at this stage).
  3. Pour rice into a 8×8 casserole dish. Top with peppers. Cover with foil & bake within 1 day. Bake covered in a 400F oven for 30 minutes. Remove foil and bake for 15 more minutes. Serve with additional salsa & sour cream if desired.

IMG_1695

Muffin Tin Meatloaf (serves 2 with 3 muffins each)

  • 1/2 lb portion ground meat
  • 1/3 cup milk
  • 1 egg
  • 2 tbsp chopped onion
  • 2 slices bread, torn into pieces
  • pinch each oregano, basil, sage
  • sprinkle salt & pepper
  • 3 tbsp ketchup
  • 1 tbsp brown sugar
  • 1/2 tsp worcestshire sauce
  • 1/2 tsp ground mustard
  1.  Take a 1/2 lb portion meat & add to a medium mixing bowl. Add the rest of the ingredredients through the salt & pepper. Stir to combine.
  2. Stir together the ketchup, sugar, worcestshiire sauce, and ground mustard. Set aside.
  3. Lightly grease half of a muffin tin (this makes 6 meatloaf muffins). Add the meat to the tin with a scoop or spoon. Cover with foil. Place in the fridge or freezer.
  4. Bake for 25 minutes if refrigerated. If frozen, take out the night before you want to bake it and place it in the fridge to thaw. Bake as previously mentioned.
  5. Once cooked, top with the sauce mixture. Bake for 5-10 moire minutes. Serve with sides of your choice. I served baked potatoes and salad.

Sorry for the lack of photos. I forgot.

Beef & Pork Noodle Casserole

  • 1/2 lb portion ground meat
  • 1 small red & yellow pepper, diced
  • 2 tomatoes, diced
  • 2 tbsp flour
  • 2 cups reduced sodium beef broth
  • 4 tbsp parmesan cheese
  • 1 1/2 cups pasta

Brown meat with peppers and tomatoes. Do not drain. Add flour and stir for 2-3 minutes. Add the broth and cook & stir over medium-low to medium heat until thickened and bubbly.

IMG_1687

Meanwhile, cook pasta according to package directions until al dente. Drain.

Add the pasta to the beef mixture and stir in parmesan cheese. Place in an appropriate sized container (I used a loaf pan). Cover with foil & place in the fridge or freezer.

If refrigerated, bake within 1 day. Bake at 400F for 30 minutes. Remove foil, stir, and bake for 10-15 more minutes. Top with more cheese if desired. If frozen, bake for 50-60 minutes covered. Remove foil, stir, & bake for 15-20 more minutes.

IMG_1690