Summer of Rhubarb: Vanilla Pudding with Rhubarb Sauce

IMG_4782


My guy asked me the other day if I quit blogging. It’s not so much that I quit it’s just that it’s been hard to try and actually write. I made this dish earlier in the summer when my rhubarb was fresh and never got around to posting it. Now all I can think about is the fact that my cat Oedipus loved this dish and he is no longer with us. Which brings me to my point of why it’s hard to write.

I started a post a few weeks after his death and have not been able to bring myself to finish it. It’s called Saddle Thrombus. Enough said. Now every time I try to blog I get teary eyed. In fact I’m crying a bit right now.

It’s been over 2 months and yes I am doing better but every now and then I still get incredibly sad. I have quit reliving that terrible day in my head and have started to just think of all the good things he brought to my life and the fond memories I have of him, but I still get sad here and there.

Most people out there are thinking…’what the hell? He was just a cat’. Well you people are wrong. He wasn’t just a cat. I’ve had other pets before and still have other pets but it’s not the same. He was special. I’ve had other pets pass before and yes I was sad but it wasn’t a debilitating sadness that consumed me when my honeybun passed.

He was the most personable animal I ever knew. Some cats are stupid and ditzy

img_4963

img_4962

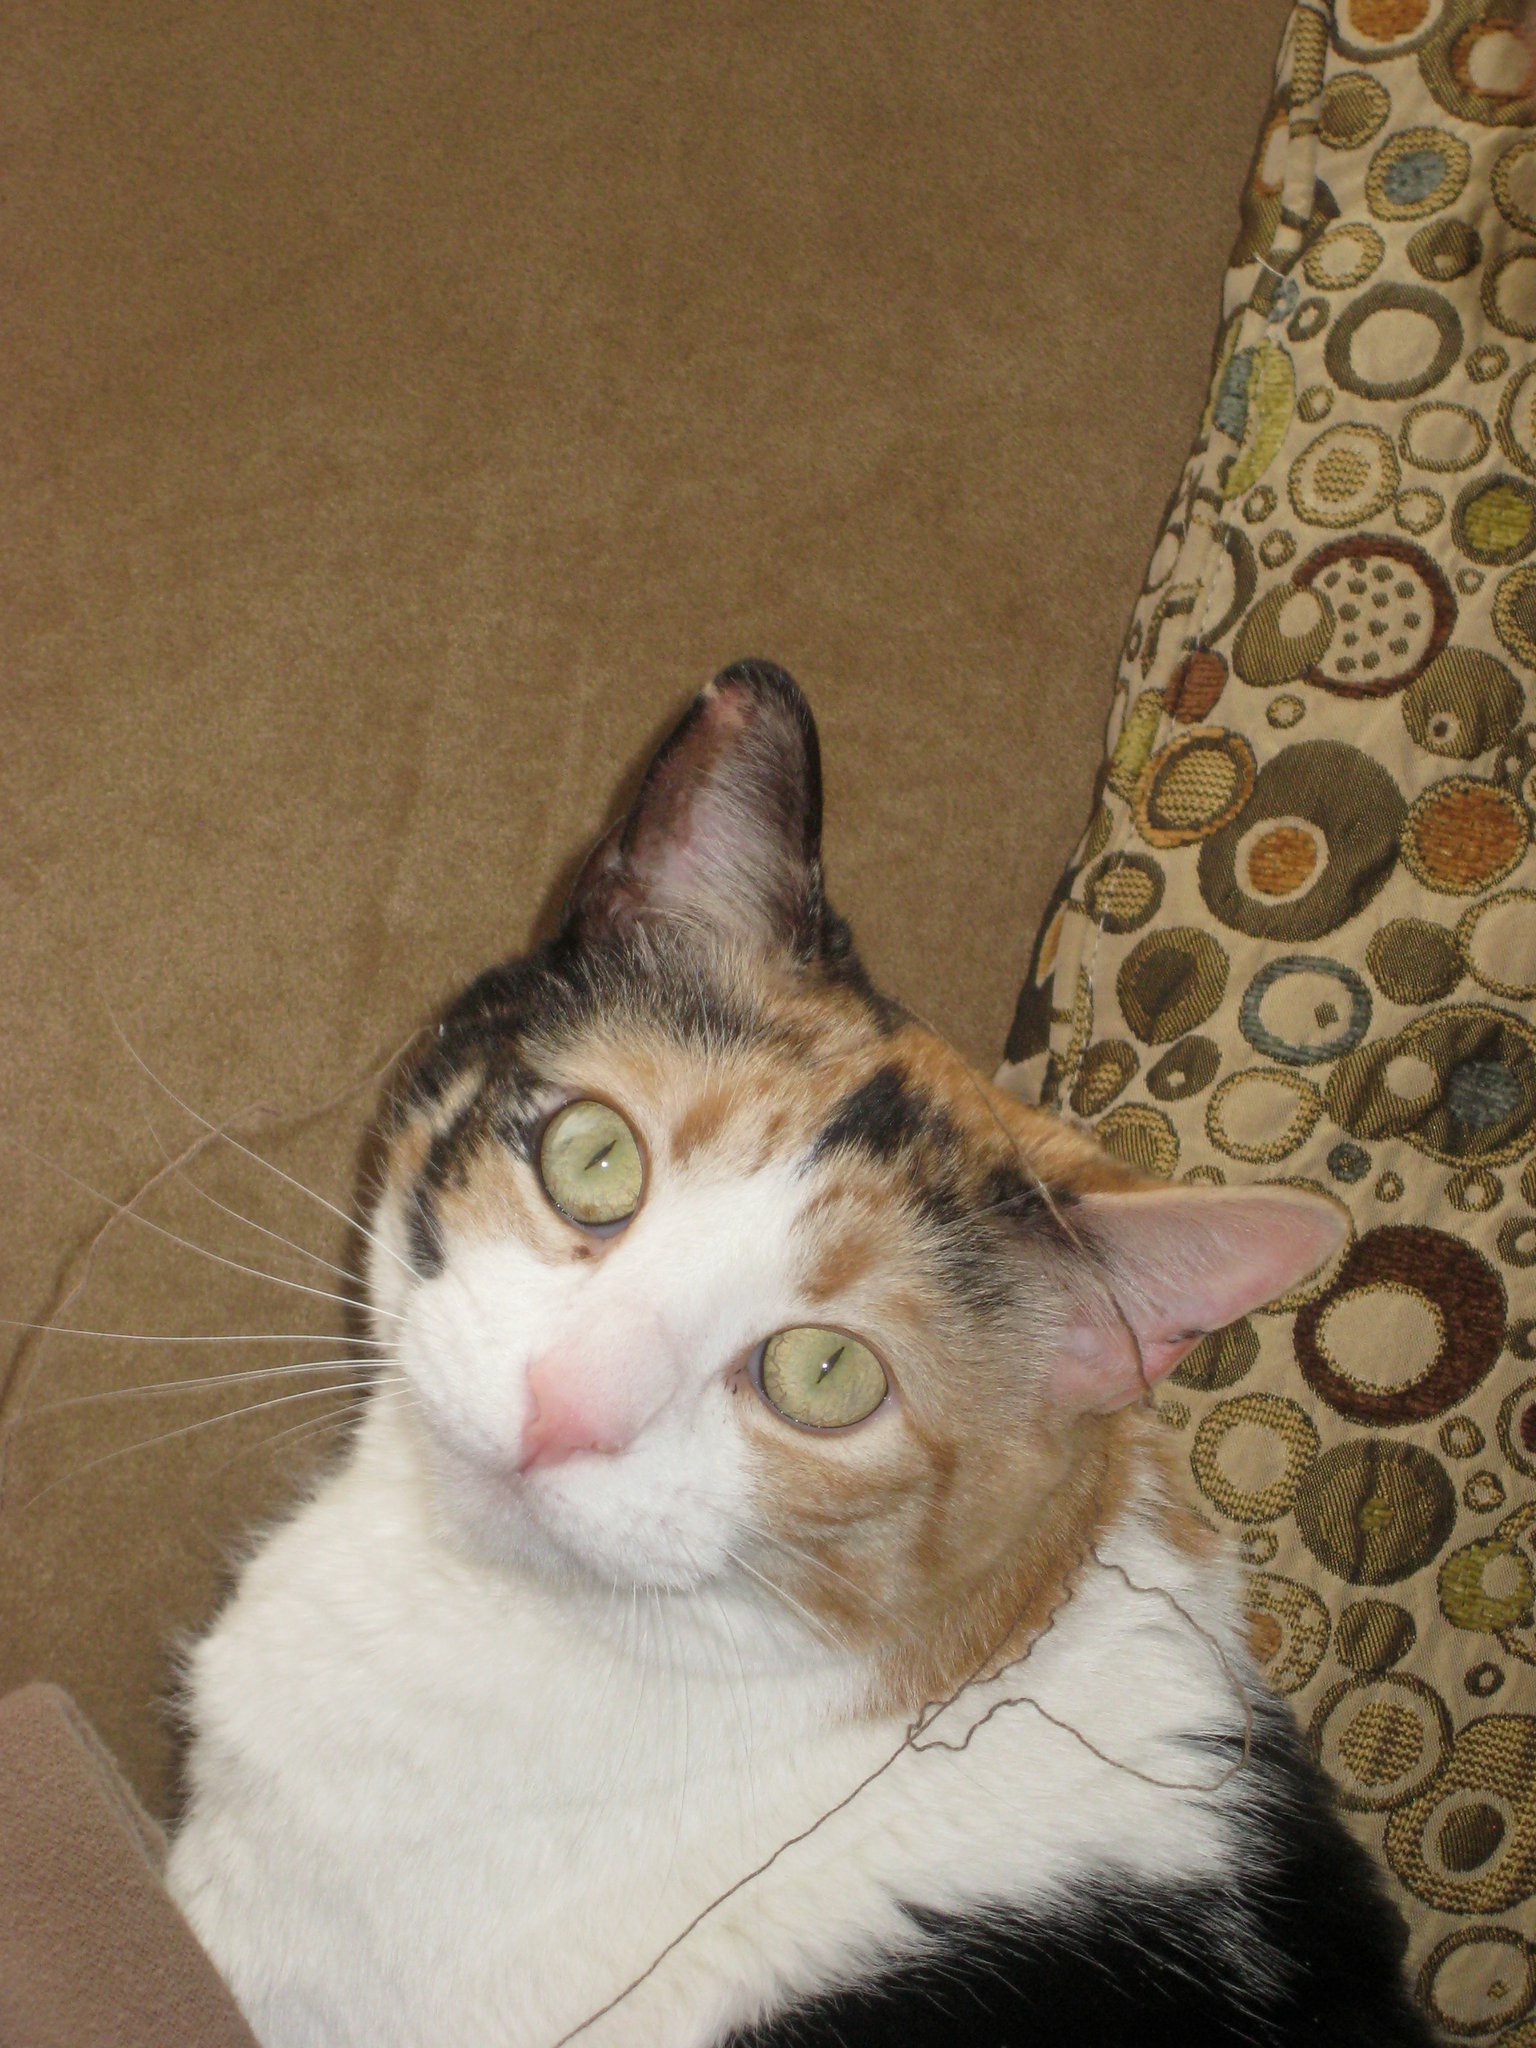
& others are more wise and exhibit more human traits.

IMG_4507


The blank page ones or ones that aren’t as aware aren’t any less lovable but I loved Oedipus the most. He was my baby boy. I know he wasn’t a real child but he acted like one. I treated him more like one. That’s why his death has been so hard. He was the closest thing I will ever have to an actual child as children are not in the cards for me.

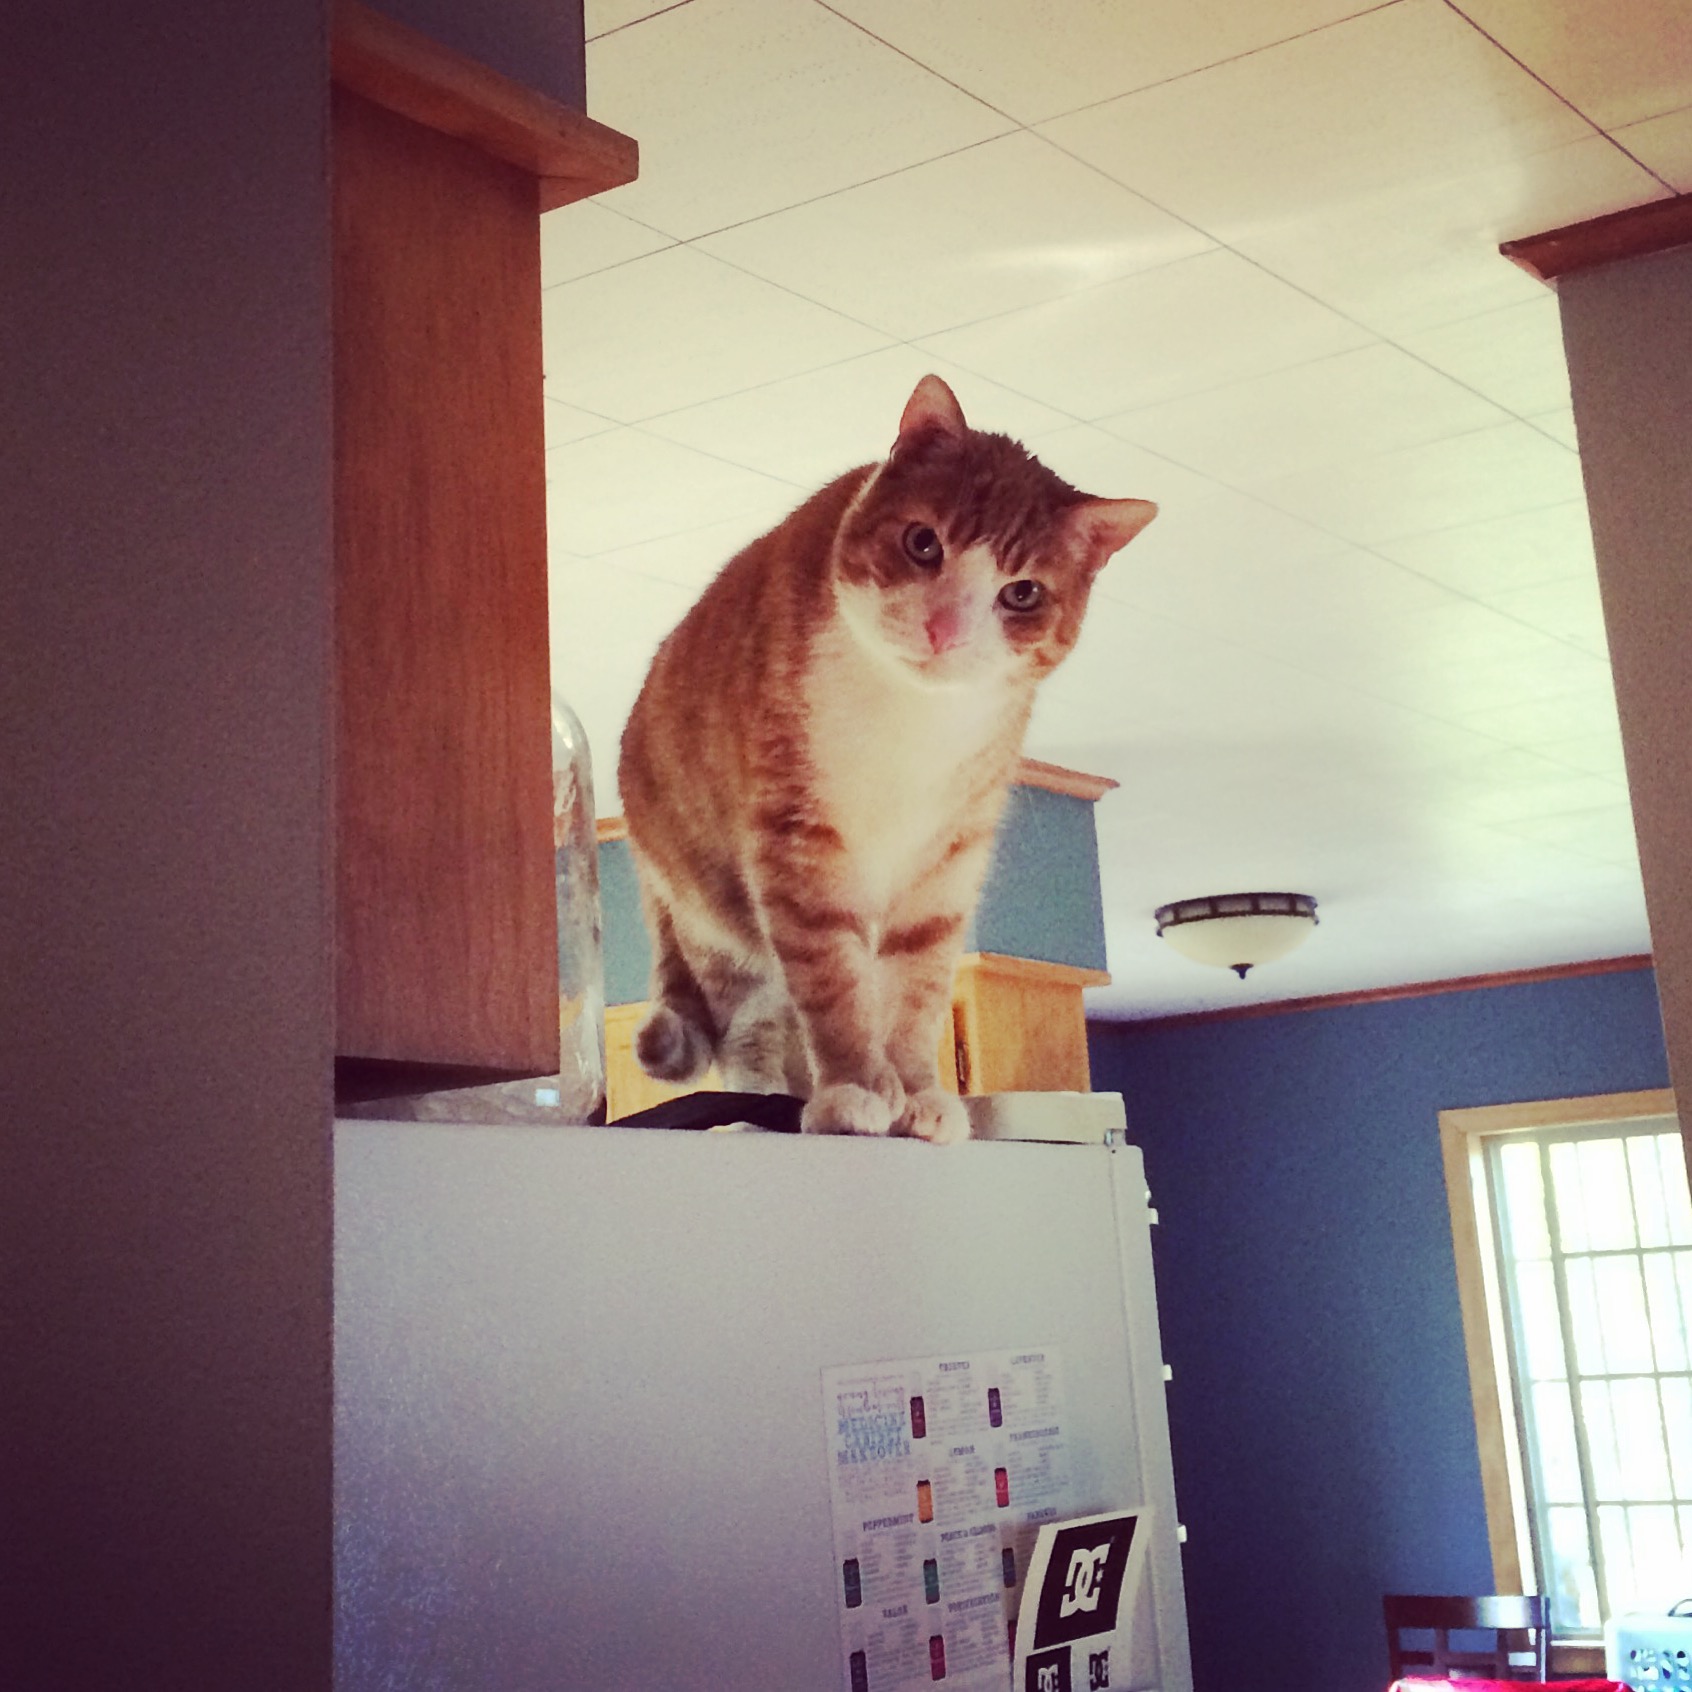
There will never be another one like him. One of his favorite things was dairy products. He loved all things dairy…cheese, cottage cheese, yogurt, sour cream, milk (he especially loved it when you ate cereal so he could get a few laps of the leftover milk in your bowl), ice cream, etc. He loved it all.

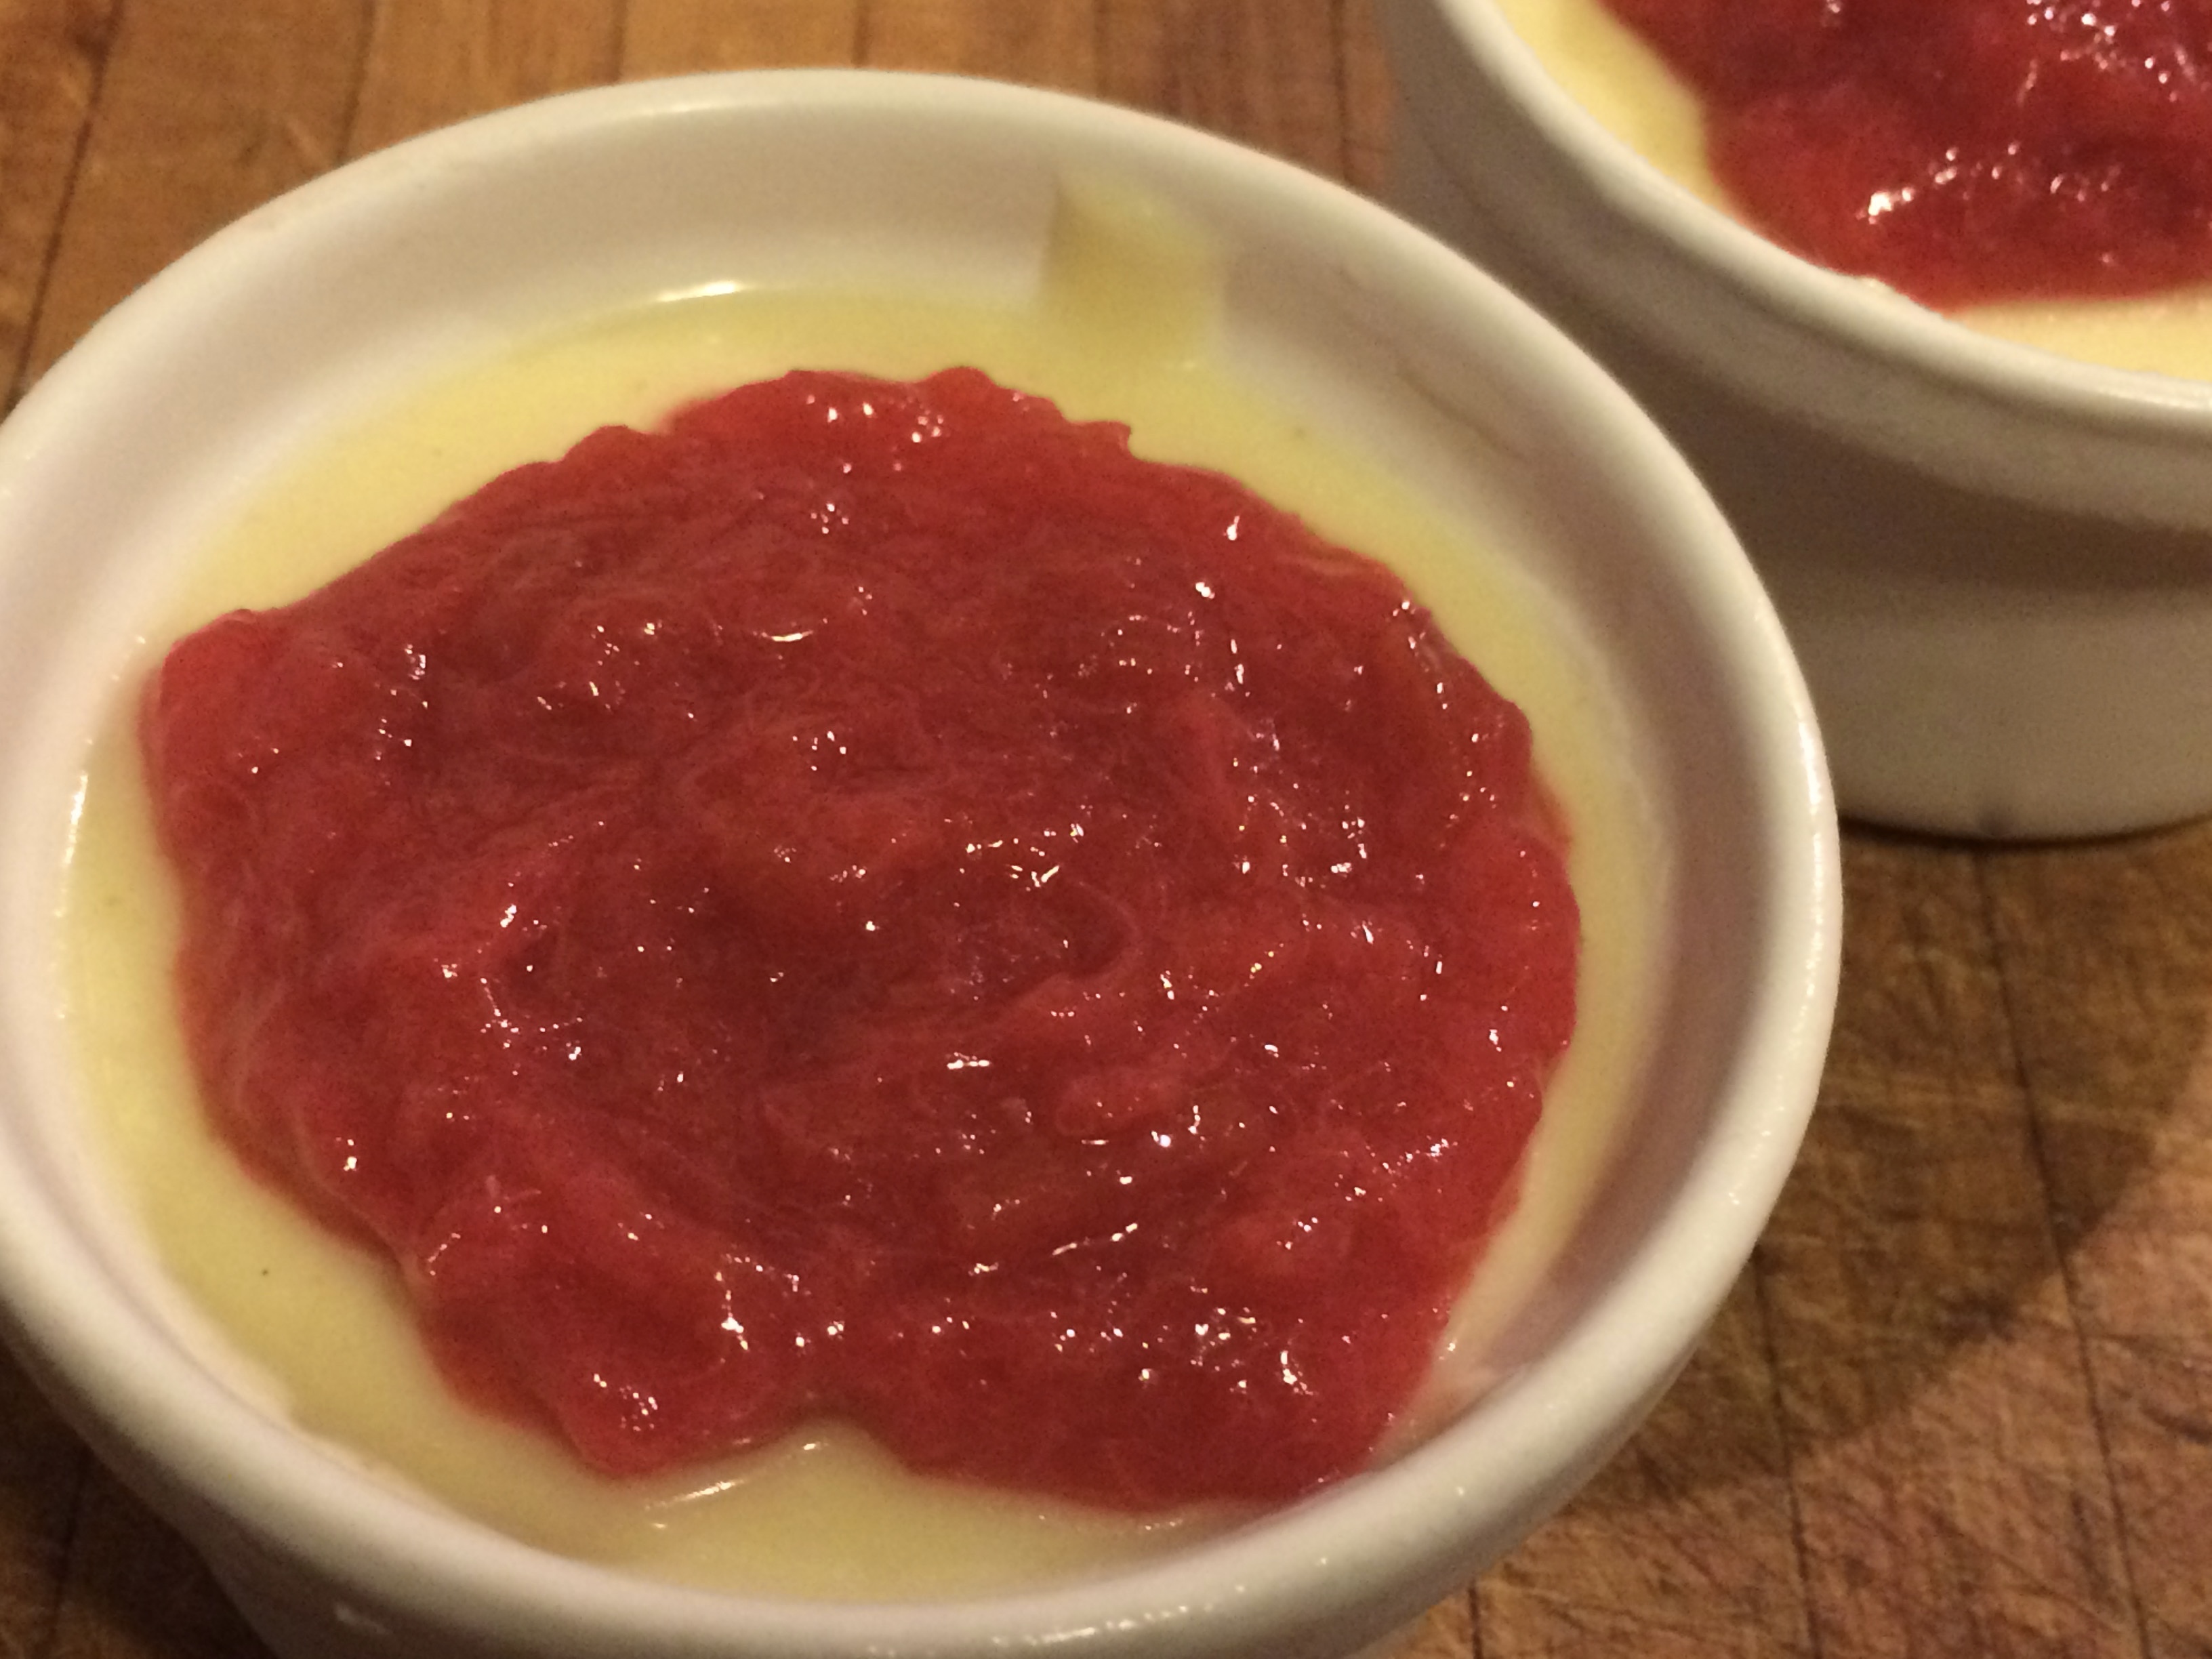
I made this vanilla pudding and he could smell the dairy in it. He’d sit right beside you begging for some. Obviously he wanted nothing to do with the rhubarb sauce but he liked the pudding part.

Vanilla Pudding with Rhubarb Sauce

Rhubarb Sauce

  • 1/3 cup sugar
  • 1/4 cup water
  • 2 1/2 cups rhubarb (if using frozen make sure it is thawed & drain out excess liquid)
  • lemon juice to taste

In a small saucepan bring sugar and water to a boil. Add the rhubarb. Cook and stir for 5-10 minutes or until rhubarb is tender and mixture is slightly thickened. Remove from the heat. Stir in lemon juice to taste.
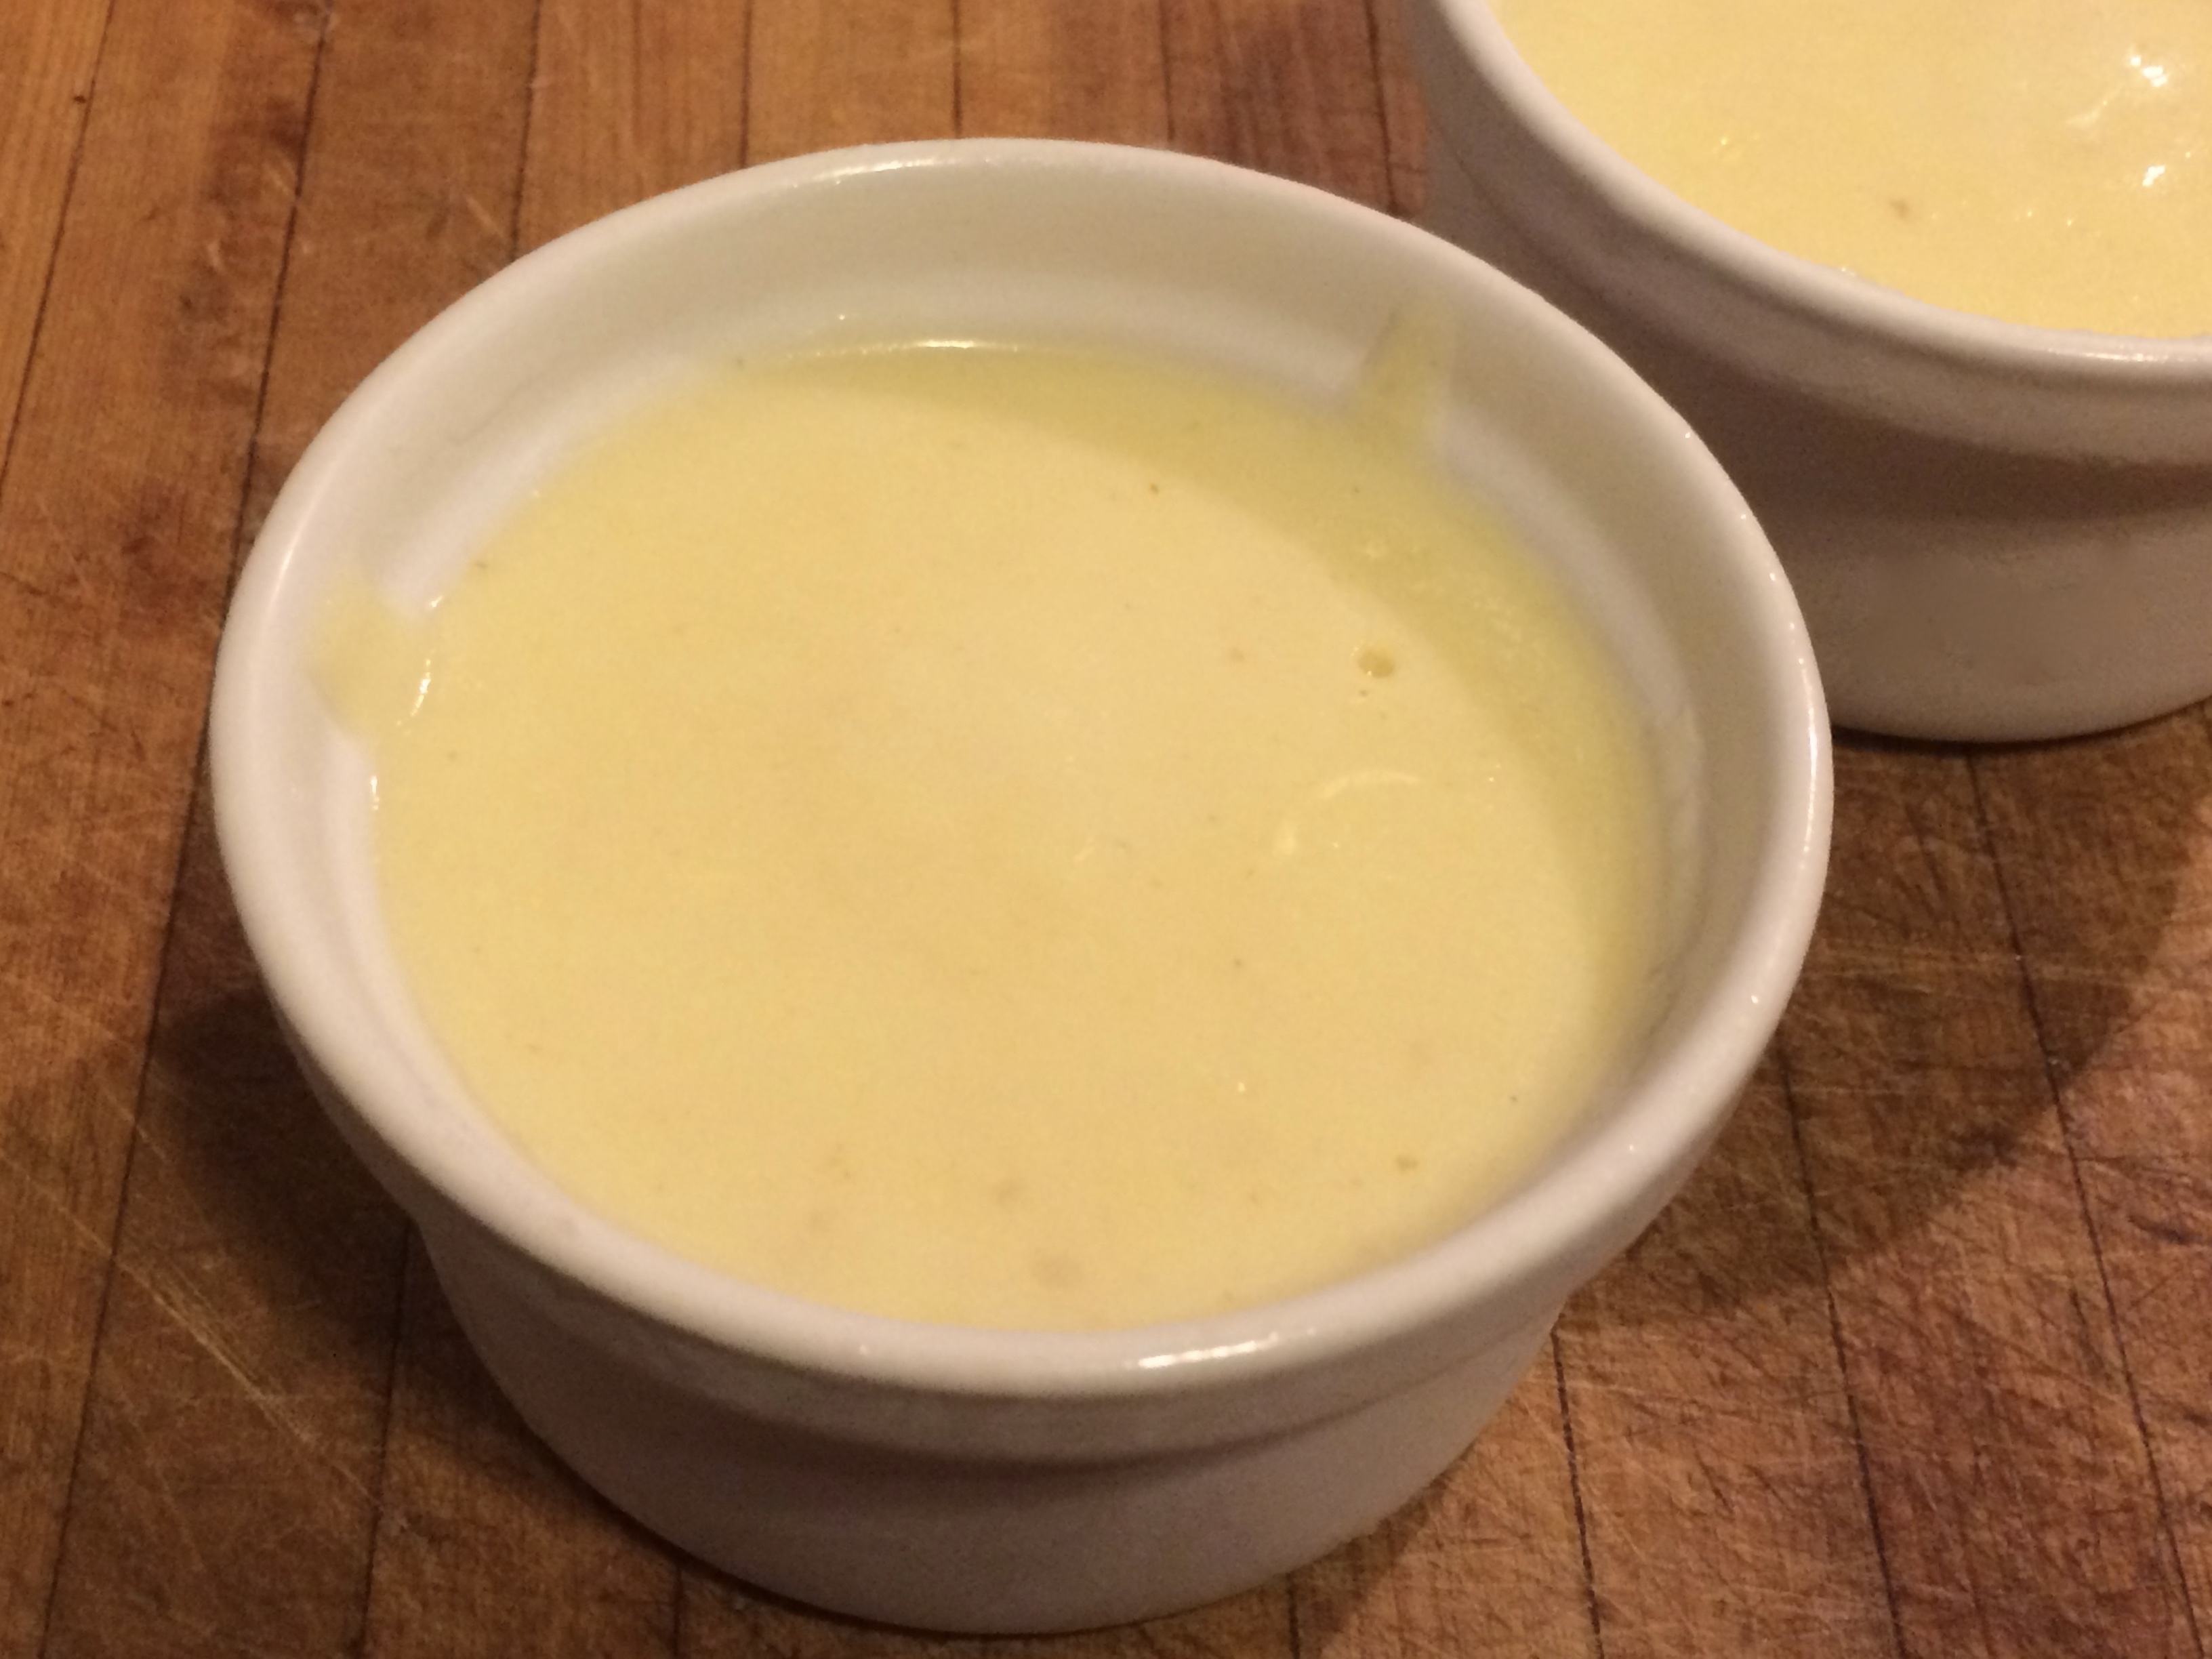
Vanila Pudding

  • 3/4 cup sugar
  • 3 tbsp corn starch
  • 3 cups milk (I used 2%)
  • 3 beaten egg yolks
  • 1 tbsp butter
  • 1 1/2 tsp vanilla

In a medium heavy saucepan combine sugar and cornstarch. Add milk. Cook and gently stir over medium heat until thickened and bubbly. Cook and stir for 2 minutes more. Remove from heat. Gradually stir 1 cup of the milk mixture into egg yolks.
Slowly whisk egg yolk mixture back into milk mixture in saucepan. Bring to a gentle boil; reduce heat. Cook and stir for 2 minutes more. Remove from heat. Stir in butter & vanilla. Pour pudding into 4 individual serving bowls. Cover surface of pudding with plastic wrap. Chill in fridge for 1 hour or up to 24 hrs before serving.

IMG_4780

Top with rhubarb sauce if desired.

IMG_4782

Multiple Meals: Ground Beef & Pork

I was hoping to make one more giant grocery shop before the snow hit in Northern Minnesota (aka Almost Canada) but it seems I was too late. The snow & cold weather has infringed upon my ability to go get groceries this last weekend. Yes I can get food in town but it is drastically overpriced. I usually make a giant trip every 1-2 months and stock up on pantry items & frozen goods. I also buy meat in bulk and then portion it into 2-4 servings (enough for me & my fishing guide for dinner with leftovers if desired) and freeze it. Since I was not going shopping for a week or two I decided to work with what I had on hand. I made 4 meals using the same meat source. Meatloaf and casseroles are big in this state/climate so I included those in my food prep. Nothing fancy but all meals are different (an important concept in many households as people get sick of the same foods being served over & over). Most importantly, you can do all the prep in one day.

Before any of the meals can be made you must combine 1 lb of ground beef with 1 lb of ground pork. Divide the meat into two 1 lb portions. Take one portion and split in half again. Set both of these 1/2 lb portions aside (one will be for meatloaf and one will be for noodle casserole). Take the other 1 lb portion & add to a skillet and brown. Add taco seasoning to your liking with a small amount of water. Let cook off for a few minutes. Take this mixture and split into two portions. Use one immediately for tacos. Set one aside for stuffed poblanos.

Tacos (serves 2)

I will not put any information here for taco prep cause everyone knows what to do. Use your favorite fixings and sides of your preference. I made a spicy pepper creamed corn but refried beans or mexican rice are great as well.

Stuffed Chile Poblanos (serves 2)

  • half of the taco seasoned meat previously prepared
  • 2 poblano chiles
  • 1/2 cup cheddar cheese
  • 1/2 cup white rice
  • 2 tomatoes, diced
  • taco seasoning
  • salsa
  • sour cream
  1. Place poblano peppers on a cooking sheet & place under broiler. Broil for 3-5 minutes per side until skins are blistered. Place peppers into a bowl & cover with pastic wrap or place in a gallon sized plastic bag. Let sit for 10 minutes & remove skins. Slice open on one side & remove seeds.  Place ground meat and 1/4 cup cheese in each pepper. Close peppers.
  2. Meanwhile, cook rice according to package directions. Stir in diced tomatoes and 1-2 tsp taco seasoning & salsa to your liking (I only use a few tsp of very hot salsa at this stage).
  3. Pour rice into a 8×8 casserole dish. Top with peppers. Cover with foil & bake within 1 day. Bake covered in a 400F oven for 30 minutes. Remove foil and bake for 15 more minutes. Serve with additional salsa & sour cream if desired.

IMG_1695

Muffin Tin Meatloaf (serves 2 with 3 muffins each)

  • 1/2 lb portion ground meat
  • 1/3 cup milk
  • 1 egg
  • 2 tbsp chopped onion
  • 2 slices bread, torn into pieces
  • pinch each oregano, basil, sage
  • sprinkle salt & pepper
  • 3 tbsp ketchup
  • 1 tbsp brown sugar
  • 1/2 tsp worcestshire sauce
  • 1/2 tsp ground mustard
  1.  Take a 1/2 lb portion meat & add to a medium mixing bowl. Add the rest of the ingredredients through the salt & pepper. Stir to combine.
  2. Stir together the ketchup, sugar, worcestshiire sauce, and ground mustard. Set aside.
  3. Lightly grease half of a muffin tin (this makes 6 meatloaf muffins). Add the meat to the tin with a scoop or spoon. Cover with foil. Place in the fridge or freezer.
  4. Bake for 25 minutes if refrigerated. If frozen, take out the night before you want to bake it and place it in the fridge to thaw. Bake as previously mentioned.
  5. Once cooked, top with the sauce mixture. Bake for 5-10 moire minutes. Serve with sides of your choice. I served baked potatoes and salad.

Sorry for the lack of photos. I forgot.

Beef & Pork Noodle Casserole

  • 1/2 lb portion ground meat
  • 1 small red & yellow pepper, diced
  • 2 tomatoes, diced
  • 2 tbsp flour
  • 2 cups reduced sodium beef broth
  • 4 tbsp parmesan cheese
  • 1 1/2 cups pasta

Brown meat with peppers and tomatoes. Do not drain. Add flour and stir for 2-3 minutes. Add the broth and cook & stir over medium-low to medium heat until thickened and bubbly.

IMG_1687

Meanwhile, cook pasta according to package directions until al dente. Drain.

Add the pasta to the beef mixture and stir in parmesan cheese. Place in an appropriate sized container (I used a loaf pan). Cover with foil & place in the fridge or freezer.

If refrigerated, bake within 1 day. Bake at 400F for 30 minutes. Remove foil, stir, and bake for 10-15 more minutes. Top with more cheese if desired. If frozen, bake for 50-60 minutes covered. Remove foil, stir, & bake for 15-20 more minutes.

IMG_1690


Chocolate Coconut Christmas

I had grand plans for making many Christmas cookies this year. I wanted to do a cookie swap. No one else wanted too. We have a food week at work prior to Christmas so in a sense it was almost like a swap. I did make some cookies & baked goods that I don’t normally make: snickerdoodles, gingerbread men & cutouts, actual gingerbread, white chocolate gingerbread balls, and some chocolate coconut balls & cookies. The coconut balls were planned. The cookies that followed were not. I used the leftover filling to make the cookies. A complete accident, but one of the most delicious unplanned actions of my life. So while I didn’t get around to making all the cookies I wanted, I am quite satisfied with the results.

Filling:

  • 1 (14 oz.) can Sweetened Condensed Milk
  • 1 (14 oz.) package flaked coconut
  • 1 cup finely chopped pecans
  • 1 cup graham cracker crumbs
  • 1 cup mini semi-sweet chocolate chips (or coarsely chopped regular semisweet chocolate chips)

Combine all ingredients in a large bowl. Cover & refrigerate for at least 30 minutes.

IMG_1818

For Chocolate Coconut Balls:

  • Chocolate almond bark
  • shortening

Melt almond bark and add 1-2 tbsp shortening as needed to reach desired constancy. Roll the filling into 1 in balls and dip into chocolate. Place on a parchment lined cookie sheet & let cool completely. Store on the counter or in the fridge.

IMG_1813

For Cookies:

  • 1/2 cup butter, softened
  • 1/2 cup granulated sugar
  • 1/2 cup brown sugar, packed
  • 1/2 tsp baking powder
  • 1/4 tsp baking soda
  • 1 egg
  • 1 tsp vanilla
  • 1 1/4 cup flour
  • 1/4 cup cocoa powder

In a large mixing bowl, beat butter & sugars until combined. Beat in baking powder & soda. Beat in egg and vanilla. Scrape sides as needed. Beat in flour & cocoa powder. Dough will be moist.

IMG_1819

Preheat oven to 375F. Line two baking sheets with parchment paper.

Take some of the dough and roll into a 1-2in ball. Flatten on the parchment paper.

IMG_1826
Take a portion of the filling & form  into a 1/2-1 in ball. Place on dough & flatten slightly.

IMG_1827

Take the sides of the dough and form around the coconut.

IMG_1828

Bake for 8-12minutes depending on how big cookies are. Remove when cooked through but still soft. Allow to sit for 2 minutes (cookies will firm up). Place on a cooling rack to cool completely. Store on a counter in an airtight container for up to one week (the cookies didn’t make it to work as they were too delicious).

IMG_1833

Enjoy.

IMG_1838


Pumpkin Cookies

IMG_1263


As I had leftover canned pumpkin from the Pumpkin Mac & Cheese I knew a dessert was in order. I have made plenty of breads, cupcakes, and cakes so wanted to try something new and pumpkin cookies were created.

I love cookies. They are probably one of my favorite desserts. They keep well for about a weeks worth of treats & they freeze well for later yumminess. They are also portion controlled which is a good thing if you love sweets.

Pumpkin Cookies (makes about 3 dozen)

  • 2 sticks butter, room temperature
  • 1 cup granulated sugar
  • 1 cup brown sugar, packed
  • 1 cup canned pumpkin
  • 1 egg
  • 1 tsp vanilla extract
  • 2 cups all-purpose flour
  • 1 tsp baking soda
  • 1 1/2 tsp cinnamon
  • pinch each ginger, nutmeg, allspice, & cloves
  • 1/2 tsp salt
  • 1 cup oats
  • 1 cup semi-sweet chocolate hips
  • 1/2 cup dried cranberries
  1. Preheat the oven to 350F. Line 2-3 baking sheets with parchment paper (If you only have one, be sure to rinse the cookie sheet after it has been used to cool it back down before lining it again).
  2. In a large bowl cream the butter & both sugars until light & fluffy. Add the pumpkin, egg, & vanilla and mix until combined.
  3. In a medium bowl mix the flour, baking soda, salt & spices. Slowly add this to the wet ingredients & mix until combined.
  4. Stir in the oats, chocolate chips, & cranberries.
  5. Drop rounded spoonfuls on the baking sheets 2in apart. Bake for 12-14 minutes until tops are golden & edges are starting to set (they will still be very soft & fall apart easily so care must be taken). Remove from the oven and let cool for 5 minutes on the pans. Slide parchment paper with cookies onto a wire rack & let cool completely.
  6. Transfer to containers & eat within a week.

IMG_1260

Pumpkin Bacon Mac & Cheese

The season of pumpkin has arrived!! The changing & falling of leaves, brisk fresh air, the list goes on. I am one of those people that loves pumpkin. Pumpkin everything. I cannot help it & nor do I want to. It is delicious. I do eat it year round thanks to the canned goods but I really go crazy in the fall & early winter.

I love it in sweets but do enjoy the savory side of it as well. This is a savory dish & it’s also a souped up Mac & Cheese dish. Mac & Cheese has never been a favorite of mine. I ate the blue box stuff as a kid but didn’t love it. I didn’t realize I liked mac & cheese until I had homemade versions.

This one is the perfect way to start the pumpkin season. The combination of pumpkin, bacon, & cheese is delicious, satisfying, & comforting. Which are all the things I want on a brisk fall day. With the extra canned pumpkin I made Pumpkin Cookies


Pumpkin Bacon Mac & Cheese (serves 2)

  • 1 cup elbow macaroni
  • 4 slices bacon
  • 2 tbsp butter
  • 2 tbsp flour
  • 2 cups milk
  • 1/2 cup canned pumpkin
  • salt & pepper to taste
  • 1/2 tsp each sage & thyme
  • few dashes garlic powder & cayenne
  • 1/2 cup cheddar cheese
  • 1/4 cup fine bread crumbs
  • 1/4 cup parmesan cheese
  1. Cook the macaroni according to package directions. Drain & set aside.
  2. Meanwhile, in a skillet cook the bacon until crisp. Remove & crumble. Set aside.
  3. Drain off the bacon grease. Add the butter & stir until melted. Add the flour & stir until dissolved. Whisk in the milk & cook until thick & bubbly. Add the pumpkin, spices, and cheddar cheese. Stir until pumpkin is incorporated & the cheese is melted.
  4. Stir in the bacon crumbles and macaroni. Pour into two individual casserole dishes.
  5. In a small bowl combine the bread crumbs & parmesan. Sprinkle over the macaroni. Bake in a 400F oven for 25-30 minutes or until topping is golden & sauce is bubbly.

IMG_1252

Multiple Meals: Pizza, Lasagna, & Gravy

There is no story behind this post. I simply had too much food that needed to be eaten so it wouldn’t go to waste. Seeing as how I only like to eat the same thing a handful of times, I decided to split it into 3 meals (this also took care of a lot of meal planning for me for the week). Each can serve 2 & you get spare lasagna as well!

Prep for all 3:

  • Brown 1lb ground beef & 1lb hot Italian sausage together. Set aside 1 cup browned meat for gravy.
  • Sauté 2 yellow squash, 2 zucchini & 2 onions together
  • Prepare pizza sauce (mix all together)
    • (1) 6oz can tomato paste
    • 1/3-2/3 cup water (depends on consistency you want for pizza sauce)
    • ¼ olive oil
    • Dash Salt & pepper
    • 2tsp each Basil & oregano
  • Prepare pizza dough (makes 2 – 1 for pizza & 1 for another use within 1 week in the fridge covered loosely):
    • Mix in a large bowl: 1.5 cups warm water, 2 ¼ tsp yeast, 1tsp salt, 2 tsp sugar, ¼ cup olive oil
    • Add 3 cups bread flour using wet hands if needed to incorporate all the flour
    • Cover loosely and let rise for 2-2.5 hrs


Pizza

  • Browned meat
  • Sautéed veggies
  • Pizza sauce
  • Half the dough
  • Mozzarella cheese
    • Preheat oven with pizza stone lightly coated with cornmeal at 450F for 30minutes. Roll out dough on a lightly floured pizza peel to be 1/8in thick.
    • Spoon half the sauce on the dough. Top with light sprinkling of cheese. You should still see the sauce through the cheese
    • Top with browned meat & veggies. Again, be light with toppings.
    • Slide onto stone & bake for 20-25minutes until crust is cooked through.

sausage pizza


Lasagna (Makes 2 lasagnas. Each lasagna serves 2)

  • Browned meat
  • Sautéed veggies
  • Pizza sauce & 15oz can tomato sauce
  • 6-12 cooked lasagna noodles (depending on preference)
  • 1 container part-skim ricotta cheese
  • 1 egg
  • Mozzarella cheese
  • Basil & oregano
    • Mix pizza sauce & tomato sauce together. Add more basil & oregano to taste.
    • Mix egg & ricotta cheese. Add ¼ cup mozzarella cheese to this mixture.
    • Put ~1/4 cup sauce on bottoms of two loaf pans.
    • Cut noodles as necessary to fit pan (about 1-2 noodles per layer & 3 layers total).
    • Add a few tbsp ricotta mixture & spread over noodles. Top with browned meat & veggies. Top with more sauce. Repeat layer again & add some mozzarella cheese over the ricotta blend. For the final layer, use ricotta, mozzarella & sauce only. Cover with foil. Repeat for second lasagna. Bake immediately, after 24hrs in fridge, or within a week in the freezer.
    • If baking immediately, bake for 30 minutes with foil & 15-20 without foil. If baking after storing in the fridge for a day, bake for 40minutes with foil & 15-20 without. If baking from the freezer, bake for 60 minutes with the foil, & 15-20 without.

sausage lasagna


Gravy

  • 1 cup Browned meat
  • 1 cup Milk
  • 1 tbsp Flour
  • Pepper to taste
    • Put browned meat in skillet or pot. Reheat for a few minutes.
    • Add 1 tbsp flour to meat & sauté for 1-2minutes.
    • Add 1 cup milk & cook over medium heat until thickened & bubbly. Add pepper to taste.
    • Serve over biscuits or toasted baguette slices (if all else fails, serve over a slice of toast like I did)


sausage gravy

Multiple Meals: Red Chard

I’ve mentioned numerous times that my grocery store leaves something to be desired. I cannot get most things I want to cook with even if they are seasonal. A few days ago I drove 2hrs to get some supplies for house renovations as well as groceries. This occasional commute has become a norm for me as of late. It doesn’t really bother me, it is just a way of life now. I ended up buying some chard to cook with as I cannot get any fancy greens in my grocery store. I didn’t know what I would use it for at the time, but I knew I needed it.

On Sunday I spent about 4hrs in the kitchen which is a nice way for me to relax. With all of the ice fishing I have been doing I have not been in the kitchen as often as I would like. It’s hard to juggle hobbies. Anyhow, I knew I needed to use the chard, make French Onion soup as I had way too many onions (thus requiring me to make bread), make lunch & dinner, & bake something (I was leaning towards cookies). It sounds more ambitious than it really was. In the morning I prepped bread for baguettes and planned out my day…

  1. Bake bread
  2. Make lunch
  3. Make soup (to be eaten with dinner & give leftovers for the next day’s lunch)
  4. Bake cookies
  5. Make dinner

I decided to divvy up the chard into 2 portions – one to be used with lunch & one to be used with dinner (each can serve 2).

IMG_1077

I ended up making Asian Garlic Shrimp & Chard over rice for lunch. Fast, delicious, & healthy.

IMG_1079

I then proceeded to make French Onion soup. While that was cooking I made cookies which quickly began to disappear.

IMG_1088

After all of this was completed, I started on dinner. I made lemon-parmesan chard & served it with roasted chicken thighs and some French Onion soup.

chard


Asian Garlic Shrimp & Chard  (Serves 2)

  • olive oil or cooking spray
  • 1/2 bunch red chard, roughly chopped & stems removed
  • 1 onion, chopped
  • 1-2 cloves garlic, minced
  • 2-3 tsp reduced sodium soy sauce
  • 2-3 tsp rice vinegar
  • 1 tsp sesame oil
  • 12-14 uncooked shrimp, deveined & peeled
  • 1 1/2 cup cooked white rice
  1. Mix soy sauce, vinegar, & sesame oil together. Set aside.
  2. Coat a non-stick skillet with olive oil or cooking spray & heat over medium heat.
  3. Sauté onion for 5-10minutes until softened.
  4. Add garlic & sauté for 2 minutes.
  5. Add swiss chard & 1/4 cup water. Sauté until chard is wilted & water has evaporated.
  6. Add shrimp & sauce. Cook for 2minutes per side or until shrimp is cooked through. Serve over cooked white rice with additional soy sauce & hot chili sauce if desired.


Lemon-Parmesan Chard

  • olive oil
  • 1/2 bunch red chard, roughly chopped (chop a few of the stems as well)
  • 1/2 small onion, chopped
  •  2-3 tsp lemon juice, or more to taste
  • parmesan cheese
  1.  Coat a non-stick skillet with olive oil & heat over medium heat.
  2. Sauté onion for 10-20 minutes until softened & caramelized to your liking.
  3. Add the stems of the chard & cook for 3-5minutes until softened.
  4. Add the chard & sauté until wilted. Spritz (or saturate) with lemon juice to your liking.
  5. Top with parmesan cheese & serve with whatever you desire. I served it with roasted chicken.


Multiple Meals: Walleye

If you know me at all you know I go ice fishing and have an abundance of Walleye in my freezer. I try to cook it in a different fashion every week. This week I decided I would bread it & bake it. The problem, however, is that I am cooking for 2 and my vacuum sealed walleye is really for 4 people. Obviously, leftover breaded & baked walleye will not re-heat very well.  That left me with the question on how to prepare all the walleye in a tasty manner & so that it would not go to waste which leads to the next installment of multiple meals.

Making multiple meals with fish seemed daunting. I didn’t want to cook half the fish & leave the other half in the fridge to dry out or lose oils for the next night’s dinner. My first thought was to prepare a Seafood Chowder that could be eaten for lunch but I didn’t have any clam juice or cream of potato soup which is my preferred way of making it. I then thought of other recipes I had been meaning to try & I hadn’t made walleye cakes yet. I thought I could try and make walleye cakes that could be eaten for breakfast with eggs. I figured I would bake the rest of the fillets with my breaded fillets & then I could put them in the fridge for the next day to flake, mix up with all the other walleye cake ingredients, & finally cook them.

Baked Walleye

  • ½ vacuum sealed bag walleye (roughly 4 small fillets or 2 medium fillets). See Walleye Breakfast Cakes below for using the rest of the fillets.
  • 1 egg, beaten
  • Splash of milk
  • Breadcrumbs
  • Mashed potato flakes
  • Grated parmesan cheese
  • Seafood seasoning
  • Seasoned salt
  • Pepper


Preheat the oven to 400F.

Place the egg in a small to medium bowl with the splash of milk.

Place equal parts breadcrumbs, mashed potato flakes, and grated parmesan cheese on a plate or in a bowl. Mix in seafood seasoning, seasoned salt, & pepper to taste.

Dip the fillets in the egg mixture and allow the excess to drip off.

Place the fillets in the breadcrumb mixture & then place on a lightly greased baking sheet.

Bake for 15-20 minutes until the fish flakes apart easily.

Serve with sides of your choice. I served them with roasted carrots & mashed potatoes & gravy.

baked walleye


Walleye Breakfast Cakes

  • ½ vacuum sealed bag walleye (roughly 4 small fillets or 2 medium fillets) previously cooked*
  • 1 egg
  • 2-3tbsp Mayonnaise
  • 1-2tsp Lemon juice
  • 1/4-1/3 cup Breadcrumbs
  • Seafood seasoning
  • Seasoned salt
  • Pepper
  • Oil
  • Eggs served to your preference


*To the half of the fillets for the walleye cakes, place them on the baking sheet with the breaded walleye (recipe above). Lightly season with seafood seasoning & drizzle with cooking wine or olive oil. Cook along with the breaded fillets. Once cooked, place these un-breaded fillets in a medium mixing bowl in the fridge covered with plastic wrap.

Shred the fillets cooked previously in the mixing bowl (the advantage of shredding them the next day is that you get nicely sized walleye chunks).

Add all the ingredients except for the oil & the eggs that you will cook to your preference.

Mix the ingredients & form into patties (makes roughly (4) 3in patties – 2 for each person).

Place a small amount of oil in a skillet over medium to medium-high heat & cook the walleye cakes for 2-3 minutes per side until golden brown & heated through. Place on a paper towel to drain off excess oil.

walleye cakes

Cook eggs to your preference (over easy, poached, etc) and serve over walleye cakes. Drizzle with sweet chili sauce if desired.

walleye with eggs

Multiple Meals: Ground Beef & Italian Sausage

To continue the theme of Meal Planning, I shall share some things I do to make multiple meals. I am usually cooking for 2 while many recipes are for 4 people. I either make the recipe as is and we have leftovers or I decide to make two separate dishes. In this first installment of Multiple Meals, I use a pound of ground beef & a pound of Italian sausage and make 2 different dinners but each can be eaten twice.

The first thing that needs to be done is to combine both meats together & then divide the meat mixture in half (now you have two separate pounds of combined meat). Brown one of the halves of meat with an onion and set aside for prepping two lasagnas. To the other half, we will be making meatballs. One for spaghetti & the other for sandwiches.

Meatballs

Take the half of meat that is for the meatballs (1lb) and add the following:

  • 1 slice milk soaked bread (place a piece of bread on a plate and pour milk over it so that it is saturated all the way through. Squeeze out the excess).
  • 1 clove garlic, minced
  • ¼ tsp each salt & pepper
  • ½ tsp each basil & oregano
  • 1 onion, chopped
  • 1 beaten egg
  • 2-3tbsp parmesan cheese

Take half of this mixture & place in the fridge for the next night’s dinner*

To the other half, form the meatballs by hand (roughly the size of a golf ball) and place on a baking sheet lined with parchment paper. Bake in a 450F oven for 5-8 minutes until browned. Remove from the oven.

Meanwhile, chop an onion & a green pepper and sauté in a large skillet in a small amount of olive oil over medium low heat for about 20-30 minutes until caramelized to your liking. Add a minced clove of garlic and sauté for about 2 minutes. Add 8oz canned tomato sauce, 1/2 tsp. oregano, 1/2 tsp. basil, and salt & pepper to taste. Add the meatballs to the skillet and cook over low heat while covered for 20-30 minutes. Top with parmesan cheese if desired & serve over cooked spaghetti noodles.

The next night you can prepare exactly the same way and serve in a hoagie bun for meatball sandwiches.

meatball

* If desired you can prep all the meatballs and sauce at once if you are having the sandwiches for lunch or if you know you are crunched for time the next day. Just reheat when ready to eat.


Loaf Pan Lasagna

For the lasagna, we will be making two lasagnas (in loaf pans) that serve two each.

  • 1lb meat previously browned with an onion
  • 8 cooked lasagna noodles
  • 16oz ricotta cheese (I used part-skim)
  • 1 egg
  • ¼ tsp pepper
  • ½ tsp each oregano & basil
  • 1.5-2 cups mozzarella
  • 1 26oz jar spaghetti sauce or make your own
  • ¼ cup Parmesan cheese (& more for sprinkling if desired)

Either the day you brown the meat with the onion or the next day after it has been browned prep the lasagnas as follows:

Mix ricotta, egg, seasonings, & 1/4 cup parmesan cheese in a bowl for the filling.

Place approximately 1/4 cup spaghetti sauce on the bottom of each loaf pan. Place two noodles on top of the sauce. Cut or overlap as necessary. Place 1/6 of the ricotta filling on the noodles and spread into a thin layer (approximately 1/3 cup). Sprinkle with mozzarella cheese. Place 1/4 of the browned meat on the filling. Top with more spaghetti sauce. Next place one noodle over the sauce cutting as necessary. Repeat filling, cheese, meat, & sauce layers once. Finally, place one noodle over the sauce and top with the rest of the ricotta filling, mozzarella, and sauce. Sprinkle with parmesan cheese if desired.

Put one in the fridge for night 3 (night 1=spaghetti & meatballs, night 2=meatball sandwiches, night 3=lasagna) and one in the freezer. Cover the one in the fridge with aluminum foil. To the one placed in the freezer make sure to cover with aluminum foil, wrap all the way around in plastic wrap, & wrap again all the way around but with foil. Use within 1-2weeks for ideal flavor.

lasagna


Fridge lasagna: Preheat the oven to 375F. Bake with the foil covering for 40minutes. Remove the cover & continue to bake for 20minutes. Let sit for 5-10 minutes.

Freezer lasagna: Preheat the oven to 375F. Remove extra foil & the plastic. Bake with the foil covering for 1 hour. Remove the cover & continue to bake for 20minutes. Let sit for 5-10 minutes.