Zucchini Bread Battle


IMG_1561


I received a giant zucchini from a co-worker. You know how it is, everyone gets sick of their zucchini crop and gives them away. Even though I grew my own for the first time this year, I didn’t get as much as I wanted, so I was happy to take everyone else’s surplus zucchini.

I decided to try two different breads. I cannot help myself. Making two different versions of food items has become a habit. One has twice as much eggs & oil as the other and uses almonds instead of walnuts & pecans. It also uses just baking soda instead of a baking soda & powder combo.

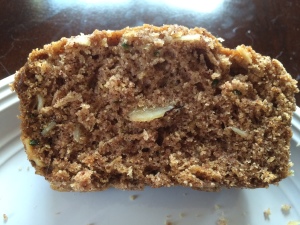
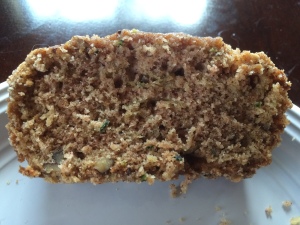
Depending on who you ask you get different results as to a favorite. It is a 50-50 tie more or less. In the future, I will use a combination of both depending on the ingredients I have on hand. I liked the look of version one in terms of rising so will most likely go with the baking soda only but liked the walnuts & pecan blend over the almonds. In terms of eggs & oil, the extra oil didn’t make too much of a difference in moisture but the extra egg might have affected the rising of the bread so maybe I will play around with that some more. With that being said, both are delicious & I encourage you to make them or play around with your own recipes.

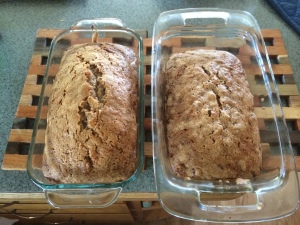
Zucchini Bread trial 1 (Right side of picture)

  • 1 1/2 cups flour
  • 1 tsp cinnamon
  • dash (or two) nutmeg & clove
  • 1/2 tsp salt
  • 1 tsp baking soda
  • 1 cup sugar
  • 1/2 cup oil
  • 2 eggs
  • 1 cup shredded zucchini
  • 1/3 cup sliced almonds

Preheat oven to 350F. Grease a loaf pan with butter. Mix the first 5 ingredients in a medium bowl. Mix the rest of the ingredients in another bowl. Add the wet ingredients to the dry. Fold in the almonds. Bake for 50-60 minutes or until a toothpick inserted near the center comes out clean. Cool on a wire rack for 10 minutes in the pan. Remove from the pan and let cool completely before slicing.

IMG_1581

 Zucchini Bread trial 2 (Left side of picture)

  • 1 1/2 cups flour
  • 1 tsp cinnamon
  • dash (or two) nutmeg & clove
  • 1/2 tsp salt
  • 1/2 tsp baking soda
  • 1/4 tsp baking powder
  • 1 cup sugar
  • 1/4 cup cooking oil
  • 1 egg
  • 1 cup shredded zucchini
  • 1/3 cup chopped walnuts or pecans (I did a blend)

Preheat oven to 350F. Grease a loaf pan with butter. Mix the ingredients from the flour through the baking powder in a medium bowl. Mix the rest of the ingredients in another bowl. Add the wet ingredients to the dry. Fold in the nuts. Bake for 50-60 minutes or until a toothpick inserted near the center comes out clean. Cool on a wire rack for 10 minutes in the pan. Remove from the pan and let cool completely before slicing.
IMG_1582


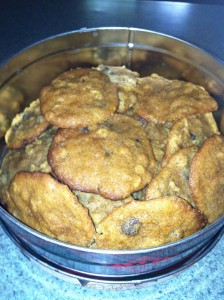
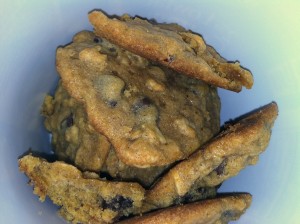
Pumpkin Cookies

IMG_1263


As I had leftover canned pumpkin from the Pumpkin Mac & Cheese I knew a dessert was in order. I have made plenty of breads, cupcakes, and cakes so wanted to try something new and pumpkin cookies were created.

I love cookies. They are probably one of my favorite desserts. They keep well for about a weeks worth of treats & they freeze well for later yumminess. They are also portion controlled which is a good thing if you love sweets.

Pumpkin Cookies (makes about 3 dozen)

  • 2 sticks butter, room temperature
  • 1 cup granulated sugar
  • 1 cup brown sugar, packed
  • 1 cup canned pumpkin
  • 1 egg
  • 1 tsp vanilla extract
  • 2 cups all-purpose flour
  • 1 tsp baking soda
  • 1 1/2 tsp cinnamon
  • pinch each ginger, nutmeg, allspice, & cloves
  • 1/2 tsp salt
  • 1 cup oats
  • 1 cup semi-sweet chocolate hips
  • 1/2 cup dried cranberries
  1. Preheat the oven to 350F. Line 2-3 baking sheets with parchment paper (If you only have one, be sure to rinse the cookie sheet after it has been used to cool it back down before lining it again).
  2. In a large bowl cream the butter & both sugars until light & fluffy. Add the pumpkin, egg, & vanilla and mix until combined.
  3. In a medium bowl mix the flour, baking soda, salt & spices. Slowly add this to the wet ingredients & mix until combined.
  4. Stir in the oats, chocolate chips, & cranberries.
  5. Drop rounded spoonfuls on the baking sheets 2in apart. Bake for 12-14 minutes until tops are golden & edges are starting to set (they will still be very soft & fall apart easily so care must be taken). Remove from the oven and let cool for 5 minutes on the pans. Slide parchment paper with cookies onto a wire rack & let cool completely.
  6. Transfer to containers & eat within a week.

IMG_1260

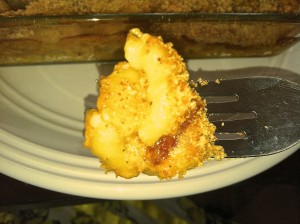
Pumpkin Bacon Mac & Cheese

The season of pumpkin has arrived!! The changing & falling of leaves, brisk fresh air, the list goes on. I am one of those people that loves pumpkin. Pumpkin everything. I cannot help it & nor do I want to. It is delicious. I do eat it year round thanks to the canned goods but I really go crazy in the fall & early winter.
I love it in sweets but do enjoy the savory side of it as well. This is a savory dish & it’s also a souped up Mac & Cheese dish. Mac & Cheese has never been a favorite of mine. I ate the blue box stuff as a kid but didn’t love it. I didn’t realize I liked mac & cheese until I had homemade versions.

This one is the perfect way to start the pumpkin season. The combination of pumpkin, bacon, & cheese is delicious, satisfying, & comforting. Which are all the things I want on a brisk fall day. With the extra canned pumpkin I made Pumpkin Cookies


Pumpkin Bacon Mac & Cheese (serves 2)

  • 1 cup elbow macaroni
  • 4 slices bacon
  • 2 tbsp butter
  • 2 tbsp flour
  • 2 cups milk
  • 1/2 cup canned pumpkin
  • salt & pepper to taste
  • 1/2 tsp each sage & thyme
  • few dashes garlic powder & cayenne
  • 1/2 cup cheddar cheese
  • 1/4 cup fine bread crumbs
  • 1/4 cup parmesan cheese
  1. Cook the macaroni according to package directions. Drain & set aside.
  2. Meanwhile, in a skillet cook the bacon until crisp. Remove & crumble. Set aside.
  3. Drain off the bacon grease. Add the butter & stir until melted. Add the flour & stir until dissolved. Whisk in the milk & cook until thick & bubbly. Add the pumpkin, spices, and cheddar cheese. Stir until pumpkin is incorporated & the cheese is melted.
  4. Stir in the bacon crumbles and macaroni. Pour into two individual casserole dishes.
  5. In a small bowl combine the bread crumbs & parmesan. Sprinkle over the macaroni. Bake in a 400F oven for 25-30 minutes or until topping is golden & sauce is bubbly.

IMG_1252

Roasted Beets & Goat Cheese

I am a beet lover but I was not into beets as a child. As soon as I had real roasted beets, and none of that Thanksgiving canned junk, I was converted. I think they taste like earthy corn but in a good way if that makes sense.

Almost everyone who eats beets enjoys them with goat cheese. I couldn’t tell you how many beet & goat cheese salads and dishes I have had in the past few years. I even made a dish not that long ago Beet Millet Salad with Goat Cheese that used that cliche combo.

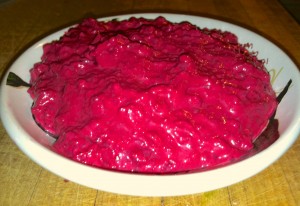
This time around I decided to make some dips. A battle of beets & goat cheese if you will. One which is a blend of beets & goat cheese and one is a goat cheese dip for beet chips. Both are delicious. When summer comes around and you have a garden of beets, or they are just readily available, feel free to add these to your list to make.

Let’s begin with the roasted beet & goat cheese dip.

Roasted Beet *&* Goat Cheese Dip (serves 2 but can easily be doubled)

  • 1 beet
  • 2 oz goat cheese
  • 1/2-1tsp olive oil
  • 2-4 tsp lemon juice
  • few dashes garlic salt, thyme, & oregano
  1. Preheat the oven to 400F. Chop off the ends of the beet & wrap in foil. Bake for 60min or until tender. Remove skins & let cool.
  2. Chop the beat in quarters & puree  in a food processor.
  3. Add the rest of the ingredients & blend to desired consistency (I left mine a bit chunky).
  4. Enjoy with crackers, bread, or veggies.

IMG_1278


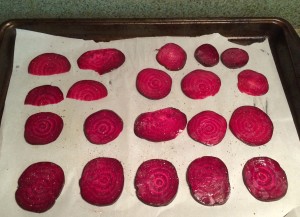
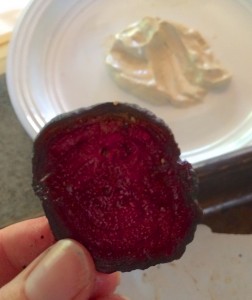
The next beet & goat cheese combo is beet chips with a goat cheese dip. Be forewarned, I have not perfected the beet chip. You do really need a mandolin unless you have serious knife skills which I do not. I tried my best to cut them thinly & in a uniform fashion but ended up with some too thick and some in half moon type shapes. The ones that turned out are below. It might not be perfect but it was good enough & the dip will go great with regular potato chips, bread, or fresh veggies of your choice if you are not making beet chips.

Roasted Beet Chips *with* Goat Cheese Dip

  • beets
  • olive oil
  • salt & pepper
  • goat cheese
  • sour cream
  • milk
  • balsamic vinegar
  • garlic salt
  • dill

Preheat oven to 375F. Slice the beets thinly. Coat lightly with olive oil and sprinkle with salt & pepper. Place on a parchment lined baking sheet & place another baking sheet on top. Roast for 20 minutes. Remove top baking sheet and roast for 15-30 minutes longer until beets crisp up & edges curl.

IMG_1524


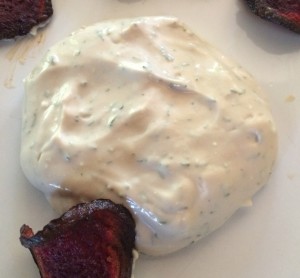
Mix equal parts goat cheese & sour cream ( I used 1-2 tbsp of each). Add a splash of milk and balsamic vinegar to reach desired dip consistency. Add a pinch of garlic salt & as much dill as desired.

IMG_1526


Serve chips with dip & watch them disappear.

IMG_1528


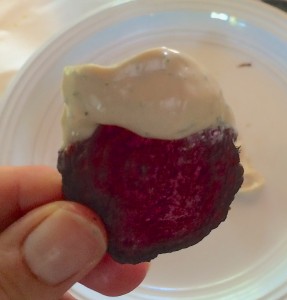
Be liberal with the dip as it is delightful to your taste buds.

IMG_1527


In terms of a winner, even though my chips did not turn out exactly perfect, the ones that did work were so tasty & the dip is now my new favorite go-to recipe that the beets *with* goat cheese dip is far superior.

Friendships & Honey-Vanilla Madeleines

Do you ever wonder how much of what you experience as a child shapes who you become? I think about it constantly. You may not know it at the time but movies, music, books, events, perhaps the smallest encounter, might affect who you become as you get older.

I first noticed it when I bought Edward Scissorhands years ago. I watched this beloved childhood movie as an adult and thought maybe this is a part of the reason why I am who I am. There is the character of the inventor (I’m a chemist) and the mother sells Avon (I sold MaryKay for a brief time).

I know that could be ridiculous but maybe it did affect me. I’m not saying that everything you watch or listen to will make you do things. I watched any horror movie I wanted growing up and I didn’t turn into a murderous monster. I read books geared to adults in elementary school, so much that my teachers would call & ask if it was appropriate for me to be reading such items, to which my mother would reply, “If she has a book she can read it.” I’ve always loved the fact that I was able to watch & read anything. I think that being treated as an adult in certain aspects enhanced my intellect. But I digress. The point is that sometimes I wonder what affected me as a child & shaped my life.
For example, I danced from 3-18yrs old and there was a Chinese restaurant next door. The paper place settings had the Chinese zodiac that told you what animal you were based on the year you were born. I am a rat. I read it every time I went to that restaurant. One thing it said is that Rats seldom have lasting friendships.

I wonder if I got that engrained in my brain which could have affected my friendships throughout life. Because for me it is true. I do seldom have lasting friendships.

My best friend in kindergarten & first grade moved away. One of my only friends in elementary school moved away. In high school I drifted away from my friends for a guy. In college I didn’t live there so I didn’t meet many new people which resulted in no new friends.

I did live in Cannes though for a semester and made some friends there. There was one in particular who I considered to be one of my best friends. We got along well & managed to keep in touch fairly well for a long time. We would Skype each other & Facebook IM one another fairly regularly. We even saw each other every few years with either her traveling to the states or me to Europe.

We don’t talk as much and it has been about 3.5 years since we have seen each other but I still consider her to be a lasting friend. I may not have (m)any friends but I do know I can always call or message her and she will be there. If I do ever go to back to Europe or if she comes to the States I am sure we will get together.

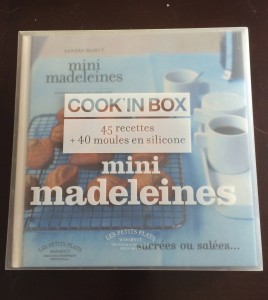
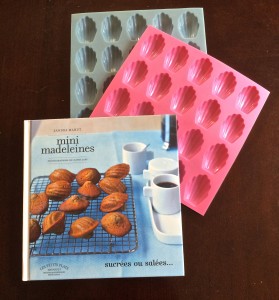
A long time ago in one of our times together, she gave me a cookbook box set.

IMG_1515

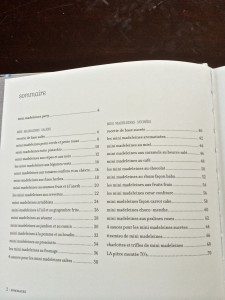
It contains a book with 22 salty & 22 sweet mini madeleine recipes.

IMG_1521

It also came with two silicone molds. I have never used it…until now.

IMG_1518


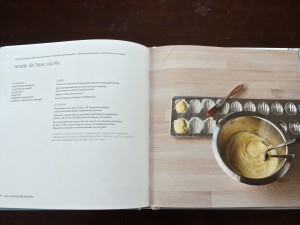
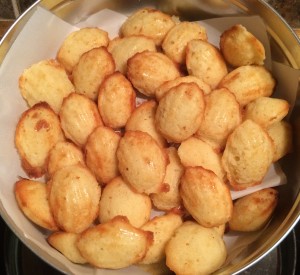
To be fair it got misplaced and then I moved countless times so it was packed up, but up north in Almost Canada, I have lots of time to bake and these will definitely be a recurring baked good in my household. They are so easy & so delicious. The recipe I made was a honey madeleine but I used half the honey and added the seeds from half of a fresh vanilla bean.

IMG_1522

Honey-Vanilla Madeleines (adapted from Mini Madeleines & translated into english) 

  •  1 cup flour
  • 1/2 cup butter, softened
  • 2/3 cup granulated sugar
  • 2 large eggs
  • 2 tbsp milk
  • 2 tsp baking powder
  • 1 tbsp honey
  • 1/2 vanilla bean

Preheat the oven to 425F. Mix the eggs & the sugar until well blended in a medium bowl. Add the flour & baking powder & mix until combined. Mix in the softened butter and milk. Add the honey & the seeds from the half vanilla bean (reserve the bean for another use). Place in the fridge for 30 minutes. Generously grease the molds with butter. Fill them so that they are not overflowing (approx. 1/2-3/4tsp). Bake for 6-8 minutes or until golden brown & cake feels spongey to the touch. Makes about 3 dozen.

IMG_1506


I don’t know if I will make any great friendships as the years go by. By now I have gotten used to having no girlfriends. Sometimes it does sadden me but other days I think it would just be too much work & am content with the way things are. I have always been a very solitary person with a few close friends. While almost all of those close friendships are basically non-existent except for in memory or the occasional communication, I know that if it comes down to it I do have people I can count on. These madeleines remind me of just that.


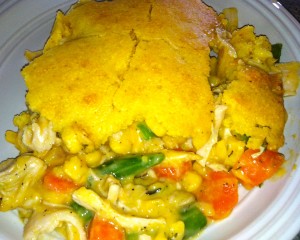
Cornbread Chicken Pot Pie


IMG_1384


I love pot pie. I think it is engrained in my Minnesota upbringing. When winter is half the year you enjoy comfort foods for half the year. The weather has turned rather brisk so pot pies are going to be a reoccurrence for many months to come.

Peas, carrots, potatoes, & chicken in a creamy sauce with a pastry crust is the traditional pot pie eaten by many, but you can really add anything. I love the fact that they are so versatile. You can add basically whatever you want to them depending on what kind of flavors you desire.

The first pot pie I ever made my fishing guide had peas & mushrooms in it. I didn’t know it then, but am constantly reminded now, how he hates peas. His mother even told me that she served him peas as a child and he responded with a question, “Are you made at me?” I guess he has always hated peas and will always hate them (except for pea soup – go figure). Anyhow, he did not enjoy that classic version & I have constantly been adapting pot pies ever since.

This version uses the veggies I had on hand as so many of my recipes do along with chicken and a cornbread crust. It is quite comforting on a brisk autumn day or cold winter night.

Cornbread Chicken Pot Pie (makes 4 servings)

Filling

  • 1 can (10 3/4 oz) Condensed Cream of Chicken Soup
  • 1 can (about 8oz) whole kernel corn, drained
  • large handful fresh green beans, washed, trimmed, & cut into 1 inch pieces (use canned if needed)
  • 2-3 medium carrots, sliced into bite-size pieces
  • 2 cups chicken, cooked & shredded
  • 1/2-3/4tsp thyme
  • pinch salt, pepper, garlic powder & onion powder
  • 1/2 cup cheddar cheese

Cornbread Crust

  • 1 package (about 6.5 oz) corn muffin mix
  • 2 tbsp melted butter
  • 1/3cup milk
  • 1 egg
  1. Preheat oven to 400F.
  2. In a small pot of boiling water add carrots & cook for 10-15 minutes. Add green beans and cook for 3-5 more minutes (if using canned omit this step and combine with the rest of the ingredients in step 3). Drain water.
  3. In a medium bowl combine cooked veggies & all other filling ingredients. Pour into a 2 qt casserole dish.
  4. In a small bowl, combine crust ingredients. Spoon dollops onto the filling in the casserole dish. Bake for 20-25 minutes or until topping is golden brown.

Stuffed Spaghetti Squash

As I was trying to think of something to make for lunch the other day I decided I wanted to do something vegetarian & use a spaghetti squash I had in my pantry. Let me start by saying that both those ideas seem crazy when it comes to my fishing (and soon to be hunting) guide. He is a strong meat & potatoes guy (the only time vegetarian dishes are safe is for lunch) and he isn’t too thrilled with that squash in general. I made it once as spaghetti squash fritters (which he enjoyed but not enough for a remake request) and once as Bacon Spaghetti Squash Pasta which I loved, but apparently he thought it was just so-so. Thus, I have a mission to make him enjoy this food.

I figured I could stuff it. After all, it looks like two bowls when you empty it out and I have come across various stuffed squash recipes in the past. So I looked into my pantry and came out with the following recipe. Even my meat & potatoes guy enjoyed this creation. It has plenty inside to make you forget that there isn’t any meat, and the squash isn’t the star, but is a strong contributor to the dish.


Stuffed Spaghetti Squash (serves 2)

  • 1 medium spaghetti squash
  • olive oil
  • 1 small-medium onion, chopped
  • 1 small-medium green pepper, chopped
  • 1 can chili beans, drained but not rinsed
  • 1/2 cup chunky salsa, hotness is your choice
  • 1/2 cup cheddar cheese, shredded

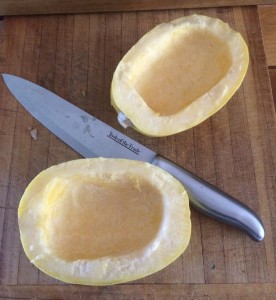
Preheat the oven to 375F. Line a baking dish with foil. Cut the spaghetti squash in half (or have someone do it for you if you are like me). Scoop out the seeds.

IMG_1478

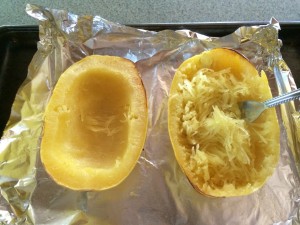
Lightly oil the inside and outside of the squash and place cut-side down on the prepared baking sheet. Bake for 45-60 minutes (adding water if needed to the baking pan for the last 15 minutes to loosen up the flesh). Remove from the oven and let cool slightly. The flesh should flake easily with a fork. Shred all the squash.

IMG_1480


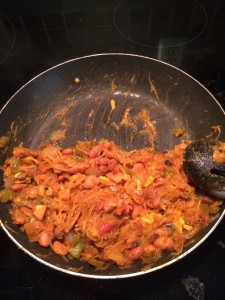
Meanwhile, sauté the onion & green pepper in a small amount of olive oil over medium to medium-low heat until caramelized (about 20-40 minutes depending how low & slow you are cooking). Add the drained chili beans until warmed through. Add the flesh from one squash half. Put the other flesh in a container to be used later. Add the salsa and 1/4 cup cheese (don’t worry about extra seasoning, the beans & salsa provide plenty!)

IMG_1482


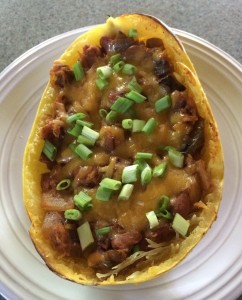
Stuff both bowl squash halves and bake for 15 minutes. Top with the rest of the cheddar cheese and bake till melted. Garnish with green onions. Serve with more salsa & sour cream if desired.

IMG_1486


The Return of Baking Sunday 2014

I have longed professed my hatred or severe dislike of football. Instead of suffering throughout the day, I decided to make it my own day where I spend much of my time in the kitchen (usually baking) and doing other things that I enjoy, i.e. watching shows & movies my fishing guide doesn’t enjoy, knitting, sewing, blogging, etc.

As the 2014-2015 season approached he kept asking me if I was excited and I would reply yes. Of course I am excited! I get to spend a whole day doing what I love and he gets to enjoy it as well (the football & the fruits of my labors from the kitchen). In the winter I am out ice fishing and the summer I am out shooting, fishing on open water, and doing misc projects around the house so the time is not as easy to find to spend in the kitchen. Thus, football season/sunday is baking season/sunday and I could not be more thrilled.

This first Sunday back I made the boys cuban type sandwiches, prepped veggies for my breakfast scrambles for the week, made beef bourguignon for dinner, and I made peanut butter balls. I do a few variations of these treats but this is my original plus the football theme.

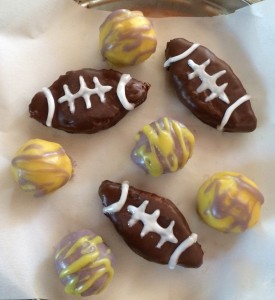
There is nothing fantastically awesome about what I accomplished, & my art skills leave something to be desired, but it was fun none the less. Plus, apparently we won the game. I like to think it was my Vikings themed PB Balls that did the trick.


Football themed Peanut Butter Balls (makes approx. 2 dozen)

  • 1 stick butter, softened
  • 3/4 cup peanut butter
  • 2 cups powdered sugar
  • 2/3 cup graham cracker crumbs
  • 1 cup each white & semi-sweet chocolate pieces
  • 2 tbsp shortening
  • 1 tbsp butter
  • milk or yogurt if needed
  • white writing gel
  • assorted food coloring

Line a baking sheet with parchment paper. Mix the butter and peanut butter together in a medium bowl. Add the powdered sugar and graham cracker crumbs. Form into 1in balls and football shapes.

Melt the semi-sweet chocolate and 1/2-1 tbsp shortening to get a fluid melted chocolate (use a double boiler or the microwave on 50% power). Dip the football shapes into the melted chocolate and place on the parchment lined sheet.

Melt the white chocolate and 1-1.5 tbsp. shortening to get a fluid melted chocolate (use a double boiler or the microwave on 50% power). Add butter and yogurt or milk if the chocolate does not become fluid. Divide into two portions. Stir in food coloring that matches your local sports team’s colors (I used purple & gold for the Vikings). Dip the balls into the melted chocolate and place on the parchment lined sheet. Take the spoon you used to stir the melted chocolate and drizzle the the other color over them.

Place the sheet in the fridge to set. Once firm, remove and draw football lines with the white writing gel. Serve to football fans and be praised.

IMG_1489


The 2014 MN State Fair

IMG_1393

It is that time of year. The end of summer and the beginning of fall. This is what the state fair says to me. One would think that going every year and doing the same thing would get old but it doesn’t. Not for me. I people watch, eat, drink, look at animals and go into the agriculture/horticulture building. I do random other things as well…look at the ice castles & farm equipment (I mean, I do live in Minnesota), go to various booths, look at items to be purchased, the list goes on. Somehow this ends up lasting 5-10 hrs. I am not sure where the time goes. This year was no different.

There was nothing really special that happened this year versus every other. I ate my classics…

Corn Dog

IMG_1439IMG_1438


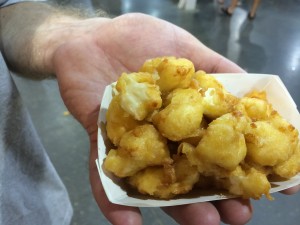
Cheese Curds

IMG_1450

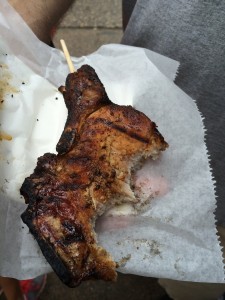
Pork Chop on a Stick

IMG_1441

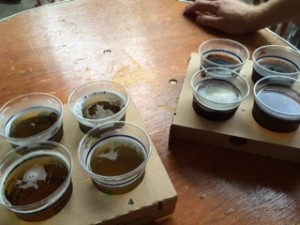
Enjoyed a beer flight (or 2…)

beer flight

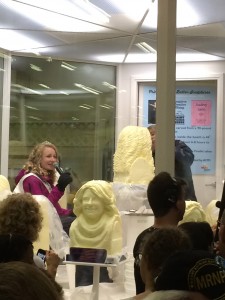
Ice Cream (no photo). Saw Princess Kay become a butter head

IMG_1458

And then I tried some new foods…New to the fair this year or just new to me.

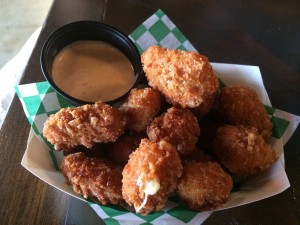
Pretzel Curds (new to the fair this year – 2014. It tasted like regular cheese curds but with a crispy, salty batter. Yum! But I do think I prefer the original in the end).

IMG_1432

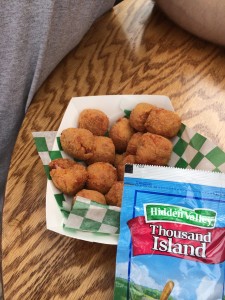
Reuben Bites (new to me)

IMG_1457

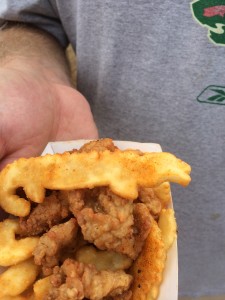
Fried Alligator with alligator shaped fries (New to me. I cannot believe I have never had this. This is a MN State Fair staple).

IMG_1454

I also looked at animals, the plants, flowers, and vegetables. Saw some interesting advertisements…I mean who made this?

IMG_1442

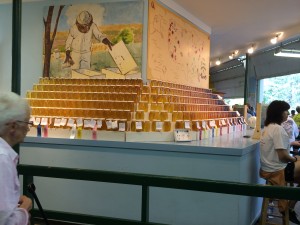
In addition to the flowers, veggies, & veggie art on display in the agriculture/horticulture building, I always look at and try the honey.

IMG_1430

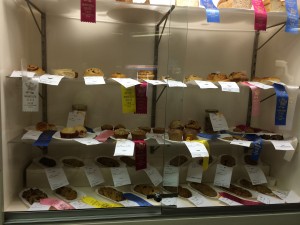
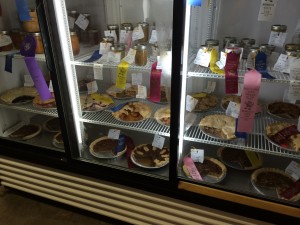
Usually I buy some, but this year I didn’t. I still haven’t even opened my jar from last year. I also look at the ribbons on the baked goods & think maybe one day…

IMG_1422

IMG_1431


Maybe one day I will venture into more contests & win a ribbon.

IMG_1421

Garden Green Bean Salad

In Minnesota it is quite common to have a  garden. With proper planning, one can grow a variety of vegetables, fruits, and general plants. I have never had a garden before. I have done container gardening with some veggies & herbs in pots but I have never had a real garden. All of that changed this year with my recent move to Almost Canada.  This year we just planted along side our garage where there was already dirt prepared and adequate sun. We might have gotten a little over zealous with the planting as some plants took over some others, but overall I am quite pleased. With the cost of produce being so high way up north I have not been able to eat all the veggies I desire on a daily basis. With summer in full swing, the garden is in full bloom & I have an abundance of vegetables to consume for the time being.

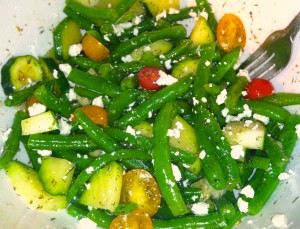
This salad was made with one of our first harvests of green beans, cucumbers, zucchini, and yellow & red cherry tomatoes. It is very refreshing on a summer day. I made it originally just for myself for lunch and my fishing guide took a bite and said to make it again. I made it a second time as a side dish to something I cannot recall. All I remember is eating my heart’s desire of vegetables.

Garden Green Bean Salad (makes 2 side dish portions or 1 lunch portion)

  • 2 cups green beans, washed, trimmed, & cut into various sized pieces
  • 1 small zucchini, sliced into moons & half moons
  • 1/4 cup cucumber, chopped
  • 1/3-1/2 cup cherry or grape tomatoes, halved or quartered
  • 2 tbsp feta cheese
  • 1 tsp olive oil
  • 2 tsp lemon juice
  • pinch salt & pepper
  • 1/2 tsp dried dill
  • 1/4 tsp each dried oregano & basil
  • dash cayenne
  1. Place green beans & zucchini in a skillet. Place enough water to almost cover the vegetables. Bring to a boil & cook for 2-3 minutes or until green beans become a vibrant green color. Drain & run under cold water until cool to the touch.
  2. Meanwhile, combine olive oil, lemon juice, and seasonings in a medium bowl. Add blanched vegetables, cucumber, tomatoes, & feta cheese. Toss to combine.

IMG_1357