Multiple Meals: Ground Beef & Italian Sausage

To continue the theme of Meal Planning, I shall share some things I do to make multiple meals. I am usually cooking for 2 while many recipes are for 4 people. I either make the recipe as is and we have leftovers or I decide to make two separate dishes. In this first installment of Multiple Meals, I use a pound of ground beef & a pound of Italian sausage and make 2 different dinners but each can be eaten twice.

The first thing that needs to be done is to combine both meats together & then divide the meat mixture in half (now you have two separate pounds of combined meat). Brown one of the halves of meat with an onion and set aside for prepping two lasagnas. To the other half, we will be making meatballs. One for spaghetti & the other for sandwiches.

Meatballs

Take the half of meat that is for the meatballs (1lb) and add the following:

  • 1 slice milk soaked bread (place a piece of bread on a plate and pour milk over it so that it is saturated all the way through. Squeeze out the excess).
  • 1 clove garlic, minced
  • ¼ tsp each salt & pepper
  • ½ tsp each basil & oregano
  • 1 onion, chopped
  • 1 beaten egg
  • 2-3tbsp parmesan cheese

Take half of this mixture & place in the fridge for the next night’s dinner*

To the other half, form the meatballs by hand (roughly the size of a golf ball) and place on a baking sheet lined with parchment paper. Bake in a 450F oven for 5-8 minutes until browned. Remove from the oven.

Meanwhile, chop an onion & a green pepper and sauté in a large skillet in a small amount of olive oil over medium low heat for about 20-30 minutes until caramelized to your liking. Add a minced clove of garlic and sauté for about 2 minutes. Add 8oz canned tomato sauce, 1/2 tsp. oregano, 1/2 tsp. basil, and salt & pepper to taste. Add the meatballs to the skillet and cook over low heat while covered for 20-30 minutes. Top with parmesan cheese if desired & serve over cooked spaghetti noodles.

The next night you can prepare exactly the same way and serve in a hoagie bun for meatball sandwiches.

meatball

* If desired you can prep all the meatballs and sauce at once if you are having the sandwiches for lunch or if you know you are crunched for time the next day. Just reheat when ready to eat.


Loaf Pan Lasagna

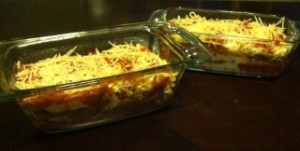
For the lasagna, we will be making two lasagnas (in loaf pans) that serve two each.

  • 1lb meat previously browned with an onion
  • 8 cooked lasagna noodles
  • 16oz ricotta cheese (I used part-skim)
  • 1 egg
  • ¼ tsp pepper
  • ½ tsp each oregano & basil
  • 1.5-2 cups mozzarella
  • 1 26oz jar spaghetti sauce or make your own
  • ¼ cup Parmesan cheese (& more for sprinkling if desired)

Either the day you brown the meat with the onion or the next day after it has been browned prep the lasagnas as follows:

Mix ricotta, egg, seasonings, & 1/4 cup parmesan cheese in a bowl for the filling.

Place approximately 1/4 cup spaghetti sauce on the bottom of each loaf pan. Place two noodles on top of the sauce. Cut or overlap as necessary. Place 1/6 of the ricotta filling on the noodles and spread into a thin layer (approximately 1/3 cup). Sprinkle with mozzarella cheese. Place 1/4 of the browned meat on the filling. Top with more spaghetti sauce. Next place one noodle over the sauce cutting as necessary. Repeat filling, cheese, meat, & sauce layers once. Finally, place one noodle over the sauce and top with the rest of the ricotta filling, mozzarella, and sauce. Sprinkle with parmesan cheese if desired.

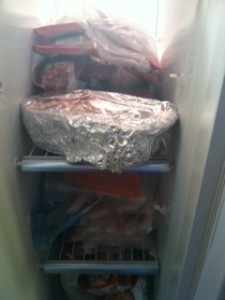
Put one in the fridge for night 3 (night 1=spaghetti & meatballs, night 2=meatball sandwiches, night 3=lasagna) and one in the freezer. Cover the one in the fridge with aluminum foil. To the one placed in the freezer make sure to cover with aluminum foil, wrap all the way around in plastic wrap, & wrap again all the way around but with foil. Use within 1-2weeks for ideal flavor.

lasagna


Fridge lasagna: Preheat the oven to 375F. Bake with the foil covering for 40minutes. Remove the cover & continue to bake for 20minutes. Let sit for 5-10 minutes.

Freezer lasagna: Preheat the oven to 375F. Remove extra foil & the plastic. Bake with the foil covering for 1 hour. Remove the cover & continue to bake for 20minutes. Let sit for 5-10 minutes.

Meal Planning in a Small Town

As I have gotten older and circumstances have changed in my life, I have spent more time in the kitchen making dinner. One of my favorite parts of cooking is meal planning. I like spending time each day or sometime during the week to decide what to make for dinner. The key is to have a well stocked pantry of food items and for me, living in more rural areas, having a well stocked freezer.

I did live in a few small towns for awhile but they were 6hrs further south than where I am now. I had access to major grocery stores as well as smaller markets even if they were 15-60minutes away. Living in the “country” I soon discovered having a well stocked freezer was not only easier, but cheaper, as you could buy meats in larger quantities & vacuum seal it into smaller portions.

freezer

As of last November I soon realized how much I was spoiled. Moving up to Almost Canada has made me miss my grocery stores even if they were a little ways away. The grocery stores up here are…how shall I say it…depressing. Everything is limited & everything is expensive. You go with a mindset of what to make and your key ingredients are not to be found. The grocery store 45minutes away is better, but still not very good. The one 2hrs away is better still, but once again, not the same. Seasonal cooking is definitely a concept I have to embrace as well as a constant lack of ingredients even in that season.

So once again I stocked my pantry with canned & boxed goods as well as stocking my freezer with meat portioned out & vacuum sealed.

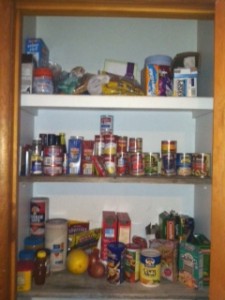
pantry


I know one day the deep freeze will be stocked as well, although probably with fishing or hunting conquests.  Having numerous supplies now at hand I proceed to go about planning dinners & lunches as needed. Sometimes on a day by day basis and sometimes for the whole week.

Meal planning still gives me enjoyment. I had some misgivings at first since everything was limited, but one has to look at it in a different light. You have to look at it like dieters do. It’s not what you can’t have but rather all the things you can have. With this mindset I set about to make dinners with leftovers if needed for easy lunches the next day all the while trying to vary what I make, use up items that need to be eaten, & try out new things. Some are huge hits & others need some tweaking but it’s fun to see what comes out of the kitchen.

Here is what I came up with for this past week as an example. I started my meal planning on Thursday last week to go through Thursday of this week. Friday is up in the air but I have a leftover prepped lasagna in the freezer for after a day of ice fishing on Saturday.

  • Thursday: Spaghetti & Meatballs (also resulted in leftovers for Fri lunch)
  • Friday: Meatball Sandwiches
  • Saturday: Lasagna
  • Sunday: Mustard Pork Roast w/apples & onions (recipe from my lovely which also produced lunch for Monday)
  • Monday: Salmon & Spaghetti Squash Fritters w/zesty dipping sauce
  • Tuesday: Chicken & Squash chausson/calzone
  • Wednesday: Pork Chops w/zucchini, summer squash, & rutabaga (made in the slow cooker with onion soup mix & broth)
  • Thursday: Skillet Chicken & Chile Rellenos w/corn & tomatoes served over rice

As part of this last weeks meal planning I was able to use some ground meat in the freezer & make numerous dishes out of it. Also, I cooked Salmon for the first time. I made up a recipe that I thought would go with a spaghetti squash fritter recipe I pulled up from the internet. The squash (and spinach) needed to be eaten so I based my meal around that item. A long time ago I learned that meals do not always need to be based around meat. Sometimes you pick a vegetable & then work your meal around that – like for the rellenos recipe. I had two poblano peppers that needed to be eaten & leftover roasted chicken from the chausson recipe, so I combined the two & used pantry items to supplement. In addition, I also try to vary the meat source used in the meals so as not to get sick of any one thing (I’m slowly getting my fishing guide to have some meatless dishes but he still prefers meat in every meal).

With all of these concepts & a well stocked pantry & freezer, I set about meal planning. It’s fun & it’s Zen for me. It relaxes me & excites me. I feel at peace in a way knowing that I will produce (hopefully) delicious meals for myself & others to eat. I also get excited when I try new things or come up with new recipes. Despite living in a small town with not much to choose from, none of that has changed.


Mint Chocolate Balls

I used to love Girl Scout cookies. Over the years, however, I feel that the quality has gone south as many food items tend to do in the quest for “healthier” or just cheaper ingredients. One cookie I never liked was the Thin Mint. I am the exception though. Everyone else I know loves this cookie & many store them in the freezer. I have never been a fan of mint desserts. I prefer mint in gum & teeth products. That is it. It is always odd to see people’s expressions when I decline a mint candy or cookie around the holiday season. They looked so confused.

One person who never declines a mint cookie or candy is my fishing guide. He loves those Girl Scout cookies & any other form/brand that they come in. This past week he has been gone for work so I decided that as a welcome home treat I would attempt to make them myself. I pulled a recipe and went to the kitchen.

Clearly I should have looked at more recipes. This one was not that great. The dough, which was said would be crumbly, was an understatement. In an attempt to help hold it together I added a tablespoon of milk but the dough was still like that of a Russian tea cake or pfeffernusse cookie. In the end I decided to make balls like those other cookies that the dough resembled instead. The result was very close in flavor. My fishing guide asked if they were crushed up thin mints in chocolate. Jackpot! The next time I make them I will try for a different dough in order to make them actually look like the beloved Thin Mint Girl Scout Cookie.

Chocolate Mint Balls (note this recipe only makes about 1.5 dozen as I wasn’t sure how it would turn out. Double the recipe if you want more cookies)

-1/2 cup (1 stick) butter, at room temperature
-1/2 cup powdered sugar
-1/2 tsp vanilla extract
-1/2 cup unsweetened cocoa powder
-1/4 tsp salt
-3/4 cup all-purpose flour
-4oz. semi-sweet chocolate
-1/2 tsp peppermint extract
-1 tbsp milk

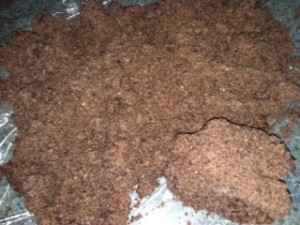
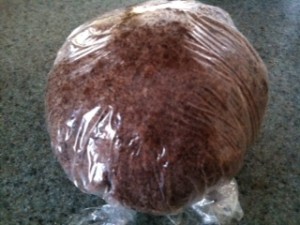
In a medium bowl cream the butter until light. Add the powdered sugar and continue mixing. Add the vanilla, salt, cocoa powder & flour and mix well. Add in a tablespoon of milk & mix until just combined. Turn the dough out onto a large piece of plastic wrap. The dough will be very crumbly and will only slightly hold together if pressed firmly.

mint dough

Wrap the dough in the plastic wrap while pressing into a ball. Chill for 30-60 minutes.

mint dough ball

Preheat the oven to 350F. Grab chunks of dough and press into a small ball. (Do them on the smaller side so the cookie to chocolate ratio is more like that of a thin mint. Too much cookie will be dry since they are balls and not flat rounds). Place cookies on a baking sheet lined with parchment paper and bake for 10-15 minutes. Cool the cookies completely.

Once the cookies are cooled, melt the chocolate in a double boiler or the microwave, stirring after every 30 seconds. Stir in the peppermint extract.

Using a fork, roll cookies completely in the chocolate. Let the excess drip off & place dipped cookies on a baking sheet lined with wax or parchment paper to set. Store cookies between layers of wax paper in an airtight container in the fridge or freezer.

mint balls


Honey-Roasted Onion, Bacon, & Corn Tart

It has been awhile since I’ve gotten to bake on Sundays. Last Sunday, I decided that I would bake a tart as I recently bought a tart pan. I’ve been meaning to get one for years but never followed through with it until now. I have been dying to make tarts for a long time. Fruit tarts, cream tarts, and of course…savory tarts. I looked in my cookbooks & online for inspiration. I ended up finding many recipes I wanted to make but used one from Bon Appetite as a guideline.

Honey Roasted Onion, Bacon, & Corn Tart inspired from Honey-Roasted Onion Tart

For the pastry: Cornmeal Pate Brisee (make half the recipe)

After the dough has been refrigerated, roll the dough out on a lightly floured surface to be 13in round & about 1/4 in thick. Fit dough into a tart pan with a removable bottom pressing into the edges. Fit the dough flush to the edge of the pan. Chill for about 30 minutes.

Preheat the oven to 375F and line chilled shell with parchment paper with a bit of overhang on the edges. Fill with dried beans or pastry weights. Bake for 30-40minutes & remove parchment & weights. Bake for 10-15 more minutes & cool completely on a wire rack.

For the filling:

  • 5 slices bacon
  • 1-1.5lb (2 large) sweet yellow onions, sliced in 1/4in half moons
  • ¼ cup honey
  • ¼ cup white cooking wine
  • ½ cup yogurt
  • ¼ cup milk
  • 2 pinches salt
  • thyme to taste (1/4-3/4 tsp)
  • 1 can corn

Preheat oven to 400F. Line a baking sheet with parchment paper. Place 5 slices bacon & bake for 15-20 minutes until crispy. Remove bacon, crumble, & set aside.

Place sliced onions on parchment paper with leftover bacon grease.

Combine honey & wine and pour over onions.

Roast onions for 45-60minutes until caramelized, stirring onions every 10-20minutes (stir more frequently at the end).

Place onions in tart shell. Mix yogurt, milk, salt, thyme, & corn and pour over onions.

Bake for 30-40minutes until almost set. Place crumbled bacon on top of tart & bake for another 10 minutes.

Remove from oven & cool slightly. Enjoy as an appetizer or for breakfast.


I didn’t have any pictures right out of the oven as it was gobbled up but I have one picture of some leftovers. Unfortunately it doesn’t do it justice.

onion tart


Winter Love Hot Cocoa

IMG_0966

Someone asked me if I was sick of winter yet. I smiled and said, “No. I love winter.” I proceeded to explain that I am very active in the winter (as I am an avid ice fisherwoman) & that winter up here in Almost Canada is better than it is in central to southern Minnesota. I know you think I am crazy but let me explain.

It snows a lot more in central to southern Minnesota than it does up here. There is also more freezing rain & slush further south. In Almost Canada it may be colder and the snow definitely lasts longer, but the constant snow & slush in the air & on the ground is not the same. I also do not have to drive 1-3hrs one way to get to work & then repeat that commute after work. I know that is the biggest part of loving winter even more since I moved. I drive about 1.5 miles to get to work or any other place in town. It is a very nice change. I also explained this to the person who asked me if I was sick of winter. He smiled & said that he was glad I said that. That it was nice to hear someone positive & say good things about winter.

I think that people here in Almost Canada sometimes forget about the beauty of a small town & what winter has to bring. Almost everyday I hear people say how they are sick of the cold & how winter came early and will probably stay late, etc. I’m not saying I’m thrilled about the -30F for the past two months. Yes, two months. It has been brutally cold, but I still love winter. The cold signifies ice which means fishing. The snow looks beautiful on the lake when you are driving a snowmobile in the morning with the sun coming up or as you stare out of your portable.


IMG_0959

IMG_0962

After a long day of fishing & being out in the cold (especially cold since the heater broke on the way out to the lake), I thought it would be nice to have some hot cocoa and remember why I love winter & this small town.

Hot Cocoa

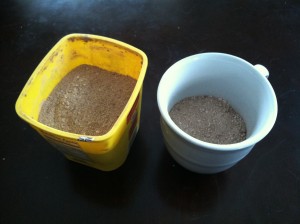
  • 1/2 cup cocoa powder
  • 1/2 cup granulated sugar
  • 3/4 cup powdered sugar
  • 1 1/4 cup powdered milk
  • 1 tsp corn starch
  • 1/2 tsp salt
  • few dashes cinnamon
  • dash cayenne

Mix all ingredients in a bowl. Fill mug half full with mix & top with boiling water or milk. Stir, add marshmallows, & enjoy the warming comfort of hot cocoa. Store the rest in an airtight container for the season.

IMG_0965


IMG_0967

(If desired one can add a teaspoon or two of instant espresso or coffee to the individual mugs as well. So good…)

Parmesan Encrusted Walleye with Lettuce Risotto

I mentioned previously that I had lots of Walleye in my freezer that needed to be cooked and that I had to get creative with it. I decided that I was going to think of it as any type of fish that I wanted, so that it could be prepared in any way that I wanted. I needed to let go of all my previous thoughts about how to cook walleye. I decided to try and make more of a gourmet dish. I though I would encrust it with parmesan and then make a nice side to accompany it.

Thus, I ended up with Parmesan Encrusted Walleye & Lettuce Risotto. Neither of these things is new, but I have never made either of them. More importantly, I came up with my own recipes for them. Although I am sure they are similar to other recipes out there (as many recipes are similar to one another), at least I can say they are mine.

For the Walleye…

  • Walleye, approximately 4 fillets fresh or thawed if frozen (enough for 2 people)
  • Flour
  • Salt & pepper
  • 1 egg
  • Milk
  • Breadcrumbs, seasoned
  • Parmesan cheese, finely grated (the kind that comes in a “shaky” container)
  • Olive oil

For the Lettuce Risotto…

  • Olive oil
  • 1 onion, chopped
  • 2/3 cup Arborio rice
  • ¼ head iceberg lettuce or 4oz lettuce, chopped
  • 1 cup chicken stock
  • 2.5-3 cups water
  • 1 tbsp butter
  • 2-4 tbsp freshly grated parmesan cheese

Chop the onion and place in a skillet with a few teaspoons of olive oil. Sauté over medium heat until tender and slightly colored.

Meanwhile get two plates and a bowl for the walleye prep. In one plate, place flour and salt & pepper. Gently mix with a fork. In a bowl, beat 1 egg with a little bit of milk. In the last plate, place equal amounts breadcrumbs & parmesan cheese & mix.

After the onion is tender, add the Arborio rice and stir for 2 minutes until toasted, but not browned.

Add ½ cup chicken stock and stir until most of the liquid has been absorbed.

Add the lettuce and sauté until slightly wilted.

Add the rest of the stock and ½ cup water. Stir until most of the liquid has been absorbed and add ½-1 cup water increments until the rice is al dente*. It should be creamy. Stir in the butter and freshly grated parmesan cheese.

*When you have about ½ cup water left to add to the risotto, prep the walleye. Take the walleye and place in the flour mixture, coating both sides, and shake the excess off. Next, place it in the egg & milk mixture. Finally, place it in the breadcrumbs & parmesan cheese mixture.

Place the coated walleye in a skillet with olive oil and cook over medium to medium high heat for about 2 minutes per side until cooked through and golden brown.

Serve the walleye over the risotto and enjoy.

parm walleye


Getting Creative with Walleye

A few weeks ago my fishing guide took me out ice fishing.  Let me explain how wonderful this is…

We get up and get ready and leave on snowmobiles from the house. We cross the street to reach a ditch and drive for a very short distance to a park with access for us to get on the river/lake. We continue to drive until we find a suitable place to fish and move if necessary. We fish and then drive home. It’s amazing if you ice fish.

We went out fishing and stopped at a point but there were no fish to be found. We moved to another spot a smidge over 5 miles away where my fishing guide was sure there would be fish. The water was a bit too shallow so we moved just a few feet away to where it was deeper. That’s when the action started. It was slow at first but around lunch time the bites were constant and they were all nicely sized fish. We ended up coming home with one shy of our limit but added a perch in there as well to make up for it. I caught the biggest walleye of my life so far…a solid 18 inches.

big walleye

Now what to do with all these fish…

jan 18 fish

Of course for lunch the next day we fried them up in beer batter. A method of eating fish that is always delicious. In the past I have made fish in a bag or en papillote where I got the recipe from Emiglia. I always add onions to the bag when I make this & use olive oil instead as I have that readily available.

Cabillaud en Papillote

I decided to look to her again for guidance as I have never really cooked fish. Almost 30 and never cooked fish. Well now I need to start. I need to get creative as I have lots of walleye and will continue to have lots of walleye to work with. I decided to make blackened walleye. There are no pictures as it was too delicious and I forgot to take them. My fishing guide who has been eating fish his whole life said it was the best walleye he ever had. I messed up and used 1tsp oregano instead of 1/4 but it didn’t matter. The fish was so flavorful! I also served it with rice & sautéed onions and roasted broccoli. The sauce was divine on the rice & onions.

Blackened Fish

As I had just finished a 12 Soups of  Christmas challenge I thought I should attempt a seafood chowder. I used my freshly caught walleye & shrimp that I had in the freezer. I did not have fish stock or clam juice so the next time I make it I would replace the water with one of those items.

Seafood Chowder

  • 1/4lb bacon
  • 1 yellow onion, chopped
  • 3 small to medium carrots, peeled & chopped
  • 2 potatoes, diced
  • 1/4tsp cayenne
  • 1/4tsp salt
  • 1tsp thyme
  • black pepper to taste
  • 16-24oz water
  • 10-12 oz milk
  • 1 can cream of mushroom soup (feel free to use cream of potato or another cream based soup)
  • Walleye, cut into bite sized pieces (perhaps 4 average walleye, I had one vacuumed sealed pack)
  • Shrimp, peeled & deveined (I used about 12-15 medium shrimp)

Cook bacon in large pot until crispy. Remove and set aside. Add onion & carrots to bacon grease and cook until translucent, about 5-10 minutes. Add potatoes and continue to cook until potatoes begin to become softened, about 10 minutes.

Add water and simmer for 20-30 minutes until vegetables are tender. Add more water as needed.

Add the milk while stirring and add the cream of mushroom soup & seasonings. Stir until combined and allow to come back to a simmer. Add the fish and cook for 8minutes. Add the shrimp and cook for 2 minutes more. Crumble the bacon and add to the soup. Serve with French bread or garlic toast.

seafood chowder


Now that I have cooked walleye in a few different ways I am very excited to continue to come up with recipes. I’ve discovered that walleye doesn’t have to be just a beer battered fish and if you get a little creative it can be used in many new & interesting preparations. Stay tuned.


Peach Muffins & Peach Bread

It has been a long time since I have been able to bake. I moved up north and had temporary living arrangements where I did not have my kitchen or pantry items available to me for 2 months. I finally closed on my new home and have started the slow process of unpacking. The kitchen, however, was put together almost immediately.

My new kitchen has a wall oven. I have always wanted a wall oven. It’s so easy to put things in and take them out without ever having to bend over. I finally got to put it to good use these past few days. Baking Sunday occurred for the first time in a long time. For those of you who don’t know “Baking Sunday” is where I bake & do other things I enjoy while my other half watches football – a sport which I completely detest.

As I was looking through my cookbooks trying to figure out what to make, my sweetie saw a photo of fudgie brownies and said that it looked yummy. So I decided to make them. They turned out very dense and fudge-like as the name implied. I decided that the next day I would make muffins as I saw a recipe for “Muffin Monday” that looked yummy which called for canned apricots.

Seeing as how I have no can opener (it’s a long story) I needed something that had a tab on the lid or those fruit in syrup packs. I ended up buying peaches in syrup.

Peach Muffins adapted from Apricot Muffins

  • 1 3/4 cups flour
  • 1 /2 cup sugar
  • 2 tsp baking powder
  • 1/2 tsp salt
  • 1/4 cup vegetable oil
  • 1/4 cup milk
  • 1 (4) pack of diced peaches in syrup (4-4oz containers)
  • 1/4 cup syrup from the drained dice peaches
  • 1 tsp vanilla
  • 1 egg

Preheat the oven to 350F & line a muffin pan with liners. Drain the peaches but retain the syrup. Mix the first 4 ingredients together in a large bowl and mix the rest of the ingredients (except the diced peaches) in a medium bowl. Add the wet ingredients to the dry and mix until just combined. Fold in the diced peaches leaving 1/2 to 2/3 cup to use in another recipe. Bake for 25-30 minutes or until a toothpick comes out clean. Cool for 5 minutes on a wire rack. Remove muffins from pan and cool completely.

IMG_0917

As I had leftover peaches and syrup I decided to make a quick bread to use them up.

Peach Bread

  • 2 cups flour
  • 2/3 cup sugar
  • 1 tsp baking powder
  • 1/2 tsp baking soda
  • 1/2 tsp salt
  • 1/3 cup vegetable oil
  • 2 eggs
  • 1/2 cup fruit syrup
  • 1/2 cup milk
  • 1/2 cup to 2/3 cup diced peaches
  • 1/2 cup chopped walnuts

Preheat oven to 350F and grease a loaf pan with butter. Mix the first 5 ingredients in a large bowl. Mix the oil, eggs, syrup, & milk in a medium bowl. Add the wet ingredients to the dry and mix until just combined. Fold in the peaches and walnuts and pour into greased loaf pan. Bake for 50-60minutes or until a toothpick near the center comes out clean. Cool for 10 minutes in a wire rack and remove from pan to cool completely before slicing.

IMG_0921


Both were delicious. The muffins had a light peach flavor throughout with bits of diced peaches, but they were a little dense and not as moist as they could have been. The bread also had peach flavor throughout and bits of diced peaches but was very moist. It had a great texture with the walnuts as well. Thus, the bread wins this battle.

The 12 Soups of Christmas

I worked briefly at a company in Plymouth, MN and met a wonderful person who helped me see the light & believe in my skills as a chemist. Prior to working there I had a position as a chemist for a different company. Towards the end I dreaded going to work. I would wake up feeling sick every morning and there was nothing to be done to help my career at this company. The company was great, but without going into details, let us just say that it was not a good fit. I started to actually believe I could not do chemistry and that I had made a grave mistake going into this line of work. The lady with the magic wand at my temporary position made that change. She made me realize that I did love my field of work and that I was good at what I do. Although I ended up leaving that position to go to a different company in a dream location – Almost Canada. I won’t ever forget her inspiration. This lady also told me about the 12 Soups of Christmas. I remember thinking that it was a cool idea. I had to ask again what it was…

About seven years ago I had the idea to make soup for 12 days in a row. I was really into soup and I had just gotten a really good soup cookbook from half price books. I did not succeed my first year, or any year after that. But, every year, I make an effort to make twelve soups between black friday and epiphany. I usually peter out around new years. I think I average about 7-8 soups.

Well, she made a group called the 12 Soups of Christmas (which later changed to the 12 Soups, Stews, & Chilies of Christmas) and invited me. I love soup. I love soup in the winter. To have a reason to make more soup just makes plain sense. So I embarked on a soup journey.

leftover

My 1st Soup was a Leftover Veggie Soup. I just used what I had in my pantry/fridge to make it (veggie stock, kidney beans, cabbage, carrots, onion, green pepper, & crushed tomatoes). It was simple, yummy, and no food got wasted.

broccoli cheese light

My 2nd Soup was a Light Broccoli Cheese Soup. I have never made broccoli cheese but didn’t want to deal with the calories & fat so I looked for a lightened up version. My Recipes/Cooking Light helped me out. It was yummy (not the same as the original version) but one I could make anytime without guilt.  Broccoli Cheese Soup

light potato

My 3rd Soup was a Light Potato Soup. I had the same line of thought as I did for the broccoli. Cooking light came to the rescue again with a recipe that uses cauliflower with the potatoes. No one will be able to tell this is a light soup. The cauliflower blends in so well.  Creamy Light Potato Soup

french onion

My 4th Soup was French Onion. Again, a soup I had never made. For the recipe I looked to my friend who resides in France and of course she had one for me. Everyone, MAKE THIS SOUP. I will not order French onion again – at least from a restaurant in the U.S. French Onion Soup

corn chowder

My 5th Soup was a Chicken & Summer Squash Corn Chowder. I had a few issues due to the fact that the food processor I was using did not have all the attachments so I will write it with how it should be made but with notes for how I made it.

  • Sautee 1 chopped summer squash in small amt of olive oil in pot until tender.
  • Add 1/2 C chopped green onions with salt, pepper, and thyme to taste.
  • Puree one can corn with 1 C milk (this is where I failed and it would not puree cause I didn’t have appropriate blades). Add another 1C milk & blend till combined. Pour onto veggies in pot.
  • Add 1.5-2C chopped cooked chicken (I used leftover rotisserie chicken).
  • Add another can corn if your puree worked. If it didn’t…Skip this step and add potato flakes until soup reaches desired consistency. Serves 3

For my 6th Soup I thought about making a tomato soup but then thought of an old soup recipe which I love. It is from my pumpkin & squash cookbook and is roasted squash, tomatoes, onions, garlic, red pepper, and various seasonings. So I decided that I would make Roasted Tomato & Red Pepper Soup to stick closer to the tomato soup aspect but so that it would be embellished a bit for grilled cheese as I had leftover baguette to be used as well. Soup 6: Roasted Tomato & Red Pepper Soup

  • 2.5lbs tomatoes
  • 2 red peppers
  • 1 onion
  • 5 cloves garlic
  • 2C chicken stock
  • bay leaf
  • salt & pepper & basil to taste


  • Preheat oven to 400 & Lightly oil a baking sheet.
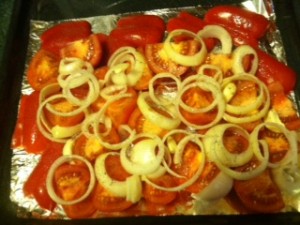
  • Cut off tops off tomatoes. Cut tomatoes in half. Cut red pepper into 4 pieces. Slice onions into rings. Peel garlic cloves.
  • Place all onto a lightly oiled baking sheet & drizzle liberally with more olive oil. Roast for 20-25minutes.
veggies for tomato

  • Place vegetables into a pot and add 2C chicken stock, a bay leaf, & salt, pepper, & basil to taste.
  • Bring to a boil & then simmer for 15-20 minutes. Remove the bay leaf.
  • Puree with an immersion blender or a food processor. Enjoy with grilled cheese or with baguette slices with melty gouda.

tomato & red pepper

Since it is winter I decided to make a squash soup. Soup 7: Butternut Squash Soup

  • 1 butternut squash
  • 1C chicken stock
  • 3/4can evaporated milk
  • 2-3 sprigs thyme


  • Cut butternut in quarters, remove seeds, and coat all surfaces with olive oil. Place cut side down on a baking sheet and roast for 45-60minutes at 375.
  • Remove pulp from skins and place in food processor with chicken stock & evaporated milk. Blend till combined.
  • Place mixture into pot and heat until desired temperature with thyme. Remove thyme and enjoy. Serves 1 hearty portion or 2 lunch/starter portions.

butternut

For Soup number 8 I made a soup I recently posted about, Carrot Soup, as I had just received some more garden carrots from a co-worker. Serve with an over-easy fried egg on top and try it for breakfast. It is a great way to get vegetables into your diet right away in the morning.

carrot

For Soup 9 I made Cream of Chicken with Wild Rice. I have never made this soup & was not even going to try to make it healthy. I did use a slow cooker to help me out as I went fishing on this day, so all I had to do was come home and add some rice & cream and let cook a bit longer. In a crockpot add…

  • 1 chopped onion
  • 3-4 chopped carrots
  • 1 can cream of chicken
  • 1 can cream of mushroom
  • 1 C water
  • 1 lb chicken cubed
  • 1 tsp oregano
  • 1/4 tsp each thyme, basil, & pepper
  • 1/8 tsp each garlic powder & onion powder.

Cook on low for 7 hrs and add 1-2C cooked wild rice (use amount you prefer). Add 1C half & half with 1-2 tbsp flour and cook on high for 30 minutes to thicken. cream of chicken

For Christmas I had duck for dinner. I decided to use the leftovers to make duck noodle soup. Soup 10: Duck Noodle Soup

  • Boil a duck carcass from leftover duck dinner for 45-60 minutes to make a duck stock and loosen all the leftover meat. Remove carcass and let cool slightly to pull meat off. Set meat aside.
  • Sautee 1 chopped onion, 1 stick chopped celery, & 3-4 chopped carrots for 10-20 minutes until slightly softened.
  • Add veggies to stock with 1 bay leaf, 1tsp oregano, basil & thyme to taste, 1/4 tsp each black pepper & salt.
  • Bring to a boil and then let simmer until vegetables are tender. Add the meat back to the pot while you cook 3-4C wide egg noodles. Add the noodles to the pot and enjoy a very flavorful soup

duck noodle

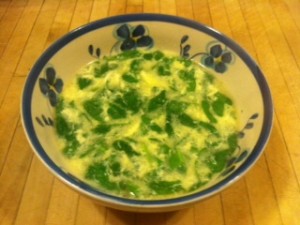
As I approached the end of my soups to make, I had no idea what to choose. I had been choosing soups I had never made before so wanted to keep along that theme. There are so many soups to choose from! I decided to make Stracciatella Soup. I had never made it and loved. It is like Italian egg drop soup. The plus side, it takes about 10 minutes to make!

Soup 11: Stracciatella Soup (Recipe courtesy Giada de Laurentiis)
stracciatella

For my last soup I decided to make one of my favorite soups which is lentil soup. I had plenty of dried lentils and bacon that needed to be used as well so it was a win for my pantry & fridge. Soup 12: Bacon Lentil Soup In a large pot…

  • Cook 4 slices of bacon until very crispy. Remove and set aside.
  • Sautee 2 chopped carrots, 1 large chopped onion, 2 chopped cloves of garlic in bacon grease until slightly tender (5-10minutes).
  • Add 1/2lb dried lentils, 3-4C chicken stock, and 1C water.
  • Bring to a boil, reduce heat, cover and simmer until lentils are tender & soup is thick (about 90minutes).
  • Top with bacon. Serves 4

bacon lentil

I did accomplish the 12 Soups of Christmas (I stayed pure to the original – No stews or chilies) before January 6th which was the deadline. It was a simple yet fun cooking challenge. I find that cooking or baking challenges give me an extra boost of motivation. I also tried making many new soups which is a win as well. There are many more soups to be conquered out there so I will continue to do this every year and hopefully come up with a list of favorite soups.

And if you are wondering, the lady who invented this group also accomplished the 12 soups.

Carrot Soup

I have always loved grocery shopping. Even when I was little, I liked to go to the store and pick items out. As I got older my mother was happy to send me to the store as it was a chore for her and a more fun experience for me. I am not sure what it is. I just like being able to pick out my own food and then cook with it later.

Now that I have moved to Almost Canada the grocery shopping experience has become a little less enjoyable. Mainly because the selection has downsized significantly. I can already see my suture self getting annoyed and frustrated as I am unable to purchase the ingredients I desire to make new or classic recipes.

For example, I was watching Rachael Ray when my special someone was visiting me, and decided to try to make Ginger-Soy Carrot Soup. I had just received a gallon bag of freshly grown carrots from a co-worker so I thought this would be a great way to use them. I went to the grocery store and was unable to find: ginger root, chili peppers, and tamari. There goes the ginger-soy aspect.

I don’t really care for ginger in the first place. I just wanted to try something new. I took this as a sign to just skip it all together as opposed to buying the spice that would sit forever in a spice drawer. I ended up buying a jalapeno as it was the only pepper available and went with low-sodium soy sauce instead of the tamari.

The soup turned out well despite a few obstacles. I know in the future I will have to do many substitutions and perhaps completely change my food plans. Instead of letting this bother me, I am going to look at it as a chance to grow as a cook. A chance to not follow the recipe and to continue to develop skills in recipe creation.

Carrot Soup, Adapted from: Ginger-Soy Carrot Soup

  • 2 tablespoons olive oil
  • 1 large onion, chopped
  • 3 cloves garlic, chopped
  • 1 jalapeno pepper, seeded and chopped
  • 1 gallon bag carrots, peeled and sliced
  • 1/4 cup low-sodium soy sauce
  • 4 cups chicken stock
  • 1 cup water
  • Salt and freshly ground black pepper
  • 4 large eggs, fried

Heat the olive oil in a large pot over medium heat. Add the onion, garlic and jalapeno pepper and sweat them out a few minutes. Stir in the carrots and soy sauce, then cover the pot and cook for about 10 minutes. Add the stock and bring to a boil. Reduce the heat and simmer the soup until the carrots are tender. Puree as smooth or chunky as you like with hand blender or in a food processor, in batches. Season the soup with salt and pepper, to taste. Fry an egg to your preference and serve over the soup (I liked them over easy so the yolk would run into the soup).

carrots

carrot soup