Cornbread Chicken Pot Pie


IMG_1384


I love pot pie. I think it is engrained in my Minnesota upbringing. When winter is half the year you enjoy comfort foods for half the year. The weather has turned rather brisk so pot pies are going to be a reoccurrence for many months to come.

Peas, carrots, potatoes, & chicken in a creamy sauce with a pastry crust is the traditional pot pie eaten by many, but you can really add anything. I love the fact that they are so versatile. You can add basically whatever you want to them depending on what kind of flavors you desire.

The first pot pie I ever made my fishing guide had peas & mushrooms in it. I didn’t know it then, but am constantly reminded now, how he hates peas. His mother even told me that she served him peas as a child and he responded with a question, “Are you made at me?” I guess he has always hated peas and will always hate them (except for pea soup – go figure). Anyhow, he did not enjoy that classic version & I have constantly been adapting pot pies ever since.

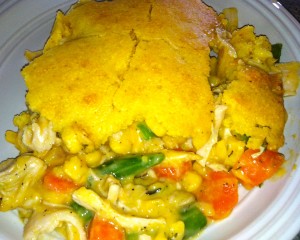
This version uses the veggies I had on hand as so many of my recipes do along with chicken and a cornbread crust. It is quite comforting on a brisk autumn day or cold winter night.

Cornbread Chicken Pot Pie (makes 4 servings)

Filling

  • 1 can (10 3/4 oz) Condensed Cream of Chicken Soup
  • 1 can (about 8oz) whole kernel corn, drained
  • large handful fresh green beans, washed, trimmed, & cut into 1 inch pieces (use canned if needed)
  • 2-3 medium carrots, sliced into bite-size pieces
  • 2 cups chicken, cooked & shredded
  • 1/2-3/4tsp thyme
  • pinch salt, pepper, garlic powder & onion powder
  • 1/2 cup cheddar cheese

Cornbread Crust

  • 1 package (about 6.5 oz) corn muffin mix
  • 2 tbsp melted butter
  • 1/3cup milk
  • 1 egg
  1. Preheat oven to 400F.
  2. In a small pot of boiling water add carrots & cook for 10-15 minutes. Add green beans and cook for 3-5 more minutes (if using canned omit this step and combine with the rest of the ingredients in step 3). Drain water.
  3. In a medium bowl combine cooked veggies & all other filling ingredients. Pour into a 2 qt casserole dish.
  4. In a small bowl, combine crust ingredients. Spoon dollops onto the filling in the casserole dish. Bake for 20-25 minutes or until topping is golden brown.

Stuffed Spaghetti Squash

As I was trying to think of something to make for lunch the other day I decided I wanted to do something vegetarian & use a spaghetti squash I had in my pantry. Let me start by saying that both those ideas seem crazy when it comes to my fishing (and soon to be hunting) guide. He is a strong meat & potatoes guy (the only time vegetarian dishes are safe is for lunch) and he isn’t too thrilled with that squash in general. I made it once as spaghetti squash fritters (which he enjoyed but not enough for a remake request) and once as Bacon Spaghetti Squash Pasta which I loved, but apparently he thought it was just so-so. Thus, I have a mission to make him enjoy this food.

I figured I could stuff it. After all, it looks like two bowls when you empty it out and I have come across various stuffed squash recipes in the past. So I looked into my pantry and came out with the following recipe. Even my meat & potatoes guy enjoyed this creation. It has plenty inside to make you forget that there isn’t any meat, and the squash isn’t the star, but is a strong contributor to the dish.


Stuffed Spaghetti Squash (serves 2)

  • 1 medium spaghetti squash
  • olive oil
  • 1 small-medium onion, chopped
  • 1 small-medium green pepper, chopped
  • 1 can chili beans, drained but not rinsed
  • 1/2 cup chunky salsa, hotness is your choice
  • 1/2 cup cheddar cheese, shredded

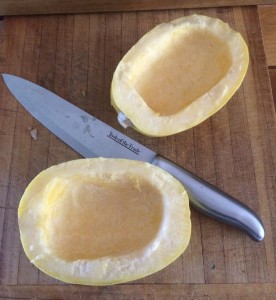
Preheat the oven to 375F. Line a baking dish with foil. Cut the spaghetti squash in half (or have someone do it for you if you are like me). Scoop out the seeds.

IMG_1478

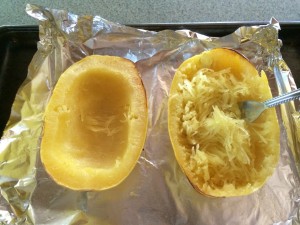
Lightly oil the inside and outside of the squash and place cut-side down on the prepared baking sheet. Bake for 45-60 minutes (adding water if needed to the baking pan for the last 15 minutes to loosen up the flesh). Remove from the oven and let cool slightly. The flesh should flake easily with a fork. Shred all the squash.

IMG_1480


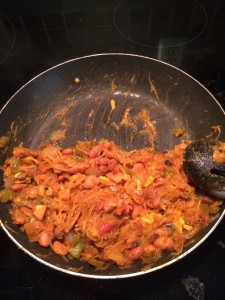
Meanwhile, sauté the onion & green pepper in a small amount of olive oil over medium to medium-low heat until caramelized (about 20-40 minutes depending how low & slow you are cooking). Add the drained chili beans until warmed through. Add the flesh from one squash half. Put the other flesh in a container to be used later. Add the salsa and 1/4 cup cheese (don’t worry about extra seasoning, the beans & salsa provide plenty!)

IMG_1482


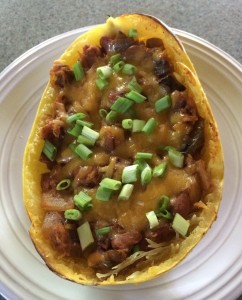
Stuff both bowl squash halves and bake for 15 minutes. Top with the rest of the cheddar cheese and bake till melted. Garnish with green onions. Serve with more salsa & sour cream if desired.

IMG_1486


The Return of Baking Sunday 2014

I have longed professed my hatred or severe dislike of football. Instead of suffering throughout the day, I decided to make it my own day where I spend much of my time in the kitchen (usually baking) and doing other things that I enjoy, i.e. watching shows & movies my fishing guide doesn’t enjoy, knitting, sewing, blogging, etc.

As the 2014-2015 season approached he kept asking me if I was excited and I would reply yes. Of course I am excited! I get to spend a whole day doing what I love and he gets to enjoy it as well (the football & the fruits of my labors from the kitchen). In the winter I am out ice fishing and the summer I am out shooting, fishing on open water, and doing misc projects around the house so the time is not as easy to find to spend in the kitchen. Thus, football season/sunday is baking season/sunday and I could not be more thrilled.

This first Sunday back I made the boys cuban type sandwiches, prepped veggies for my breakfast scrambles for the week, made beef bourguignon for dinner, and I made peanut butter balls. I do a few variations of these treats but this is my original plus the football theme.

There is nothing fantastically awesome about what I accomplished, & my art skills leave something to be desired, but it was fun none the less. Plus, apparently we won the game. I like to think it was my Vikings themed PB Balls that did the trick.


Football themed Peanut Butter Balls (makes approx. 2 dozen)

  • 1 stick butter, softened
  • 3/4 cup peanut butter
  • 2 cups powdered sugar
  • 2/3 cup graham cracker crumbs
  • 1 cup each white & semi-sweet chocolate pieces
  • 2 tbsp shortening
  • 1 tbsp butter
  • milk or yogurt if needed
  • white writing gel
  • assorted food coloring

Line a baking sheet with parchment paper. Mix the butter and peanut butter together in a medium bowl. Add the powdered sugar and graham cracker crumbs. Form into 1in balls and football shapes.

Melt the semi-sweet chocolate and 1/2-1 tbsp shortening to get a fluid melted chocolate (use a double boiler or the microwave on 50% power). Dip the football shapes into the melted chocolate and place on the parchment lined sheet.

Melt the white chocolate and 1-1.5 tbsp. shortening to get a fluid melted chocolate (use a double boiler or the microwave on 50% power). Add butter and yogurt or milk if the chocolate does not become fluid. Divide into two portions. Stir in food coloring that matches your local sports team’s colors (I used purple & gold for the Vikings). Dip the balls into the melted chocolate and place on the parchment lined sheet. Take the spoon you used to stir the melted chocolate and drizzle the the other color over them.

Place the sheet in the fridge to set. Once firm, remove and draw football lines with the white writing gel. Serve to football fans and be praised.

IMG_1489


Italian Dunkers

My fishing guide asked me what my favorite Italian food was the other day. I sat a moment and realized I didn’t have one. It’s not that I don’t like Italian food, I actually really like it. Pastas, pizzas, risottos, chicken & seafood dishes, biscotti, tiramisu…Ok, maybe my favorite is tiramisu. There is a story there but that can be saved for a later date.

I replied that I didn’t have a favorite. I then asked him what his favorite Italian food was. I knew he had a great response waiting as it was such a random question. He said, Italian Dunkers. Well played. Who didn’t love the Italian Dunkers school lunch? School lunches get a bad rap but there are a few that everyone loves. Italian Dunkers is one of those in my expert opinion. With the approaching start to the new school year this dish was inspired at the perfect time.

I decided to make it with homemade bread & a meat marinara sauce. It turned out to be one of my favorite new things to make. Make it your own with whatever cheese you like or omit the meat from the sauce if you want to go vegetarian.


Italian Dunkers (serves 2, although it should really be 4)

  • 1 small baguette, halved both ways (store bought or see below)
  • 1/2 lb ground beef
  • 1 15oz can tomato sauce
  • 1 tsp each basil & oregano
  • salt & pepper to taste
  • dash onion powder, garlic powder, & cayenne
  • 1 bay leaf
  • head garlic
  • feta cheese
  • mozzarella cheese

If making your own bread:

  • 1 1/2 cups warm water
  • 2 tsp salt
  • 2.5 tsp dry active yeast
  • 3 cups bread flour
  • 1 cup warm water for baking
  1. Add 1.5 cups water to a medium bowl. Stir in salt & yeast. Add flour all at once & stir to combine. Use wet hands if necessary to incorporate all the flour.
  2. Cover loosely and let rise for 2-3 hrs (or let rise in the fridge for 8hrs).
  3. Preheat the oven with a pizza stone to 450F for 20 minutes. Have a shallow pan on another rack that won’t interfere with the rising of the bread. While the oven is preheating, take half of the dough and make a baguette shaped loaf on a lightly floured surface. Repeat with the other half. Let rise for 20 minutes. Brush the tops of the loaves with water and score a few times. Slide onto the heat stone and pour the 1 cup warm water into the shallow baking dish.
  4. Bake for 20-25 minutes to until golden brown and firm.
  5. Remove from the oven and let cool before slicing.

Preparation:

  1.  Peel all the papery skin off of the head of garlic. Chop 1/4in off of the top and drizzle with olive oil. Wrap in foil and roast the garlic in a 400F oven for 30-45minutes. Squeeze out the pulp once cooled slightly.
  2. Meanwhile, brown the meat and drain off excess grease. Add the tomato sauce and seasonings. Cover and simmer for 20-45 minutes. Remove the bay leaf before serving.
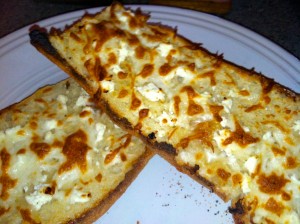
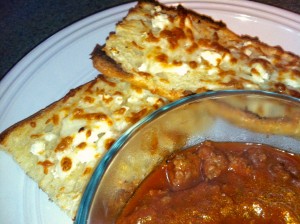
  3. Take the cut pieces of baguette and spread the roasted garlic over them. Top with feta & mozzarella cheese. Broil for 2-5 minutes until melted & bubbly. IMG_1363
  4. Serve with the meat sauce.

IMG_1366

Summer of Rhubarb: Oatmeal Rhubarb Bars

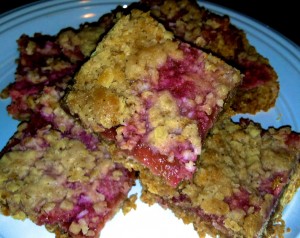
Seeing as how I had leftover Rhubarb Sauce from my Mustard Sage Pork Roast, I knew another dessert was in order. Since I had made coffee cake & a crisp, I decided I would more or less combine the two recipes & make oatmeal bars. These are great! They can be eaten plain or with ice cream. Also, they can be made with whatever filling you desire. Any fruit will do. Use the same amount of sugar for raspberries, but if using peaches, blueberries, or strawberries only use 1/4 cup sugar.

Oatmeal Rhubarb Bars

  • 1 cup all-purpose flour
  • 1 cup quick cooking rolled oats
  • 2/3 cup packed brown sugar
  • 1/4 tsp baking soda
  • few dashes cinnamon
  • dash or two nutmeg
  • dash all-spice
  • dash cloves
  • 1 stick (1/2 cup) butter
  • approx. 2 cups rhubarb sauce (2 cups rhubarb & 1/4 cup water brought to a boil & simmered for 5 minutes. Add 1/3 cup sugar & two tbsp. corn starch & cook for 2 more minutes)

Preheat the oven to 350F. Combine all the ingredients except the butter & rhubarb sauce in to a medium sized bowl & stir to combine. Cut in the butter until the mixture resembles coarse crumbs. Reserve 1/2 cup of this mixture. Press the rest into a 9x9x2in baking pan. Top with rhubarb sauce & sprinkle remaining crumb mixture on top. Bake for 30-35 minutes until the topping is golden brown.
IMG_1343


Summer of Rhubarb: Mustard & Sage Pork Roast with Rhubarb Sauce

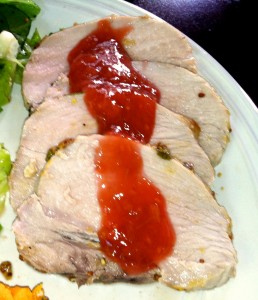
When deciding on how to use my summer supply of rhubarb I knew I wanted to make a sauce. Perhaps for a cheesecake or perhaps for a meat. I decided that it would go nicely with a pork roast.  I love pork roasts. They are so easy & so delicious. This one is a mustard-sage roast as I had fresh sage from my garden. Serve it with sweet potatoes & a salad or some other vegetable of your choice. It’s sort of a fall inspired dish but it will be wonderful no matter when you have it.

Mustard & Sage Pork Roast with Rhubarb Sauce

  • 3-4tbsp whole grain mustard
  • 1/2 tsp minced garlic
  • dash of salt & pepper
  • 1 tbsp fresh sage (hopefully from your garden), chopped. You can sub 1 tsp dried sage if needed.
  • 1.5-2 lb pork roast
  • 2 cups fresh or frozen rhubarb (If frozen let thaw but do not drain off liquid. Also if your rhubarb is on the greener side, add a handful of raspberries for extra color).
  • 1/4 cup water
  • 1/3 cup sugar
  • 2 tbsp corn starch
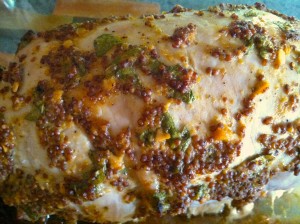
  1. Preheat the oven to 375F. Mix the first 4 ingredients in a small bowl. Coat the roast entirely and place in a shallow baking dish. Roast for 60 minutes & let stand for 10 minutes (covered) before slicing. IMG_1315
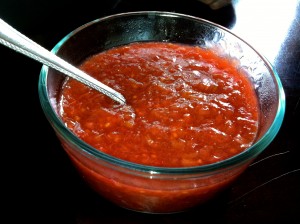
  2. Place the rhubarb in a small pot with the water. Bring to a boil & then reduce heat to a simmer and let cook for 5 minutes. Stir the sugar & corn starch together. Add to the rhubarb. Cook for another 2 minutes until thick & bubbly. IMG_1322
  3. Serve the sauce* with the roast

IMG_1324

*This sauce is almost more of a glaze. I wanted it thick because I knew I would use it for other recipes & this makes too much sauce for just a roast. If you prefer it thinner, use only 1-2 tsp corn starch. Use the leftovers in oatmeal for breakfast, as an ice cream topping, or make a dessert out of it. I made Oatmeal Rhubarb Bars

Cajun Chicken Burger on Crusty Sandwich Bread

I have the Artisan Bread in Five Minutes a Day cookbook. The only things I have ever made out of it are boules, baguettes, & bâtards. I’ve made them plain & with herbs. That is all. Even though it is so easy I have never tried the countless other recipes. Partly because I am still intimidated & partly because I love bread. I don’t want to make it because then I eat too much of it.

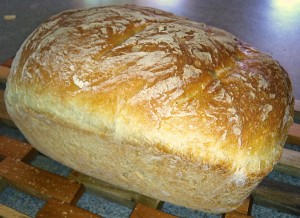
The other day I decided I wanted to make sandwich bread. It looked easy enough & I thought I could incorporate it into dinner. I’m always trying to find or think of new recipes as most people who cook tend to do. I also like them to be seasonal. With the fact that it’s summer & I was making bread I knew a sandwich or burger  was in store. I thought, why not make a burger that uses sandwich bread. Thus the Cajun Chicken Burger on Crusty Sandwich Bread was born. This is so juicy & has just the right amount of kick. The sautéed veggies give an extra little something as opposed to just lettuce, tomato, or onion. And the sandwich bread…well, there is nothing like fresh bread. It gives a slight crunch but is still soft on the inside.

Crusty Sandwich Bread

  • 11/2 cups warm water
  • 2 tsp salt
  • 2.5 tsp dry active yeast
  • 3 cups bread flour
  • 1 cup warm water for baking
  1. Add water to bowl. Stir in salt & yeast. Add flour all at once & stir to combine. Use wet hands if necessary to incorporate all the flour.
  2. Cover loosely and let rise for 2-3 hrs (or let rise in the fridge for 8hrs).
  3. Lightly grease a loaf pan that is 9x3x2in with neutral tasting oil.
  4. Dust the surface of the risen dough & cut off a cantaloupe sized piece (about 3/4 of the dough mixture) and shape into a ball by stretching the surface of the dough around to the bottom on all sides, rotating the ball a quarter-turn as you go. Elongate this into an oval & place in pan. Let rise for 40 minutes (1hr40min if it’s been refrigerated). Dust with flour & score the top of the bread.
  5. Preheat the oven to 450F for 5 minutes. Place the pan in the oven on the middle shelf with another pan on a shelf that won’t interfere with the dough baking. Add 1 cup warm water to the other pan & bake for 35 minutes or until the surface is hard & brown.
  6. Remove from the pan and cool completely before slicing & eating.

IMG_1221

Cajun Chicken Burger

  • 1lb ground chicken
  • 1/4 cup diced onion
  • 1tsp diced garlic
  • 1tsp worcestshire sauce
  • 1 jalepeno, seeded & diced (optional)
  • 1 tsp olive oil
  • 1 onion, sliced in thin half moons
  • 1/2 large red & yellow pepper (or 1 small of each pepper) sliced into thin strips
  • 1/4 cup mayonnaise
  • 1-2.5 tsp cajun seasoning (store bought or mix 1/2tsp each salt, black pepper, oregano, paprika, & cayenne)
  • 4 slices crusty sandwich bread
  • lettuce
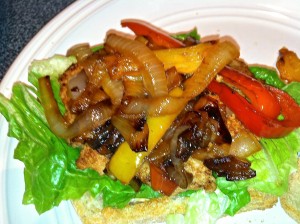
  1. Heat a skillet with 1tsp olive oil over medium heat. Add the whole chopped onion & sauté for 5-8 minutes until softened. Add the peppers & continue to sauté until caramelized (about 10-20 more minutes).
  2. Meanwhile, mix chicken, 1/4C onion, garlic, worcestire sauce, jalepeno if desired, & 1-1.5 tsp cajun seasoning in a medium bowl. Put half in the fridge for lunch in the next few days. Form the other half into 2 patties.
  3. Once the onions & peppers are cooked, transfer them to another skillet or container to keep warm (keep half set aside for the burgers in the next few days). Cook the chicken patties in the skillet that the veggies were sautéed in (about 5 minutes for the first side & 3 min on the second side). Cover the skillet with a lid for the first side of cooking.
  4. Mix the mayonnaise with 1/4-3/4tsp cajun seasoning.
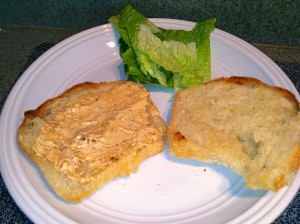
  5. Toast the bread slightly in a toaster. Coat 2 slices with 1 tbsp mayonnaise. Top with lettuce.

IMG_1222

6.   Place a burger on each piece of bread with mayo & lettuce. Top with sautéed veggies.

IMG_1225

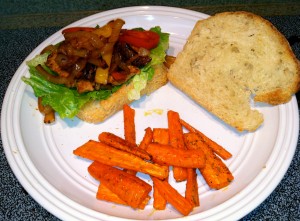
7. Top with the other slice of bread & serve with side of your choice (I chose roasted carrots).

IMG_1226


White Chicken Lasagna

When I was younger I never cared for lasagna. I attribute this to a few things. I did not care for lots of red sauce at that time. I always thought lasagnas had too much sauce. It was unappealing to look at & I ended up scraping excess away. I also thought they were too cheesy. I love cheese. I have always loved cheese. I eat way too much cheese I am sure, but when it comes to pizzas & lasagnas I believe that less is more. I also don’t know if I ever had a homemade lasagna. They were always frozen aisle lasagnas.

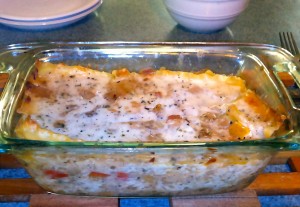
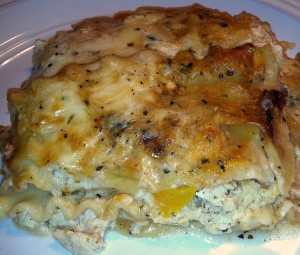
Once I started cooking for myself, I realized I love lasagna. I just like it the way I make it with less sauce & cheese. I also never used to use loaf pans. I would use a normal 8×8 or 9×13 pan. Since I am cooking for 2 almost always, I like using the loaf pans. That way it is always fresh when you pop it in the oven. I also like being able to prep meals ahead of time & lasagna is one of the perfect make ahead meals. With the loaf pans you get one right away and another within a week. As the guy I am cooking for likes red lasagnas I have always made those. I decided to make a white lasagna this time. It is creamy, savory, & a nice change from a traditional red sauced lasagna. It even has his approval.

IMG_1240

White Chicken Lasagna

  • 2 large chicken breasts, cooked and shredded
  • 8 lasagna noodles, cooked
  • 1 1/2 cups cottage cheese
  • 1/2 cup mozzarella cheese
  • 1 egg
  • 1tsp each basil, oregano, pepper
  • few dashes each onion powder & garlic powder
  • 1 diced onion, red pepper, & yellow pepper
  • olive oil
  • 1 tbsp. butter
  • 3 tbsp. flour
  • 1 cup chicken stock
  • 3 cups milk
  • pinch sage, basil, oregano, pepper & salt
  • 1/4 cup mozzarella
  • 1/2-3/4 cup mozzarella cheese
  • parmesan cheese (optional)
  1. Lightly coat a large skillet with olive oil. Sauté the onion & peppers until almost caramelized. Add one tbsp. butter & stir until melted. Add 3 tbsp. flour & stir until dissolved. Add 1 cup chicken stock, 3 cups milk, & pinch each basil, oregano, pepper & salt. Stir often until thickened & bubbly. Add 1/4 cup mozzarella cheese.
  2. Meanwhile, mix egg, cottage cheese, shredded chicken, tsp each basil, oregano, & pepper, few dashes each onion & garlic powder, & 1/2 cup mozzarella cheese in a medium bowl.
  3. Take two loaf pans & place 1/4 cup sauce on the bottoms of each. Place approx. 1.5 noodles (cutting & overlapping as necessary) on sauce. Top each with 1/4 the chicken mixture. Sprinkle a small amount of mozzarella cheese over the chicken. Top with sauce. Repeat layers once ending with last layer of noodles on top. Finally, over the last set of noodles place some more mozzarella & top with remainder of sauce. If desired, top with parmesan cheese. Cover both with foil. Bake immediately, place in the fridge overnight, or place in the freezer for up to a week (if placing in freezer cover with foil, wrap it completely in plastic wrap, & wrap again completely with foil. Remove outer wrap of foil & plastic before baking).
  4. Bake in a 375F oven for 40-45min covered & 15-20 minutes without foil (if frozen add 10-15 minutes to each portion of baking).

IMG_1275

Summer of Rhubarb: Rhubarb-Raspberry Crisp

IMG_1232

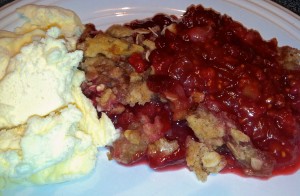
Cobbler, crumble, or crisp? What is the difference? I am still not clear. Depending on who you ask you get different answers. Everyone agrees that a cobbler has a biscuit type topping. A batter dropped in small spoonfuls giving the appearance of a cobbled road. When it comes to crisps & crumbles the answer is not so easy. Some say it depends on whether you live in the US or in Britain. Some say it has to do with whether or not the topping has oats in it. However, people do not agree on which baked good contains the oats. Some say the crumble has the oats while others say the crisps contain the oats. For my purposes, a crisp has a topping of flour, butter, nuts & oats. The oats crisp up while baking, hence the crisp. That is how I learned it so that’s how it shall be for me.

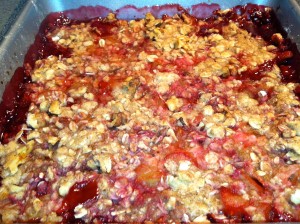
With that in mind, I decided to continue my summer of rhubarb with a crisp. They are so simple & quick. Plus, I had vanilla ice cream in the freezer I wanted to eat up so I thought it was a perfect combination.

Rhubarb-Raspberry Crisp

  • 3 cups fresh or frozen rhubarb
  • 2 cups fresh or frozen raspberries
  • 1/2 cup granulated sugar
  • 1/3 cup all-pupose flour
  • 1/2 cup oats
  • 1/2 cup packed brown sugar
  • 1/4 tsp cinnamon
  • dash or two of nutmeg
  • 1/4 cup cold butter
  • 1/4 cup chopped walnuts
  1. Preheat oven to 375F. Thaw fruit if frozen but do not drain. Place fruit in a 2 qt baking dish. Stir in the granulated sugar.
  2. In a medium bowl, combine flour, oats, brown sugar, & spices. Cut in the butter until mixture resembles coarse crumbs. Stir in the nuts. Sprinkle topping over fruit.
  3. Bake for 30-35 minutes (40 minutes for thawed fruit) or until fruit is tender & topping is golden. Serve warm with ice cream.


IMG_1235

Sunny Summer Strawberry-Cream Cheese Muffins

I have joked with people before about having reverse SADS. I know I don’t really have this but sometimes I feel like I do. I love the winter. I love being active in the winter & doing “wintery” things. Once spring rolls around, I feel let down. Maybe it’s due to the fact that spring in Minnesota is basically non-existent. A muddy, wet, cool climate that prohibits me from ice fishing as well as doing other outdoor activities. Or maybe it’s from the fact that I have always thought of fall as the beginning of the year due to being in school from ages 3-23. Fall, for me, has always felt like a time to start fresh.

With that being said, the reverse SADS only lasts a small amount of time & I always laugh at myself when I feel this quasi-sadness, but it does happen every spring. This year in Almost Canada, the spring sadness came in a bit later due to the season arriving late, but rolled away with what I assume to be summer. Sunny days. Warmish weather. Yard games & shooting my bow in the backyard. It also came with strawberries.

Berries are one of the great advantages of summer. Fresh & seasonally delicious. These muffins will make your days seem bright & sunny or just add to the bright & sunny goodness you are already experiencing. These muffins are cake-like & spongey. Enjoy for breakfast, as a tea-time snack, or heated up with ice-cream for dessert.

Sorry for the lack of photos but they all got eaten & given away before any could be taken.

Strawberry Cream Cheese Muffins (adapted from Raspberry-Cream Cheese Muffins)

  • 2/3 cup (5 ounces) 1/3-less-fat cream cheese, softened
  • 1/3 cup butter, softened
  • 1 1/4 cups sugar
  • 1/2 cup brown sugar, not packed
  • 1 tsp vanilla extract
  • 2 large egg whites
  • 1 large egg
  • 2 cups all-purpose flour
  • 1 tsp baking powder
  • 1/4 teaspoon baking soda
  • 1/2 teaspoon salt
  • 1/2 cup milk with 1/2tsp lemon juice
  • 2 cups fresh strawberries, sliced & diced
  • 1/4 cup finely chopped walnuts
  1. Preheat oven to 350°F.
  2. Combine cream cheese and butter in a large bowl. Beat with a mixer at high speed until well blended. Add sugar; beat until fluffy. Add vanilla, egg whites, and egg; beat well.
  3. Combine flour, baking powder, baking soda, and salt. With mixer on low speed, alternate adding the flour mixture and milk to cream cheese mixture, beginning and ending with flour mixture. Gently fold in strawberries and walnuts.
  4. Place 20 foil cup liners in muffin cups. Spoon batter evenly into liners. Bake for 25 minutes or until a wooden pick inserted in center comes out clean. Remove from pans & cool on a wire rack.