Summer of Rhubarb: Rhubarb-Strawberry Coffee Cake

Here in Minnesota, and many other places as well, summer means rhubarb. Everything rhubarb. I grew up eating the beloved strawberry-rhubarb pie which my grandmother would make every summer using fresh rhubarb from her garden. As I grew older, I realized how amazing & versatile rhubarb can be.

I love all things rhubarb. Pies, crisps & crumbles, tarts, sauces for dessert or for savory dishes. There are so many options for how to use it. When a co-worker asked me if I wanted any rhubarb I jumped at getting as much as I could until I start growing it. She gave me 14 cups which I separated into various quantities & stored in the freezer so I could just pull it out & cook with it when I wanted.

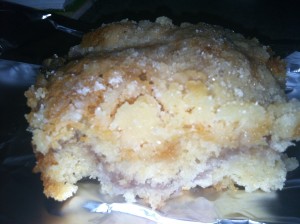
I began my summer of rhubarb on Sunday with a coffee cake from my Better Homes & Gardens cookbook.

Rhubarb-Strawberry Coffee Cake:

  • 3/4 cup fresh or frozen rhubarb cut into 1in pieces
  • 3/4 cup fresh or frozen unsweetened strawberries
  • 1/4 cup water
  • 1/4 cup sugar
  • 2 tbsp cornstarch
  • 1 1/2 cups all-purpose flour
  • 3/4 cup sugar
  • 1/2 tsp baking powder
  • 1/4 tsp baking soda
  • 1/4 cup butter
  • 1 egg, beaten
  • 1/2 cup buttermilk or sour milk (alternatively use 1 tbsp lemon juice & fill with milk to 8oz & let stand 5 minutes)
  • 1 tsp vanilla
  • 1/4 cup all-purpose flour
  • 1/4 cup sugar
  • 2 tbsp butter
  1. For filling, in a medium saucepan combine fruit & water. Bring to  boil. Reduce heat & simmer, covered, for about 5 minutes or until fruit is tender. Combine the 1/4 cup sugar & corn starch. Stir into the fruit. Cook & stir over medium heat until mixture is thickened & bubbly.
  2. In a medium bowl combine the 1 1/2 cups flour, 3/4 cup sugar, baking powder & baking soda. Cut in the 1/4 cup butter until the mixture resembles coarse crumbs. Make a well in the center.
  3. In another bowl combine the egg, buttermilk, & vanilla. Add the egg mixture to the flour mixture & stir until just moistened. Batter will be lumpy.
  4. Spread half the batter into an ungreased 8x8x2in baking pan. Spread filling over batter. Drop remaining batter in small mounds onto filling.
  5. In a small bowl stir together the 1/4 flour & 1/4 sugar. Cut in the 2 tbsp butter until the mixture resembles coarse crumbs. Sprinkle over the coffee cake. Bake in a 350F oven for 40-45minutes or until golden. Serve warm.

IMG_1134

Multiple Meals: Pizza, Lasagna, & Gravy

There is no story behind this post. I simply had too much food that needed to be eaten so it wouldn’t go to waste. Seeing as how I only like to eat the same thing a handful of times, I decided to split it into 3 meals (this also took care of a lot of meal planning for me for the week). Each can serve 2 & you get spare lasagna as well!

Prep for all 3:

  • Brown 1lb ground beef & 1lb hot Italian sausage together. Set aside 1 cup browned meat for gravy.
  • Sauté 2 yellow squash, 2 zucchini & 2 onions together
  • Prepare pizza sauce (mix all together)
    • (1) 6oz can tomato paste
    • 1/3-2/3 cup water (depends on consistency you want for pizza sauce)
    • ¼ olive oil
    • Dash Salt & pepper
    • 2tsp each Basil & oregano
  • Prepare pizza dough (makes 2 – 1 for pizza & 1 for another use within 1 week in the fridge covered loosely):
    • Mix in a large bowl: 1.5 cups warm water, 2 ¼ tsp yeast, 1tsp salt, 2 tsp sugar, ¼ cup olive oil
    • Add 3 cups bread flour using wet hands if needed to incorporate all the flour
    • Cover loosely and let rise for 2-2.5 hrs


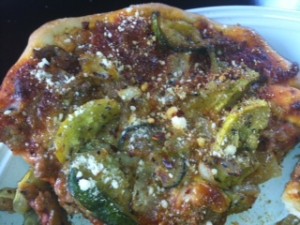
Pizza

  • Browned meat
  • Sautéed veggies
  • Pizza sauce
  • Half the dough
  • Mozzarella cheese
    • Preheat oven with pizza stone lightly coated with cornmeal at 450F for 30minutes. Roll out dough on a lightly floured pizza peel to be 1/8in thick.
    • Spoon half the sauce on the dough. Top with light sprinkling of cheese. You should still see the sauce through the cheese
    • Top with browned meat & veggies. Again, be light with toppings.
    • Slide onto stone & bake for 20-25minutes until crust is cooked through.

sausage pizza


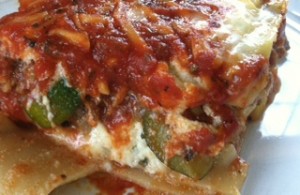
Lasagna (Makes 2 lasagnas. Each lasagna serves 2)

  • Browned meat
  • Sautéed veggies
  • Pizza sauce & 15oz can tomato sauce
  • 6-12 cooked lasagna noodles (depending on preference)
  • 1 container part-skim ricotta cheese
  • 1 egg
  • Mozzarella cheese
  • Basil & oregano
    • Mix pizza sauce & tomato sauce together. Add more basil & oregano to taste.
    • Mix egg & ricotta cheese. Add ¼ cup mozzarella cheese to this mixture.
    • Put ~1/4 cup sauce on bottoms of two loaf pans.
    • Cut noodles as necessary to fit pan (about 1-2 noodles per layer & 3 layers total).
    • Add a few tbsp ricotta mixture & spread over noodles. Top with browned meat & veggies. Top with more sauce. Repeat layer again & add some mozzarella cheese over the ricotta blend. For the final layer, use ricotta, mozzarella & sauce only. Cover with foil. Repeat for second lasagna. Bake immediately, after 24hrs in fridge, or within a week in the freezer.
    • If baking immediately, bake for 30 minutes with foil & 15-20 without foil. If baking after storing in the fridge for a day, bake for 40minutes with foil & 15-20 without. If baking from the freezer, bake for 60 minutes with the foil, & 15-20 without.

sausage lasagna


Gravy

  • 1 cup Browned meat
  • 1 cup Milk
  • 1 tbsp Flour
  • Pepper to taste
    • Put browned meat in skillet or pot. Reheat for a few minutes.
    • Add 1 tbsp flour to meat & sauté for 1-2minutes.
    • Add 1 cup milk & cook over medium heat until thickened & bubbly. Add pepper to taste.
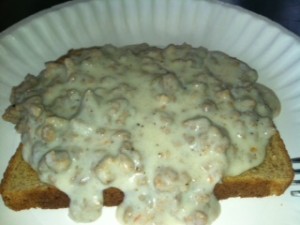
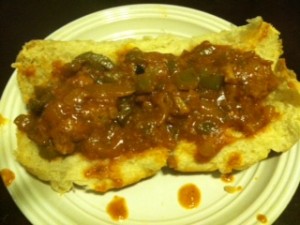
    • Serve over biscuits or toasted baguette slices (if all else fails, serve over a slice of toast like I did)


sausage gravy

Chicken or Cheese Rellenos

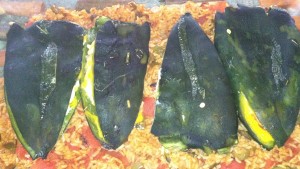
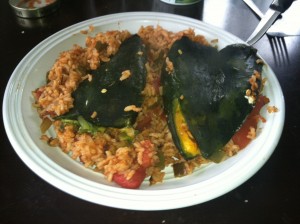
IMG_1091

Do you have a plan for dinner?

A question that I have become quite familiar with. The answer is yes & no. I am normally the one to make dinners. Every week I take some time to vaguely plan out a dinner menu. I write down a few ideas that I might do throughout the week & cross-check it with my fridge, freezer, & pantry.

As we had just run a commuting errand to get some food items, I knew I had poblano peppers to be used. I also knew I had cheese & salsa in the fridge, green bell peppers & jalapenos in the freezer, and rice, canned tomatoes, & taco seasoning in the pantry.

I said that I would make chile rellenos. I said it would be vegetarian. I received a look of disapproval or skepticism. Maybe a combination of the two. As I was pulling my ingredients together, I noticed that there was a leftover chicken thigh in the fridge. I said I could put in the rellenos & received a nonchalant reply but knew that this would be much preferred.

I decided to make half of the rellenos with chicken & half without. While the chicken had more substance, the cheese variation was much creamier & tasted more rich. They were both delicious & depending on your mood or taste preferences, either will satisfy your needs.

IMG_1093


While these may not be traditional, they are very good.

Chicken or Cheese Rellenos (serves 2)

  • 4 poblano peppers
  • 1 onion, chopped
  • 1 green pepper, chopped
  • 1 jalapeno, diced
  • 1 can diced, stewed, or peeled tomatoes with sauce (if you use whole or stewed tomatoes, give them a rough chop)
  • 1 cup instant rice
  • 1 cup water
  • 2-3 tsp taco seasoning (use prepared or make your own…see below)
  • 1/2 cup reduced fat cheddar cheese
  • 3-4 oz Neufchatel cream cheese
  • pulled or shredded cooked chicken (equivalent to 1 thigh or small breast)
  • salsa
  • sour cream, optional

If you are making your own taco seasoning mix together the following in a small dish…

  • 1 tbsp. chili powder
  • 1 tsp cumin
  • 1 tsp paprika
  • 1/2 tsp salt
  • 1/2 tsp pepper
  • 1/4 tsp garlic powder
  • 1/4 tsp onion powder
  • 1/4 tsp crushed red pepper or cayenne
  • 1/4 tsp oregano
  1.  Place poblano peppers on a cooking sheet & place under broiler. Broil for 3-5 minutes per side until skins are blistered. Place peppers into a bowl & cover with pastic wrap or place in a gallon sized plastic bag. Let sit for 10 minutes & remove skins. Slice open on one side & remove seeds. Add 2 tbsp. cheddar cheese to each pepper. Add 1-2 tbsp. cream cheese. Add salsa as desired. Add pulled chicken to two of the peppers. Close peppers.
  2. Meanwhile, chop the onion, green pepper, & jalapeno. Sauté in a small amount of olive oil over medium heat until caramelized. Add the tomatoes & the water. Bring this to a boil & stir in the rice & taco seasoning. Cover & remove from heat. Let sit for 5-8 minutes until rice absorbs liquid.
  3. Pour rice into a 9×13 in casserole dish. Top with peppers. Bake in a 400F oven for 20-30 minutes until cheese is melted. Serve with additional salsa & sour cream if desired.


Multiple Meals: Red Chard

I’ve mentioned numerous times that my grocery store leaves something to be desired. I cannot get most things I want to cook with even if they are seasonal. A few days ago I drove 2hrs to get some supplies for house renovations as well as groceries. This occasional commute has become a norm for me as of late. It doesn’t really bother me, it is just a way of life now. I ended up buying some chard to cook with as I cannot get any fancy greens in my grocery store. I didn’t know what I would use it for at the time, but I knew I needed it.

On Sunday I spent about 4hrs in the kitchen which is a nice way for me to relax. With all of the ice fishing I have been doing I have not been in the kitchen as often as I would like. It’s hard to juggle hobbies. Anyhow, I knew I needed to use the chard, make French Onion soup as I had way too many onions (thus requiring me to make bread), make lunch & dinner, & bake something (I was leaning towards cookies). It sounds more ambitious than it really was. In the morning I prepped bread for baguettes and planned out my day…

  1. Bake bread
  2. Make lunch
  3. Make soup (to be eaten with dinner & give leftovers for the next day’s lunch)
  4. Bake cookies
  5. Make dinner

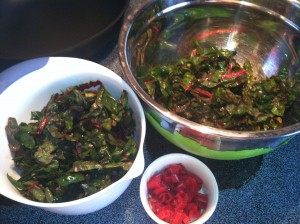
I decided to divvy up the chard into 2 portions – one to be used with lunch & one to be used with dinner (each can serve 2).

IMG_1077

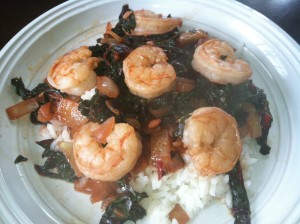
I ended up making Asian Garlic Shrimp & Chard over rice for lunch. Fast, delicious, & healthy.

IMG_1079

I then proceeded to make French Onion soup. While that was cooking I made cookies which quickly began to disappear.

IMG_1088

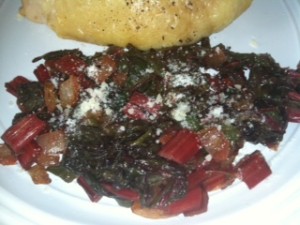
After all of this was completed, I started on dinner. I made lemon-parmesan chard & served it with roasted chicken thighs and some French Onion soup.

chard


Asian Garlic Shrimp & Chard  (Serves 2)

  • olive oil or cooking spray
  • 1/2 bunch red chard, roughly chopped & stems removed
  • 1 onion, chopped
  • 1-2 cloves garlic, minced
  • 2-3 tsp reduced sodium soy sauce
  • 2-3 tsp rice vinegar
  • 1 tsp sesame oil
  • 12-14 uncooked shrimp, deveined & peeled
  • 1 1/2 cup cooked white rice
  1. Mix soy sauce, vinegar, & sesame oil together. Set aside.
  2. Coat a non-stick skillet with olive oil or cooking spray & heat over medium heat.
  3. Sauté onion for 5-10minutes until softened.
  4. Add garlic & sauté for 2 minutes.
  5. Add swiss chard & 1/4 cup water. Sauté until chard is wilted & water has evaporated.
  6. Add shrimp & sauce. Cook for 2minutes per side or until shrimp is cooked through. Serve over cooked white rice with additional soy sauce & hot chili sauce if desired.


Lemon-Parmesan Chard

  • olive oil
  • 1/2 bunch red chard, roughly chopped (chop a few of the stems as well)
  • 1/2 small onion, chopped
  •  2-3 tsp lemon juice, or more to taste
  • parmesan cheese
  1.  Coat a non-stick skillet with olive oil & heat over medium heat.
  2. Sauté onion for 10-20 minutes until softened & caramelized to your liking.
  3. Add the stems of the chard & cook for 3-5minutes until softened.
  4. Add the chard & sauté until wilted. Spritz (or saturate) with lemon juice to your liking.
  5. Top with parmesan cheese & serve with whatever you desire. I served it with roasted chicken.


Breakfast Lasagna

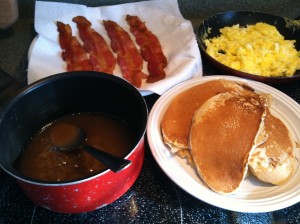
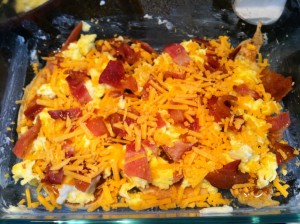
On the weekends, particularly Sunday, I like to have something different for breakfast if possible. Considering all I had was bacon & eggs, I decided I would just make pancakes to go along with that. Nothing special. As I was gathering all my supplies, I thought…why not make it more fun and turn it into Breakfast Lasagna. The pancakes can be the noodles, the bacon & eggs could be the meat, I have cheese, and couldn’t the syrup become some sort of sauce? Yes. Yes. Yes. Thus, Breakfast Lasagna was made. The best part is that you can use whatever you have on hand & make it your own. Sausage, bacon, ham, none of the above? It doesn’t really matter. It’s whatever you feel like throwing together. Here is what I did…

Bacon

  1. Cook 4 slices bacon in a skillet over medium to medium high heat until crispy or preheat the oven to 400F and bake on a foil lined baking sheet for 15-20minutes until crispy. (I always bake my bacon as it turns out more even & is out of the way while I prep other things).
  2. Set bacon on a paper towel lined plate & pour bacon grease into a small pot (if you baked your bacon) or keep in the skillet for later use.

Pancakes (use your own recipe or follow this one)

  • 1/2 cup all-purpose flour
  • 2 tsp sugar
  • 1/2 tsp baking powder
  • 1/8 tsp baking soda
  • 1/8 tsp salt
  • few dashes cinnamon
  • 1 egg white or the whole egg if you desire
  • 1/2 cup buttermilk or sour milk (or 1/2tbsp lemon juice and 1/2 cup milk that stood for 5 minutes)
  • 1/2tsp vanilla extract
  • butter or cooking oil for cooking the pancakes
  1. Combine all the dry ingredients in a medium bowl.
  2. Combine all the wet ingredients in a small bowl.
  3. Add the wet ingredients to the dry ingredients & stir until just combined.
  4. Preheat a skillet over medium heat. Add a small pat of butter to coat the skillet.
  5. Pour batter* into skillet and cook until pancakes are golden brown, turning to second side when they have turned bubbly & the edges are slightly dry. Cook the second side until pancakes are golden brown. Approx. 2min per side.

* Make whatever size pancakes will fit into a small casserole dish or oven safe container so you don’t have to tare them as much. I made oval pancakes.

Scrambled Eggs

  1. Whisk 4 eggs & a few tbsp milk together until smooth.
  2. Pour into a small greased skillet that has been heating over medium heat.
  3. Let sit until edges start to set – approx 1 minute. Using a wooden spoon or a spatula, scrape the sides of the eggs to create large curds. Continue in this manner until the eggs are cooked through. Set aside.

Maple Bechamel

  1. Place the skillet or small pot with reserved bacon grease over medium-low to medium heat.
  2. Add a small pat of butter & stir until almost melted. Add a tbsp flour and stir into bacon-butter mixture.
  3. Add approx. 1/2 cup maple syrup to this and mix constantly until thickened & bubbly. Set aside.

Assembly

IMG_1051

  1. Preheat the oven to 400F if you did not bake your bacon. If you did, keep the oven set at this temperature.
  2. Take a small casserole dish or oven safe container and grease the bottom & sides.
  3. Place a layer of pancakes (approx half the pancakes) on the bottom.
  4. Coat the pancakes with half of the béchamel sauce.
  5. Top with half the eggs.
  6. Crumble the bacon and place half on top. 
  7. Add a small amount (a few tbsp) of cheddar cheese over this.
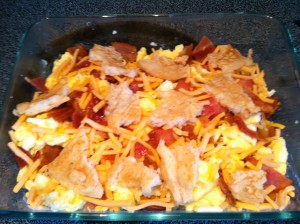
    IMG_1053
  8. Repeat layers. (I had one pancake leftover so tore it into small pieces & placed it over the top).

IMG_1054

9. Cover with foil and bake for 10min. Remove the foil & bake for 5-10min more.

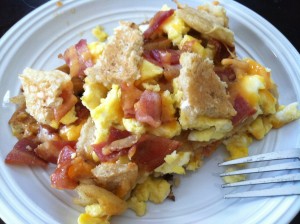
10. Cut into 2 pieces & serve with additional syrup if desired.

IMG_1058


Raisin Bread: To Yeast or not to Yeast

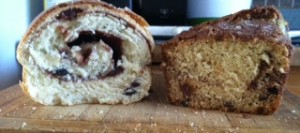
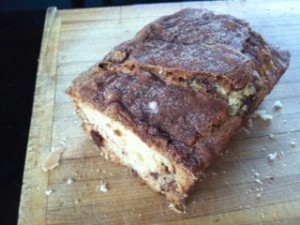
I have never liked raisins. Not even as a child. I would rather eat nothing than eat raisins. A while back I did a battle of Oatmeal Raisin Cookies and I have been sitting on a bag of raisins ever since. I don’t like them in salads or cookies but on occasion I have eaten Cinnamon Raisin Bread and enjoyed them that way. I decided to try a few different recipes to see if I could begin to use up my supply. I made one bread recipe with yeast & a quick bread recipe (with no yeast).

raisin both

I went with the no yeast recipe first. I love making quick breads. They are so “quick” & easy as the name implies. They almost always turn out delicious & moist which are the two basic criteria for a successful quick bread.

Cinnamon Raisin Quick Bread

  • 2 cups all-purpose flour
  • 1 ½ cups granulated sugar, divided
  • 1 tbsp cinnamon
  • 1 tsp baking soda
  • ½ tsp salt
  • 1 egg
  • 1 cup buttermilk or sour milk (I used 1tbsp lemon juice and enough milk to make 1  cup & let stand for 5 minutes)
  • ¼ cup vegetable oil
  •  1/3  cup raisins
  1. Preheat oven to 350°F. In a medium bowl combine flour, 1 cup sugar, baking soda, and salt.
  2. In a small bowl whisk egg, buttermilk, and oil. Add the wet ingredients to the dry & stir until just combined. Fold in raisins.
  3. Combine cinnamon and remaining sugar; set aside.
  4. Spoon half the batter into a greased loaf pan. Sprinkle with half of the reserved cinnamon-sugar; repeat layers. Cut through batter with a knife to swirl.
  5. Bake 55-65 minutes or until a toothpick inserted in center comes out clean. Cool in pan 10 minutes before removing from pans to wire racks. Let cool completely.

raisin no yeast_2

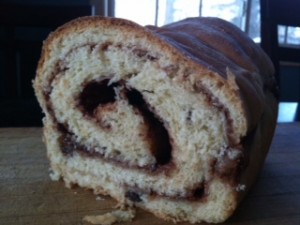
Cinnamon Raisin Bread

  • ½ cup milk
  • 1/3 cup warm water, approximately 110F
  • 2 ¼ tsp active dry yeast
  • 1 egg
  • ¼ cup butter, softened
  • ¼ cup granulated sugar
  • ¼ tsp salt
  • 1/3 cup raisins
  • 2 cups all-purpose flour plus a few tablespoons (to reach desired consistency)
  • ½ cup granulated sugar
  • 1 tbsp cinnamon
  1. Add warm water to a medium bowl. Stir yeast in water and set aside, about 5-10 minutes.
  2. Meanwhile, warm milk in a small saucepan or microwave until it just starts to bubble. Let cool until lukewarm.
  3. Mix in egg, 1/4 cup sugar, butter, salt and raisins to yeast mixture. Stir in the cooled milk slowly.
  4. Add the flour gradually to make a stiff dough. Knead the dough on a lightly floured surface for a few minutes until smooth.
  5. Grease a large bowl and place the dough inside turning to lightly grease all sides of the dough. Cover loosely with a warm, damp cloth.
  6. Let rise until doubled in size (approximately 2 hrs).
  7. Roll dough out on a lightly floured surface into a large rectangle, approximately 1/2 inch thick.
  8. Moisten the surface of the dough with 1 tablespoon milk.
  9. Mix together ½  cup of sugar & 1 tbsp cinnamon and sprinkle mixture evenly on top of the moistened dough.
  10. Roll the dough tightly (the long way). Tuck under ends and pinch bottom together.
  11. Place a piece of parchment paper inside the loaf pan (for easy removal), grease with butter, and add the loaf. Let rise uncovered for about an hour.
  12. Place in cold oven and set to 350F. Bake for 60minutes until lightly browned and the loaf sounds hollow when tapped.
  13. Cool for 10 minutes in pan.
  14. Remove from the pan and let cool completely.

raisin yeast


Results:

Both breads were scrumptious. However…the yeasted bread was exceptional! The texture was what one would expect from a Cinnamon Raisin Bread & it looked more pleasing to the eye as the swirls were very pronounced. The cinnamon swirls were also more sticky compared to the quick bread. When you bit in to the quick bread, it had a sugar-cinnamon crust on top and in the middle, whereas the swirls in the other were slightly crispy & slightly gooey & sticky all at the same time.

Definitely take the time to make the bread with yeast. Also, the recipe can easily be doubled or tripled so you can make many loaves at once and place some in the fridge to bake at a later date. If this is done, once the dough is rolled out and rolled back up with the cinnamon-sugar mixture, cut in half or into thirds depending on how many loaves you are making. Place in the loaf pan with parchment paper and cover loosely. Place in the fridge and use within 1 week. When ready to bake, let stand on the counter or in a cold oven for 1 hour. Proceed to bake as previously directed.


Spring or Not Spring


According to the calendar it is currently Spring. For many people in Minnesota it does not feel like spring though. The winter has been long & has rolled into spring like it frequently has in the past. This year as I gaze out into my backyard, this is what spring looks like:

spring


What a beautiful December, I mean March Day. I never understood when people said they loved spring. Spring has always been my least favorite season. Generally, it keeps snowing, or it begins to melt and everything looks gross, brown, grey, and wet.

Spring does mean different produce though. Asparagus in the grocery store means spring has arrived. Asparagus in my grocery store means I hit the jackpot since my store has nothing. I bought the asparagus and decided to use it to make a Chicken, Asparagus, & White Sauce Pizza. No matter what season it is or feels like, this pizza is exquisite.

Pizza Dough from Artisan Bread in Five Minutes a Day (makes 4 1lb dough balls)

  • 2 ¾ cup lukewarm water
  • 1 ½ tbsp granulated  yeast or two packets
  • 1 ½ tbsp kosher salt
  • 1 tbsp sugar
  • ¼ cup olive oil
  • 6 ½ cup unbleached all purpose flour or 6-6 ¼ cup bread flour
  1. Mix all ingredients except the flour.
  2. Add the flour without kneading. Use wet hands to incorporate the last bit of flour.
  3. Cover the container (not airtight) for 2 hrs.
  4. Use immediately or place in the fridge until ready. Use within 12 days.

White Pizza Sauce 

  • 2 tbsp. butter
  • 2 tbsp. flour
  • 1 cup milk
  • dash cayenne
  • dash nutmeg
  • 1/4 cup freshly grated parmesan cheese
  1. Melt butter over medium heat in a skillet
  2. Stir in flour and cook for 1-2 minutes
  3. Stir in milk and whisk until thick & bubbly.
  4. Add seasonings and cheese. Stir until combined.

Chicken & Asparagus Toppings

  • 1-2 chicken breast or 3 thighs cut into 1in pieces
  • 1/2lb bunch asparagus
  • olive oil
  1. In a skillet heat olive oil over medium to medium-high heat.
  2. Add cut-up chicken and sauté until just cooked through. Remove from heat & set aside
  3. Meanwhile, in large pot, bring salted water to a boil.
  4. Chop asparagus into 1in pieces and blanch for a minute.
  5. Drain & run under cool water until the asparagus are cool to the touch

Assembly & Baking

  • 1/4 cup parmesan cheese
  • 1/3 cup mozzarella cheese
  • cornmeal
  • flour
  1. Preheat the oven to 450F with a heat stone inside the oven. Do this 20minutes before baking.
  2. Sprinkle cornmeal on the pizza stone and flour on the counter.
  3. Take a 1lb portion of the dough and place on the floured surface and roll into a circle that is 1/8in thick (or some sort of shape that looks like pizza).
  4. Spread sauce on the surface leaving a 1in border. Place more parmesan cheese on the sauce (roughly 1/4cup).
  5. Top with chicken & asparagus.
  6. Top with mozzarella cheese lightly (roughly 1/3 cup).
  7. Bake for 15-20 minutes until the crust is cooked through & cheese is melted & bubbly.

IMG_1030


Multiple Meals: Walleye

If you know me at all you know I go ice fishing and have an abundance of Walleye in my freezer. I try to cook it in a different fashion every week. This week I decided I would bread it & bake it. The problem, however, is that I am cooking for 2 and my vacuum sealed walleye is really for 4 people. Obviously, leftover breaded & baked walleye will not re-heat very well.  That left me with the question on how to prepare all the walleye in a tasty manner & so that it would not go to waste which leads to the next installment of multiple meals.

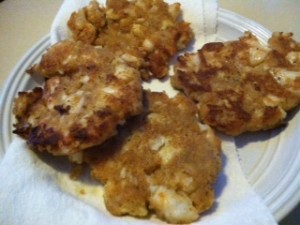
Making multiple meals with fish seemed daunting. I didn’t want to cook half the fish & leave the other half in the fridge to dry out or lose oils for the next night’s dinner. My first thought was to prepare a Seafood Chowder that could be eaten for lunch but I didn’t have any clam juice or cream of potato soup which is my preferred way of making it. I then thought of other recipes I had been meaning to try & I hadn’t made walleye cakes yet. I thought I could try and make walleye cakes that could be eaten for breakfast with eggs. I figured I would bake the rest of the fillets with my breaded fillets & then I could put them in the fridge for the next day to flake, mix up with all the other walleye cake ingredients, & finally cook them.

Baked Walleye

  • ½ vacuum sealed bag walleye (roughly 4 small fillets or 2 medium fillets). See Walleye Breakfast Cakes below for using the rest of the fillets.
  • 1 egg, beaten
  • Splash of milk
  • Breadcrumbs
  • Mashed potato flakes
  • Grated parmesan cheese
  • Seafood seasoning
  • Seasoned salt
  • Pepper


Preheat the oven to 400F.

Place the egg in a small to medium bowl with the splash of milk.

Place equal parts breadcrumbs, mashed potato flakes, and grated parmesan cheese on a plate or in a bowl. Mix in seafood seasoning, seasoned salt, & pepper to taste.

Dip the fillets in the egg mixture and allow the excess to drip off.

Place the fillets in the breadcrumb mixture & then place on a lightly greased baking sheet.

Bake for 15-20 minutes until the fish flakes apart easily.

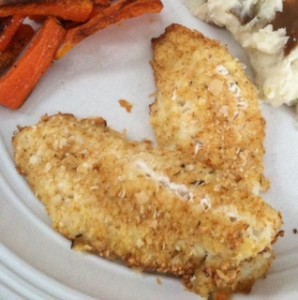
Serve with sides of your choice. I served them with roasted carrots & mashed potatoes & gravy.

baked walleye


Walleye Breakfast Cakes

  • ½ vacuum sealed bag walleye (roughly 4 small fillets or 2 medium fillets) previously cooked*
  • 1 egg
  • 2-3tbsp Mayonnaise
  • 1-2tsp Lemon juice
  • 1/4-1/3 cup Breadcrumbs
  • Seafood seasoning
  • Seasoned salt
  • Pepper
  • Oil
  • Eggs served to your preference


*To the half of the fillets for the walleye cakes, place them on the baking sheet with the breaded walleye (recipe above). Lightly season with seafood seasoning & drizzle with cooking wine or olive oil. Cook along with the breaded fillets. Once cooked, place these un-breaded fillets in a medium mixing bowl in the fridge covered with plastic wrap.

Shred the fillets cooked previously in the mixing bowl (the advantage of shredding them the next day is that you get nicely sized walleye chunks).

Add all the ingredients except for the oil & the eggs that you will cook to your preference.

Mix the ingredients & form into patties (makes roughly (4) 3in patties – 2 for each person).

Place a small amount of oil in a skillet over medium to medium-high heat & cook the walleye cakes for 2-3 minutes per side until golden brown & heated through. Place on a paper towel to drain off excess oil.

walleye cakes

Cook eggs to your preference (over easy, poached, etc) and serve over walleye cakes. Drizzle with sweet chili sauce if desired.

walleye with eggs

Multiple Meals: Ground Beef & Italian Sausage

To continue the theme of Meal Planning, I shall share some things I do to make multiple meals. I am usually cooking for 2 while many recipes are for 4 people. I either make the recipe as is and we have leftovers or I decide to make two separate dishes. In this first installment of Multiple Meals, I use a pound of ground beef & a pound of Italian sausage and make 2 different dinners but each can be eaten twice.

The first thing that needs to be done is to combine both meats together & then divide the meat mixture in half (now you have two separate pounds of combined meat). Brown one of the halves of meat with an onion and set aside for prepping two lasagnas. To the other half, we will be making meatballs. One for spaghetti & the other for sandwiches.

Meatballs

Take the half of meat that is for the meatballs (1lb) and add the following:

  • 1 slice milk soaked bread (place a piece of bread on a plate and pour milk over it so that it is saturated all the way through. Squeeze out the excess).
  • 1 clove garlic, minced
  • ¼ tsp each salt & pepper
  • ½ tsp each basil & oregano
  • 1 onion, chopped
  • 1 beaten egg
  • 2-3tbsp parmesan cheese

Take half of this mixture & place in the fridge for the next night’s dinner*

To the other half, form the meatballs by hand (roughly the size of a golf ball) and place on a baking sheet lined with parchment paper. Bake in a 450F oven for 5-8 minutes until browned. Remove from the oven.

Meanwhile, chop an onion & a green pepper and sauté in a large skillet in a small amount of olive oil over medium low heat for about 20-30 minutes until caramelized to your liking. Add a minced clove of garlic and sauté for about 2 minutes. Add 8oz canned tomato sauce, 1/2 tsp. oregano, 1/2 tsp. basil, and salt & pepper to taste. Add the meatballs to the skillet and cook over low heat while covered for 20-30 minutes. Top with parmesan cheese if desired & serve over cooked spaghetti noodles.

The next night you can prepare exactly the same way and serve in a hoagie bun for meatball sandwiches.

meatball

* If desired you can prep all the meatballs and sauce at once if you are having the sandwiches for lunch or if you know you are crunched for time the next day. Just reheat when ready to eat.


Loaf Pan Lasagna

For the lasagna, we will be making two lasagnas (in loaf pans) that serve two each.

  • 1lb meat previously browned with an onion
  • 8 cooked lasagna noodles
  • 16oz ricotta cheese (I used part-skim)
  • 1 egg
  • ¼ tsp pepper
  • ½ tsp each oregano & basil
  • 1.5-2 cups mozzarella
  • 1 26oz jar spaghetti sauce or make your own
  • ¼ cup Parmesan cheese (& more for sprinkling if desired)

Either the day you brown the meat with the onion or the next day after it has been browned prep the lasagnas as follows:

Mix ricotta, egg, seasonings, & 1/4 cup parmesan cheese in a bowl for the filling.

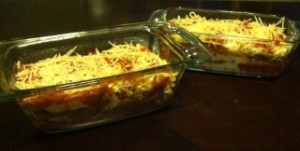
Place approximately 1/4 cup spaghetti sauce on the bottom of each loaf pan. Place two noodles on top of the sauce. Cut or overlap as necessary. Place 1/6 of the ricotta filling on the noodles and spread into a thin layer (approximately 1/3 cup). Sprinkle with mozzarella cheese. Place 1/4 of the browned meat on the filling. Top with more spaghetti sauce. Next place one noodle over the sauce cutting as necessary. Repeat filling, cheese, meat, & sauce layers once. Finally, place one noodle over the sauce and top with the rest of the ricotta filling, mozzarella, and sauce. Sprinkle with parmesan cheese if desired.

Put one in the fridge for night 3 (night 1=spaghetti & meatballs, night 2=meatball sandwiches, night 3=lasagna) and one in the freezer. Cover the one in the fridge with aluminum foil. To the one placed in the freezer make sure to cover with aluminum foil, wrap all the way around in plastic wrap, & wrap again all the way around but with foil. Use within 1-2weeks for ideal flavor.

lasagna


Fridge lasagna: Preheat the oven to 375F. Bake with the foil covering for 40minutes. Remove the cover & continue to bake for 20minutes. Let sit for 5-10 minutes.

Freezer lasagna: Preheat the oven to 375F. Remove extra foil & the plastic. Bake with the foil covering for 1 hour. Remove the cover & continue to bake for 20minutes. Let sit for 5-10 minutes.

Mint Chocolate Balls

I used to love Girl Scout cookies. Over the years, however, I feel that the quality has gone south as many food items tend to do in the quest for “healthier” or just cheaper ingredients. One cookie I never liked was the Thin Mint. I am the exception though. Everyone else I know loves this cookie & many store them in the freezer. I have never been a fan of mint desserts. I prefer mint in gum & teeth products. That is it. It is always odd to see people’s expressions when I decline a mint candy or cookie around the holiday season. They looked so confused.

One person who never declines a mint cookie or candy is my fishing guide. He loves those Girl Scout cookies & any other form/brand that they come in. This past week he has been gone for work so I decided that as a welcome home treat I would attempt to make them myself. I pulled a recipe and went to the kitchen.

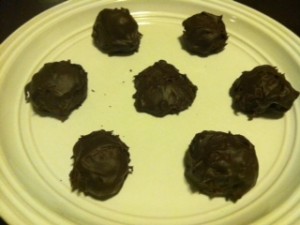
Clearly I should have looked at more recipes. This one was not that great. The dough, which was said would be crumbly, was an understatement. In an attempt to help hold it together I added a tablespoon of milk but the dough was still like that of a Russian tea cake or pfeffernusse cookie. In the end I decided to make balls like those other cookies that the dough resembled instead. The result was very close in flavor. My fishing guide asked if they were crushed up thin mints in chocolate. Jackpot! The next time I make them I will try for a different dough in order to make them actually look like the beloved Thin Mint Girl Scout Cookie.

Chocolate Mint Balls (note this recipe only makes about 1.5 dozen as I wasn’t sure how it would turn out. Double the recipe if you want more cookies)

-1/2 cup (1 stick) butter, at room temperature
-1/2 cup powdered sugar
-1/2 tsp vanilla extract
-1/2 cup unsweetened cocoa powder
-1/4 tsp salt
-3/4 cup all-purpose flour
-4oz. semi-sweet chocolate
-1/2 tsp peppermint extract
-1 tbsp milk

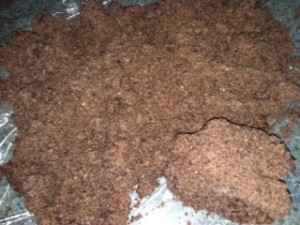
In a medium bowl cream the butter until light. Add the powdered sugar and continue mixing. Add the vanilla, salt, cocoa powder & flour and mix well. Add in a tablespoon of milk & mix until just combined. Turn the dough out onto a large piece of plastic wrap. The dough will be very crumbly and will only slightly hold together if pressed firmly.

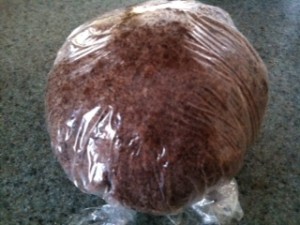
mint dough

Wrap the dough in the plastic wrap while pressing into a ball. Chill for 30-60 minutes.

mint dough ball

Preheat the oven to 350F. Grab chunks of dough and press into a small ball. (Do them on the smaller side so the cookie to chocolate ratio is more like that of a thin mint. Too much cookie will be dry since they are balls and not flat rounds). Place cookies on a baking sheet lined with parchment paper and bake for 10-15 minutes. Cool the cookies completely.

Once the cookies are cooled, melt the chocolate in a double boiler or the microwave, stirring after every 30 seconds. Stir in the peppermint extract.

Using a fork, roll cookies completely in the chocolate. Let the excess drip off & place dipped cookies on a baking sheet lined with wax or parchment paper to set. Store cookies between layers of wax paper in an airtight container in the fridge or freezer.

mint balls