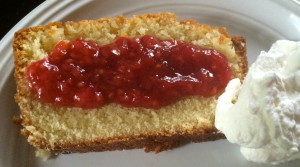
Summer of Rhubarb: Pound Cake with Rhubarb Sauce

IMG_2306


In for a penny, in for a pound.

A phrase I am not too familiar with. I am not that type of a person. I don’t have an all or nothing mentality. I am fine with moderation. I am content with not taking high-stakes risks. Although sometimes you do have to take them. There are moments when the world presents you with opportunities which are all or nothing.

That’s what happened to me 2 years ago. I went ice fishing up north with my guy and said that I wanted to move there. He agreed. We wanted to leave the cities, the constant rushing around, the rat-race as they say. I jokingly began looking for jobs and realized that there were opportunities for me as a chemist in this small town in Almost Canada.

Then I got the job offer. Now things were real. It wasn’t just a dream or fantasy any longer. My guy and I had to make a choice. Do we do it? Get up and move? Change everything? Risk losing everything?

For me the risks were not that great. I had a job offer. I could easily pack up and move. My guy, however, had a house and job in the cities. He had to be willing to lose everything. We both knew that it was now or never and decided to go for it. It was time to hit the reset button.

This was easier for me. I accepted the job. I took a pay cut. I cashed out my 401K. I bought a house. I started over. My guy had a lot to lose. He did end up losing his job. And now the prospect of losing his house and credit is very real.

That was a risk he was willing to take. A risk that is becoming reality. Everything that he spent his whole life working for is disappearing.

We both went all in…In for a penny, in for a pound. I cannot thank him enough. I appreciate everything he has done. The reset button for me was fairly quick and painless. For him it has been a slow process and is still on-going. He was willing to lose everything to slow things down and move to Almost Canada with me. To actually enjoy more of life. I know when it is all said and done, by losing all these things we both are gaining so much more.


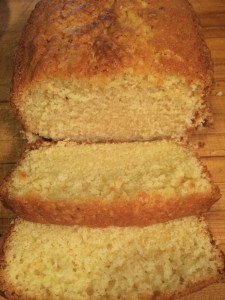
Pound Cake

  • 1 stick butter, softened
  • 1 1/2 cups granulated sugar
  • 3 eggs
  • 1 1/2 cups all-purpose flour
  • 1/2 tsp salt
  • 1/2 tsp baking powder
  • 1/2 cup whipping cream
  • 1 tsp vanilla

Cream together the butter and sugar until the mixture is light & fluffy (about 3-5 minutes). Mix in the eggs one at a time scraping the sides of the bowl as needed. Add the flour, salt, and baking powder all at once. Mix until combined. Add the whipping cream and mix until just incorporated. Stir in the vanilla. Pour into a buttered & lightly floured loaf pan. Place in a cold oven. Set the oven to 325F and bake for 80 minutes. Remove from the oven and let cool in pan on a wire rack for 10-15 minutes. Remove from pan and let cool completely on a wire rack.

IMG_2305

Rhubarb Sauce

  • 3 cups fresh or frozen rhubarb
  • 1 cup fresh or frozen raspberries
  • 1/2 cup water
  • 1/2 cup granulated sugar
  • 2 tbsp corn starch
  • ginger and/or cinnamon

Place the fruit (I used frozen) and water in a medium saucepan and bring to a boil. Reduce heat and simmer for 5 minutes. Stir together the sugar & corn starch. Stir the mixture into the fruit. Cook for 2-3 minutes. Stir in ginger and/or cinnamon if desired (I did a few dashes of both).

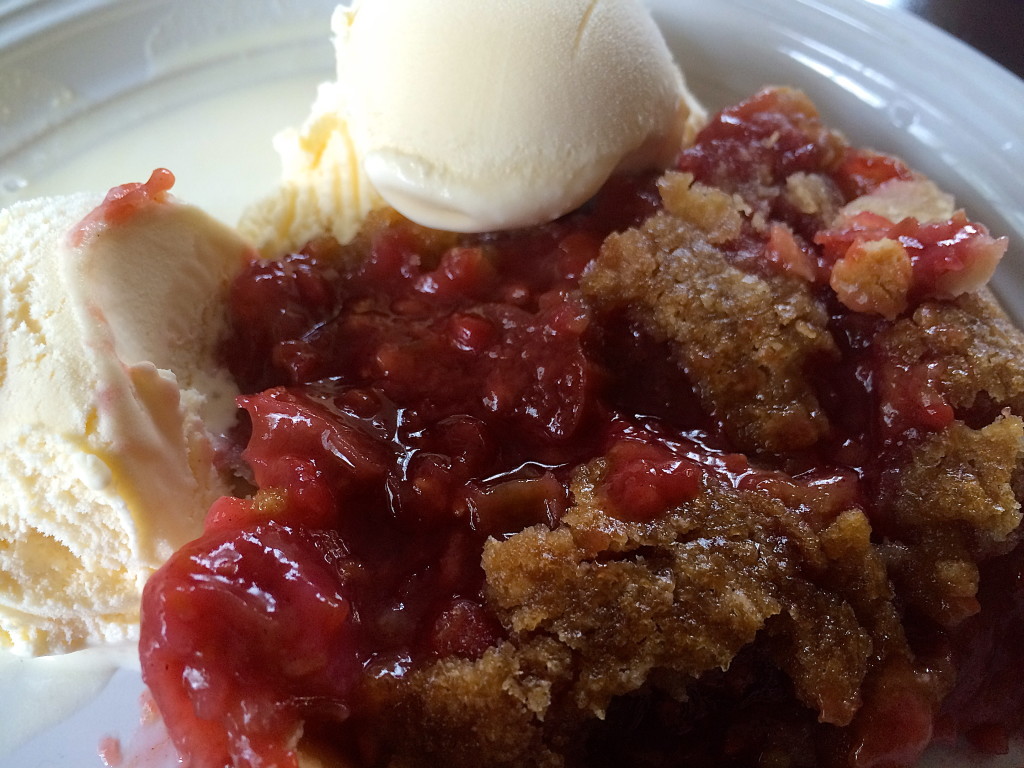
Note that this recipe makes a lot of sauce. Use as a topping for ice cream or in other baked goods such as Oatmeal Rhubarb Bars which is what I did with mine.

Whipped Cream

  • 2 tbsp sugar
  • 1 cup heavy whipping cream
  • 1/2 tsp vanilla

Place bowl and metal whisk in freezer for 10-15 minutes. Place sugar, cream, and vanilla in bowl. Whisk until mixture forms stiff peaks. Use immediately or place in the fridge.

Summer of Rhubarb: Rhubarb-Raspberry Pie


IMG_2271


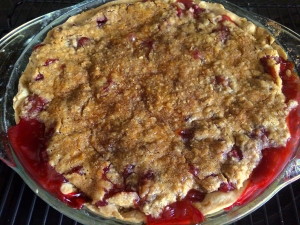
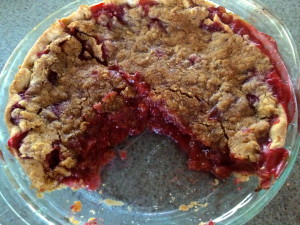
Memorial Weekend is the kick-off to summer. Fishing, gardening, barbecues, and fruit pies. In Minnesota, rhubarb pies are very common and for me, summer is also about rhubarb. It was a no-brainer that for my Baking Sunday this memorial weekend I decided to make a Rhubarb-Raspberry Pie using some frozen rhubarb that I had from last summer.

What a great way to kick-off the Summer of Rhubarb.

IMG_2275

Rhubarb-Raspberry Pie

  • For the crust… (use store-bought or your favorite recipe. This is my quick go-to cause I always have these ingredients in my pantry)
    • 1 1/4 cups all-pupose flour
    • 1/4 tsp salt
    • 1/3 cup shortening
    • cold water
  • For the filling…
    • 4 cups fresh or frozen rhubarb
    • 2 cups fresh or frozen raspberries
    • 1/2 tsp cinnamon
    • 3/4 cup sugar
    • 1/3 cup flour
  • For the crumb topping…
    • 1/2 cup flour
    • 1/2 cup packed brown sugar
    • 3 tbsp cold butter


Crust: Combine the flour and salt in a medium bowl. Cut in the shortening until the mixture is in pea-size chunks. Add cold water a tablespoon at a time, pushing the moistened dough to the sides. Add enough water until the dough is moist enough to hold a ball shape. Lightly flour a clean surface and roll out the dough to be 1/8 in thick. Line a 9in pie plate with pastry. Crimp edge as desired.

Filling: Stir together the sugar, flour, & cinnamon. Add the fruit. Gently toss until coated (if using frozen fruit let stand for 45 minutes until the fruit is partially thawed but still icy).

Crumb topping: Stir together the flour & sugar in a medium bowl. Cut in the butter until the mixture resembles coarse crumbs.

Assembly: Pour the prepared filling into the pastry lined pie plate. Top with crumb topping. Line edge of pie plate with foil to prevent overbrowning. Bake in a 375F oven for 25 minutes (50 minutes if using frozen fruit). Remove foil and bake for another 30-40 minutes until crust & topping are golden and filling is bubbly). Let cool on a wire rack for at least 2 hrs (this will prevent your pie from running all over the place). Serve with vanilla ice cream if desired.

IMG_2273


Boston Cream Pie, Deconstructed

I’ve been on vacation for about a month. Well, not exactly, but it feels as such. I  spent time in Florida, went turkey hunting (which I shall write about shortly), and went to Arizona. Thus, I have not been baking. As I set out to bake on Baking Sunday for the first time in a long time, I had no idea what I wanted to make.

I knew I didn’t want to make cookies or brownies as those are my go-to baked goods. I wanted to do something a bit different. Not necessarily fancy or complicated, but just not my norm. I was thinking cake. After much deliberation (yes I deliberated over this trivial matter) I decided to make Boston Cream Pie. I have never made one before so figured I should give it a go.

I prepped the filling and it looked superb. I prepped the batter and popped the cake in the oven. It came out looking amazing & smelled even better. I let it cool slightly and went to invert the pan and…it did not come out of the pan the way it was supposed to come out. All bakers have experienced this. Part of the bottom of the cake remained in the pan during the inversion process and it resulted in a split cake.

At first I thought it would be OK. I had to slice it in half anyway for the two layers required for the finished good but it had split in a way that this would not be possible.

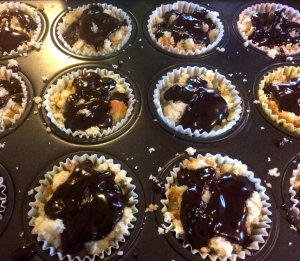
I sat there grumpy, tapping my nails on the counter, & I tried to think of what I was going to do. I decided to just make Deconstructed Boston Cream Pie.  I don’t know if that exists or not but that’s what I did. I took my aggression out on the cake and crumbled it into various sized pieces. I made the glaze as planned. I then assembled my new creation by layering crumbs, filling, more crumbs, and then the glaze in muffin cups.

IMG_2244

It might not be what I intended to make, but kitchen mishaps are bound to happen. It’s all about adapting and making it work. True in the kitchen & true in life.

Recipe From Betty Crocker: Boston Cream Pie

Pesto Prosciutto Pizza with Cauliflower Crust


IMG_1974


I have a samurai living inside me. 

This is what I tell people when I say I have Hashimoto’s Disease. “I have a samurai living inside me.” Making a joke sounds better than when I say I have an autoimmune disease that it attacking my thyroid & causes many other health side effects.

Apparently the only way to cure it (maybe) is by going gluten free. Supposedly after 6 months to 2 yrs of being gluten free, my antibodies will go back down to a normal level. I have yet to do this. Why haven’t I? Well, it’s complicated.

For one, I have most of my symptoms under control. I feel much better than I did before. My hands only feel somewhat cold. I am not constantly fatigued. My headaches are under control. The list goes on.

Another reason is that I really don’t want to go gluten free. It is really hard. Gluten is everywhere. There are so many hidden sources of gluten it isn’t even funny. People with celiac’s disease will tell you a gluten free diet is no joke. Sure, it is easier today than it was 10 years ago with gluten free menu options or new & interesting food ideas, but it is still no walk in the park. I have done a massive gluten reduction but am by no means “gluten free”. For now my reduction plan is working for most of my symptoms.

I also love baking. I will not give that up. I don’t think I could afford to bake gluten free right now anyhow. And baking regular for the heck of it and gluten free for myself does not appeal to me. Maybe one day I will get there. Maybe one day I will have to. Until then I try to do the best I can and make better choices so that I feel well.

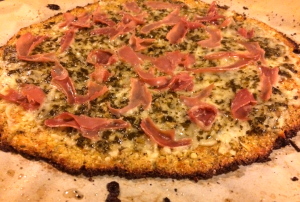
One thing I tried was a cauliflower crust for pizza. Cauliflower is on the internet everywhere in the food world as a healthy alternative to breads & pastas. This pizza is amazing and healthy. Give it a try for something different or maybe for your own health reasons.


Pesto Prosciutto Pizza with Cauliflower Crust (serves 1-2)

  • small bag cauliflower florets (or half head cauliflower)
  • 1 egg
  • 1/2 cup shredded asiago cheese
  • 1/4 tsp each oregano & basil
  • few dashes onion powder
  • 1 clove garlic, minced
  • pinch salt & pepper
  • olive oil (for brushing parchment paper)
  • 1/2 to 3/4 cup shredded parmesan cheese
  • 1/4 cup homemade or store bought pesto
  • 1.5 oz prosciutto, sliced into bite sized pieces


Preheat a pizza stone or clean baking sheet in an oven to 450 degrees F.

Add the cauliflower to a food processor and pulse until finely ground.

Transfer the cauliflower to a medium bowl. Add the Asiago, egg, garlic, and seasonings. Combine until the mixture holds together when pinched. Pour onto a cheesecloth and wring out as much moisture as you can.

Line a pizza peel with parchment paper & brush with some olive oil. Spread the cauliflower mixture into a circle about 1/4in thick. Slide the parchment onto the preheated pizza stone and bake until barely golden and darker at the edges, about 17-20 minutes.

Remove the crust from the oven, sprinkle with the mozzarella and spread the pesto over the top. Scatter the prosciutto on the pizza. Slide back onto the pizza stone and bake until bubbly with browned spots, about 4-6 minutes.

Serves one as an entree or serves two when paired with a side.

IMG_1974

Picked Pea Pot Pie

Do you ever just have bad days? Of course you do. Everyone does. My fishing guide had one the other day. This year he is not really my fishing guide. He became a real fishing guide as he needed a job. The job options up here in Almost Canada are rather bleak so he was more or less forced to work on the ice. He now brings others to fish, thus we do not get to fish. Something that is none too thrilling for our hobby of ice fishing which we are both quite passionate about. But what can you do? He needed a job.

This job is different from his previous accounting desk type jobs. He likes this job well enough but like all jobs, things set you off. You get grumpy. He called me on his way home with a grumpy & annoyed tone the other day. Our conversation was brief. He had a long day.

All his days are long actually. He gets up at 4:30 and working 12 hour days (or longer) is the norm. Consequently, I make dinner. I always made dinner before but now it is more of a necessity. I don’t mind. I love making dinner.

When he called me I had planned on making individual pot pies with biscuits. A comforting, warming dish common in Minnesota this time of year. This one would be super easy and all my ingredients were readily available. I had leftover duck already shredded, I had biscuits for the crust, and I had cream of chicken soup, cheddar cheese, herbs, and a bag of mixed veggies in the freezer for the filling.

The veggies consisted of corn, green beans, carrots, and peas. And here lied my dilemma…peas. He hates peas with a passion. I love peas and I love them in my pot pie. Needless to say he does not enjoy them at all in food. I knew today was not the day to be serving him peas. I actually burst out laughing in the kitchen imagining his reaction if I were to serve them to him. Funny to me but not to him most likely. So I set about removing the peas from my filling. It wasn’t that difficult. I just tried to scoop portions for his that didn’t contain many peas and then removed any stray peas.

When he came home and saw mini pot pies for dinner he looked pleased. When I served him his plate and put mine before me he said, “mine looks different”. I responded, “That’s because I picked out all the peas from yours.” A smile appeared on his face. And then a smile appeared on mine. We then enjoyed what little time we had left before he went to bed.

While I know that picking out peas did not cure his grumpiness completely it did lighten the mood. It is a reminder of how much I care for him. A small thing that reminds me that things aren’t as bad as one might think if all you have to do is take the time to remove some peas.

Individual Pot Pies* (serves 4) 

*Note that I do not know who came up with this recipe first. I know that biscuit companies have this almost exact recipe listed on their websites but I also know that I didn’t learn it from them. I’m not sure where I learned it. I think it is one of those recipes that everyone comes up with at some point.

  • pack of 8 refrigerated biscuits (or make your own)
  • 1 1/2-2 cups shredded meat (I used duck but chicken works just fine)
  • 1 can cream of chicken soup
  • 1/2 tsp each oregano & thyme
  • salt & pepper to taste
  • 1/4 cup shredded cheddar cheese (use more if desired)
  • 1 bag mixed vegetables or use what you have on hand (about 2- 2 1/2 cups veggies)

Preheat oven to 375F. Grease 8 muffin cups.

Cook veggies according to package directions. Place meat, veggies, soup, cheese, and seasonings in a large bowl. Mix well. Take biscuit dough and stretch each biscuit until about 1/4 in thin. The circle should be about 5-6in diameter. Place biscuits in greased muffin cups. Fill with filling until about the top of the muffin cup. Fold sides of biscuit over filling. Bake for 20 minutes until golden brown.

IMG_1867

Heat excess filling on the stove or in the microwave. Serve pot pies with the additonal filling.

IMG_1872

(Picture is of my pies, the ones with peas. My fishing guide’s pot pies looked the same but contained only corn, carrots, and green beans in terms of veggies)

Banana Pancakes

IMG_1939


It has been about 2 months since my fishing guide became a real fishing guide and consequently we do not get to spend much time together. He works long days every day and I am left to entertain myself. Don’t get me wrong, I love alone time. I am the type of person who would rather hang out by myself than go out on most occasions. But on Sundays, it does feel a bit lonely.

Sunday was always our day to relax (like most people I assume). We drink coffee together in the morning, have a nice brunch type breakfast, and then he would watch football and I would bake if it were that time of year which it currently is.

I have been baking despite his absence which is easy enough to do, but I do miss our Sunday brunches. It’s a little hard to pull off just for myself. Cooking a brunch for 2 is one thing and cooking a whole brunch for one is another. I know it can be done, but it just doesn’t have the same feeling.

This Sunday I decided to make Banana Pancakes. I have seen numerous recipes on the web and this once is my version of it. It is very simple but delicious. It is also a good recipe since it is easy to make for just one person and I know my fishing guide wouldn’t enjoy it as much as I do. It’s the perfect breakfast dish to give me that brunch type feel while he is gone.

Banana Pancakes

  • 1 small banana
  • 1 egg
  • 1/8 tsp baking powder
  • cinnamon & nutmeg
  • 1 tbsp peanut butter, optional
  • cooking spray or butter

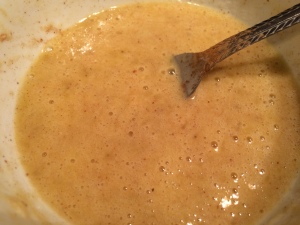
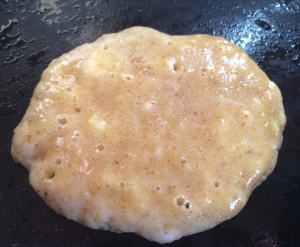
In a bowl, mash a banana very well. Try to get rid of as many lumps as possible (a more ripe banana works very well). Beat one egg into the mashed banana. Add the baking powder and as much cinnamon and nutmeg as desired.

IMG_1938

Heat a skillet over medium-low to medium heat. Spray with cooking spray or melt butter if desired (I used spray as I was using peanut butter at the end). Pour 1/8 cup batter onto hot greased skillet and cook as if cooking a normal pancake (this will make about 6 pancakes. I find making the smaller pancakes works better for flipping). The edges with firm up and the batter will start to bubble.

IMG_1930

Flip with a spatula and cook the other side. Meanwhile, heat peanut butter on the stove or in a microwave until softened enough to drizzle (feel free to add a teaspoon of honey to this as well if desired). Drizzle peanut butter over pancakes if using (these are delicious plain if you do not like peanut butter). Enjoy eating well, even if it is by yourself.

IMG_1939


Multiple Meals: Ground Beef & Pork

I was hoping to make one more giant grocery shop before the snow hit in Northern Minnesota (aka Almost Canada) but it seems I was too late. The snow & cold weather has infringed upon my ability to go get groceries this last weekend. Yes I can get food in town but it is drastically overpriced. I usually make a giant trip every 1-2 months and stock up on pantry items & frozen goods. I also buy meat in bulk and then portion it into 2-4 servings (enough for me & my fishing guide for dinner with leftovers if desired) and freeze it. Since I was not going shopping for a week or two I decided to work with what I had on hand. I made 4 meals using the same meat source. Meatloaf and casseroles are big in this state/climate so I included those in my food prep. Nothing fancy but all meals are different (an important concept in many households as people get sick of the same foods being served over & over). Most importantly, you can do all the prep in one day.

Before any of the meals can be made you must combine 1 lb of ground beef with 1 lb of ground pork. Divide the meat into two 1 lb portions. Take one portion and split in half again. Set both of these 1/2 lb portions aside (one will be for meatloaf and one will be for noodle casserole). Take the other 1 lb portion & add to a skillet and brown. Add taco seasoning to your liking with a small amount of water. Let cook off for a few minutes. Take this mixture and split into two portions. Use one immediately for tacos. Set one aside for stuffed poblanos.

Tacos (serves 2)

I will not put any information here for taco prep cause everyone knows what to do. Use your favorite fixings and sides of your preference. I made a spicy pepper creamed corn but refried beans or mexican rice are great as well.

Stuffed Chile Poblanos (serves 2)

  • half of the taco seasoned meat previously prepared
  • 2 poblano chiles
  • 1/2 cup cheddar cheese
  • 1/2 cup white rice
  • 2 tomatoes, diced
  • taco seasoning
  • salsa
  • sour cream
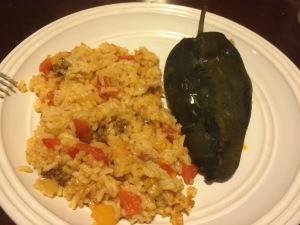
  1. Place poblano peppers on a cooking sheet & place under broiler. Broil for 3-5 minutes per side until skins are blistered. Place peppers into a bowl & cover with pastic wrap or place in a gallon sized plastic bag. Let sit for 10 minutes & remove skins. Slice open on one side & remove seeds.  Place ground meat and 1/4 cup cheese in each pepper. Close peppers.
  2. Meanwhile, cook rice according to package directions. Stir in diced tomatoes and 1-2 tsp taco seasoning & salsa to your liking (I only use a few tsp of very hot salsa at this stage).
  3. Pour rice into a 8×8 casserole dish. Top with peppers. Cover with foil & bake within 1 day. Bake covered in a 400F oven for 30 minutes. Remove foil and bake for 15 more minutes. Serve with additional salsa & sour cream if desired.

IMG_1695

Muffin Tin Meatloaf (serves 2 with 3 muffins each)

  • 1/2 lb portion ground meat
  • 1/3 cup milk
  • 1 egg
  • 2 tbsp chopped onion
  • 2 slices bread, torn into pieces
  • pinch each oregano, basil, sage
  • sprinkle salt & pepper
  • 3 tbsp ketchup
  • 1 tbsp brown sugar
  • 1/2 tsp worcestshire sauce
  • 1/2 tsp ground mustard
  1.  Take a 1/2 lb portion meat & add to a medium mixing bowl. Add the rest of the ingredredients through the salt & pepper. Stir to combine.
  2. Stir together the ketchup, sugar, worcestshiire sauce, and ground mustard. Set aside.
  3. Lightly grease half of a muffin tin (this makes 6 meatloaf muffins). Add the meat to the tin with a scoop or spoon. Cover with foil. Place in the fridge or freezer.
  4. Bake for 25 minutes if refrigerated. If frozen, take out the night before you want to bake it and place it in the fridge to thaw. Bake as previously mentioned.
  5. Once cooked, top with the sauce mixture. Bake for 5-10 moire minutes. Serve with sides of your choice. I served baked potatoes and salad.

Sorry for the lack of photos. I forgot.

Beef & Pork Noodle Casserole

  • 1/2 lb portion ground meat
  • 1 small red & yellow pepper, diced
  • 2 tomatoes, diced
  • 2 tbsp flour
  • 2 cups reduced sodium beef broth
  • 4 tbsp parmesan cheese
  • 1 1/2 cups pasta

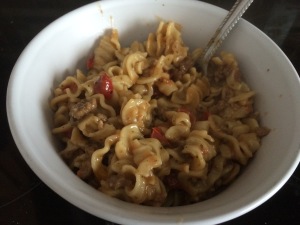
Brown meat with peppers and tomatoes. Do not drain. Add flour and stir for 2-3 minutes. Add the broth and cook & stir over medium-low to medium heat until thickened and bubbly.

IMG_1687

Meanwhile, cook pasta according to package directions until al dente. Drain.

Add the pasta to the beef mixture and stir in parmesan cheese. Place in an appropriate sized container (I used a loaf pan). Cover with foil & place in the fridge or freezer.

If refrigerated, bake within 1 day. Bake at 400F for 30 minutes. Remove foil, stir, and bake for 10-15 more minutes. Top with more cheese if desired. If frozen, bake for 50-60 minutes covered. Remove foil, stir, & bake for 15-20 more minutes.

IMG_1690


Cold Weather, Tropical Muffins

Winter is finally here in Northern Minnesota which I like to refer to as Almost Canada. It has been mild compared to last year when I moved up north. Last year was one of the coldest winters in awhile. This year it has been rather nice in terms of snow and freezing temperatures. But now winter is upon us.

IMG_1898

It snowed 8in the other day and today (Sunday) it is -15 to -30F for actual temperatures but it felt as cold as -50F. Burr. I am not complaining. If anyone should be complaining it is my fishing guide who became an actual fishing guide this year as he needed a job.

He gets up at 4:30 in the morning and many days he actually gets breakfast at work but it isn’t until 7:30 or 8 that he gets to eat. He has certain tasks he has to take care of first, so he needs a little bit of something to get him through the first few hours. That being said, he is not a big eater right away in the morning so he is not getting up to cook himself breakfast. He needs something that he can grab quickly.

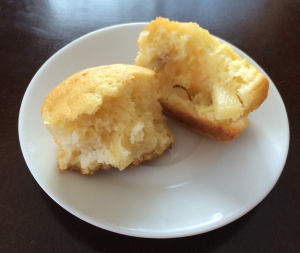
I decided to make muffins. These are individually portioned so he can grab one or two and eat them as needed. The weather outside is terribly cold but these muffins remind you of warmer climates or warmer seasons to come.


Pineapple Muffins (makes 18 muffins or 1 loaf*) adapted from my Peach Bread recipe

2 cups flour
2/3 cup sugar
1 tsp baking powder
1/2 tsp baking soda
1/2 tsp salt
1/3 cup vegetable oil
2 eggs
1/2 cup pineapple juice
1/2 cup milk
1/2 cup to 2/3 cup diced pineapple
1/2 cup sliced almonds


IMG_1903

 
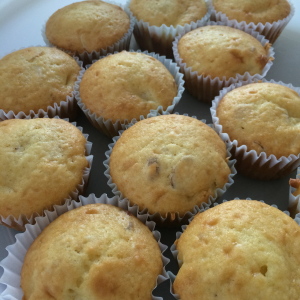
Preheat oven to 350F and grease a muffin tin or line with muffin cups. Mix the first 5 ingredients in a large bowl. Mix the oil, eggs, juice, & milk in a medium bowl. Add the wet ingredients to the dry and mix until just combined. Fold in the pineapple and almonds. Fill the muffin cups 2/3 full. Bake for 20-25 minutes or until a toothpick near the center comes out clean. Cool for 2 minutes in tin. Remove muffins and cool completely on a wire rack.

IMG_1905

*This recipe can also be used as a quick bread. Just pour batter into a greased loaf pan and bake for 50-60minutes or until a toothpick near center comes out clean. Cool for 10 minutes in pan on a wire rack. Remove bread from pan and cool completely on a wire rack before slicing.


Chocolate Coconut Christmas

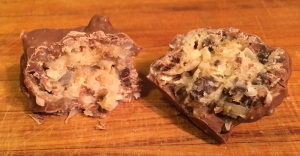
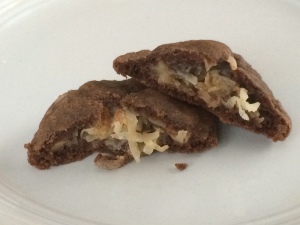
I had grand plans for making many Christmas cookies this year. I wanted to do a cookie swap. No one else wanted too. We have a food week at work prior to Christmas so in a sense it was almost like a swap. I did make some cookies & baked goods that I don’t normally make: snickerdoodles, gingerbread men & cutouts, actual gingerbread, white chocolate gingerbread balls, and some chocolate coconut balls & cookies. The coconut balls were planned. The cookies that followed were not. I used the leftover filling to make the cookies. A complete accident, but one of the most delicious unplanned actions of my life. So while I didn’t get around to making all the cookies I wanted, I am quite satisfied with the results.

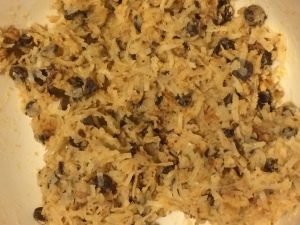
Filling:

  • 1 (14 oz.) can Sweetened Condensed Milk
  • 1 (14 oz.) package flaked coconut
  • 1 cup finely chopped pecans
  • 1 cup graham cracker crumbs
  • 1 cup mini semi-sweet chocolate chips (or coarsely chopped regular semisweet chocolate chips)

Combine all ingredients in a large bowl. Cover & refrigerate for at least 30 minutes.

IMG_1818

For Chocolate Coconut Balls:

  • Chocolate almond bark
  • shortening

Melt almond bark and add 1-2 tbsp shortening as needed to reach desired constancy. Roll the filling into 1 in balls and dip into chocolate. Place on a parchment lined cookie sheet & let cool completely. Store on the counter or in the fridge.
IMG_1813

For Cookies:

  • 1/2 cup butter, softened
  • 1/2 cup granulated sugar
  • 1/2 cup brown sugar, packed
  • 1/2 tsp baking powder
  • 1/4 tsp baking soda
  • 1 egg
  • 1 tsp vanilla
  • 1 1/4 cup flour
  • 1/4 cup cocoa powder

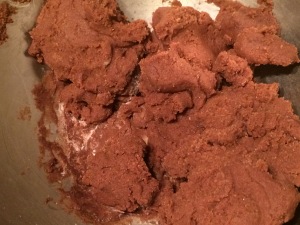
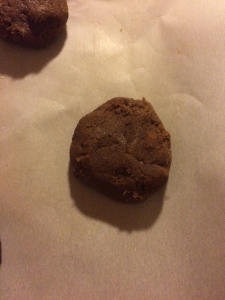
In a large mixing bowl, beat butter & sugars until combined. Beat in baking powder & soda. Beat in egg and vanilla. Scrape sides as needed. Beat in flour & cocoa powder. Dough will be moist.

IMG_1819

Preheat oven to 375F. Line two baking sheets with parchment paper.

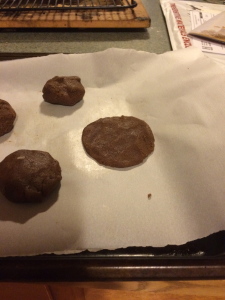
Take some of the dough and roll into a 1-2in ball. Flatten on the parchment paper.

IMG_1826
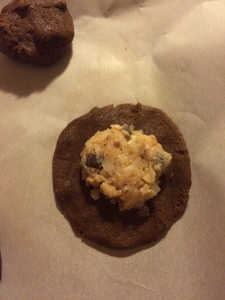
Take a portion of the filling & form  into a 1/2-1 in ball. Place on dough & flatten slightly.

IMG_1827

Take the sides of the dough and form around the coconut.

IMG_1828

Bake for 8-12minutes depending on how big cookies are. Remove when cooked through but still soft. Allow to sit for 2 minutes (cookies will firm up). Place on a cooling rack to cool completely. Store on a counter in an airtight container for up to one week (the cookies didn’t make it to work as they were too delicious).

IMG_1833

Enjoy.

IMG_1838


Baked Grouse, two ways

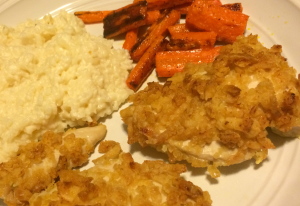
On the last day of My First Deer Hunt I ended up going grouse hunting and managed to come home with 4 grouse which was totally amazing! I had recently made Apricot Glazed Grouse which was delicious but was in the mood for more of a warming fall/winter type dish. I made a casserole the first night which is very easy & comforting. The next night I made an easy breaded grouse & served it with roasted carrots and creamy goat cheese rice. Neither are fancy but both are delicious.

Grouse Casserole (serves 2)

  • 2 grouse, cleaned and cut into bite-sized chunks
  • 1/2 cup rice
  • 1 can cream mushroom soup
  • 10 oz milk
  • 1/2 bag frozen vegetables (I used a broccoli & cauliflower blend)
  • 1/2 dry onion soup packet
  • water, as needed

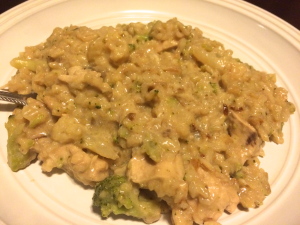
Mix all ingredients in a medium bowl. Pour into a greased casserole dish. Bake for 75-90 minutes until rice is cooked through stirring every 15 minutes. Add water as necessary.

IMG_1716


Crispy Onion Breaded Grouse (serves 2)

  • 2 grouse, cleaned (keep breasts intact or cut into tender sized strips)
  • 1 egg, beaten
  • frenchs onions
  • 3 large carrots, chopped into bite sized pieces
  • olive oil
  • salt & pepper
  • 1/2 cup rice
  • 1 cup chicken stock
  • 1oz goat cheese

Line two baking sheets with foil. Lightly grease one with cooking spray and set aside. Drizzle 2-3 tsp olive oil over the other baking sheet and also add pinch or two salt & pepper. Add carrots to olive oil tray and gently toss. Place in 400F oven for 20-25minutes.

Place stock and rice into small pot. Bring to a boil & then cover and simmer for 20 minutes until rice is tender. Stir in goat cheese.

Meanwhile, coat grouse in egg and dip into onions. Bake on lightly greased foil lined sheet for 12-17minutes until cooked through.

IMG_1719