Chocolate Pecan Pie Bars

I hadn’t baked since Halloween so knew that I needed bake some treats. Besides, all my Halloween candy was almost gone. With Thanksgiving approaching I wanted to make something a bit festive and asked my guy what he wanted. He said cookies or bars. I decided to make pecan pie bars but than added chocolate in a last minute decision cause I really wanted something chocolate as well. If you don’t want the chocolate than just add an extra 1/2-1 cup chopped pecans depending on how nutty you want it.

Chocolate Pecan Pie Bars (makes 32)

For the crust…

  • 2 sticks unsalted butter, softened
  • 2/3 cup brown sugar, packed
  • 2 1/2 cups flour
  • 1/2 tsp salt

For the filling…

  • 1 stick unsalted butter, softened
  • 3/4 cup brown sugar, packed
  • 1/2 cup corn syrup
  • 1 cup chopped pecans
  • 1 cup semi-sweet chocolate chips

Take a 9x13x2in pan and line with foil so that it has a slight overhang. Preheat the oven to 350F.

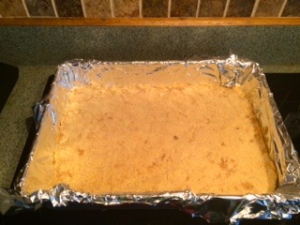
Crust: In a large bowl cream together the butter and brown sugar. Add the flour and salt and mix until crumbly. Press into the lined pan firmly. Bake for 20-25minutes until golden brown and no loose flour is visible.

Image 2


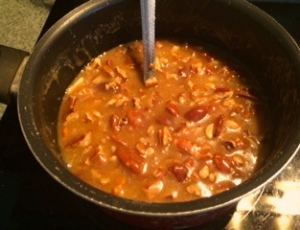
Filling: Meanwhile, in a medium saucepan melt butter with brown sugar and corn syrup over medium-low to medium heat.

Image

Add the chopped pecans.

Image 4

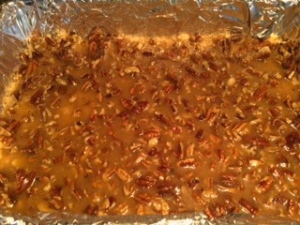
Pour over the crust and spread to all sides.

Image 3

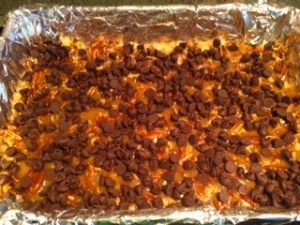
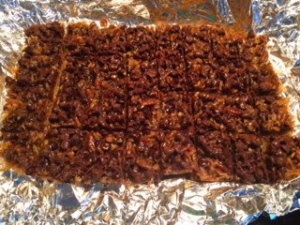
Top with chocolate.

Image 1

Bake for 20-25 minutes and remove to cool completely in the pan. Remove the bars via the foil overhang and cut into bars. Place back into pan for storage. Enjoy.

Image 5


Chocolate Beet Cupcakes

This post is a bit delayed as I wrote it around Halloween. Just decorate them however you desire or not at all. I enjoyed them the best with no frosting.


As I had made Bloody Beet Cake I knew I needed to make chocolate beet cupcakes. I have this problem. Once I find something I have to go all out and keep trying different variations. This time, it is baking with beets. I threw together these cupcakes and was blown away. I think these might the best cupcakes I have ever made. I always have problems with trying cupcake recipes and they end up being dry or just not that great. These are neither. They are moist (I hate that word except for cake descriptions), fluffy, and super chocolately. I strongly suggest doubling or tripling the recipe.

I also made the same recipe but instead of butter I used 1/3 cup vegetable oil. I added all the dry ingredients to a bowl and then added all the wet ingredients on top. I just beat them until mixed and poured into a prepared muffin tin. The baking time is also the same. I do think the ones with butter were a smidge better, but they were both scrumptious.


Chocolate Beet Cupcakes (makes 1 dozen)

  • 6 tbsp butter
  • 1 cup sugar
  • 1/2 cup beet puree
  • 1/2 cup coffee
  • 1 cup all-purpose flour
  • 1/3 cup cocoa powder
  • 3/4 tsp baking powder
  • 1/2 tsp baking soda
  • 1/2 tsp salt
  • 1 egg
  • 1/3 cup chocolate chips
  • frosting (optional)

Preheat oven to 350F. Line a muffin tin with paper liners. Beat butter until soft. Beat in sugar until creamy. Add beet puree & coffee and mix until just combined. Add all dry ingredients and mix until incorporated. Fold in chocolate chips. Bake for 15-20 minutes or until tops are spongey and a toothpick inserted near the center comes out clean.

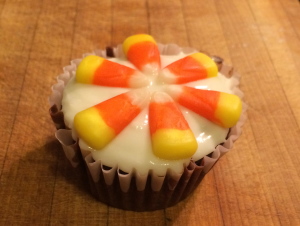
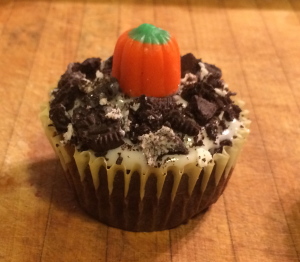
Feel free to frost with your favorite frosting. I did a few with cream cheese frosting & Halloween decorations as well. In my opinion though, I think they are amazing plain.

IMG_1651


IMG_1654


Bloody Beet Cake

IMG_1638


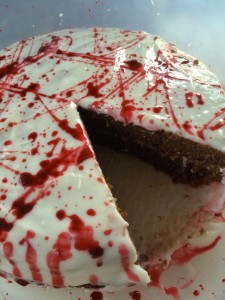
I just posted about Gory Cupcakes that I made two years ago which inspired this dessert. I wanted to make some elaborate cake or dessert but was not feeling that ambitious to take on such an endeavor. I decided that I should just stick to something that I knew would end up good. Since edible blood is the easiest Halloween item to make, I decided to make a blood splattered cake. As I had also just received a surplus of beets from a co-worker I knew a beet cake was in order. I had never made a beet cake but figured it would be similar to carrot cake or zucchini cake.

This cake is like a cross between a carrot cake & red velvet cake but without the food coloring in the batter. If I had made this for a party I would have added the red dye to get the extreme visual of red cake to blood splattered frosting. No one will know that there are beets in this cake. It is so light & fluffy and sweet that everyone will gobble it down. Be warned, after storing in the fridge it does become dense. Still delicious, but dense. Enjoy.

Bloody Beet Cake

  • 3/4 cup butter, plus more for greasing pans
  • 1 3/4 cup sugar
  • 3 eggs
  • 1 cup beet puree
  • 3/4 cup milk
  • 1 tsp white vinegar
  • 1 tbsp + 1tsp lemon juice
  • 1 tsp vanilla
  • 2 cups cake flour
  • 3 tbsp cocoa powder
  • 1 tsp salt
  • 1 tsp baking powder
  • 1/2 tsp baking soda
  • cream cheese frosting
    • 1 8oz pkg cream cheese (I used 1/3 less fat)
    • 1 tbsp milk
    • 1 tsp vanilla
    • 4 cups powdered sugar
  • blood
    • 2 tbsp corn syrup
    • 1 tbsp water
    • 2 tbsp corn starch
    • red, blue, green food coloring
    • chocolate syrup

Beet Puree: Trim off ends and peel 1-2 beets. Chop into chunks, place in a pot, and cover with water. Bring to a boil & boil until tender (about 30-45minutes depending on size of beets). Drain and place in a food processor & chop until pieces are very fine. Remove beets from the processor. Place one cup of this back into the processor and add milk, vanilla, vinegar, & lemon juice. Puree until smooth. Reserve the other beet puree for another use (feel free to make as much puree as you want by chopping more beets).

Preheat oven to 350F. Grease two 8-9in round cake pans with butter. Line with parchment paper and grease again.

In a large bowl, beat butter until fluffy. Add the sugar and beat until creamy. Beat in the eggs one at a time until just incorporated.  Add the beet mixture & mix until combined. Add all of the dry ingredients and mix until just incorporated scraping the sides as needed*. Pour into prepared cake pans.

*Note that if you want an intense red in the batter, as in a traditional red velvet cake, add a tsp of red food coloring to the batter at this point.

Bake for 25-30 minutes or until a toothpick inserted near the center comes out clean. Cool for 10 minutes on a wire rack. Remove from pans and cool completely. Place in the fridge or freezer for 30-60 minutes.

Frosting: In a large bowl beat the cream cheese, milk, & vanilla until light & fluffy. Add the powdered sugar in 1 cup increments and beat until desired texture is achieved.

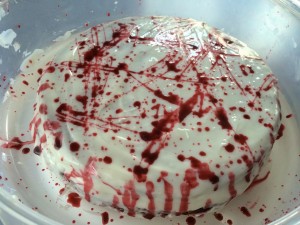
Blood: Mix the corn syrup, water, and corn starch until desired consistency is achieved by adding more water or corn starch as needed. Add red food coloring until a deep red is achieved. Add 1-2 drops of blue &/or green food coloring (I did 2 drops of each). Add chocolate syrup to make a more blood-like color if needed (not very much is needed – don’t overdo it).

Assembly: Skim off the tops of the cakes if needed to make them flat. Frost the top of one with some frosting. Add the other cake, top side down, on top of this frosted cake. Add frosting to the top and spread in a even layer and coat the sides. Dip a pastry brush or tooth brush into the blood & flick at the cake to create a splattered blood look.

Serve at a party or just enjoy your creation.


IMG_1642

Pumpkin Cookies Revisited

IMG_1590


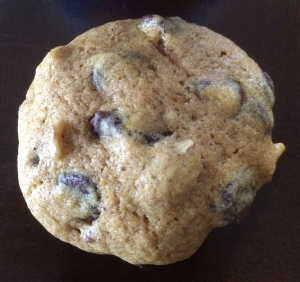
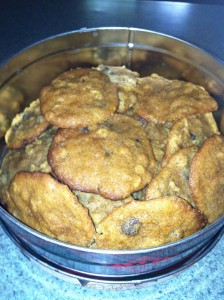
Seeing as how my last batch of Pumpkin Cookies was so temperamental in baking, I decided to try again. These cookies are much easier to bake and figure out when done. The are very cake-like in texture and taste great the day of or even a week later which is important to me in a cookie. I cannot stand making stuff that is only good for a day.

Pumpkin Cookies (Makes approx 2 dozen)

  • 1 cup all-pupose flour
  • 1 tsp ground cinnamon
  • few dashes each nutmeg & clove
  • 1/2 tsp baking soda
  • 1/2 cup butter (1 stick)
  • 1/4 cup granulated sugar
  • 1/4 cup packed brown sugar
  • 1/2 cup canned pumpkin
  • 1 egg
  • 1 tsp vanilla extract
  • 1 cup semi-sweet chocolate chips
  • 1/3 cup chopped pecans

Preheat the oven to 350F. Line two baking sheets with parchment paper. Combine the flour, spices, & baking soda in a medium bowl. Beat the butter and both sugars in a large bowl until creamy. Beat in the pumpkin, egg, & vanilla until combined. Gradually beat in flour mixture. Fold in chips & nuts. Drop by rounded spoonfuls onto prepared baking sheets. Bake for 10-12 minutes or until set and lightly browned. Let cool for 2 minutes on baking sheets & then let cool completely on a wire rack.

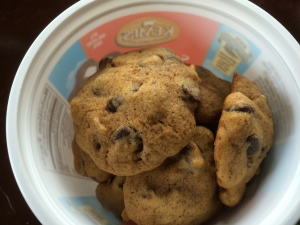
Divvy up the cookies so that they don’t all get eaten (I use yogurt & cottage cheese containers).


IMG_1586

Gory Cupcakes

I have never been good at art. I cannot draw, paint, sculpt, or any other type of art that so many people seem to be able to do. I am good at taking candid photos or photos in general of people. Since starting this blog, however, I have realized that I am not very good at taking food photographs. I think it’s because they have to be staged and prepared. I have gotten a bit better but still have a long ways to go. Since I am not very artistic, it is no surprise that I am not very good at decorating cakes, cupcakes, or other food items. I know once I get a piping bag it will improve, but I still recognize my own flaws in the baking-decorating world.

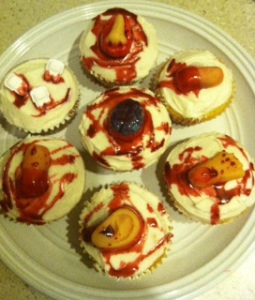
To improve this skill I look at photographs of food on pinterest & the web for inspiration. The other day I was looking for Halloween ideas. I happened to come across a photo that I had taken in an image Google search of “gory desserts halloween,” and I was reminded that once I did do something artsy in the food world.
photo-4

Two years ago I entered a contest. It was a Halloween contest from Food for Hunters that required you to make a Halloween themed dessert. I decided to make cupcakes with body parts & blood. I bought gummy candy body parts, baked some cupcakes, frosted them, and made fake edible blood. They looked awesome. I did end up winning the contest and won a camping knife set, which was so cool, but I am most proud of the cupcakes. They look simple but they look fantastic (at least for me). I even ended up posting the recipe Gory Cupcakes on Better Recipes which I also forgot about.

I should have remembered this because I look at a photo of me with these cupcakes everyday on pinterest, twitter, and the About Me page of this blog. Sometimes what is right in front of you gets missed the most.

cropped-cropped-cropped-408487_10151210178367231_358382354_n.jpg

I know that I have a lot of work to do in terms of artsy-pretty food but also know that if I keep at it maybe one day I will be able to do it with ease or at least be able to do it and be satisfied with the result. If all else fails, at least I have this contest to remind me that I did accomplish it once.

Zucchini Bread Battle


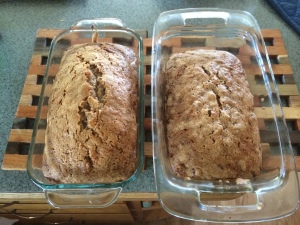
IMG_1561


I received a giant zucchini from a co-worker. You know how it is, everyone gets sick of their zucchini crop and gives them away. Even though I grew my own for the first time this year, I didn’t get as much as I wanted, so I was happy to take everyone else’s surplus zucchini.

I decided to try two different breads. I cannot help myself. Making two different versions of food items has become a habit. One has twice as much eggs & oil as the other and uses almonds instead of walnuts & pecans. It also uses just baking soda instead of a baking soda & powder combo.

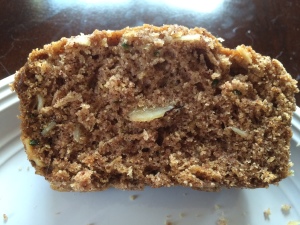
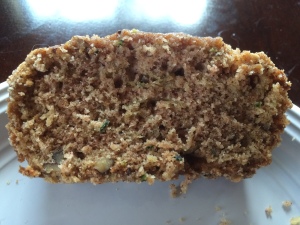
Depending on who you ask you get different results as to a favorite. It is a 50-50 tie more or less. In the future, I will use a combination of both depending on the ingredients I have on hand. I liked the look of version one in terms of rising so will most likely go with the baking soda only but liked the walnuts & pecan blend over the almonds. In terms of eggs & oil, the extra oil didn’t make too much of a difference in moisture but the extra egg might have affected the rising of the bread so maybe I will play around with that some more. With that being said, both are delicious & I encourage you to make them or play around with your own recipes.

Zucchini Bread trial 1 (Right side of picture)

  • 1 1/2 cups flour
  • 1 tsp cinnamon
  • dash (or two) nutmeg & clove
  • 1/2 tsp salt
  • 1 tsp baking soda
  • 1 cup sugar
  • 1/2 cup oil
  • 2 eggs
  • 1 cup shredded zucchini
  • 1/3 cup sliced almonds

Preheat oven to 350F. Grease a loaf pan with butter. Mix the first 5 ingredients in a medium bowl. Mix the rest of the ingredients in another bowl. Add the wet ingredients to the dry. Fold in the almonds. Bake for 50-60 minutes or until a toothpick inserted near the center comes out clean. Cool on a wire rack for 10 minutes in the pan. Remove from the pan and let cool completely before slicing.

IMG_1581

 Zucchini Bread trial 2 (Left side of picture)

  • 1 1/2 cups flour
  • 1 tsp cinnamon
  • dash (or two) nutmeg & clove
  • 1/2 tsp salt
  • 1/2 tsp baking soda
  • 1/4 tsp baking powder
  • 1 cup sugar
  • 1/4 cup cooking oil
  • 1 egg
  • 1 cup shredded zucchini
  • 1/3 cup chopped walnuts or pecans (I did a blend)

Preheat oven to 350F. Grease a loaf pan with butter. Mix the ingredients from the flour through the baking powder in a medium bowl. Mix the rest of the ingredients in another bowl. Add the wet ingredients to the dry. Fold in the nuts. Bake for 50-60 minutes or until a toothpick inserted near the center comes out clean. Cool on a wire rack for 10 minutes in the pan. Remove from the pan and let cool completely before slicing.

IMG_1582


Pumpkin Cookies

IMG_1263


As I had leftover canned pumpkin from the Pumpkin Mac & Cheese I knew a dessert was in order. I have made plenty of breads, cupcakes, and cakes so wanted to try something new and pumpkin cookies were created.

I love cookies. They are probably one of my favorite desserts. They keep well for about a weeks worth of treats & they freeze well for later yumminess. They are also portion controlled which is a good thing if you love sweets.

Pumpkin Cookies (makes about 3 dozen)

  • 2 sticks butter, room temperature
  • 1 cup granulated sugar
  • 1 cup brown sugar, packed
  • 1 cup canned pumpkin
  • 1 egg
  • 1 tsp vanilla extract
  • 2 cups all-purpose flour
  • 1 tsp baking soda
  • 1 1/2 tsp cinnamon
  • pinch each ginger, nutmeg, allspice, & cloves
  • 1/2 tsp salt
  • 1 cup oats
  • 1 cup semi-sweet chocolate hips
  • 1/2 cup dried cranberries
  1. Preheat the oven to 350F. Line 2-3 baking sheets with parchment paper (If you only have one, be sure to rinse the cookie sheet after it has been used to cool it back down before lining it again).
  2. In a large bowl cream the butter & both sugars until light & fluffy. Add the pumpkin, egg, & vanilla and mix until combined.
  3. In a medium bowl mix the flour, baking soda, salt & spices. Slowly add this to the wet ingredients & mix until combined.
  4. Stir in the oats, chocolate chips, & cranberries.
  5. Drop rounded spoonfuls on the baking sheets 2in apart. Bake for 12-14 minutes until tops are golden & edges are starting to set (they will still be very soft & fall apart easily so care must be taken). Remove from the oven and let cool for 5 minutes on the pans. Slide parchment paper with cookies onto a wire rack & let cool completely.
  6. Transfer to containers & eat within a week.

IMG_1260

Pumpkin Bacon Mac & Cheese

The season of pumpkin has arrived!! The changing & falling of leaves, brisk fresh air, the list goes on. I am one of those people that loves pumpkin. Pumpkin everything. I cannot help it & nor do I want to. It is delicious. I do eat it year round thanks to the canned goods but I really go crazy in the fall & early winter.

I love it in sweets but do enjoy the savory side of it as well. This is a savory dish & it’s also a souped up Mac & Cheese dish. Mac & Cheese has never been a favorite of mine. I ate the blue box stuff as a kid but didn’t love it. I didn’t realize I liked mac & cheese until I had homemade versions.

This one is the perfect way to start the pumpkin season. The combination of pumpkin, bacon, & cheese is delicious, satisfying, & comforting. Which are all the things I want on a brisk fall day. With the extra canned pumpkin I made Pumpkin Cookies


Pumpkin Bacon Mac & Cheese (serves 2)

  • 1 cup elbow macaroni
  • 4 slices bacon
  • 2 tbsp butter
  • 2 tbsp flour
  • 2 cups milk
  • 1/2 cup canned pumpkin
  • salt & pepper to taste
  • 1/2 tsp each sage & thyme
  • few dashes garlic powder & cayenne
  • 1/2 cup cheddar cheese
  • 1/4 cup fine bread crumbs
  • 1/4 cup parmesan cheese
  1. Cook the macaroni according to package directions. Drain & set aside.
  2. Meanwhile, in a skillet cook the bacon until crisp. Remove & crumble. Set aside.
  3. Drain off the bacon grease. Add the butter & stir until melted. Add the flour & stir until dissolved. Whisk in the milk & cook until thick & bubbly. Add the pumpkin, spices, and cheddar cheese. Stir until pumpkin is incorporated & the cheese is melted.
  4. Stir in the bacon crumbles and macaroni. Pour into two individual casserole dishes.
  5. In a small bowl combine the bread crumbs & parmesan. Sprinkle over the macaroni. Bake in a 400F oven for 25-30 minutes or until topping is golden & sauce is bubbly.

IMG_1252

Roasted Beets & Goat Cheese

I am a beet lover but I was not into beets as a child. As soon as I had real roasted beets, and none of that Thanksgiving canned junk, I was converted. I think they taste like earthy corn but in a good way if that makes sense.

Almost everyone who eats beets enjoys them with goat cheese. I couldn’t tell you how many beet & goat cheese salads and dishes I have had in the past few years. I even made a dish not that long ago Beet Millet Salad with Goat Cheese that used that cliche combo.

This time around I decided to make some dips. A battle of beets & goat cheese if you will. One which is a blend of beets & goat cheese and one is a goat cheese dip for beet chips. Both are delicious. When summer comes around and you have a garden of beets, or they are just readily available, feel free to add these to your list to make.

Let’s begin with the roasted beet & goat cheese dip.

Roasted Beet *&* Goat Cheese Dip (serves 2 but can easily be doubled)

  • 1 beet
  • 2 oz goat cheese
  • 1/2-1tsp olive oil
  • 2-4 tsp lemon juice
  • few dashes garlic salt, thyme, & oregano
  1. Preheat the oven to 400F. Chop off the ends of the beet & wrap in foil. Bake for 60min or until tender. Remove skins & let cool.
  2. Chop the beat in quarters & puree  in a food processor.
  3. Add the rest of the ingredients & blend to desired consistency (I left mine a bit chunky).
  4. Enjoy with crackers, bread, or veggies.

IMG_1278


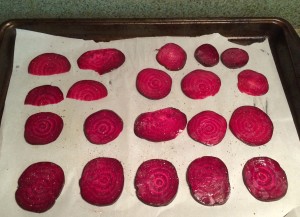
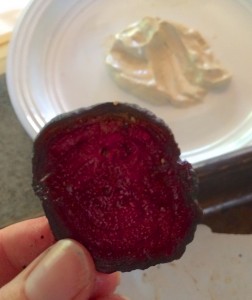
The next beet & goat cheese combo is beet chips with a goat cheese dip. Be forewarned, I have not perfected the beet chip. You do really need a mandolin unless you have serious knife skills which I do not. I tried my best to cut them thinly & in a uniform fashion but ended up with some too thick and some in half moon type shapes. The ones that turned out are below. It might not be perfect but it was good enough & the dip will go great with regular potato chips, bread, or fresh veggies of your choice if you are not making beet chips.

Roasted Beet Chips *with* Goat Cheese Dip

  • beets
  • olive oil
  • salt & pepper
  • goat cheese
  • sour cream
  • milk
  • balsamic vinegar
  • garlic salt
  • dill

Preheat oven to 375F. Slice the beets thinly. Coat lightly with olive oil and sprinkle with salt & pepper. Place on a parchment lined baking sheet & place another baking sheet on top. Roast for 20 minutes. Remove top baking sheet and roast for 15-30 minutes longer until beets crisp up & edges curl.

IMG_1524


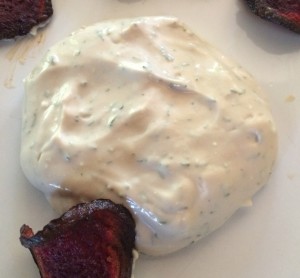
Mix equal parts goat cheese & sour cream ( I used 1-2 tbsp of each). Add a splash of milk and balsamic vinegar to reach desired dip consistency. Add a pinch of garlic salt & as much dill as desired.

IMG_1526


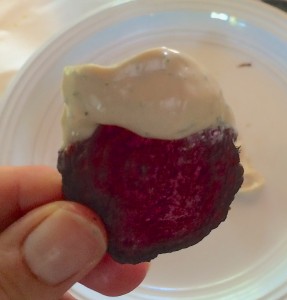
Serve chips with dip & watch them disappear.

IMG_1528


Be liberal with the dip as it is delightful to your taste buds.

IMG_1527


In terms of a winner, even though my chips did not turn out exactly perfect, the ones that did work were so tasty & the dip is now my new favorite go-to recipe that the beets *with* goat cheese dip is far superior.

Friendships & Honey-Vanilla Madeleines

Do you ever wonder how much of what you experience as a child shapes who you become? I think about it constantly. You may not know it at the time but movies, music, books, events, perhaps the smallest encounter, might affect who you become as you get older.

I first noticed it when I bought Edward Scissorhands years ago. I watched this beloved childhood movie as an adult and thought maybe this is a part of the reason why I am who I am. There is the character of the inventor (I’m a chemist) and the mother sells Avon (I sold MaryKay for a brief time).

I know that could be ridiculous but maybe it did affect me. I’m not saying that everything you watch or listen to will make you do things. I watched any horror movie I wanted growing up and I didn’t turn into a murderous monster. I read books geared to adults in elementary school, so much that my teachers would call & ask if it was appropriate for me to be reading such items, to which my mother would reply, “If she has a book she can read it.” I’ve always loved the fact that I was able to watch & read anything. I think that being treated as an adult in certain aspects enhanced my intellect. But I digress. The point is that sometimes I wonder what affected me as a child & shaped my life.

For example, I danced from 3-18yrs old and there was a Chinese restaurant next door. The paper place settings had the Chinese zodiac that told you what animal you were based on the year you were born. I am a rat. I read it every time I went to that restaurant. One thing it said is that Rats seldom have lasting friendships.

I wonder if I got that engrained in my brain which could have affected my friendships throughout life. Because for me it is true. I do seldom have lasting friendships.

My best friend in kindergarten & first grade moved away. One of my only friends in elementary school moved away. In high school I drifted away from my friends for a guy. In college I didn’t live there so I didn’t meet many new people which resulted in no new friends.

I did live in Cannes though for a semester and made some friends there. There was one in particular who I considered to be one of my best friends. We got along well & managed to keep in touch fairly well for a long time. We would Skype each other & Facebook IM one another fairly regularly. We even saw each other every few years with either her traveling to the states or me to Europe.

We don’t talk as much and it has been about 3.5 years since we have seen each other but I still consider her to be a lasting friend. I may not have (m)any friends but I do know I can always call or message her and she will be there. If I do ever go to back to Europe or if she comes to the States I am sure we will get together.

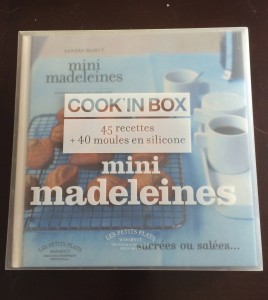
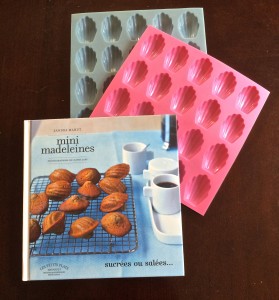
A long time ago in one of our times together, she gave me a cookbook box set.
IMG_1515

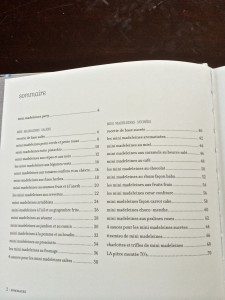
It contains a book with 22 salty & 22 sweet mini madeleine recipes.
IMG_1521

It also came with two silicone molds. I have never used it…until now.
IMG_1518


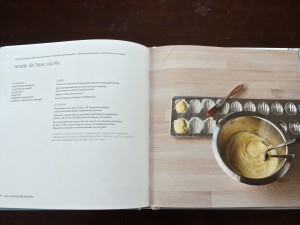
To be fair it got misplaced and then I moved countless times so it was packed up, but up north in Almost Canada, I have lots of time to bake and these will definitely be a recurring baked good in my household. They are so easy & so delicious. The recipe I made was a honey madeleine but I used half the honey and added the seeds from half of a fresh vanilla bean.
IMG_1522

Honey-Vanilla Madeleines (adapted from Mini Madeleines & translated into english) 

  •  1 cup flour
  • 1/2 cup butter, softened
  • 2/3 cup granulated sugar
  • 2 large eggs
  • 2 tbsp milk
  • 2 tsp baking powder
  • 1 tbsp honey
  • 1/2 vanilla bean

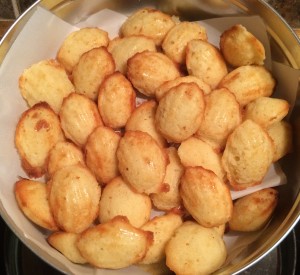
Preheat the oven to 425F. Mix the eggs & the sugar until well blended in a medium bowl. Add the flour & baking powder & mix until combined. Mix in the softened butter and milk. Add the honey & the seeds from the half vanilla bean (reserve the bean for another use). Place in the fridge for 30 minutes. Generously grease the molds with butter. Fill them so that they are not overflowing (approx. 1/2-3/4tsp). Bake for 6-8 minutes or until golden brown & cake feels spongey to the touch. Makes about 3 dozen.
IMG_1506


I don’t know if I will make any great friendships as the years go by. By now I have gotten used to having no girlfriends. Sometimes it does sadden me but other days I think it would just be too much work & am content with the way things are. I have always been a very solitary person with a few close friends. While almost all of those close friendships are basically non-existent except for in memory or the occasional communication, I know that if it comes down to it I do have people I can count on. These madeleines remind me of just that.