Cornbread Chicken Pot Pie


IMG_1384


I love pot pie. I think it is engrained in my Minnesota upbringing. When winter is half the year you enjoy comfort foods for half the year. The weather has turned rather brisk so pot pies are going to be a reoccurrence for many months to come.

Peas, carrots, potatoes, & chicken in a creamy sauce with a pastry crust is the traditional pot pie eaten by many, but you can really add anything. I love the fact that they are so versatile. You can add basically whatever you want to them depending on what kind of flavors you desire.

The first pot pie I ever made my fishing guide had peas & mushrooms in it. I didn’t know it then, but am constantly reminded now, how he hates peas. His mother even told me that she served him peas as a child and he responded with a question, “Are you made at me?” I guess he has always hated peas and will always hate them (except for pea soup – go figure). Anyhow, he did not enjoy that classic version & I have constantly been adapting pot pies ever since.

This version uses the veggies I had on hand as so many of my recipes do along with chicken and a cornbread crust. It is quite comforting on a brisk autumn day or cold winter night.

Cornbread Chicken Pot Pie (makes 4 servings)

Filling

  • 1 can (10 3/4 oz) Condensed Cream of Chicken Soup
  • 1 can (about 8oz) whole kernel corn, drained
  • large handful fresh green beans, washed, trimmed, & cut into 1 inch pieces (use canned if needed)
  • 2-3 medium carrots, sliced into bite-size pieces
  • 2 cups chicken, cooked & shredded
  • 1/2-3/4tsp thyme
  • pinch salt, pepper, garlic powder & onion powder
  • 1/2 cup cheddar cheese

Cornbread Crust

  • 1 package (about 6.5 oz) corn muffin mix
  • 2 tbsp melted butter
  • 1/3cup milk
  • 1 egg
  1. Preheat oven to 400F.
  2. In a small pot of boiling water add carrots & cook for 10-15 minutes. Add green beans and cook for 3-5 more minutes (if using canned omit this step and combine with the rest of the ingredients in step 3). Drain water.
  3. In a medium bowl combine cooked veggies & all other filling ingredients. Pour into a 2 qt casserole dish.
  4. In a small bowl, combine crust ingredients. Spoon dollops onto the filling in the casserole dish. Bake for 20-25 minutes or until topping is golden brown.


The 2014 MN State Fair

IMG_1393

It is that time of year. The end of summer and the beginning of fall. This is what the state fair says to me. One would think that going every year and doing the same thing would get old but it doesn’t. Not for me. I people watch, eat, drink, look at animals and go into the agriculture/horticulture building. I do random other things as well…look at the ice castles & farm equipment (I mean, I do live in Minnesota), go to various booths, look at items to be purchased, the list goes on. Somehow this ends up lasting 5-10 hrs. I am not sure where the time goes. This year was no different.

There was nothing really special that happened this year versus every other. I ate my classics…

Corn Dog

IMG_1439IMG_1438


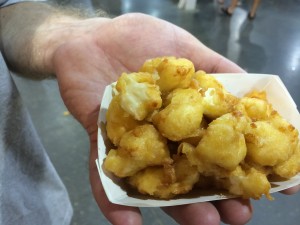
Cheese Curds

IMG_1450

Pork Chop on a Stick

IMG_1441

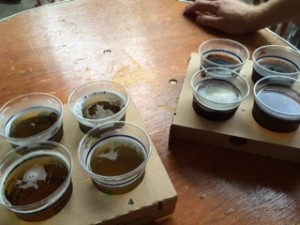
Enjoyed a beer flight (or 2…)

beer flight

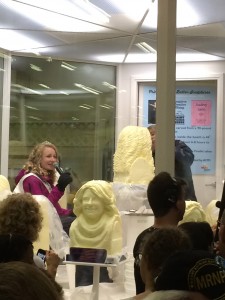
Ice Cream (no photo). Saw Princess Kay become a butter head

IMG_1458

And then I tried some new foods…New to the fair this year or just new to me.

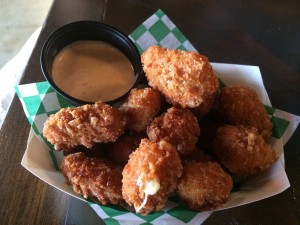
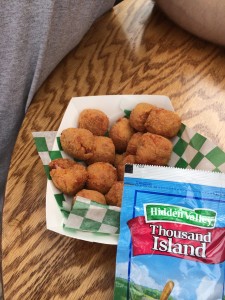
Pretzel Curds (new to the fair this year – 2014. It tasted like regular cheese curds but with a crispy, salty batter. Yum! But I do think I prefer the original in the end).

IMG_1432

Reuben Bites (new to me)

IMG_1457

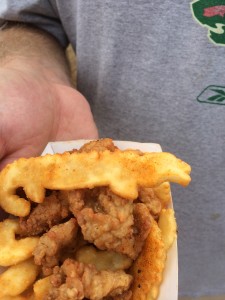
Fried Alligator with alligator shaped fries (New to me. I cannot believe I have never had this. This is a MN State Fair staple).

IMG_1454

I also looked at animals, the plants, flowers, and vegetables. Saw some interesting advertisements…I mean who made this?

IMG_1442

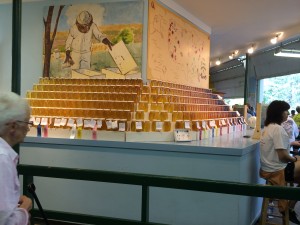
In addition to the flowers, veggies, & veggie art on display in the agriculture/horticulture building, I always look at and try the honey.

IMG_1430

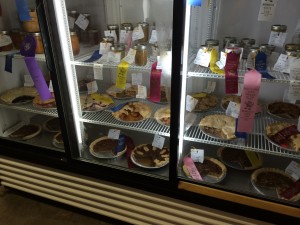
Usually I buy some, but this year I didn’t. I still haven’t even opened my jar from last year. I also look at the ribbons on the baked goods & think maybe one day…

IMG_1422

IMG_1431


Maybe one day I will venture into more contests & win a ribbon.

IMG_1421

Garden Green Bean Salad

In Minnesota it is quite common to have a  garden. With proper planning, one can grow a variety of vegetables, fruits, and general plants. I have never had a garden before. I have done container gardening with some veggies & herbs in pots but I have never had a real garden. All of that changed this year with my recent move to Almost Canada.  This year we just planted along side our garage where there was already dirt prepared and adequate sun. We might have gotten a little over zealous with the planting as some plants took over some others, but overall I am quite pleased. With the cost of produce being so high way up north I have not been able to eat all the veggies I desire on a daily basis. With summer in full swing, the garden is in full bloom & I have an abundance of vegetables to consume for the time being.

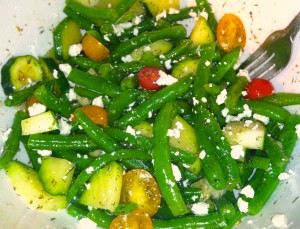
This salad was made with one of our first harvests of green beans, cucumbers, zucchini, and yellow & red cherry tomatoes. It is very refreshing on a summer day. I made it originally just for myself for lunch and my fishing guide took a bite and said to make it again. I made it a second time as a side dish to something I cannot recall. All I remember is eating my heart’s desire of vegetables.

Garden Green Bean Salad (makes 2 side dish portions or 1 lunch portion)

  • 2 cups green beans, washed, trimmed, & cut into various sized pieces
  • 1 small zucchini, sliced into moons & half moons
  • 1/4 cup cucumber, chopped
  • 1/3-1/2 cup cherry or grape tomatoes, halved or quartered
  • 2 tbsp feta cheese
  • 1 tsp olive oil
  • 2 tsp lemon juice
  • pinch salt & pepper
  • 1/2 tsp dried dill
  • 1/4 tsp each dried oregano & basil
  • dash cayenne
  1. Place green beans & zucchini in a skillet. Place enough water to almost cover the vegetables. Bring to a boil & cook for 2-3 minutes or until green beans become a vibrant green color. Drain & run under cold water until cool to the touch.
  2. Meanwhile, combine olive oil, lemon juice, and seasonings in a medium bowl. Add blanched vegetables, cucumber, tomatoes, & feta cheese. Toss to combine.

IMG_1357


Summer of Rhubarb: Oatmeal Rhubarb Bars

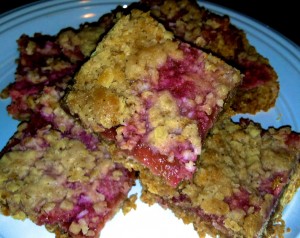
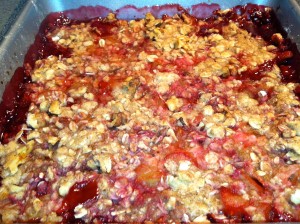
Seeing as how I had leftover Rhubarb Sauce from my Mustard Sage Pork Roast, I knew another dessert was in order. Since I had made coffee cake & a crisp, I decided I would more or less combine the two recipes & make oatmeal bars. These are great! They can be eaten plain or with ice cream. Also, they can be made with whatever filling you desire. Any fruit will do. Use the same amount of sugar for raspberries, but if using peaches, blueberries, or strawberries only use 1/4 cup sugar.

Oatmeal Rhubarb Bars

  • 1 cup all-purpose flour
  • 1 cup quick cooking rolled oats
  • 2/3 cup packed brown sugar
  • 1/4 tsp baking soda
  • few dashes cinnamon
  • dash or two nutmeg
  • dash all-spice
  • dash cloves
  • 1 stick (1/2 cup) butter
  • approx. 2 cups rhubarb sauce (2 cups rhubarb & 1/4 cup water brought to a boil & simmered for 5 minutes. Add 1/3 cup sugar & two tbsp. corn starch & cook for 2 more minutes)

Preheat the oven to 350F. Combine all the ingredients except the butter & rhubarb sauce in to a medium sized bowl & stir to combine. Cut in the butter until the mixture resembles coarse crumbs. Reserve 1/2 cup of this mixture. Press the rest into a 9x9x2in baking pan. Top with rhubarb sauce & sprinkle remaining crumb mixture on top. Bake for 30-35 minutes until the topping is golden brown.

IMG_1343


Summer of Rhubarb: Mustard & Sage Pork Roast with Rhubarb Sauce

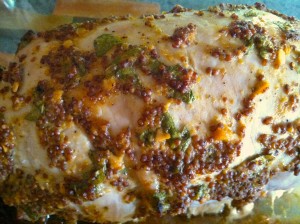
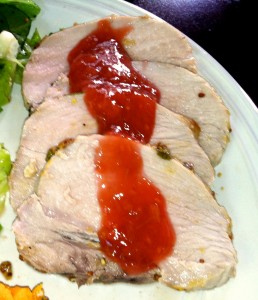
When deciding on how to use my summer supply of rhubarb I knew I wanted to make a sauce. Perhaps for a cheesecake or perhaps for a meat. I decided that it would go nicely with a pork roast.  I love pork roasts. They are so easy & so delicious. This one is a mustard-sage roast as I had fresh sage from my garden. Serve it with sweet potatoes & a salad or some other vegetable of your choice. It’s sort of a fall inspired dish but it will be wonderful no matter when you have it.

Mustard & Sage Pork Roast with Rhubarb Sauce

  • 3-4tbsp whole grain mustard
  • 1/2 tsp minced garlic
  • dash of salt & pepper
  • 1 tbsp fresh sage (hopefully from your garden), chopped. You can sub 1 tsp dried sage if needed.
  • 1.5-2 lb pork roast
  • 2 cups fresh or frozen rhubarb (If frozen let thaw but do not drain off liquid. Also if your rhubarb is on the greener side, add a handful of raspberries for extra color).
  • 1/4 cup water
  • 1/3 cup sugar
  • 2 tbsp corn starch
  1. Preheat the oven to 375F. Mix the first 4 ingredients in a small bowl. Coat the roast entirely and place in a shallow baking dish. Roast for 60 minutes & let stand for 10 minutes (covered) before slicing. IMG_1315
  2. Place the rhubarb in a small pot with the water. Bring to a boil & then reduce heat to a simmer and let cook for 5 minutes. Stir the sugar & corn starch together. Add to the rhubarb. Cook for another 2 minutes until thick & bubbly. IMG_1322
  3. Serve the sauce* with the roast

IMG_1324

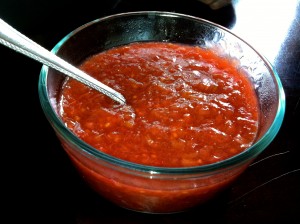
*This sauce is almost more of a glaze. I wanted it thick because I knew I would use it for other recipes & this makes too much sauce for just a roast. If you prefer it thinner, use only 1-2 tsp corn starch. Use the leftovers in oatmeal for breakfast, as an ice cream topping, or make a dessert out of it. I made Oatmeal Rhubarb Bars

Summer of Rhubarb: Rhubarb-Raspberry Crisp

IMG_1232

Cobbler, crumble, or crisp? What is the difference? I am still not clear. Depending on who you ask you get different answers. Everyone agrees that a cobbler has a biscuit type topping. A batter dropped in small spoonfuls giving the appearance of a cobbled road. When it comes to crisps & crumbles the answer is not so easy. Some say it depends on whether you live in the US or in Britain. Some say it has to do with whether or not the topping has oats in it. However, people do not agree on which baked good contains the oats. Some say the crumble has the oats while others say the crisps contain the oats. For my purposes, a crisp has a topping of flour, butter, nuts & oats. The oats crisp up while baking, hence the crisp. That is how I learned it so that’s how it shall be for me.

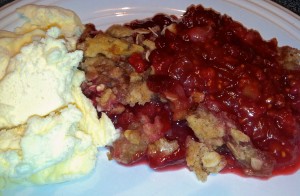
With that in mind, I decided to continue my summer of rhubarb with a crisp. They are so simple & quick. Plus, I had vanilla ice cream in the freezer I wanted to eat up so I thought it was a perfect combination.

Rhubarb-Raspberry Crisp

  • 3 cups fresh or frozen rhubarb
  • 2 cups fresh or frozen raspberries
  • 1/2 cup granulated sugar
  • 1/3 cup all-pupose flour
  • 1/2 cup oats
  • 1/2 cup packed brown sugar
  • 1/4 tsp cinnamon
  • dash or two of nutmeg
  • 1/4 cup cold butter
  • 1/4 cup chopped walnuts
  1. Preheat oven to 375F. Thaw fruit if frozen but do not drain. Place fruit in a 2 qt baking dish. Stir in the granulated sugar.
  2. In a medium bowl, combine flour, oats, brown sugar, & spices. Cut in the butter until mixture resembles coarse crumbs. Stir in the nuts. Sprinkle topping over fruit.
  3. Bake for 30-35 minutes (40 minutes for thawed fruit) or until fruit is tender & topping is golden. Serve warm with ice cream.


IMG_1235

My Man Can Grill

IMG_1170


I love baking & cooking. Most people who know me know this. But what I don’t tell people is how limited I am at certain things. For example, I had never cooked fish until this year. It’s always been so intimidating. Since moving up to Almost Canada I have cooked salmon & it goes without saying, Walleye. Lots of walleye.

One of the other things I have never done is grill. Please, hold all gasps. I realize I am a 30 year old woman from Minnesota (where backyard BBQs are a way of life) who has never grilled. I think it is because my family never grilled when I was a child. I was never exposed to it except for Memorial Day picnics where we grilled at a park.

Luckily, I did end up with a man who can grill. Not just burgers or brats either. Actually, he never grills those things. I think he has grilled burgers once or twice since I’ve known him. When he grills it is an all day experience.

It starts with a plan. Yes, even he meal plans. I usually end up helping with sides & dessert. Then it moves on to a marinade or rub which could be 2-24hrs.

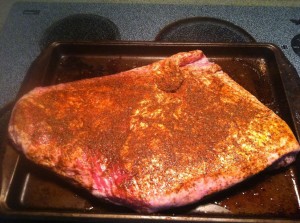
IMG_1174

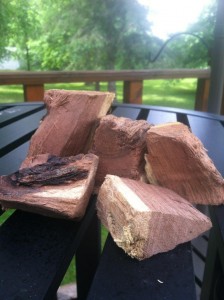
After that, he starts the grill. Of course it is charcoal, but a good portion of the time there is smoking involved. Apple, cherry, hickory, or mesquite wood are all options depending on the recipe.

IMG_1173

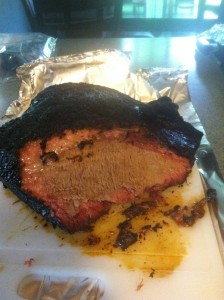
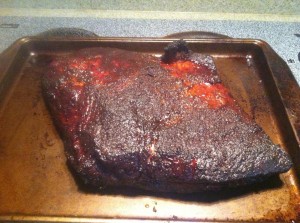
I don’t claim to understand all the aspects of grilling but I do know that the end results are always fantastic. He made the best pulled pork I have ever had in my life a little while ago & most recently he made the best brisket I have ever had which is pictured here.

IMG_1172

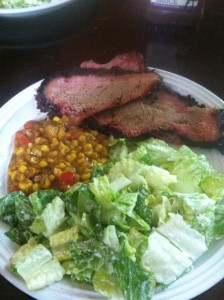
 Once done, it is paired with sides & dinner is served.

IMG_1169

Perhaps one day I will try my hand at grilling, but for the moment I am content to let him take care of that aspect of cooking. He does the grilling & I do the baking. It’s the perfect match.

Summer of Rhubarb: Rhubarb-Strawberry Coffee Cake

Here in Minnesota, and many other places as well, summer means rhubarb. Everything rhubarb. I grew up eating the beloved strawberry-rhubarb pie which my grandmother would make every summer using fresh rhubarb from her garden. As I grew older, I realized how amazing & versatile rhubarb can be.

I love all things rhubarb. Pies, crisps & crumbles, tarts, sauces for dessert or for savory dishes. There are so many options for how to use it. When a co-worker asked me if I wanted any rhubarb I jumped at getting as much as I could until I start growing it. She gave me 14 cups which I separated into various quantities & stored in the freezer so I could just pull it out & cook with it when I wanted.

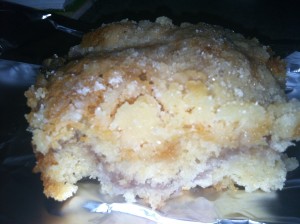
I began my summer of rhubarb on Sunday with a coffee cake from my Better Homes & Gardens cookbook.

Rhubarb-Strawberry Coffee Cake:

  • 3/4 cup fresh or frozen rhubarb cut into 1in pieces
  • 3/4 cup fresh or frozen unsweetened strawberries
  • 1/4 cup water
  • 1/4 cup sugar
  • 2 tbsp cornstarch
  • 1 1/2 cups all-purpose flour
  • 3/4 cup sugar
  • 1/2 tsp baking powder
  • 1/4 tsp baking soda
  • 1/4 cup butter
  • 1 egg, beaten
  • 1/2 cup buttermilk or sour milk (alternatively use 1 tbsp lemon juice & fill with milk to 8oz & let stand 5 minutes)
  • 1 tsp vanilla
  • 1/4 cup all-purpose flour
  • 1/4 cup sugar
  • 2 tbsp butter
  1. For filling, in a medium saucepan combine fruit & water. Bring to  boil. Reduce heat & simmer, covered, for about 5 minutes or until fruit is tender. Combine the 1/4 cup sugar & corn starch. Stir into the fruit. Cook & stir over medium heat until mixture is thickened & bubbly.
  2. In a medium bowl combine the 1 1/2 cups flour, 3/4 cup sugar, baking powder & baking soda. Cut in the 1/4 cup butter until the mixture resembles coarse crumbs. Make a well in the center.
  3. In another bowl combine the egg, buttermilk, & vanilla. Add the egg mixture to the flour mixture & stir until just moistened. Batter will be lumpy.
  4. Spread half the batter into an ungreased 8x8x2in baking pan. Spread filling over batter. Drop remaining batter in small mounds onto filling.
  5. In a small bowl stir together the 1/4 flour & 1/4 sugar. Cut in the 2 tbsp butter until the mixture resembles coarse crumbs. Sprinkle over the coffee cake. Bake in a 350F oven for 40-45minutes or until golden. Serve warm.

IMG_1134

Multiple Meals: Walleye

If you know me at all you know I go ice fishing and have an abundance of Walleye in my freezer. I try to cook it in a different fashion every week. This week I decided I would bread it & bake it. The problem, however, is that I am cooking for 2 and my vacuum sealed walleye is really for 4 people. Obviously, leftover breaded & baked walleye will not re-heat very well.  That left me with the question on how to prepare all the walleye in a tasty manner & so that it would not go to waste which leads to the next installment of multiple meals.

Making multiple meals with fish seemed daunting. I didn’t want to cook half the fish & leave the other half in the fridge to dry out or lose oils for the next night’s dinner. My first thought was to prepare a Seafood Chowder that could be eaten for lunch but I didn’t have any clam juice or cream of potato soup which is my preferred way of making it. I then thought of other recipes I had been meaning to try & I hadn’t made walleye cakes yet. I thought I could try and make walleye cakes that could be eaten for breakfast with eggs. I figured I would bake the rest of the fillets with my breaded fillets & then I could put them in the fridge for the next day to flake, mix up with all the other walleye cake ingredients, & finally cook them.

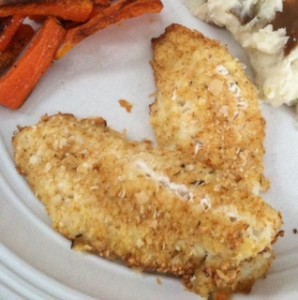
Baked Walleye

  • ½ vacuum sealed bag walleye (roughly 4 small fillets or 2 medium fillets). See Walleye Breakfast Cakes below for using the rest of the fillets.
  • 1 egg, beaten
  • Splash of milk
  • Breadcrumbs
  • Mashed potato flakes
  • Grated parmesan cheese
  • Seafood seasoning
  • Seasoned salt
  • Pepper


Preheat the oven to 400F.

Place the egg in a small to medium bowl with the splash of milk.

Place equal parts breadcrumbs, mashed potato flakes, and grated parmesan cheese on a plate or in a bowl. Mix in seafood seasoning, seasoned salt, & pepper to taste.

Dip the fillets in the egg mixture and allow the excess to drip off.

Place the fillets in the breadcrumb mixture & then place on a lightly greased baking sheet.

Bake for 15-20 minutes until the fish flakes apart easily.

Serve with sides of your choice. I served them with roasted carrots & mashed potatoes & gravy.

baked walleye


Walleye Breakfast Cakes

  • ½ vacuum sealed bag walleye (roughly 4 small fillets or 2 medium fillets) previously cooked*
  • 1 egg
  • 2-3tbsp Mayonnaise
  • 1-2tsp Lemon juice
  • 1/4-1/3 cup Breadcrumbs
  • Seafood seasoning
  • Seasoned salt
  • Pepper
  • Oil
  • Eggs served to your preference


*To the half of the fillets for the walleye cakes, place them on the baking sheet with the breaded walleye (recipe above). Lightly season with seafood seasoning & drizzle with cooking wine or olive oil. Cook along with the breaded fillets. Once cooked, place these un-breaded fillets in a medium mixing bowl in the fridge covered with plastic wrap.

Shred the fillets cooked previously in the mixing bowl (the advantage of shredding them the next day is that you get nicely sized walleye chunks).

Add all the ingredients except for the oil & the eggs that you will cook to your preference.

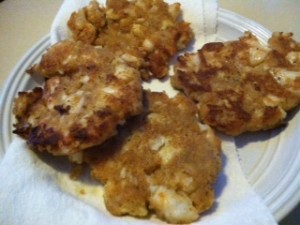
Mix the ingredients & form into patties (makes roughly (4) 3in patties – 2 for each person).

Place a small amount of oil in a skillet over medium to medium-high heat & cook the walleye cakes for 2-3 minutes per side until golden brown & heated through. Place on a paper towel to drain off excess oil.

walleye cakes

Cook eggs to your preference (over easy, poached, etc) and serve over walleye cakes. Drizzle with sweet chili sauce if desired.

walleye with eggs

Meal Planning in a Small Town

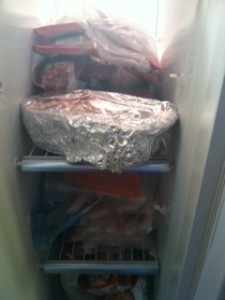
As I have gotten older and circumstances have changed in my life, I have spent more time in the kitchen making dinner. One of my favorite parts of cooking is meal planning. I like spending time each day or sometime during the week to decide what to make for dinner. The key is to have a well stocked pantry of food items and for me, living in more rural areas, having a well stocked freezer.

I did live in a few small towns for awhile but they were 6hrs further south than where I am now. I had access to major grocery stores as well as smaller markets even if they were 15-60minutes away. Living in the “country” I soon discovered having a well stocked freezer was not only easier, but cheaper, as you could buy meats in larger quantities & vacuum seal it into smaller portions.

freezer

As of last November I soon realized how much I was spoiled. Moving up to Almost Canada has made me miss my grocery stores even if they were a little ways away. The grocery stores up here are…how shall I say it…depressing. Everything is limited & everything is expensive. You go with a mindset of what to make and your key ingredients are not to be found. The grocery store 45minutes away is better, but still not very good. The one 2hrs away is better still, but once again, not the same. Seasonal cooking is definitely a concept I have to embrace as well as a constant lack of ingredients even in that season.

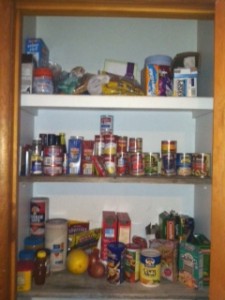
So once again I stocked my pantry with canned & boxed goods as well as stocking my freezer with meat portioned out & vacuum sealed.

pantry


I know one day the deep freeze will be stocked as well, although probably with fishing or hunting conquests.  Having numerous supplies now at hand I proceed to go about planning dinners & lunches as needed. Sometimes on a day by day basis and sometimes for the whole week.

Meal planning still gives me enjoyment. I had some misgivings at first since everything was limited, but one has to look at it in a different light. You have to look at it like dieters do. It’s not what you can’t have but rather all the things you can have. With this mindset I set about to make dinners with leftovers if needed for easy lunches the next day all the while trying to vary what I make, use up items that need to be eaten, & try out new things. Some are huge hits & others need some tweaking but it’s fun to see what comes out of the kitchen.

Here is what I came up with for this past week as an example. I started my meal planning on Thursday last week to go through Thursday of this week. Friday is up in the air but I have a leftover prepped lasagna in the freezer for after a day of ice fishing on Saturday.

  • Thursday: Spaghetti & Meatballs (also resulted in leftovers for Fri lunch)
  • Friday: Meatball Sandwiches
  • Saturday: Lasagna
  • Sunday: Mustard Pork Roast w/apples & onions (recipe from my lovely which also produced lunch for Monday)
  • Monday: Salmon & Spaghetti Squash Fritters w/zesty dipping sauce
  • Tuesday: Chicken & Squash chausson/calzone
  • Wednesday: Pork Chops w/zucchini, summer squash, & rutabaga (made in the slow cooker with onion soup mix & broth)
  • Thursday: Skillet Chicken & Chile Rellenos w/corn & tomatoes served over rice

As part of this last weeks meal planning I was able to use some ground meat in the freezer & make numerous dishes out of it. Also, I cooked Salmon for the first time. I made up a recipe that I thought would go with a spaghetti squash fritter recipe I pulled up from the internet. The squash (and spinach) needed to be eaten so I based my meal around that item. A long time ago I learned that meals do not always need to be based around meat. Sometimes you pick a vegetable & then work your meal around that – like for the rellenos recipe. I had two poblano peppers that needed to be eaten & leftover roasted chicken from the chausson recipe, so I combined the two & used pantry items to supplement. In addition, I also try to vary the meat source used in the meals so as not to get sick of any one thing (I’m slowly getting my fishing guide to have some meatless dishes but he still prefers meat in every meal).

With all of these concepts & a well stocked pantry & freezer, I set about meal planning. It’s fun & it’s Zen for me. It relaxes me & excites me. I feel at peace in a way knowing that I will produce (hopefully) delicious meals for myself & others to eat. I also get excited when I try new things or come up with new recipes. Despite living in a small town with not much to choose from, none of that has changed.