Poutine


IMG_3068


I have never had real Poutine. I don’t know how this is possible considering I live in Minnesota or Almost Canada. I had poutine at the MN State Fair but it wasn’t real Poutine. It was more like a fast food version. This recipe might not be traditional but it is delicious. Maybe one day I will have a traditional version but until I do this will suit me just fine.

Poutine (serves 2)

  • 1-1.5 cups shredded cooked duck
  • 1 cup duck gravy
  • 2 cups diced potatoes
  • 2 tbsp lard
  • salt & pepper to taste
  • shredded swiss cheese

Fry the potatoes in the lard with salt & pepper until crispy. Place in a pie plate.

IMG_3064

Top with shredded duck and then gravy. Bake for 15-20 minutes until duck is heated through. Top with swiss cheese. Bake for 5 minutes more until cheese is melted. Serve & enjoy

IMG_3068

Walleye Cakes & A Poached Egg

This was an exceptionally short ice fishing season. It hasn’t been this short in 28 years for everyone in Almost Canada. For Lake Minnetonka it was the shortest ice out season since 1887. Wow. That is a crazy record. Because of this I didn’t get to go fishing as often as I would have liked. Normally I have to find creative ways to work through all the walleye we catch but not this year. I decided to make walleye cakes with this batch which is one of my favorite ways to eat walleye. I was even adventurous enough to make poached eggs for the first time & was very pleased with the results.

Walleye Cakes (serves 2)

  • ½ vacuum sealed bag walleye (roughly 4 small fillets or 2 medium fillets) previously cooked*
  • 1 egg
  • 2 tbsp Mayonnaise
  • 1-2tsp Lemon juice
  • 1/4-1/3 cup potato flakes
  • Oil
  • 2-4 poached eggs (I just served 1 egg per person but feel free to do more)

*To cook the walleye, place the walleye on a baking sheet lined with foil & spray with cooking spray or lightly coat it in olive oil. Lightly season the fillets on both sides with blackened seasoning or cajun seasoning. Spray fillets with cooking spray or drizzle with olive oil. Bake for 10-15 minutes depending on the size of the fillets until cooked through. Once cooked, place them in a medium mixing bowl in the fridge covered with plastic wrap to be used the next day or shred into chunks to be used immediately.

Cooking the Walleye Cakes: Shred the fillets if needed. Add all the ingredients except for the oil & the eggs that you will poach.

Mix the ingredients & form into patties (makes roughly (6) 2in patties – 3 patties for each person).

Place a small amount of oil in a skillet over medium to medium-high heat & cook the walleye cakes for 2-3 minutes per side until golden brown & heated through. Place on a paper towel to drain off excess oil.

Serve with poached eggs.IMG_2256

Asian Venison & Broccoli

IMG_2956


I harvested my first deer this last deer season. My guide cooked the tenderloin & made chicken fried venison steaks thus far, but one of the reasons I wanted to harvest a deer was to learn how to cook with venison. It’s hard for me to justify hunting unless you have good reasons, i.e. putting food on the table, conservation, using the hide, gaining skills & perspective on life, etc. I don’t understand people who hunt for antlers. Don’t get me wrong, I wouldn’t turn down a nice buck to put on the wall, but that cannot be my only reason to hunt.

One of the times my guide and I went to check out my hunting grounds I brought my shotgun with me to see if I could get some grouse or other small game. My guide said, “There is a squirrel, shoot him.” This is what he saw…

IMG_2879


I, however, saw this…

IMG_2880


Needless to say I didn’t shoot him. I saw a squirrel and he was eating something. He was small. There was not enough meat on him to feed one, let alone two. I looked back at my guide and I said, “He’s eating breakfast.” I kid you not. Hunting happens in split seconds and in that moment I didn’t see something worth shooting. I saw an animal enjoying the morning like my guide and I were doing.

Maybe that is part of the reason why I was able to harvest a deer. Maybe the world smiled upon me for making a good hunting choice on when to shoot. My deer was not so lucky in that aspect. I decided to pull the trigger. Now I have provided my guide and myself with a freezer full of venison.

I decided to cook with one of the choice cuts of meat for my first attempt at cooking venison. It actually turned out really good. I will definitely be making this again in the future.

Asian Venison & Broccoli (serves 2)

  • small amount of sesame & olive oil
  • 1 lb deer steak sliced into thin bite-sized strips or pieces
  • heaping tsp minced garlic
  • 12 oz bag broccoli florets, blanched or lightly steamed.
  • 1/2 cup white rice cooked according to package directions

Marinade

  • 1 tsp corn starch
  • 1 tsp sesame oil
  • 1 tbsp soy sauce
  • 1/8 tsp each onion & garlic powder
  • pinch each salt & pepper

Sauce

  • 1.5 tbsp each hoisin, oyster, & soy sauce
  • 2 tsp rice vinegar
  • 1 tsp each chili sauce & honey
  • 1/4 tsp ground mustard
  • dash or two ground ginger


Add marinade to venison and allow to stand for 15-30 minutes. Meanwhile, mix sauce ingredients together.

Heat a small amount of sesame oil or sesame & olive oil in a skillet (I find too much sesame oil is overwhelming so usually do a blend for stir-fries). Add the marinaded venison and garlic and cook briefly (about 1-2 minutes depending on how thin your pieces are). Add the sauce and allow to come to a boil. Cook for another 2 minutes or so. Stir in the broccoli and serve over rice with additional soy sauce.

IMG_2956

Bread Pudding

IMG_3054


Since moving to Almost Canada I haven’t gone down to the cities for Christmas. I moved up north during one of the coldest winters in a very long time. My guy and I made numerous trips back and forth throughout that terrible winter and have since refused to do winter driving. I’ve offered to host Christmas but no one has taken me up on it yet. Go figure. It has actually been nice. My guy and I have our own little Christmas. Christmas morning I made coffee cake muffins for brunch. They are delicious fresh out of the oven with a gooey layer of cinnamon goodness inside and a cinnamon crumble on top. They dry out quickly unfortunately. I only made a half dozen but was still left with two muffins that were going to be inedible by the next day. I also had neglected to make a dessert for our Christmas dinner. As my guy had gotten me a set of ramekins for one of my gifts I knew exactly what I was going to do. I was going to make individual bread puddings. It turned out to be one of the best bread puddings I have ever made and might be my new go-to recipe for bread pudding.

Bread Pudding (serves 2)

  • 2 leftover muffins, mine were coffee cake muffins
  • 2/3 cup buttermilk
  • 1 egg
  • 2 tbsp sugar
  • 1 tsp vanilla
  • couple dashes cinnamon
  • bourbon sauce:
    • 2 tbsp butter
    • 1/4 cup sugar
    • 1 tbsp water
    • 1 tbsp bourbon

Take the leftover muffins and crumble them into their own ramekin dish. Combine the buttermilk, egg, sugar, vanilla, & cinnamon. Pour into the ramekin dishes and press the muffins down into the liquid.

IMG_3050

Bake for 25 minutes in a 350F oven or until set.

IMG_3053

Meanwhile prepare bourbon sauce by meting butter in a small sauce pan. Add sugar & water and cook for 5 minutes or so. Stir in bourbon. Cook for 2 minutes more. Remove bread puddings from ramekins and place into two serving bowls. Drizzle with bourbon sauce and enjoy.

IMG_3054

Pork & Zucchini Meatballs


IMG_2470


I’ve always been a baker. I started baking brownies after school in fourth grade which may have been a contributing factor to my fourth grade chubbiness. It’s only in the last few years that I have actually started cooking.

I do almost all the cooking in my household. I enjoy it. I like to make dinner and meals for other people. With that comes the task of meal planning. I probably take this way too seriously. I will spend 1-2 hours on Sunday and plan meals out for the week.

I live in Almost Canada where a well stocked pantry & freezer is a way of life. I’m usually cooking for two so coming up with meals that use common ingredients is a necessity. In the summer months that means using the garden’s bounty.

Zucchini is one such ingredient. The little zucchini are great for side dishes or replacing noodles. It’s those big guys that hide in your garden that become breads, cakes, fritters, etc. I decided to use them in a meatball instead of onion to keep them moist. The worst kind of meatball is a dry meatball which is probably the most common problem when it comes to making them. These are divine. I also used homemade tomato sauce which makes any dish that much better.

Pork & Zucchini Meatballs (serves 2)

  • 1/2 pound ground pork
  • 1/2 cup shredded zucchini
  • 1-2 tsp minced garlic
  • 1 egg
  • 1 slice bread, torn into small pieces
  • 1 tsp italian seasoning
  • 1/4 tsp onion powder
  • salt & pepper to taste
  • tomato sauce (store bought or use this recipe Garden Fresh Tomato Sauce)


Preheat oven to 400F. Line a baking sheet with foil or parchment paper. Mix all the ingredients together except for the sauce. Form into meatballs (roughly the size of a golf ball). Place on baking sheet and bake in oven for 8 minutes or so until browned. Place in tomato sauce and cook for at least 20 minutes until cooked through (preferably longer for deeper flavor, turning occasionally). Serve over pasta, or if you are like me, sautéed zucchini.


IMG_2470


Tomato Sauce


IMG_2445


I might have been a little too ambitious when it came time to plant the garden. Last year we had two tomato plants. This year we had 18. Yes 18. This included 6 cherry tomato plants which is way too many cherry tomato plants by the way. Next year we are only doing 2 of that variety – one yellow and one red. We also had 6 Roma tomato plants and 6 early girl tomato plants.

I have been working through my tomatoes like crazy. I have made numerous batches of tomato sauce for various dinners as needed and I have frozen about 10 pints of tomato sauce for the winter months. 10 pints really isn’t that much if you use a pint at a time for recipes. I probably use a pint a week for spaghetti or lasagna so I really only have 10 weeks worth of sauce.

Everyone has their favorite recipe. I always change the amounts of seasoning depending on my mood. The only thing I keep constant, the key ingredient for me for a good tomato sauce, is the bay leaf. This is absolutely essential for all good tomato sauces in my opinion. This is probably because my mother used to make tomato sauce and she used bay leaves in her recipes.

I don’t remember many things she made. This is because she wasn’t the best cook. Sorry mom. She wasn’t terrible but I don’t have any fond memories or favorite dishes she made. The only great thing I remember was her long, slow simmer of tomato sauce with a bay leaf.


Tomato Sauce (serves 2)

If you have dozens of tomatoes to work through feel free to double or quadruple this recipe & freeze it for when your garden is covered in snow.

  • 10-12 ripe tomatoes (I prefer a combination of roma & vine-on)
  • 1 tsp olive oil
  • 1 onion, diced
  • 1-2 tsp garlic, minced
  • salt & pepper, to taste
  • 1-2 tsp italian seasoning
  • 1/4 tsp crushed red pepper or more if desired
  • 1 bay leaf


Score an ‘X’ on the top of each tomato.


IMG_2436

Blanch in boiling water for 30-60seconds until the skins split. Remove from the boiling water and add to an ice bath.

IMG_2437

Remove skins. Remove the core portion on top. Roughly chop the tomatoes if you want it to cook down more quickly. Otherwise just cut them in half or so if you don’t care how long it takes.

IMG_2439

Saute the onion in olive oil until translucent. Add the garlic and sauté for 2-3 more minutes.

IMG_2438

Add the tomatoes and the seasoning. Simmer, covered, on low for 2 hours. Remove the bay leaf. Leave as is if you like your sauce a bit chunky or puree with an immersion blender.

IMG_2445

Cauliflower Cheesy Bread


IMG_2391


I’ve mentioned before how I am not allowed to make vegetarian dishes. My fishing guide is a meat & potatoes type of guy. I’ve made a few dishes but those vegetarian meals have to be at lunch. I think he would flip his lid if I tried to make a veggie meal for dinner.

I’ve actually made this cheesy bread for him but it was a side dish to something. He really enjoyed it. He said, “there is no bread in this?” Nope. Just cauliflower vegetable goodness. The best part is you don’t have to spend forever squeezing out the excess moisture from the “dough.”

Since he is driving a boat today, being a real fishing guide for others, I got to make this dish as an entree and eat it myself for lunch. Delicious.

Cauliflower Cheesy Bread (serves 2 as a side dish or 1 as a main dish)

  • 1/2 head cauliflower, cut into chunks
  • 2 eggs
  • 1/4 cup mozzarella cheese
  • 1 tsp basil
  • 1 tsp oregano
  • 1-2 tsp minced garlic
  • salt & pepper, to taste
  • 1/2 cup to 1 cup mozzarella cheese

Marinara Sauce: Make your favorite recipe, use store bought, or try this quick go-to…

  • 1/2 can stewed tomatoes
  • pepper to taste
  • 1/2-1 tsp italian seasoning (or equal parts basil & oregano if you prefer)
  • few dashes hot red pepper flakes

Marinara Sauce: Puree tomatoes lightly so that there are still some chunks. Add seasonings. Simmer all ingredients for 15-30minutes.

Cauliflower Cheesy Bread: Pick cauliflower from your garden (or just go to the store, but these guys are super easy to grow. I recommend you do so next year).

IMG_2398

Puree 1/2 head cauliflower that has been cut into chunks in a food processor.

IMG_2380

While oven preheats with a baking stone sauté cauliflower in a skillet over medium low to medium heat to release excess moisture and soften the cauliflower.

IMG_2383

Add to a medium bowl. Add the rest of the ingredients except for the 1/2- 1 cup mozzarella and mix well. Form into a square on a piece of parchment paper.


IMG_2384

Place paper on heat stone. Bake for 20 minutes. Top with cheese. Bake for 5 minutes more. Serve with marinara sauce.

IMG_2391

IMG_2387

Seared Ahi Tuna

IMG_2309


I moved to Almost Canada two years ago this fall. Making the decision was easy but involved a lot of sacrifice. My guy sacrificed everything to move with me. One of the things he gave up was his career as an accountant.

The job opportunities are bleak to say the least where we live. They basically include the company I work for and a lot of dead end jobs. Since he has moved with me he has been on unemployment, worked at a bait/outdoors store, he became an ice fishing guide, & he has been doing lawn care/landscaping.

He often used to talk about how this town was eating him alive. That he didn’t have any chances to succeed.

He ended up pursuing one of the only opportunities here which was becoming a boat captain. Something that is not that easy to do. The application is rather extensive and it takes quite a bit of time & cash. When it came down to it, he made it happen.

He got his Captain’s License!

IMG_2342

I couldn’t be more proud of him. My fishing guide is now a professional fishing guide.

This is something he has talked about for awhile and it is finally a reality. He has even gotten some experience on the lake and has taken people out a few times on his own despite the season being half over.

Even though this has been a long time in the making, and he is thrilled to be able to do this, being on a boat is no walk in the park. It’s hot, it’s windy, people get sick, the fishing is slow & your customers are upset, the list goes on.

Despite the list of negatives this isn’t the worst job in the world & it is a consistent seasonal position. It’s one of the few seasonal opportunities around that actually pays OK & there might be some chances for growth. Life doesn’t always give you the best opportunities but it’s how you deal & what you make of them.

The same is true for grocery shopping in this small town. It’s impossible to get anything here so you have to adapt. I cannot get many items here.  I most certainly cannot get quality sushi, but I can have it overnighted by a company to my door! Sushi grade fish delivered right to me. An opportunity that I simply could not pass up.


Seared Ahi Tuna Salad (serves 2)

  • 11 oz sashimi grade ahi tuna
  • salt & pepper
  • oil
  • salad of your choice (I used a salad kit with sunflower seeds and a citrus onion dressing)

If the tuna is frozen allow it to come to room temperature in the fridge. Do not let it sit on the counter. Cut the tuna into two pieces. Season with salt and pepper. Heat a small amount of olive oil in a skillet and sear the tuna on all sides for 1-2 minutes per side until. Slice and serve over salad of your choice.

IMG_2309

Thai Turkey Noodles


I went turkey hunting for the first time this year and ended up with a turkey! Now the fun of getting to cook with it begins. I had two bags of breast meat and one of dark meat.

IMG_2163

My plan is to turn the dark meat into sausage or jerky. The breast meat was very pink so I decided to actually make a dish with it as I didn’t think it would be too gamey. I came up with Thai Turkey Noodles. It is delicious and if you didn’t know it was made with wild game you would think it was chicken.


Thai Turkey Noodles (serves 2)

  • 4 oz spaghetti noodles, cooked and drained
  • sesame oil
  • 1  turkey breast, cubed
  • 1/2 cup chopped onion
  • 1/2 cup chopped red bell pepper
  • 1 cup water chestnuts, sliced
  • 1 tsp garlic, minced
  • pinch each ginger & red pepper flakes
  • 1 tbsp flour
  • 1.5-2 cups chicken stock
  • 2 tbsp soy sauce
  • 2 tbsp hoisin sauce
  • 1 tbsp oyster sauce
  • green onions, optional

Heat a small amount of sesame oil in a large skillet. Add turkey and cook & stir until just cooked through. Remove from turkey from skillet & set aside.

Add onion, red bell pepper, water chestnuts, garlic, ginger, & red pepper flakes. Sauté for about five minutes until slightly softened. Stir in flour and cook for 1-2 minutes. Whisk in chicken stock. Stir in soy sauce, hoisin sauce, and oyster sauce. Add turkey back to skillet.

Heat to boiling and then cover & reduce heat to simmer. Stir occasionally until mixture is thick and bubbly (add more chicken stock if needed to thin sauce or more  seasonings if desired). Stir in noodles.

Garnish with chopped green onions if desired. Feel proud that you provided this meal.

IMG_2252


Pesto Prosciutto Pizza with Cauliflower Crust


IMG_1974


I have a samurai living inside me. 

This is what I tell people when I say I have Hashimoto’s Disease. “I have a samurai living inside me.” Making a joke sounds better than when I say I have an autoimmune disease that it attacking my thyroid & causes many other health side effects.

Apparently the only way to cure it (maybe) is by going gluten free. Supposedly after 6 months to 2 yrs of being gluten free, my antibodies will go back down to a normal level. I have yet to do this. Why haven’t I? Well, it’s complicated.

For one, I have most of my symptoms under control. I feel much better than I did before. My hands only feel somewhat cold. I am not constantly fatigued. My headaches are under control. The list goes on.

Another reason is that I really don’t want to go gluten free. It is really hard. Gluten is everywhere. There are so many hidden sources of gluten it isn’t even funny. People with celiac’s disease will tell you a gluten free diet is no joke. Sure, it is easier today than it was 10 years ago with gluten free menu options or new & interesting food ideas, but it is still no walk in the park. I have done a massive gluten reduction but am by no means “gluten free”. For now my reduction plan is working for most of my symptoms.

I also love baking. I will not give that up. I don’t think I could afford to bake gluten free right now anyhow. And baking regular for the heck of it and gluten free for myself does not appeal to me. Maybe one day I will get there. Maybe one day I will have to. Until then I try to do the best I can and make better choices so that I feel well.

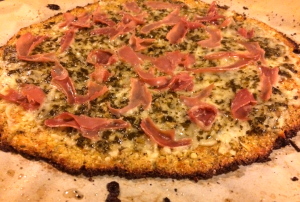
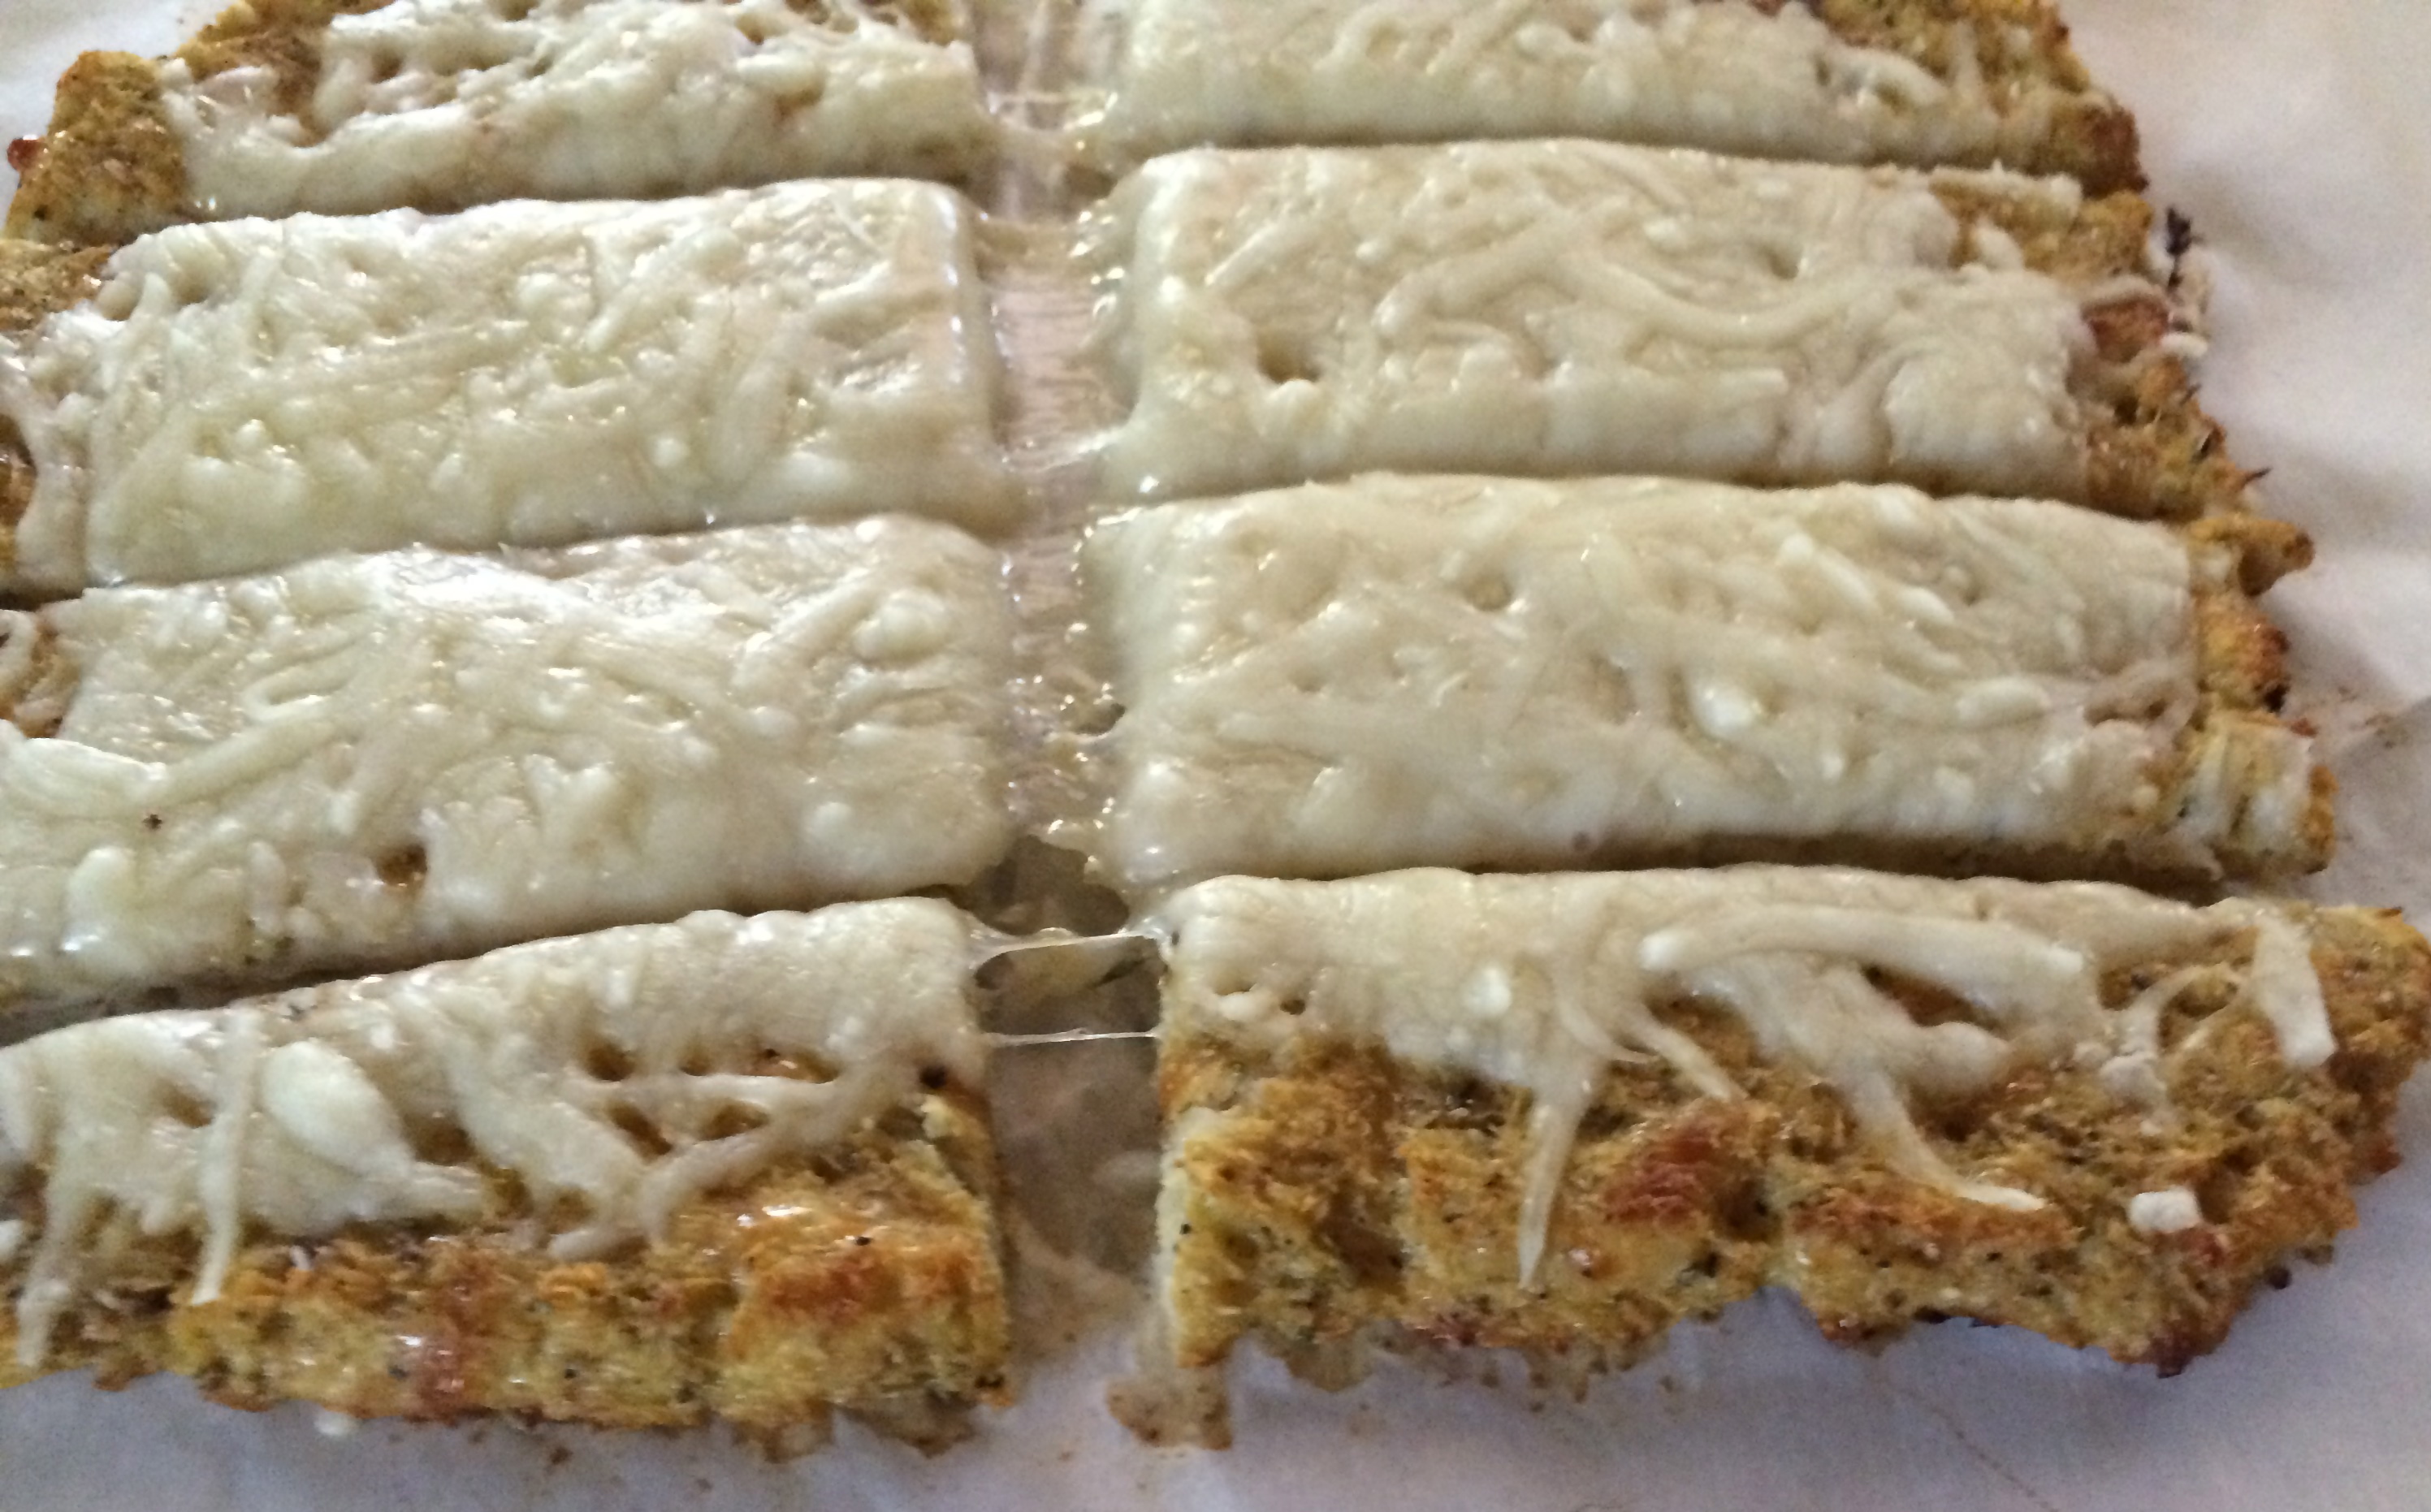
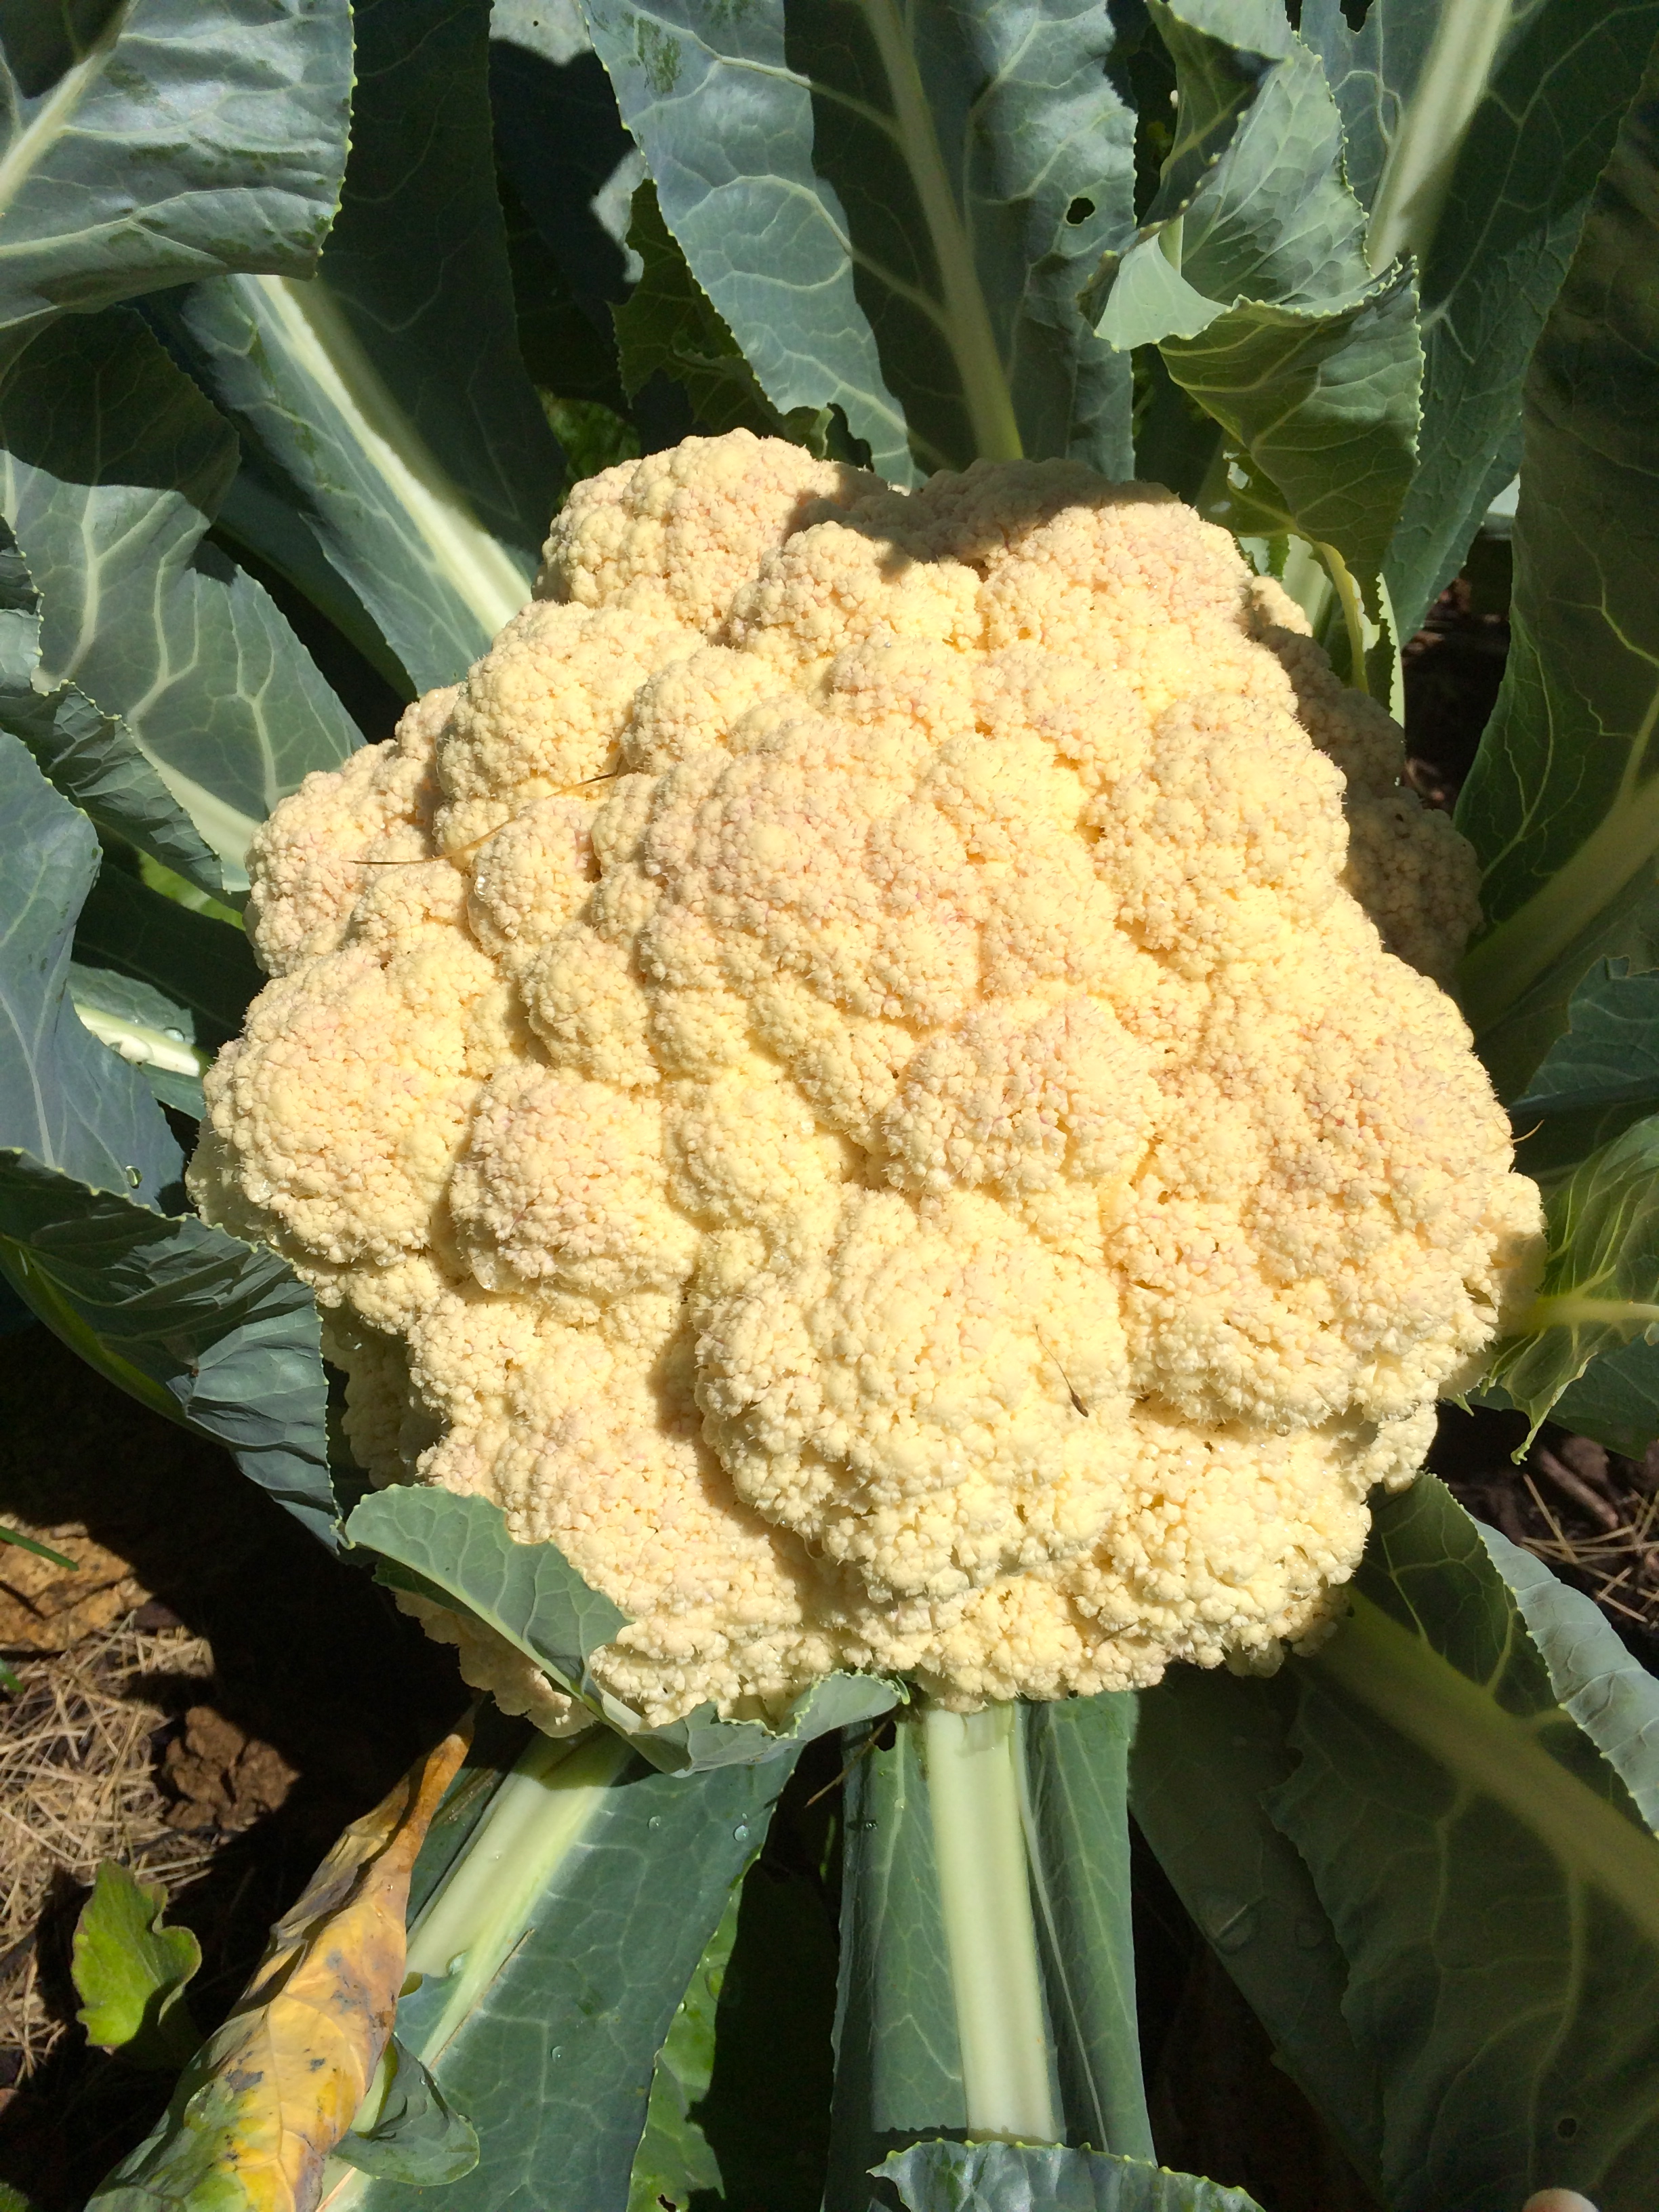
One thing I tried was a cauliflower crust for pizza. Cauliflower is on the internet everywhere in the food world as a healthy alternative to breads & pastas. This pizza is amazing and healthy. Give it a try for something different or maybe for your own health reasons.


Pesto Prosciutto Pizza with Cauliflower Crust (serves 1-2)

  • small bag cauliflower florets (or half head cauliflower)
  • 1 egg
  • 1/2 cup shredded asiago cheese
  • 1/4 tsp each oregano & basil
  • few dashes onion powder
  • 1 clove garlic, minced
  • pinch salt & pepper
  • olive oil (for brushing parchment paper)
  • 1/2 to 3/4 cup shredded parmesan cheese
  • 1/4 cup homemade or store bought pesto
  • 1.5 oz prosciutto, sliced into bite sized pieces


Preheat a pizza stone or clean baking sheet in an oven to 450 degrees F.

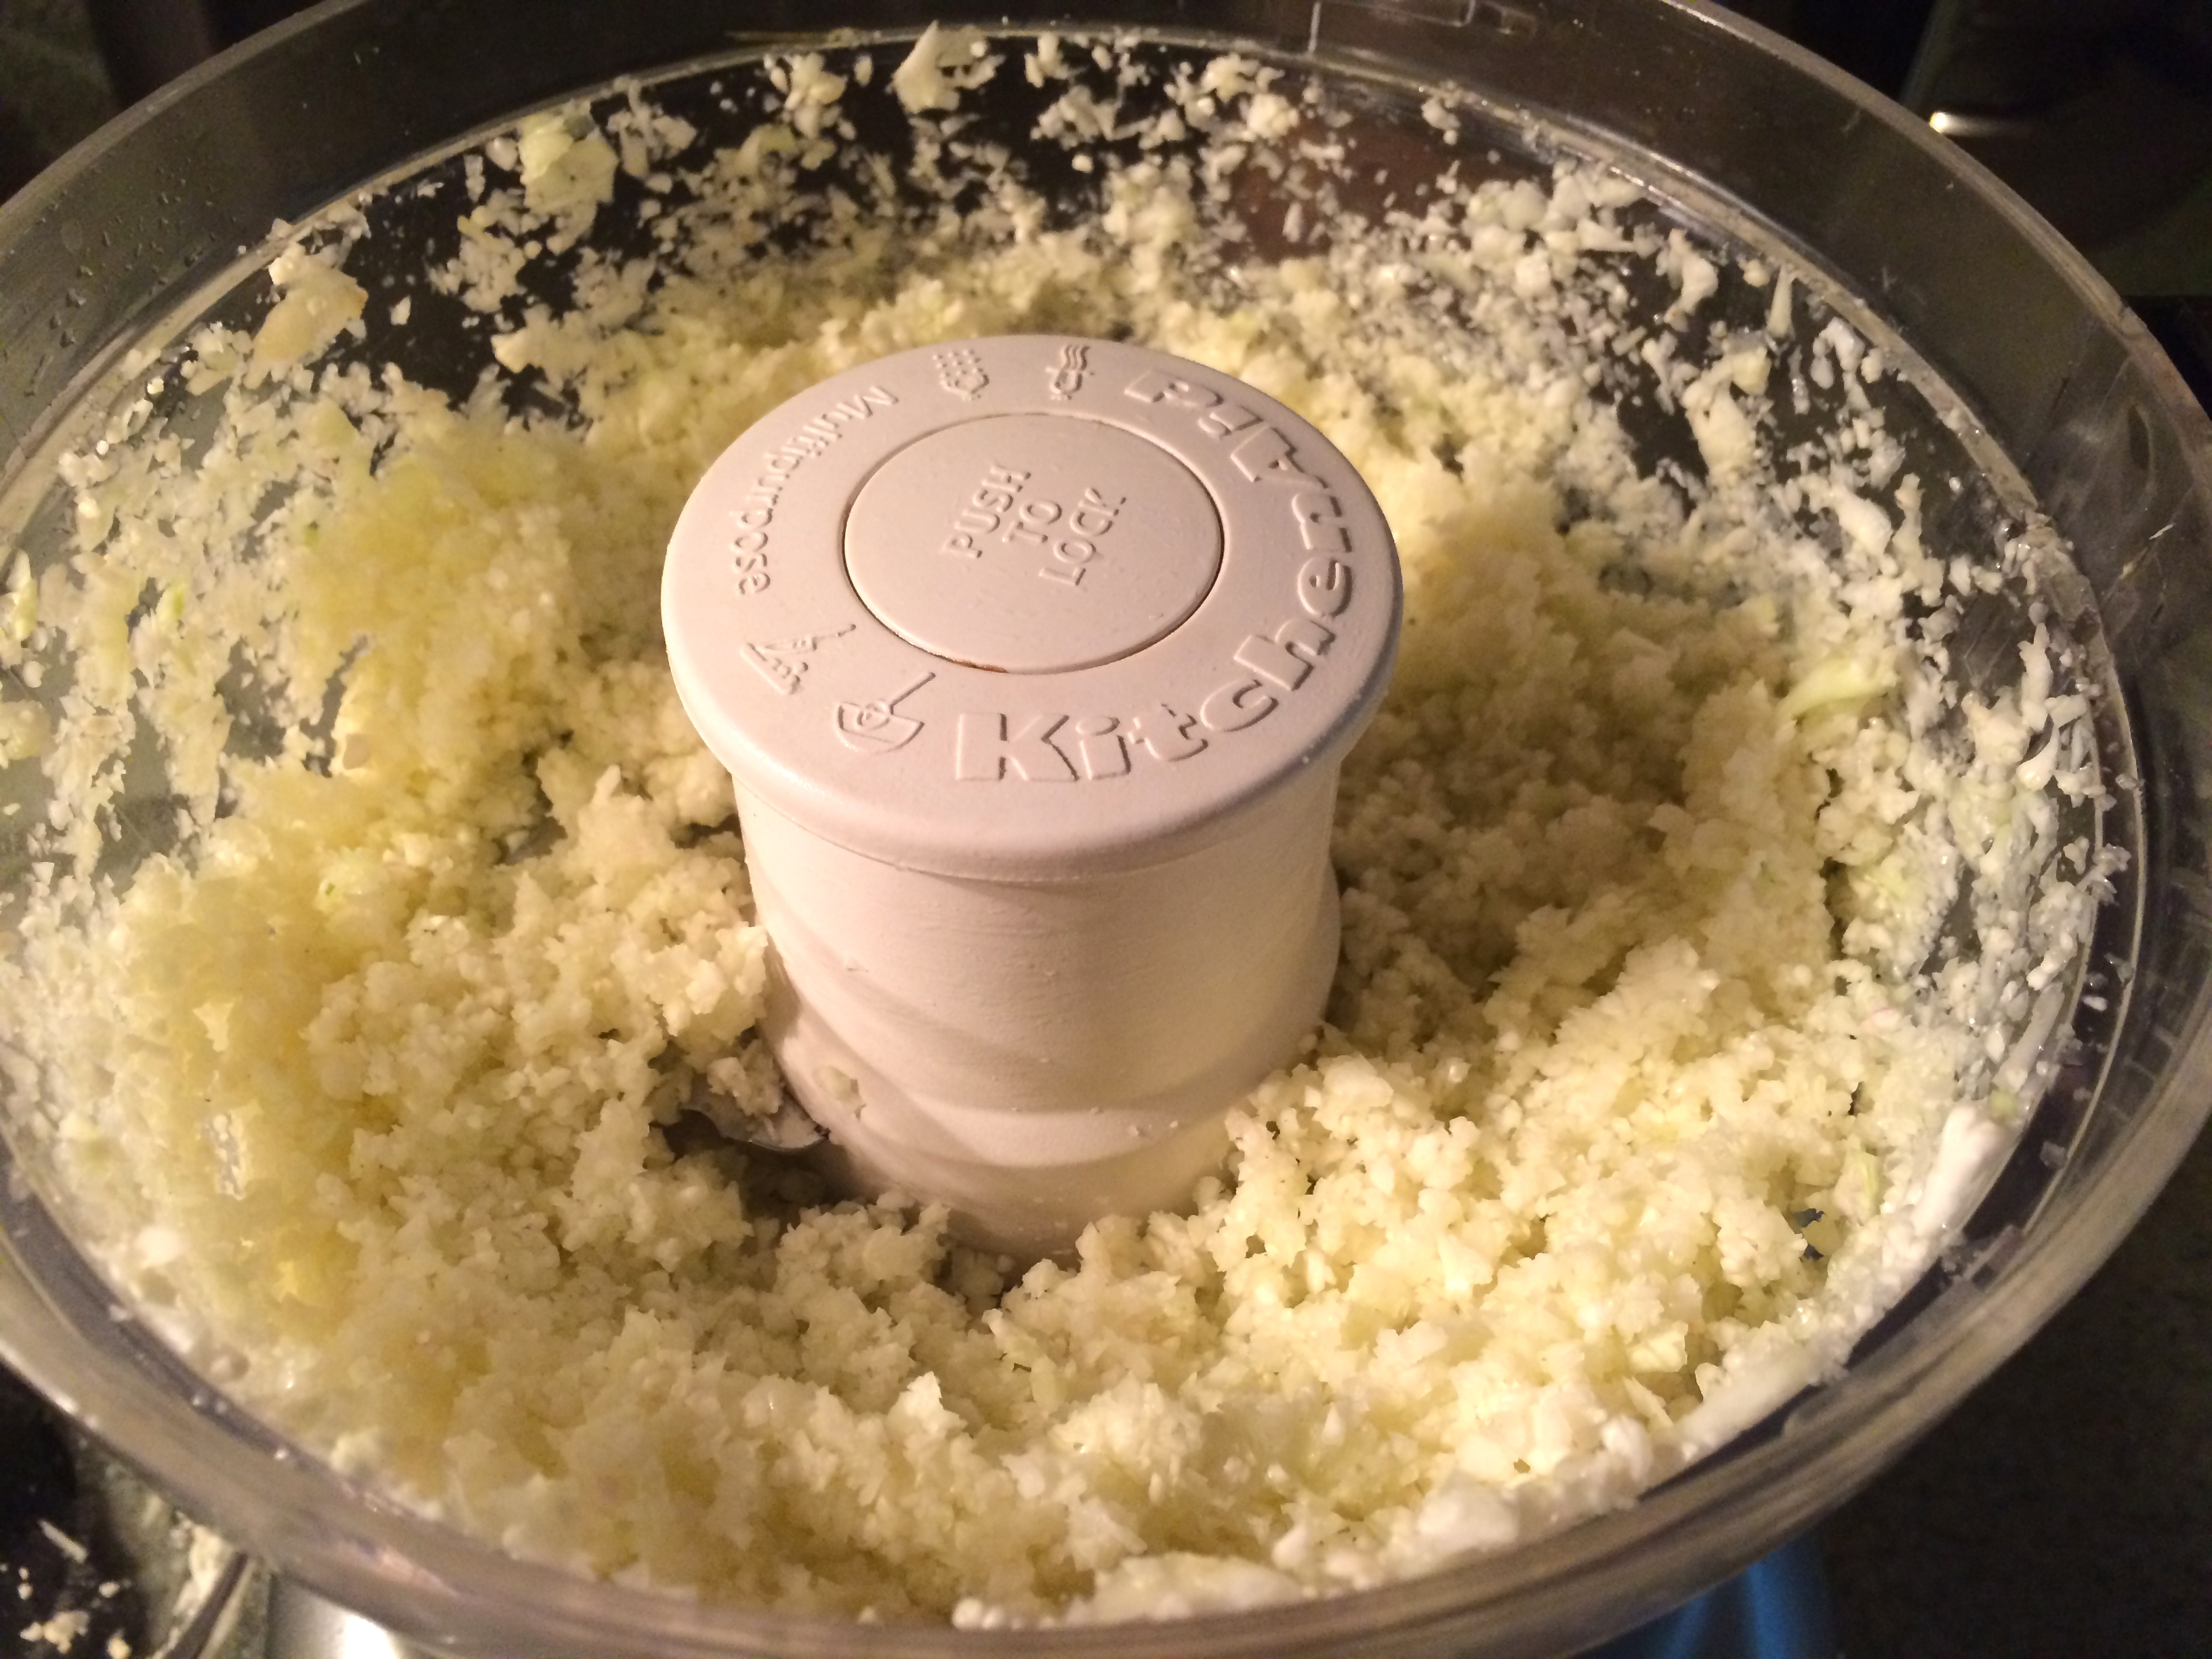
Add the cauliflower to a food processor and pulse until finely ground.

Transfer the cauliflower to a medium bowl. Add the Asiago, egg, garlic, and seasonings. Combine until the mixture holds together when pinched. Pour onto a cheesecloth and wring out as much moisture as you can.

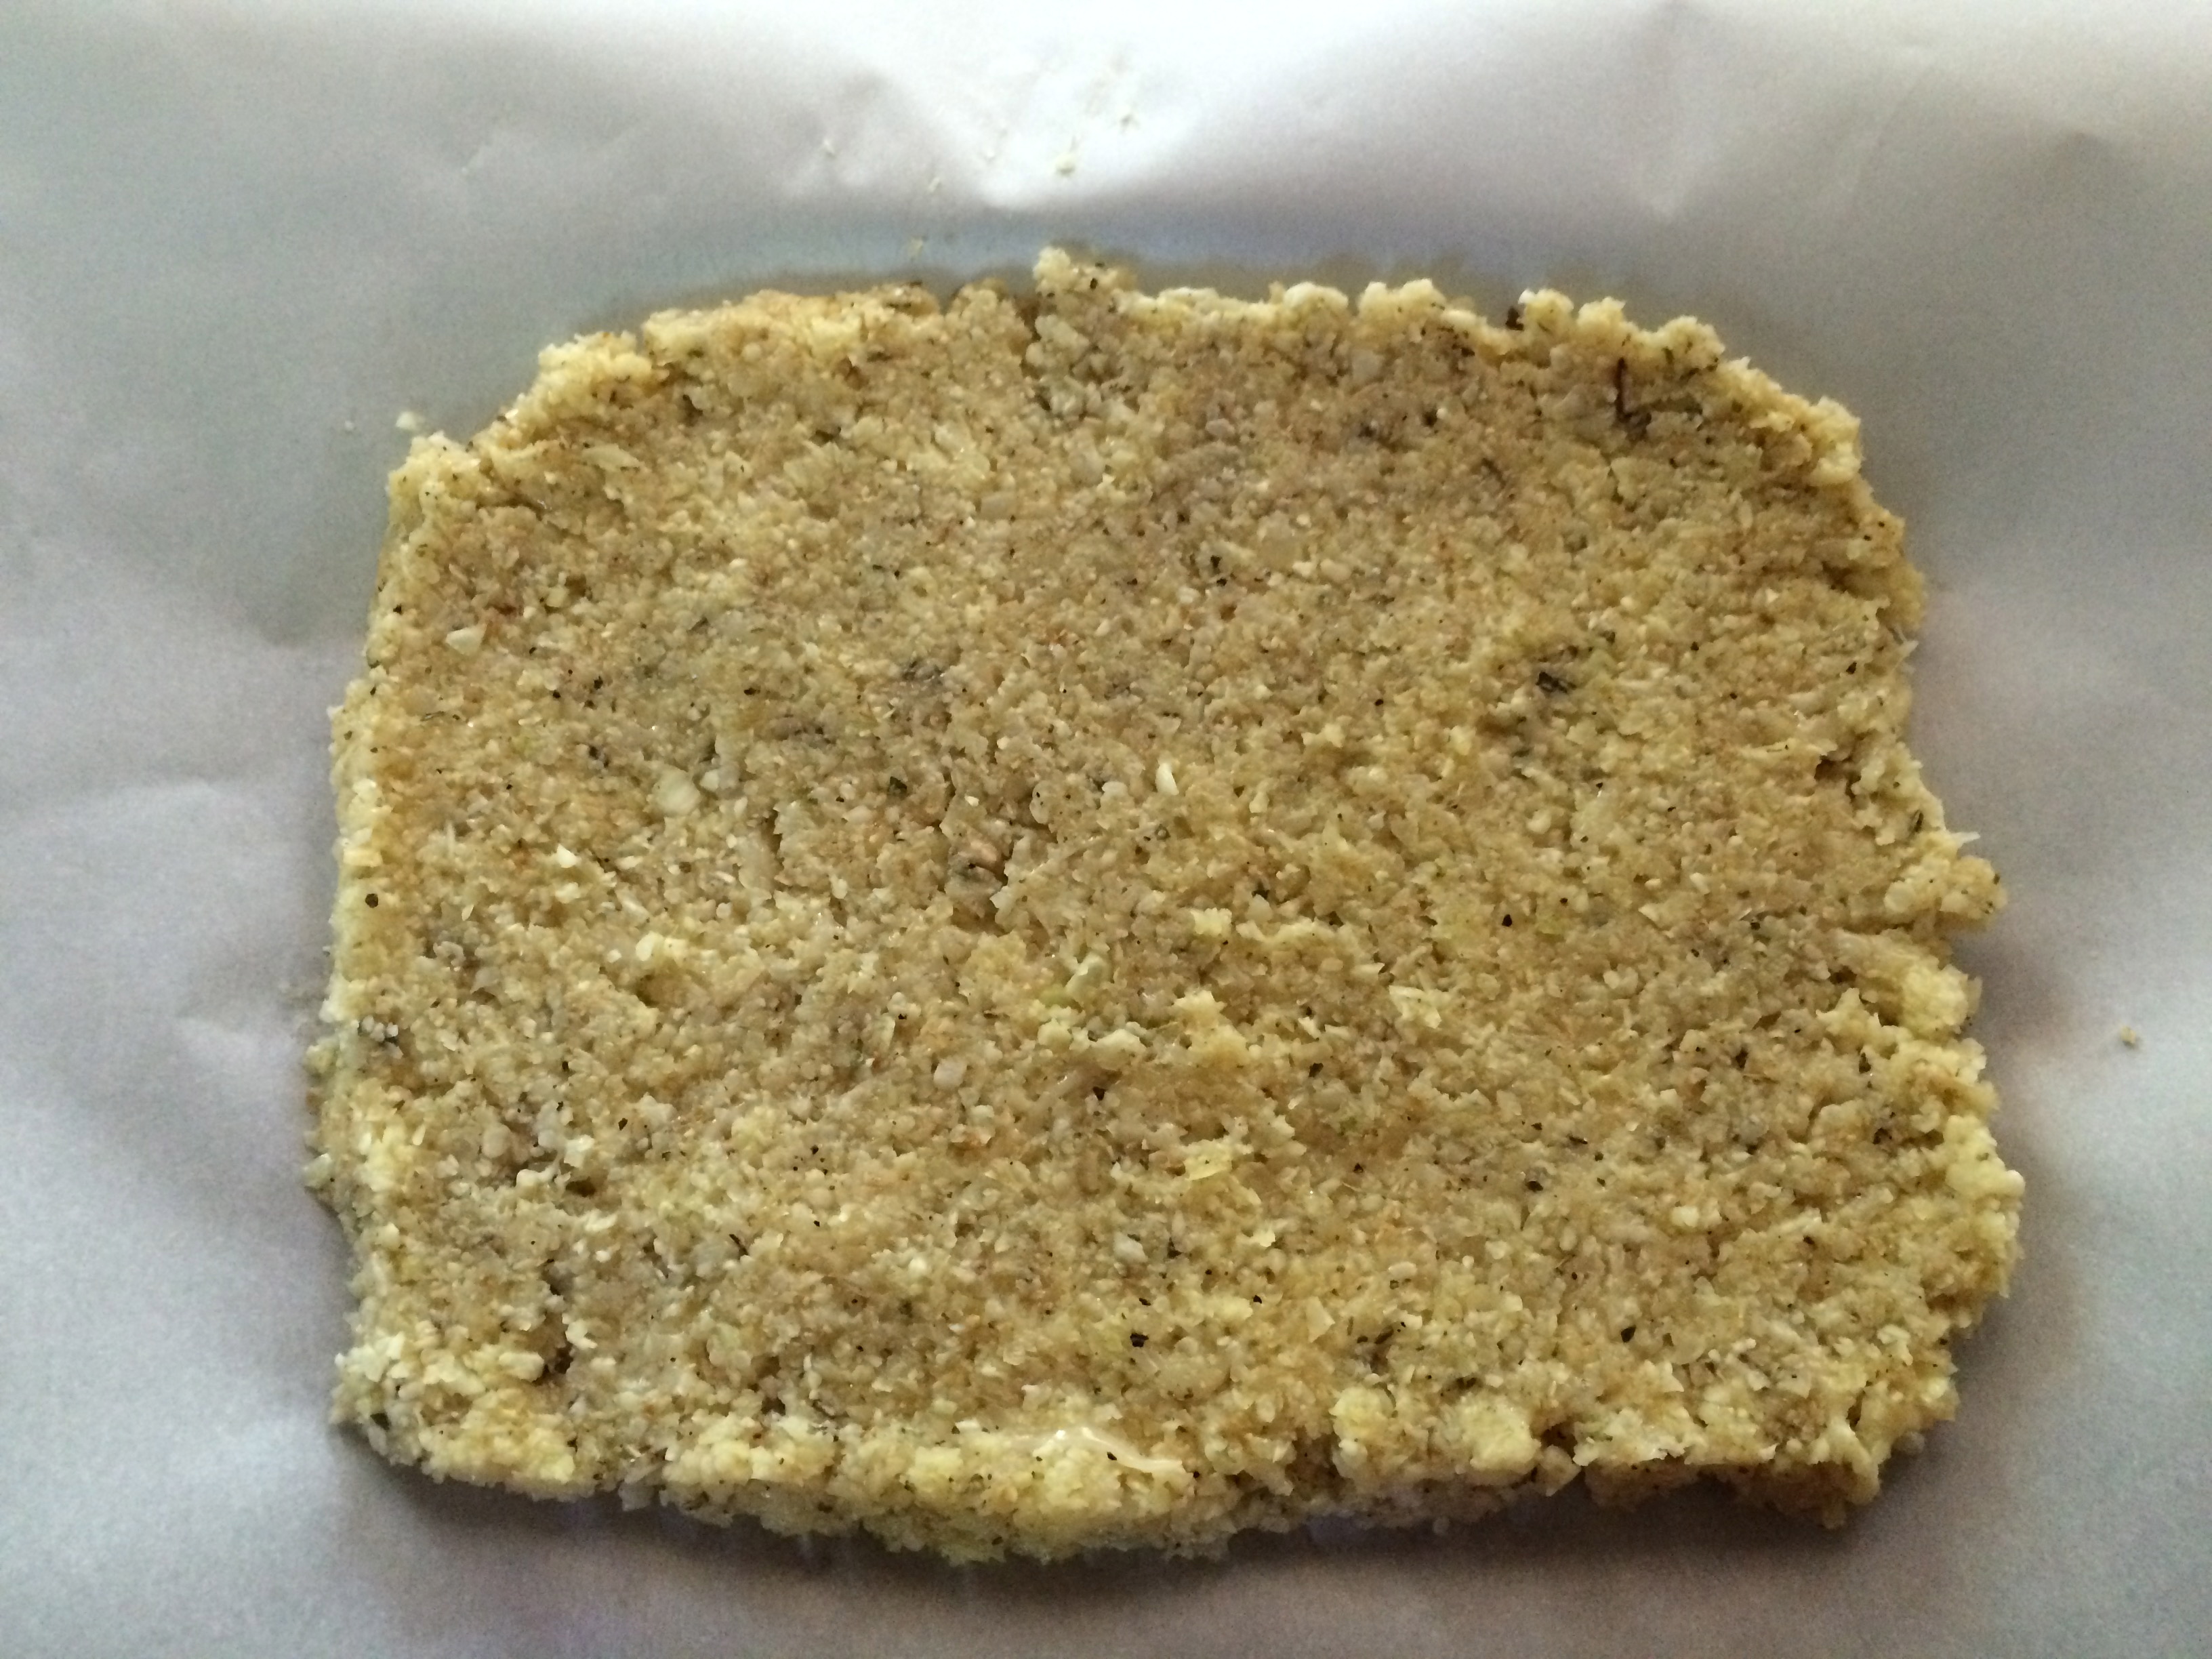
Line a pizza peel with parchment paper & brush with some olive oil. Spread the cauliflower mixture into a circle about 1/4in thick. Slide the parchment onto the preheated pizza stone and bake until barely golden and darker at the edges, about 17-20 minutes.

Remove the crust from the oven, sprinkle with the mozzarella and spread the pesto over the top. Scatter the prosciutto on the pizza. Slide back onto the pizza stone and bake until bubbly with browned spots, about 4-6 minutes.

Serves one as an entree or serves two when paired with a side.

IMG_1974