Rhubarb Muffins

It took me years to be able to eat breakfast in the morning. In junior high and high school I lived off of slimfasts for breakfast because I just couldn’t bring myself to eat food. I didn’t have an appetite until I had been up for a few hours. Slowly over the years I have trained myself to eat actual food. Not a lot, but enough to get me going and last until lunch. My guy however, is still unable to eat in the morning. He likes to wait. The only problem with this is that he waits and then has no food to eat because he is at work. Consequently he ends up waiting until lunch. This is simply unacceptable in my opinion.  When he told me he wasn’t eating I decided to make muffins. They are perfect for a grab-n-go breakfast. And what a great way to use up more of my rhubarb.

Rhubarb Muffins (makes 12)

  • 1 1/2 cups flour
  • 3/4 cups sugar (I did half granulated sugar & half brown sugar)
  • 1 tsp baking powder
  • 1/2 teaspoon baking soda
  • 1/2 teaspoon salt
  • 1/3 cup vegetable oil
  • 1 egg
  • 1/2 cup buttermilk
  • 1 teaspoon vanilla
  • 1 cup chopped rhubarb
  • 1/2 cup chopped walnuts

Preheat oven 350 degrees F. Combine dry ingredients. Add wet ingredients, mixing only until moist. Fold in rhubarb and walnuts. Bake for 20 to 25 minutes or until a toothpick inserted near the center comes out clean.


IMG_4753

Summer of Rhubarb: Rhubarb Torte


us

It has been a long time since I have had time for anything let alone time to bake. This is my first creation on my first Baking Sunday in a long time. The reason I have been absent is because I was busy planning a wedding and European honeymoon. I love planning. I always say that if I weren’t a chemist that I would be an event planner.

Our wedding was small but that doesn’t mean I had any less work to do. The only thing I didn’t have to deal with was the processional and music that coincides with that as well as bridesmaids dresses or bridesmaid flowers since I didn’t have any of those (honestly bridesmaid flowers are super easy because you just make them similar to the bride’s bouquet but have less flowers or simpler flowers). My flowers I spent a lot of time designing. I had a florist do the final arrangement but I gave specific flowers with colors and just told her (Kim from Artemisia) to arrange them.

flowers

Everything else I had to plan and I even had to write an entire ceremony since we did not have a church wedding which is not very easy to do. In addition, finding a venue for a small wedding (50 or less) is very difficult. All venues hold 100-300 so finding one with charm is not an easy task.

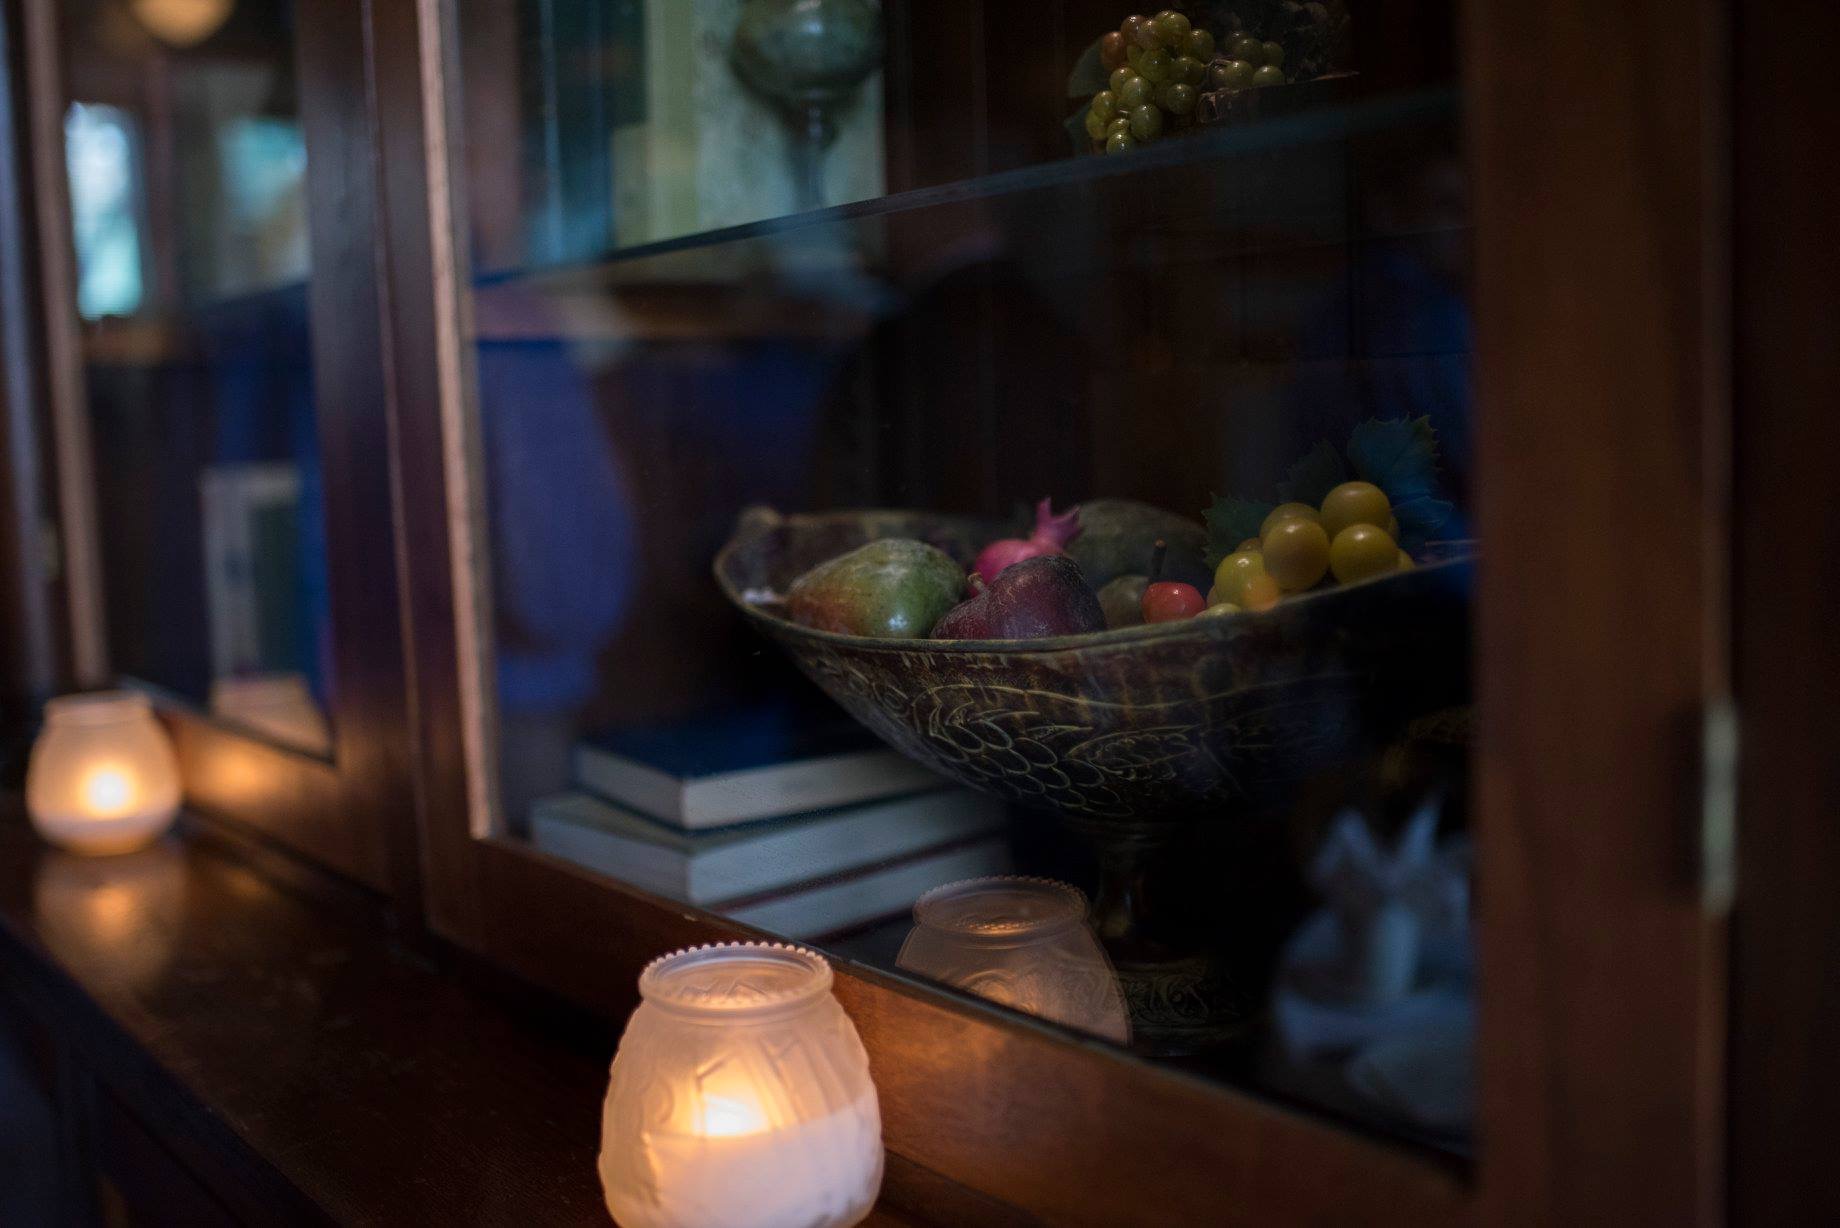
We ended up finding W.A. Frost which turned out to be absolutely amazing. It’s a small restaurant in historic St. Paul full of charm & beauty.

IMG_4794

It is gorgeous inside and no decorations were needed.

IMG_4791

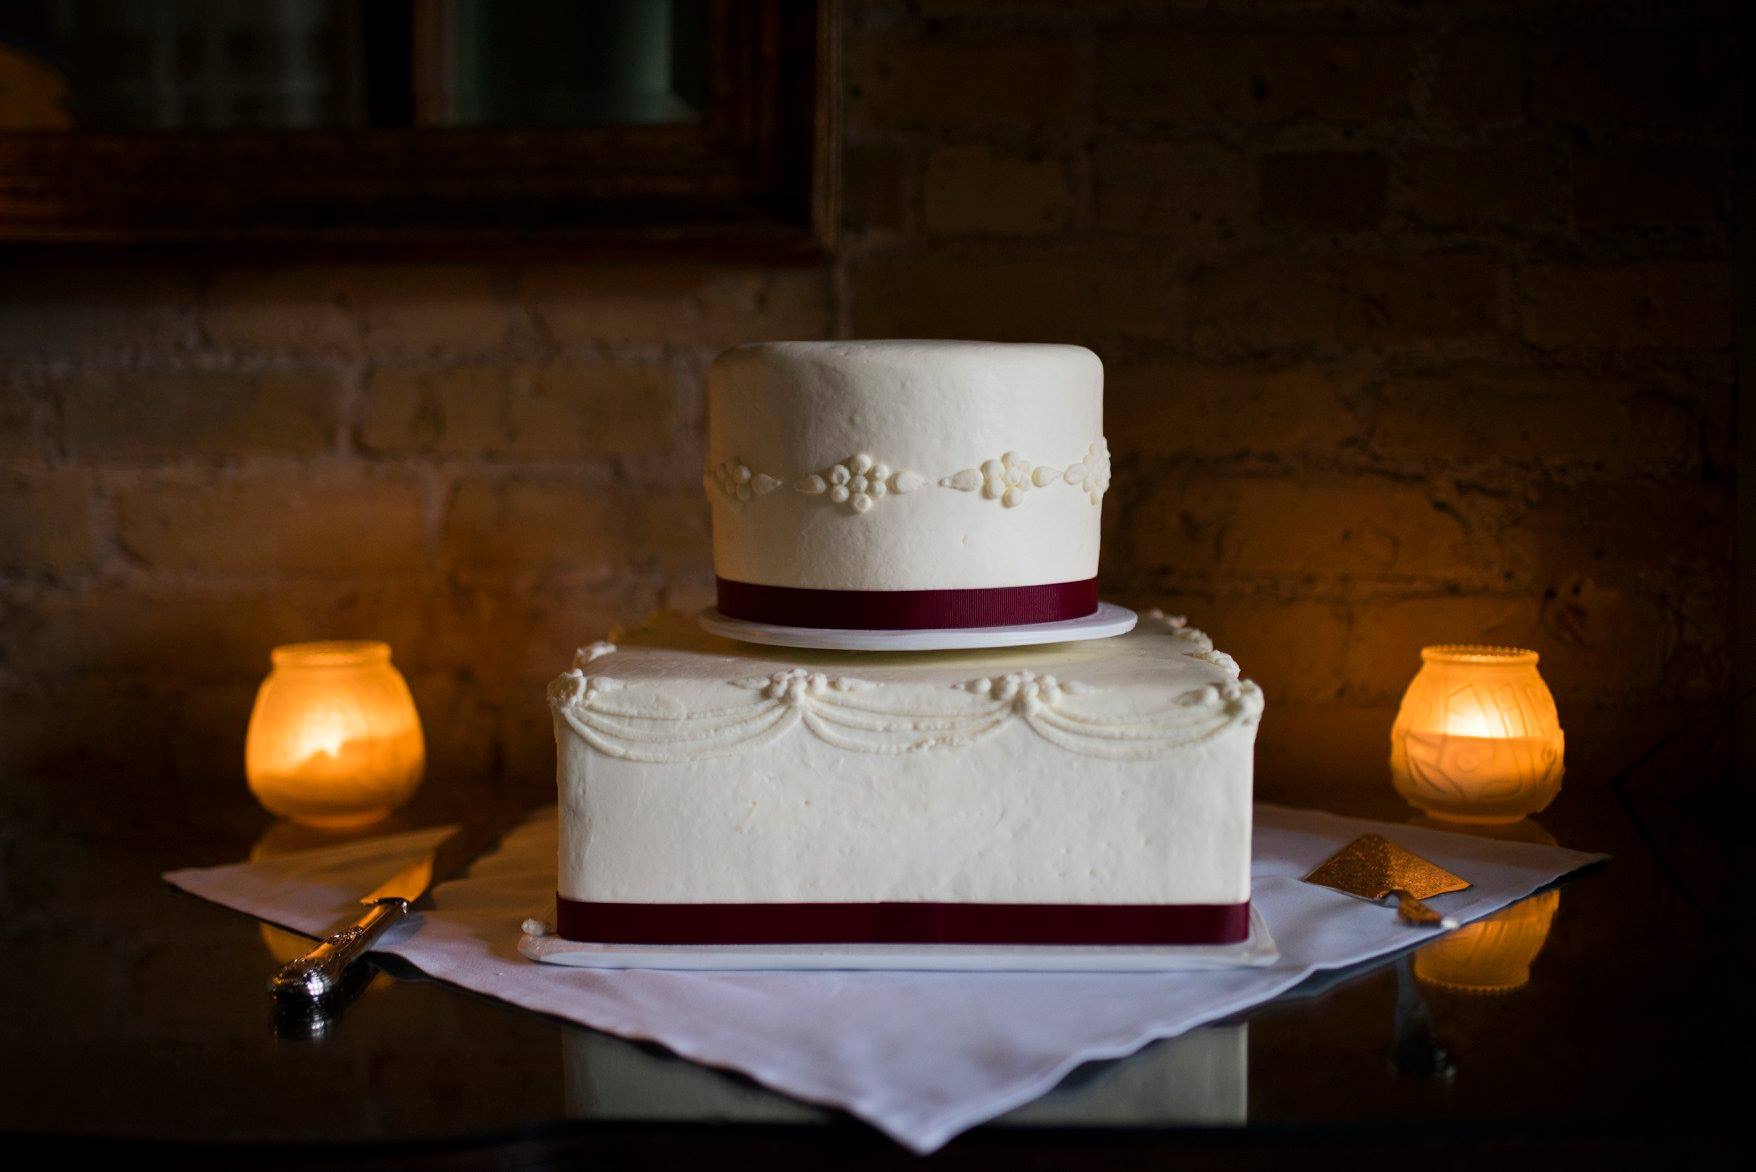
The two rooms we rented held 57 max so it was perfect. We went there for lunch before we picked it and I tried the bouillabaisse and my guy got a cheeseburger. We figured that if they could cook a high-end dish and a simple cheeseburger that no matter what we ordered for the reception would be fantastic. We weren’t disappointed. Everything was delicious. For the night of we went with a walleye dish, a pork dish, as well as a bistro steak. I had the steak the night of and it was incredible. For our cake we went with tiramisu for our top layer and strawberry lemon for the bottom layer from Buttercream. Buttercream is expensive but it is worth it. They really are the best for wedding cakes in Minnesota.

cake

I should also mention that my photographer (Angela from Angela Divine Photography) was absolutely amazing and all my wedding photos are from her. I told her we only needed a few hours of coverage and she did better than I could have imagined. I knew I wanted her once I saw her portfolio as she did many small weddings, and with our wedding being under 50 it was a perfect match.

I could talk about all the other details of event planning but this post would go on forever. Needless to say it takes a lot of time to research options for every single item for a wedding and a European trip. There is a lot to consider but just take it one thing at a time while always thinking about the next 20 tasks coming up if that makes any sense. I guess that’s why I am good at planning. I’m great at multitasking & thinking about the future while enjoying & living in the present.

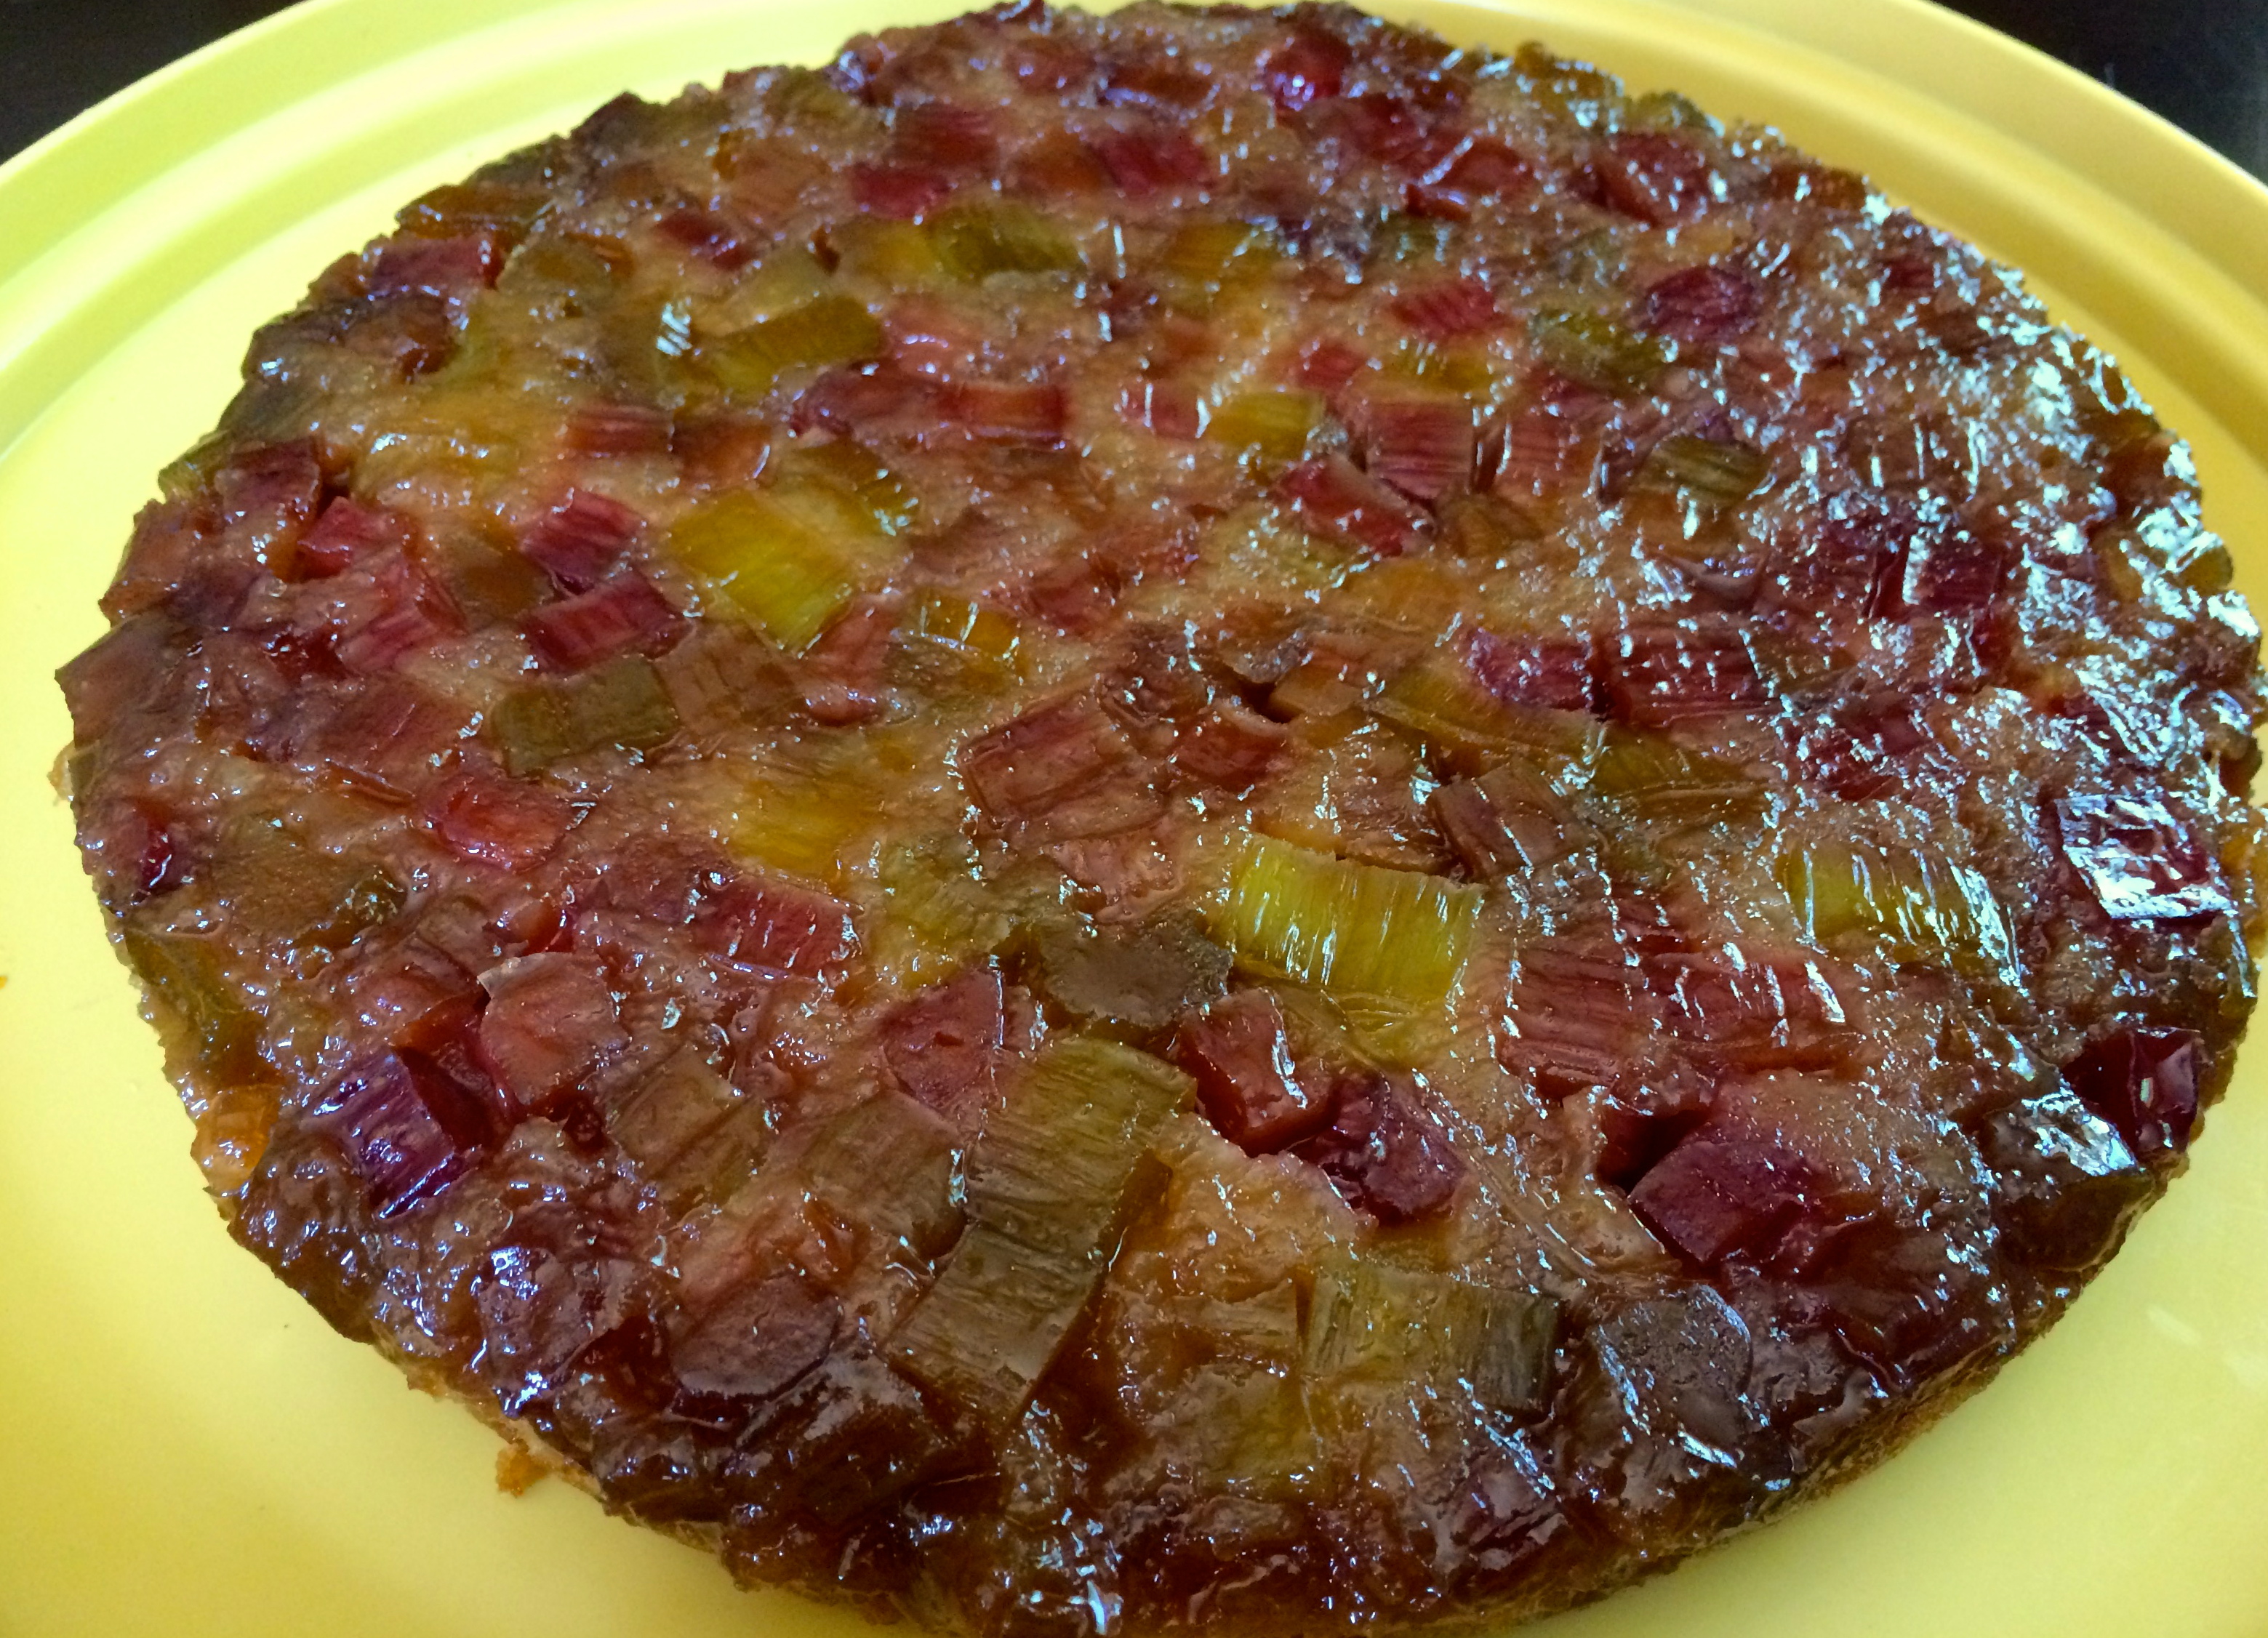
As of now, my rhubarb is growing like crazy. I will have plenty of things to make rhubarb-wise in the future so prepare yourself. Maybe I could actually remember to take a decent photograph of my baked goods before they all get eaten.
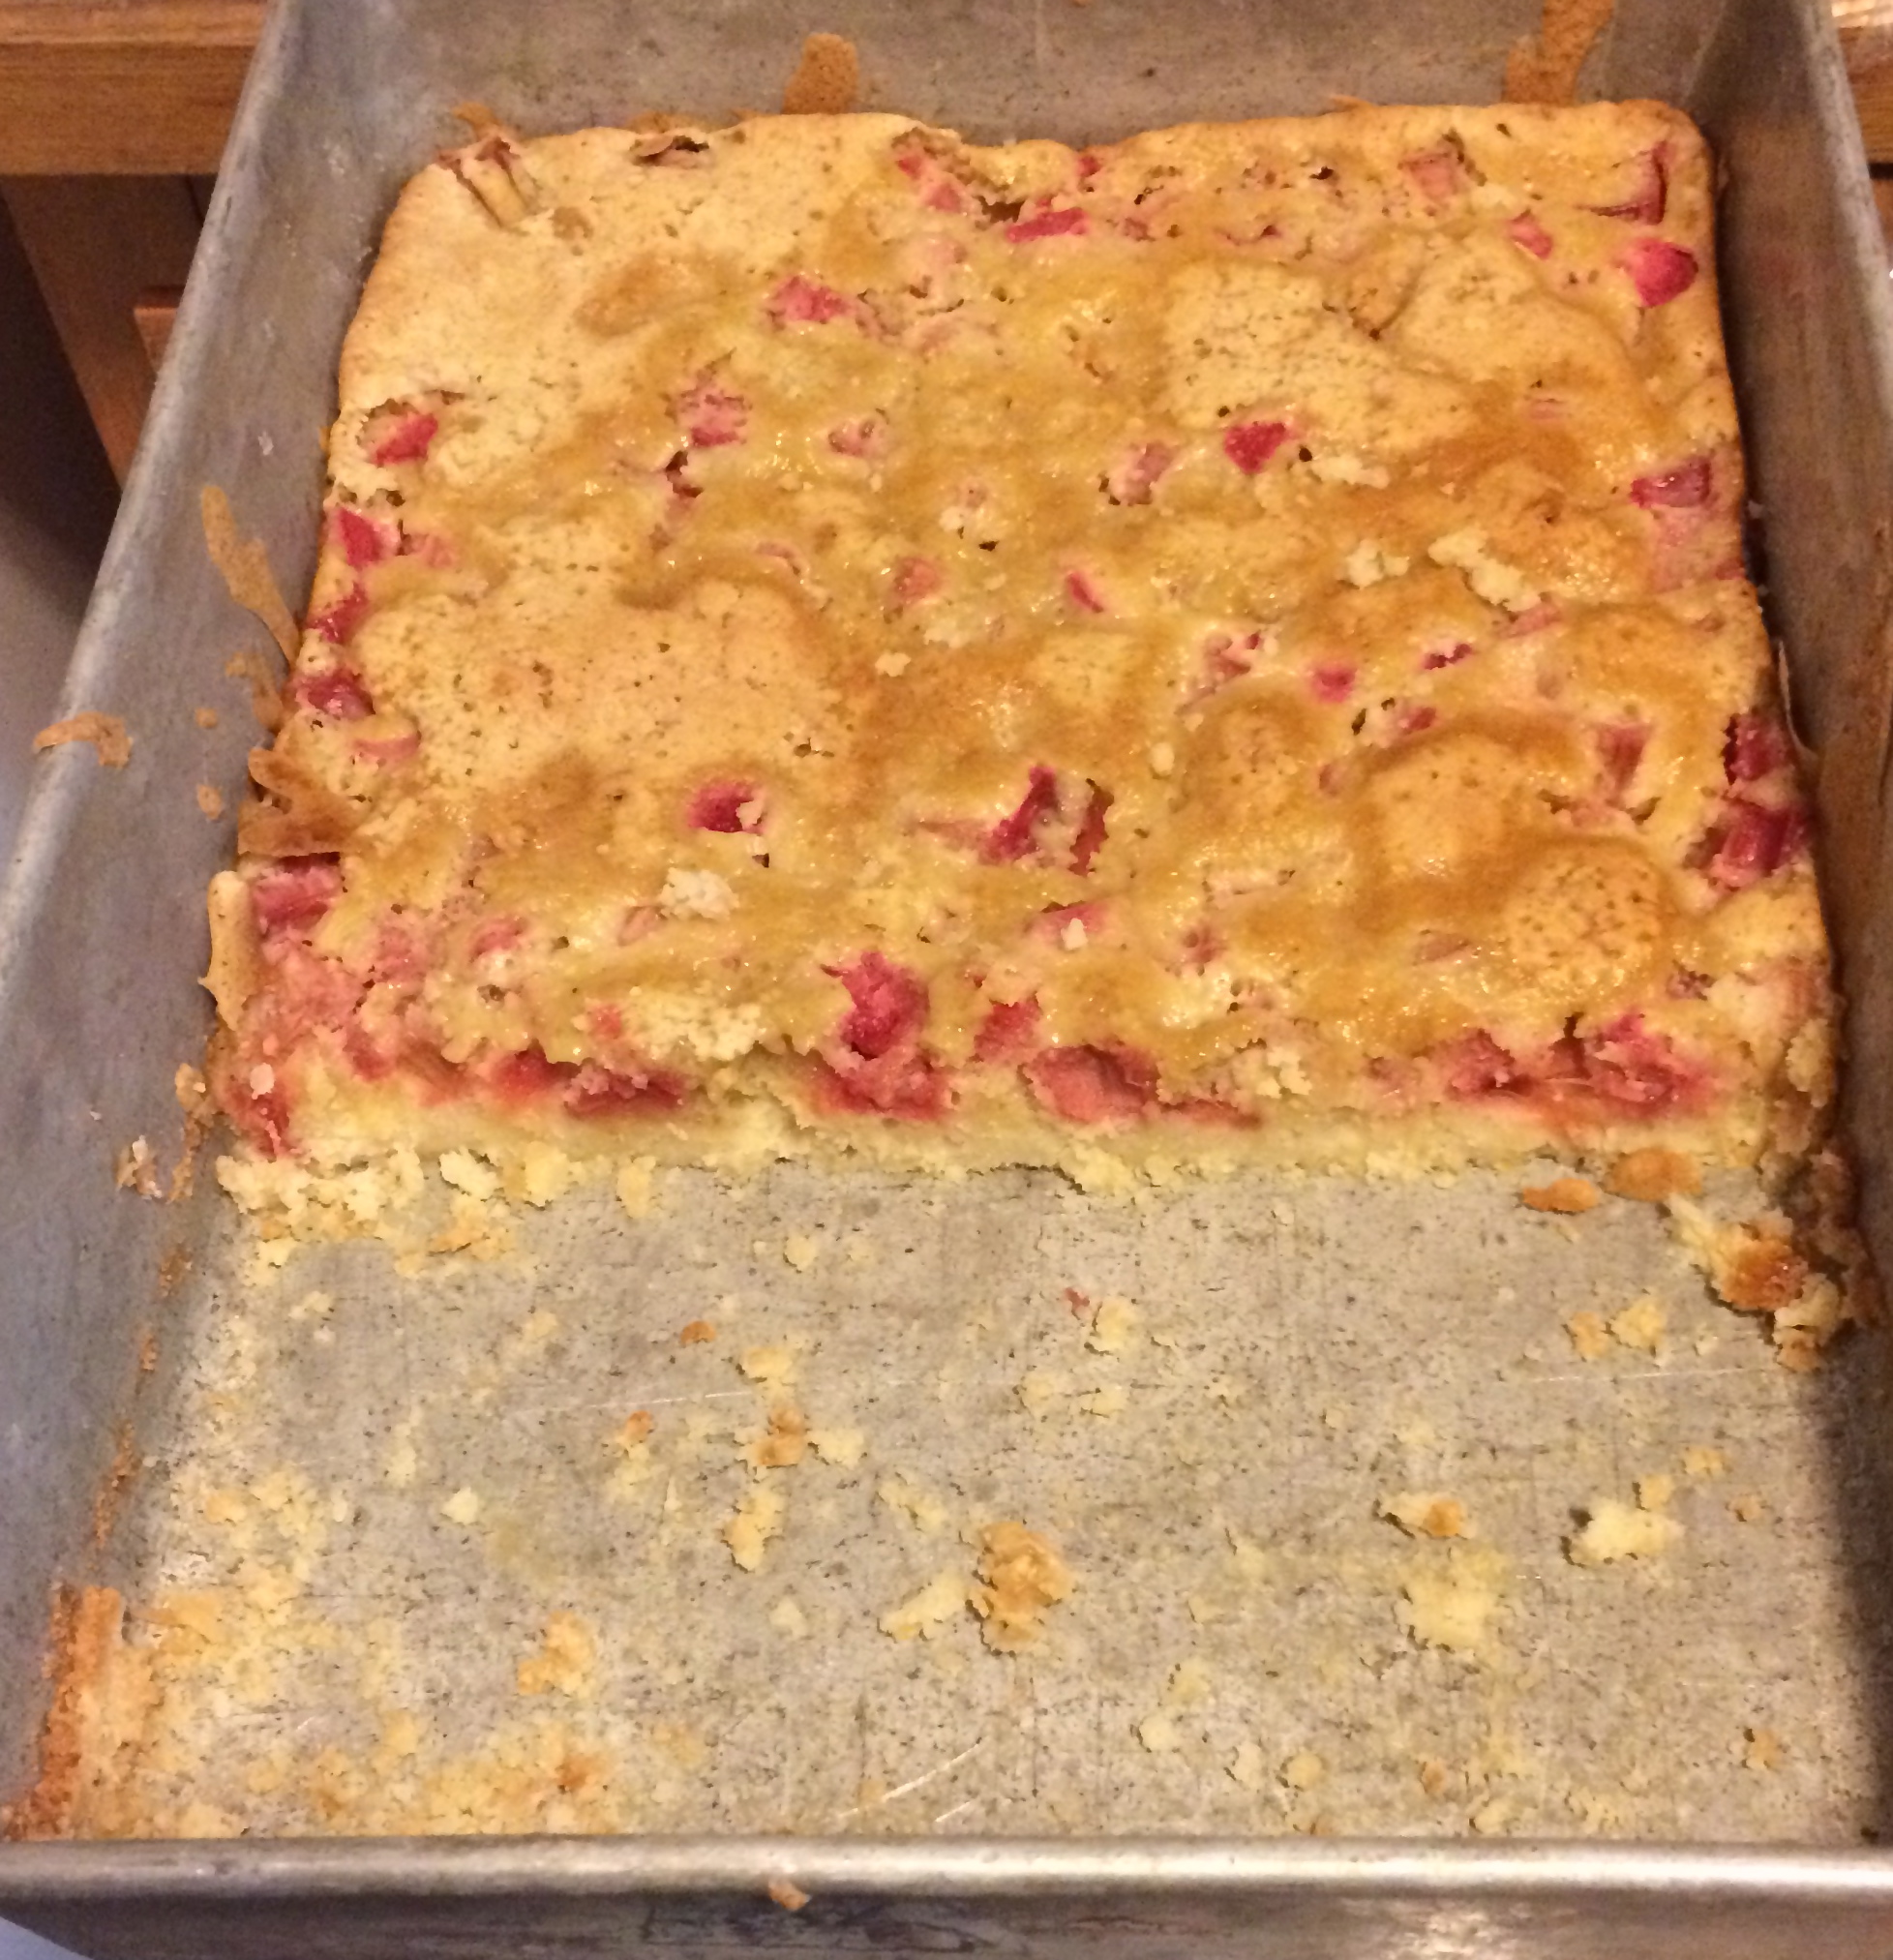
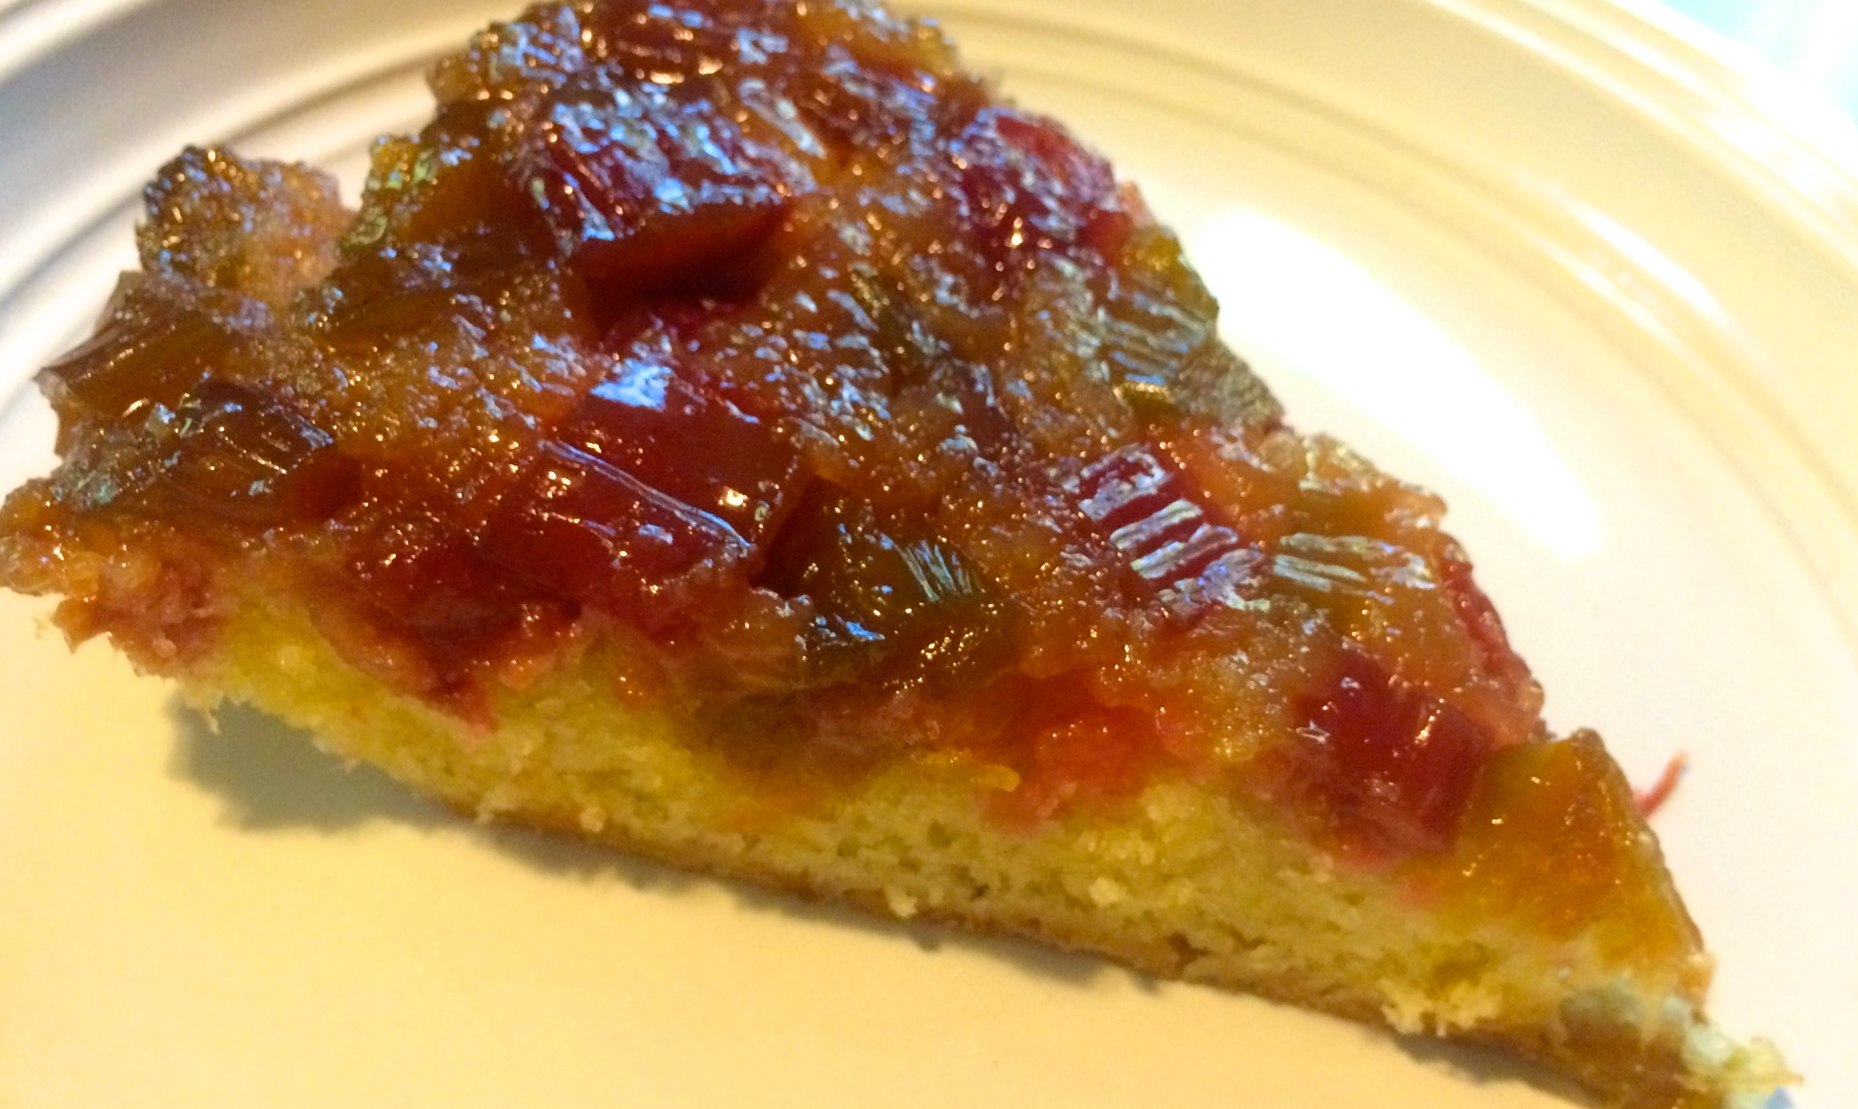
Rhubarb Torte

For the crust

  • 1 1/2 C flour
  • 7 T sugar
  • 1 1/2 sticks cold butter, cut into cubes

Heat the oven to 350°F. In a large mixing bowl, combine the flour and sugar. Cut in the butter as if you’re making a pie crust. Press the dough into a 9- by 13-inch pan.

For the custard

  •  2 eggs
  • 3/4 C granulated sugar
  • 3/4 C brown sugar
  • 1 tsp vanilla
  • 1 C flour
  • 3/4 t baking soda
  • 1/2 t salt
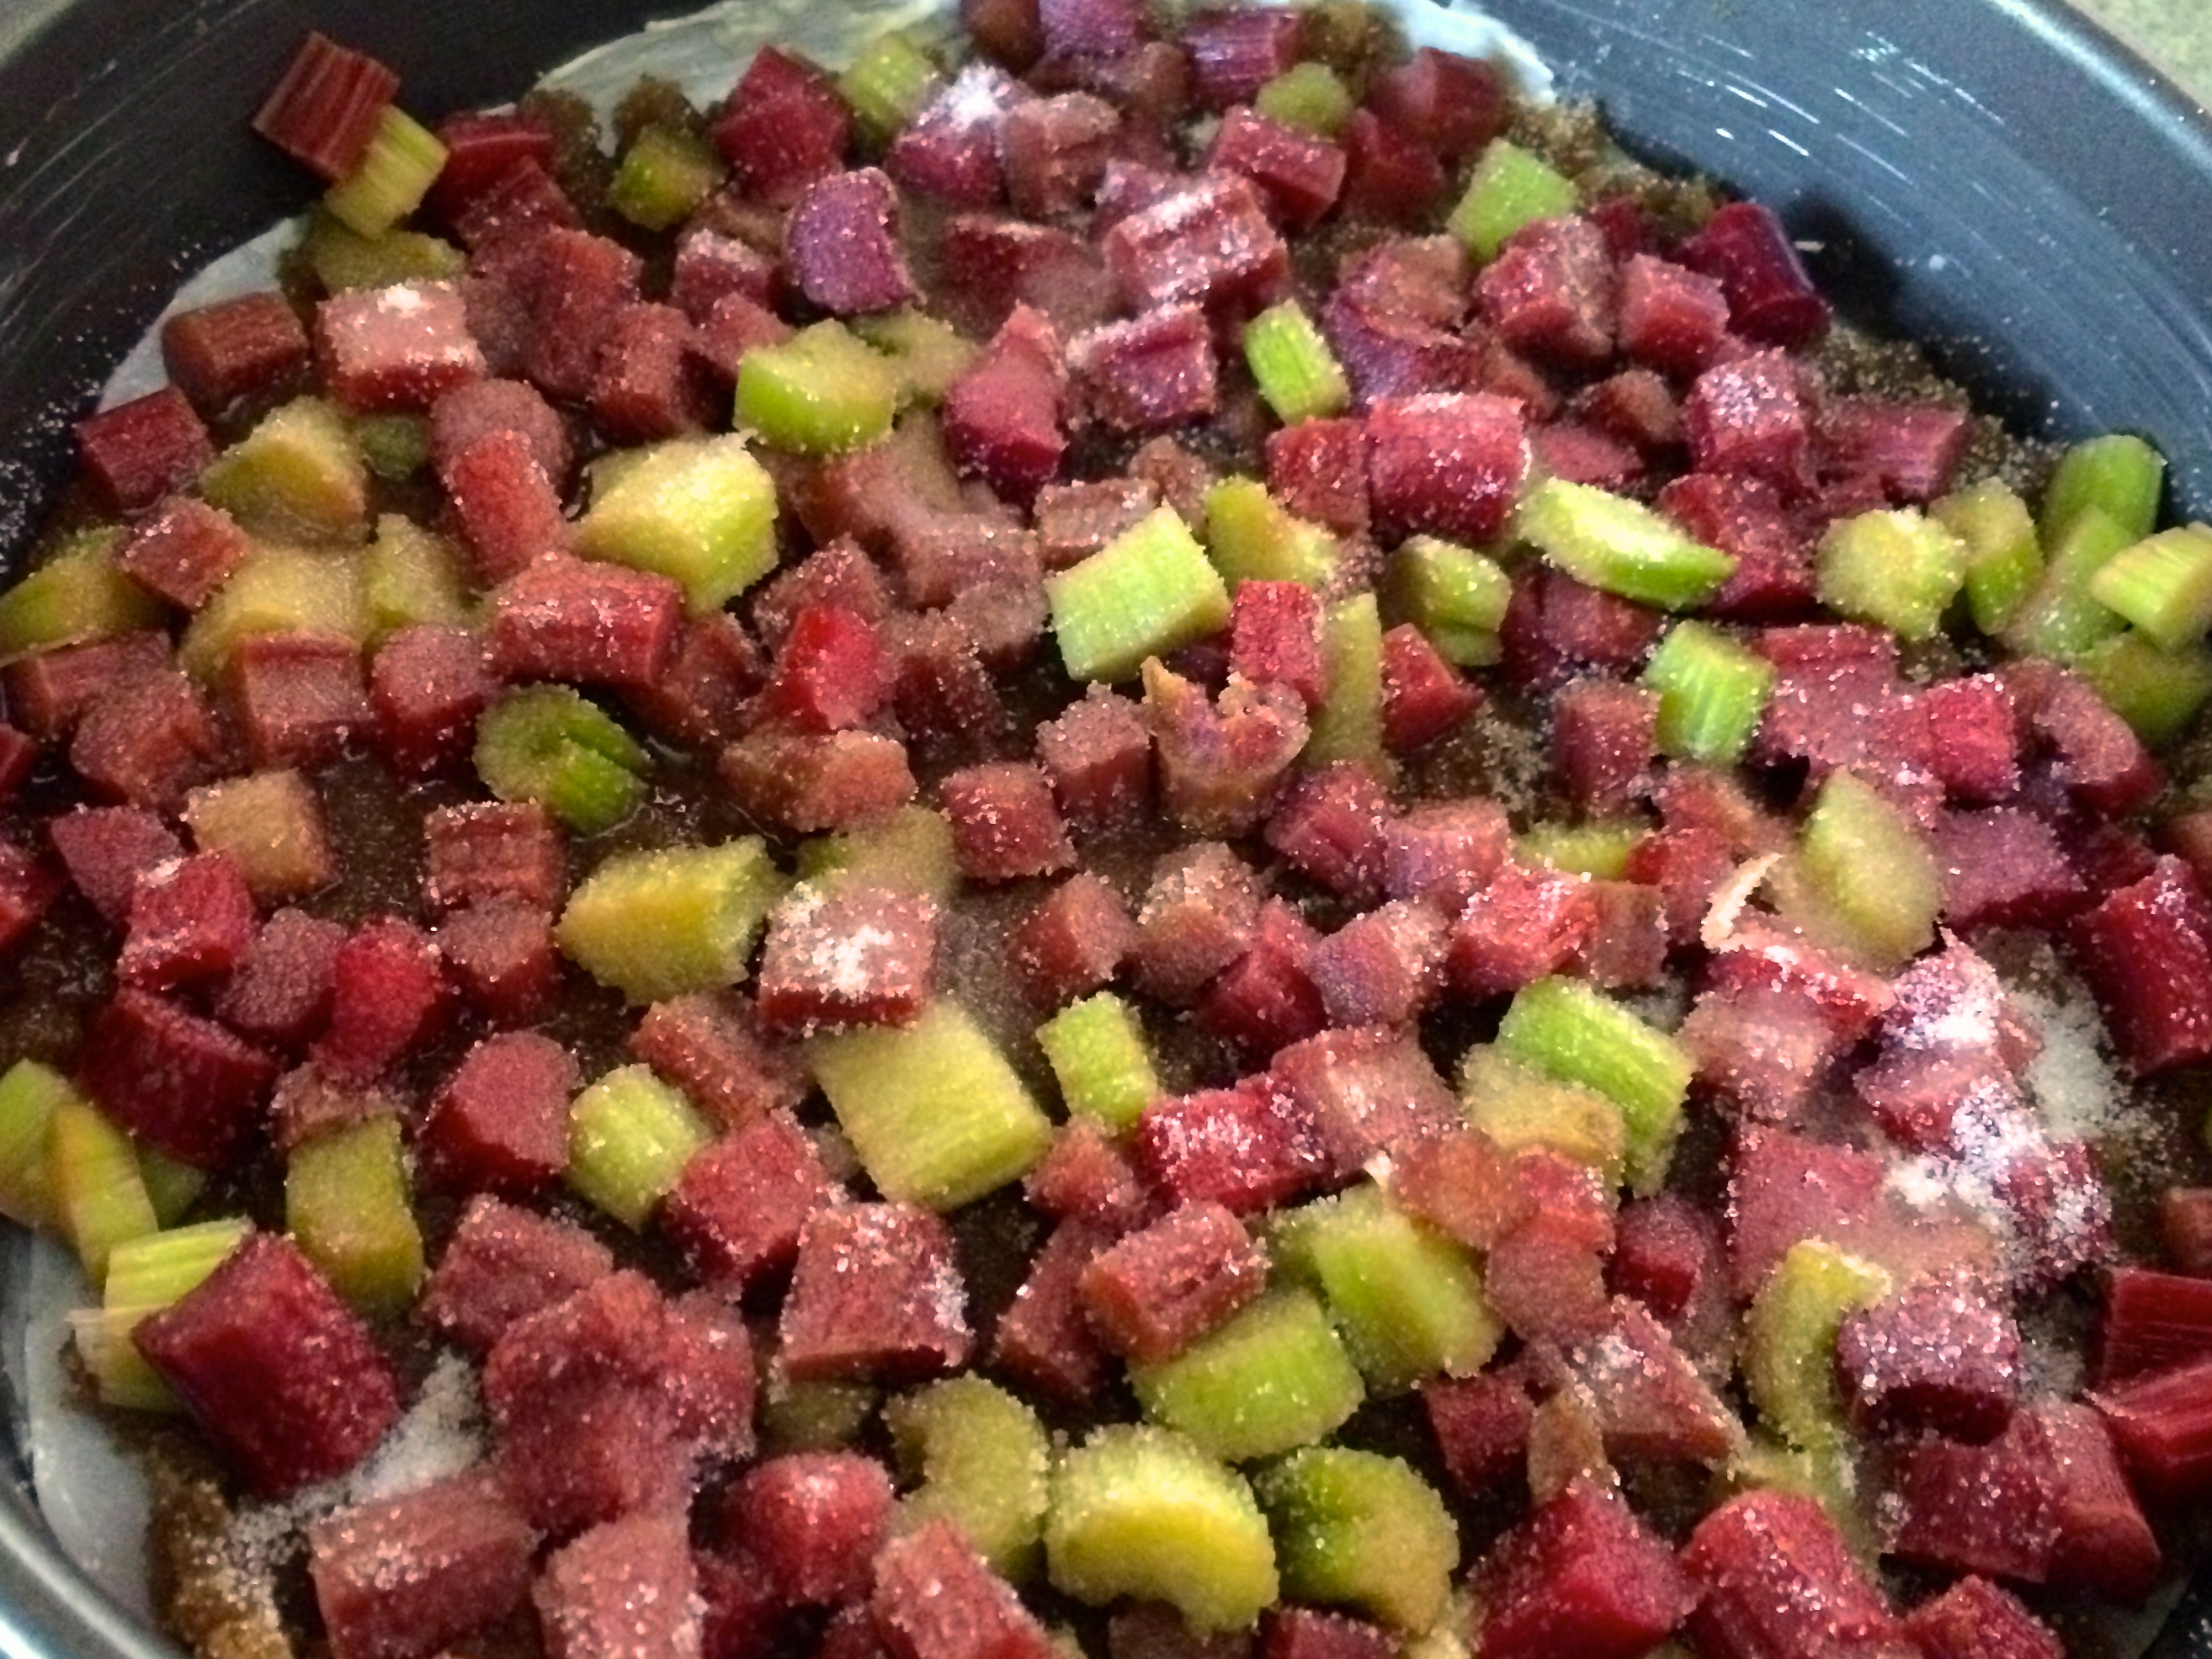
  • 3 C fresh rhubarb (I used the red variety)

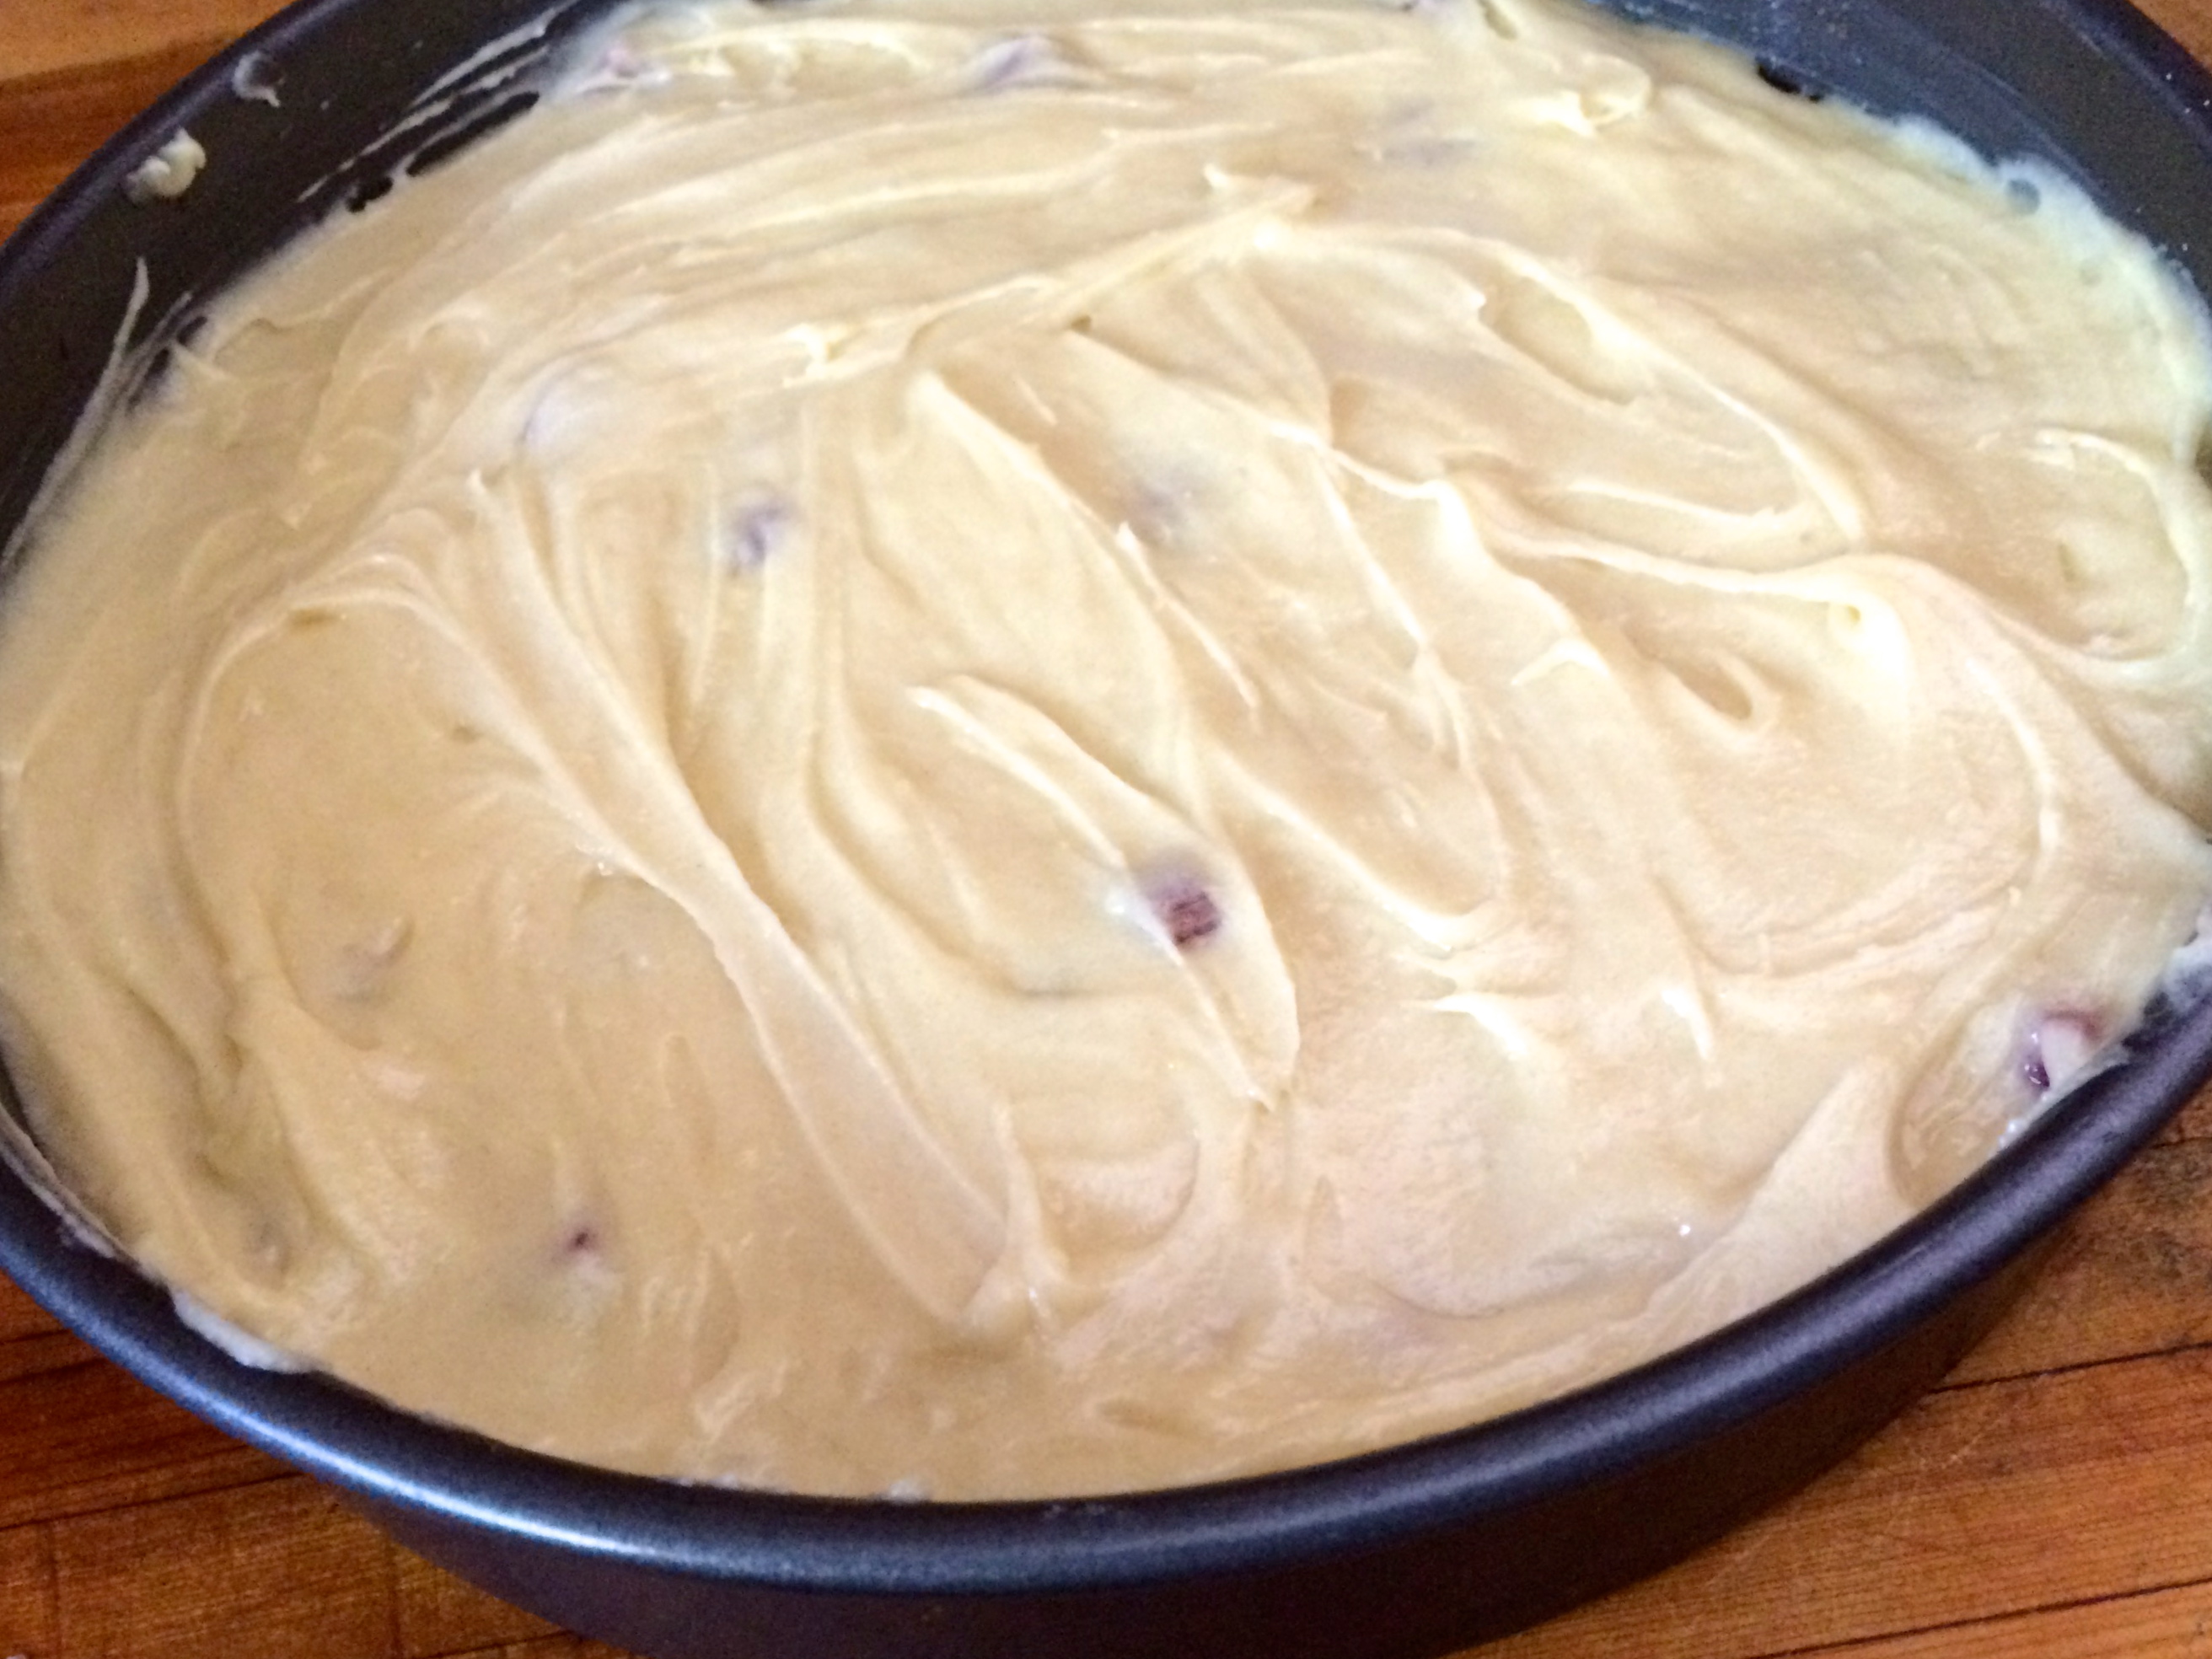
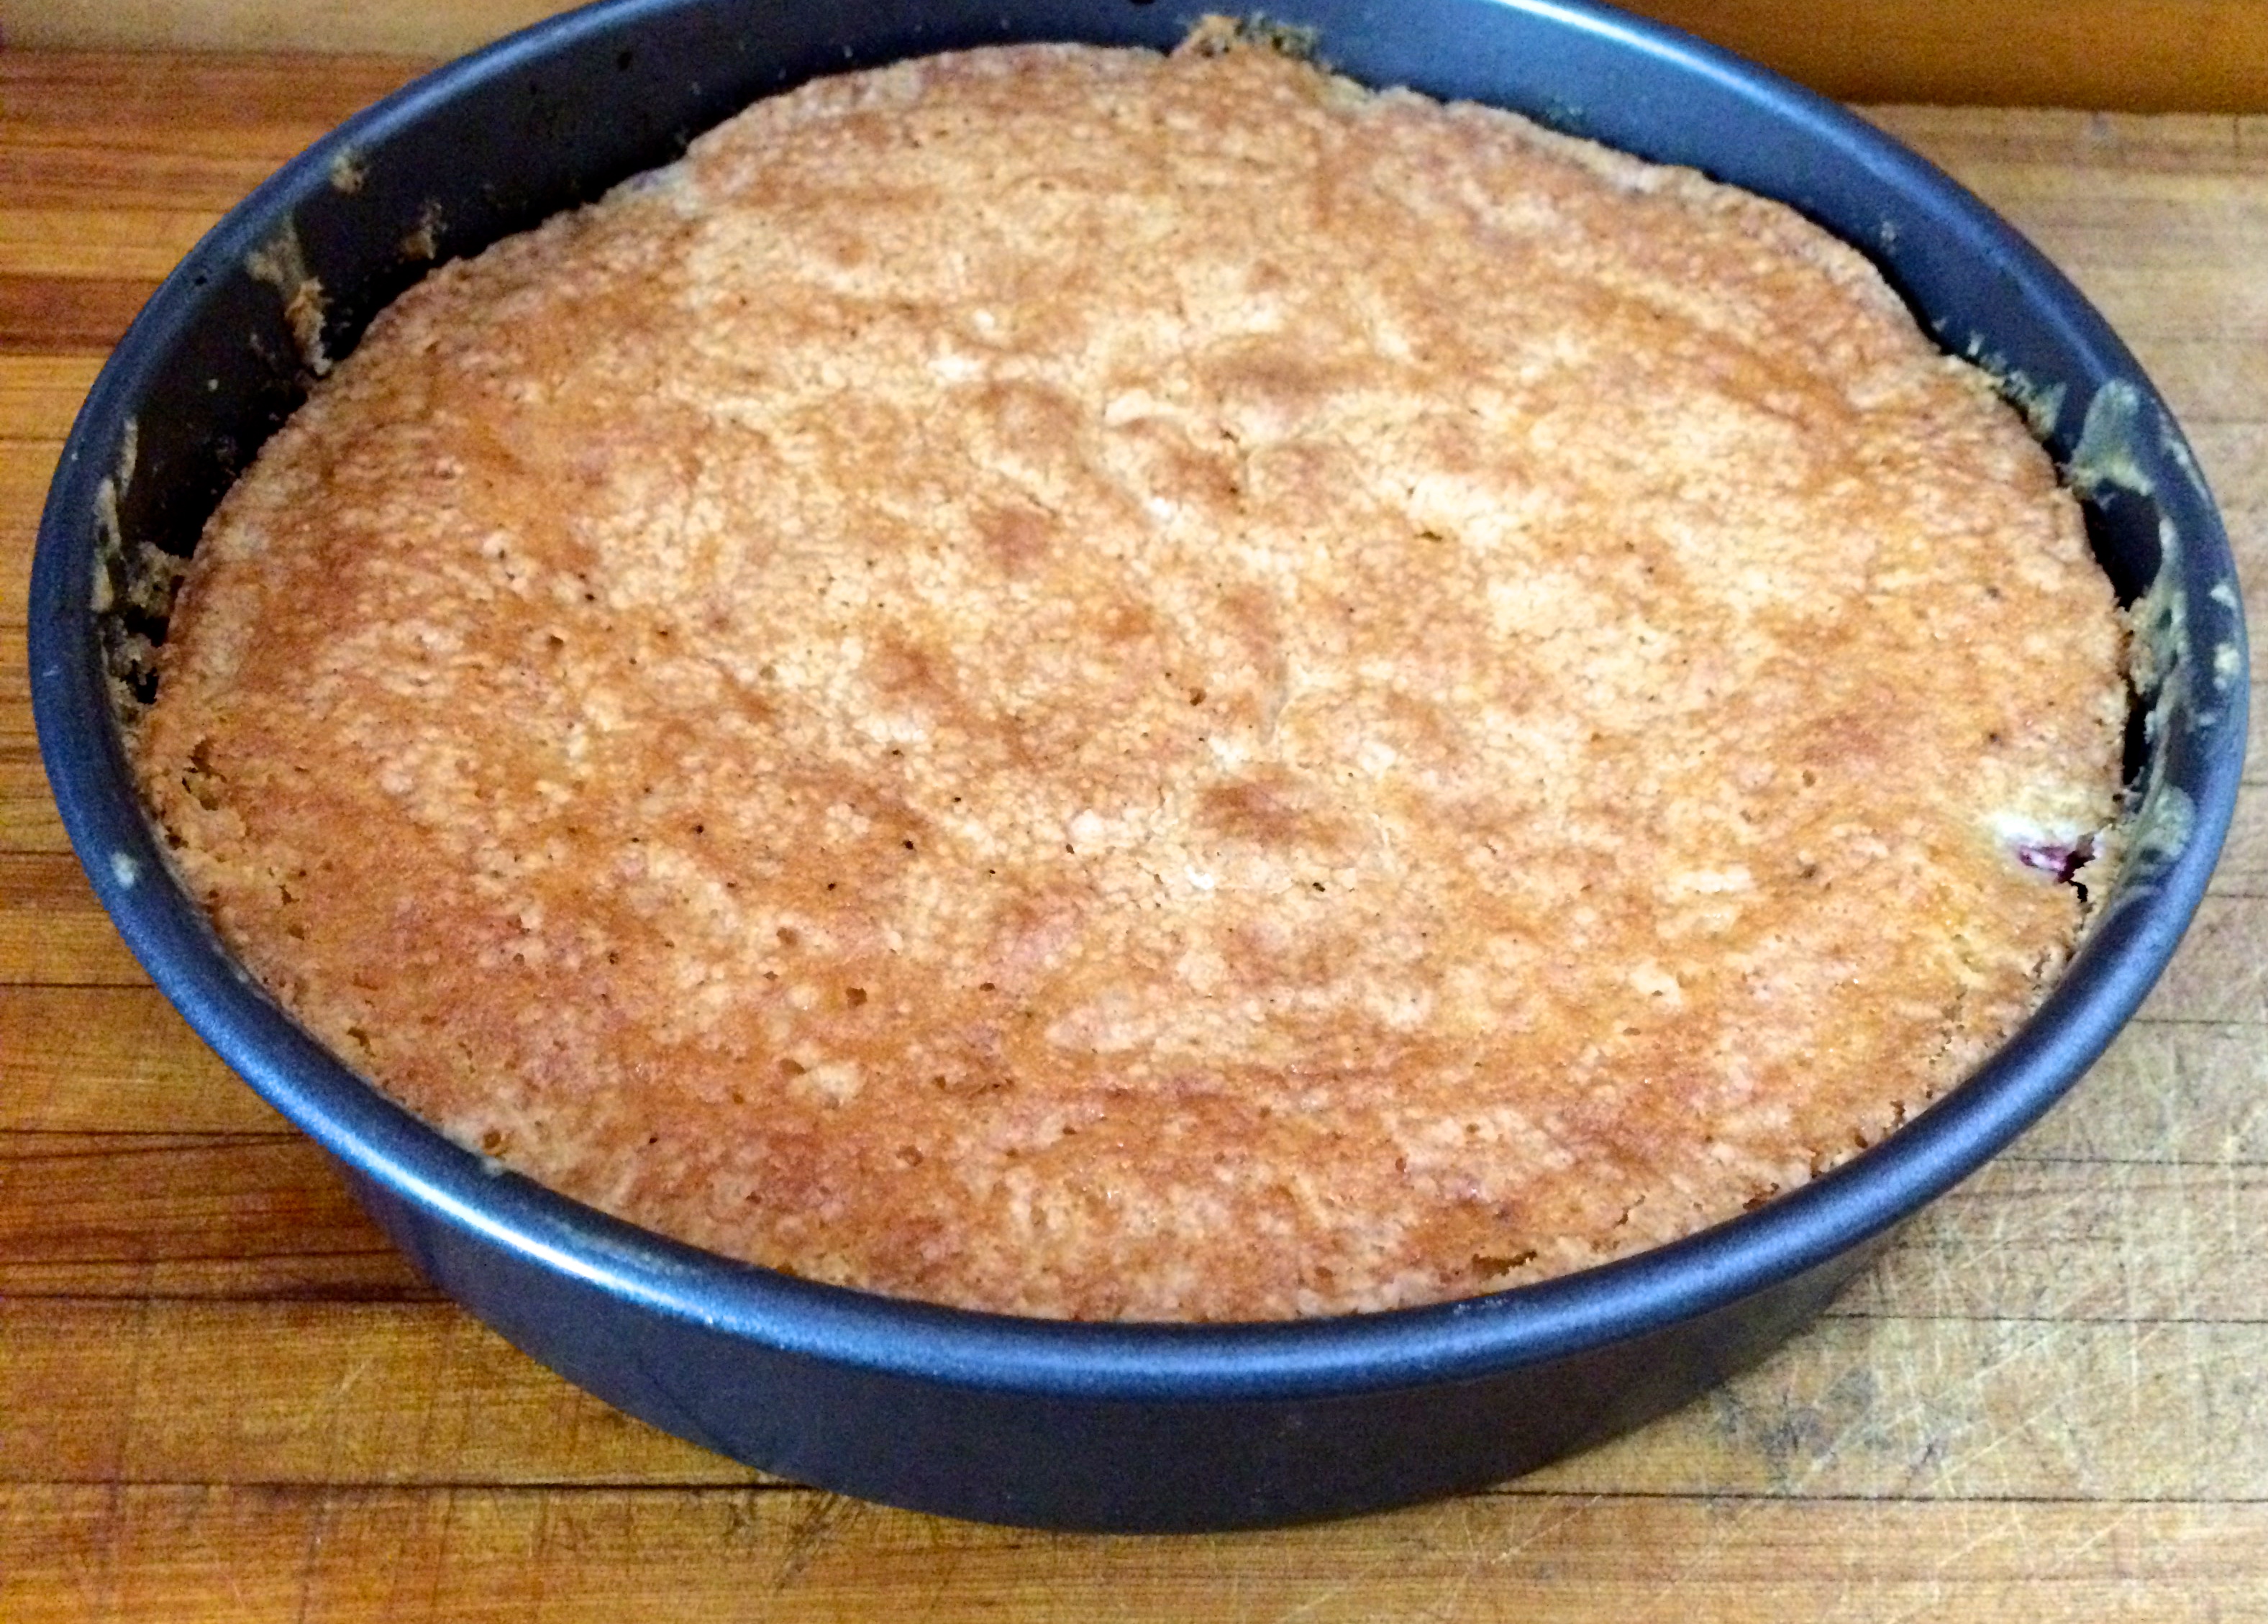
In a large mixing bowl, beat the eggs and sugar until combined. Stir in the vanilla. Stir in the flour, baking soda, & salt. Stir in the rhubarb. Let sit for 30 minutes. Pour the custard into the crust, and bake for 35–45 minutes, until the torte is set and slightly golden, not toasty brown. Store any leftovers, covered, at room temperature.

IMG_4649

Summer of Rhubarb: Rhubarb Upside-Down Cake

IMG_2413

It’s that time of year again…Summer of Rhubarb time. There is a period of time where you could sit outside and literally watch your rhubarb grow. It happens that quickly. I actually made this last year but never got around to posting it. I was busy planning a wedding and a european honeymoon so I didn’t have much free time or ambition for anything else.

This cake seems ambitious but is really very easy. Every time I go to invert an upside-down cake I am fearful that it won’t come out. That it will remain stuck in the pan and I will have a crumbled cake mess. Every time, however, it slides out beautifully and I have a moment of pure satisfaction & baker’s bliss.

Upside-Down Rhubarb Cake

  • 3 tbsp butter, melted
  • 2/3 cup packed brown sugar
  • 2 1/2 cup fresh or frozen* rhubarb, diced (I used 1 3/4 cup red rhubarb and 3/4 cup green rhubarb)
  • 1.5 tbsp granulated sugar
  • 6 tbsp butter, softened
  • 3/4 cup sugar
  • 1.5 tsp vanilla
  • 2 eggs, separated
  • 1/4 tsp cream of tartar
  • 1 cup flour
  • 1 1/2 tsp baking powder
  • 1/2 tsp salt
  • 1/4 cup milk

*Note that if you are using frozen rhubarb thaw completely first and drain off excess liquid.

Preheat oven to 325F. Grease the bottom and sides of a 9in round cake pan with butter. Line with parchment paper. Grease the parchment paper with butter.

In a small bowl combine the melted butter and brown sugar. Spread over the greased parchment paper. Place rhubarb over sugar mixture. Sprinkles granulated sugar over rhubarb.

IMG_2399

In a medium bowl, cream together the softened butter and sugar. Beat in egg yolks and vanilla. Add the flour, baking powder and salt. Mix until combined. Add the milk. Mix until combined.

In a medium bowl beat egg whites and tartar until stiff peaks form. Fold into the batter gently. Pour over rhubarb.

IMG_2403

Bake for 55 minutes or until top is golden and lightly springs back when touched or a toothpick inserted comes out clean.

IMG_2406

Invert the cake.

IMG_2410

Be proud. Be happy. Serve with whipped cream or ice cream if desired.

IMG_2413

Pork & Zucchini Meatballs


IMG_2470


I’ve always been a baker. I started baking brownies after school in fourth grade which may have been a contributing factor to my fourth grade chubbiness. It’s only in the last few years that I have actually started cooking.

I do almost all the cooking in my household. I enjoy it. I like to make dinner and meals for other people. With that comes the task of meal planning. I probably take this way too seriously. I will spend 1-2 hours on Sunday and plan meals out for the week.

I live in Almost Canada where a well stocked pantry & freezer is a way of life. I’m usually cooking for two so coming up with meals that use common ingredients is a necessity. In the summer months that means using the garden’s bounty.

Zucchini is one such ingredient. The little zucchini are great for side dishes or replacing noodles. It’s those big guys that hide in your garden that become breads, cakes, fritters, etc. I decided to use them in a meatball instead of onion to keep them moist. The worst kind of meatball is a dry meatball which is probably the most common problem when it comes to making them. These are divine. I also used homemade tomato sauce which makes any dish that much better.

Pork & Zucchini Meatballs (serves 2)

  • 1/2 pound ground pork
  • 1/2 cup shredded zucchini
  • 1-2 tsp minced garlic
  • 1 egg
  • 1 slice bread, torn into small pieces
  • 1 tsp italian seasoning
  • 1/4 tsp onion powder
  • salt & pepper to taste
  • tomato sauce (store bought or use this recipe Garden Fresh Tomato Sauce)


Preheat oven to 400F. Line a baking sheet with foil or parchment paper. Mix all the ingredients together except for the sauce. Form into meatballs (roughly the size of a golf ball). Place on baking sheet and bake in oven for 8 minutes or so until browned. Place in tomato sauce and cook for at least 20 minutes until cooked through (preferably longer for deeper flavor, turning occasionally). Serve over pasta, or if you are like me, sautéed zucchini.


IMG_2470


Tomato Sauce


IMG_2445


I might have been a little too ambitious when it came time to plant the garden. Last year we had two tomato plants. This year we had 18. Yes 18. This included 6 cherry tomato plants which is way too many cherry tomato plants by the way. Next year we are only doing 2 of that variety – one yellow and one red. We also had 6 Roma tomato plants and 6 early girl tomato plants.

I have been working through my tomatoes like crazy. I have made numerous batches of tomato sauce for various dinners as needed and I have frozen about 10 pints of tomato sauce for the winter months. 10 pints really isn’t that much if you use a pint at a time for recipes. I probably use a pint a week for spaghetti or lasagna so I really only have 10 weeks worth of sauce.

Everyone has their favorite recipe. I always change the amounts of seasoning depending on my mood. The only thing I keep constant, the key ingredient for me for a good tomato sauce, is the bay leaf. This is absolutely essential for all good tomato sauces in my opinion. This is probably because my mother used to make tomato sauce and she used bay leaves in her recipes.

I don’t remember many things she made. This is because she wasn’t the best cook. Sorry mom. She wasn’t terrible but I don’t have any fond memories or favorite dishes she made. The only great thing I remember was her long, slow simmer of tomato sauce with a bay leaf.


Tomato Sauce (serves 2)

If you have dozens of tomatoes to work through feel free to double or quadruple this recipe & freeze it for when your garden is covered in snow.

  • 10-12 ripe tomatoes (I prefer a combination of roma & vine-on)
  • 1 tsp olive oil
  • 1 onion, diced
  • 1-2 tsp garlic, minced
  • salt & pepper, to taste
  • 1-2 tsp italian seasoning
  • 1/4 tsp crushed red pepper or more if desired
  • 1 bay leaf


Score an ‘X’ on the top of each tomato.


IMG_2436

Blanch in boiling water for 30-60seconds until the skins split. Remove from the boiling water and add to an ice bath.

IMG_2437

Remove skins. Remove the core portion on top. Roughly chop the tomatoes if you want it to cook down more quickly. Otherwise just cut them in half or so if you don’t care how long it takes.

IMG_2439

Saute the onion in olive oil until translucent. Add the garlic and sauté for 2-3 more minutes.

IMG_2438

Add the tomatoes and the seasoning. Simmer, covered, on low for 2 hours. Remove the bay leaf. Leave as is if you like your sauce a bit chunky or puree with an immersion blender.

IMG_2445

Cauliflower Cheesy Bread


IMG_2391


I’ve mentioned before how I am not allowed to make vegetarian dishes. My fishing guide is a meat & potatoes type of guy. I’ve made a few dishes but those vegetarian meals have to be at lunch. I think he would flip his lid if I tried to make a veggie meal for dinner.

I’ve actually made this cheesy bread for him but it was a side dish to something. He really enjoyed it. He said, “there is no bread in this?” Nope. Just cauliflower vegetable goodness. The best part is you don’t have to spend forever squeezing out the excess moisture from the “dough.”

Since he is driving a boat today, being a real fishing guide for others, I got to make this dish as an entree and eat it myself for lunch. Delicious.

Cauliflower Cheesy Bread (serves 2 as a side dish or 1 as a main dish)

  • 1/2 head cauliflower, cut into chunks
  • 2 eggs
  • 1/4 cup mozzarella cheese
  • 1 tsp basil
  • 1 tsp oregano
  • 1-2 tsp minced garlic
  • salt & pepper, to taste
  • 1/2 cup to 1 cup mozzarella cheese

Marinara Sauce: Make your favorite recipe, use store bought, or try this quick go-to…

  • 1/2 can stewed tomatoes
  • pepper to taste
  • 1/2-1 tsp italian seasoning (or equal parts basil & oregano if you prefer)
  • few dashes hot red pepper flakes

Marinara Sauce: Puree tomatoes lightly so that there are still some chunks. Add seasonings. Simmer all ingredients for 15-30minutes.

Cauliflower Cheesy Bread: Pick cauliflower from your garden (or just go to the store, but these guys are super easy to grow. I recommend you do so next year).

IMG_2398

Puree 1/2 head cauliflower that has been cut into chunks in a food processor.

IMG_2380

While oven preheats with a baking stone sauté cauliflower in a skillet over medium low to medium heat to release excess moisture and soften the cauliflower.

IMG_2383

Add to a medium bowl. Add the rest of the ingredients except for the 1/2- 1 cup mozzarella and mix well. Form into a square on a piece of parchment paper.


IMG_2384

Place paper on heat stone. Bake for 20 minutes. Top with cheese. Bake for 5 minutes more. Serve with marinara sauce.

IMG_2391

IMG_2387

Zucchini Bread

IMG_2442

I love trying to find the best recipe there is for any given item. I performed a Zucchini Bread Battle last year. Both recipes were good but they weren’t good enough. As I had just received some giant zucchini from a co-worker again, I knew another zucchini bread was a necessity. This recipe is perfection. I borrowed the base of the recipe from a friend. Thanks lovely.

Zucchini Bread (adapted from Apple Sparkle Cake)

  • 1 cup shredded zucchini
  • 1/2 cup vegetable oil
  • 1 cup sugar
  • 2 eggs
  • 1 tsp vanilla
  • 1 1/3 cup flour
  • 1 tsp baking soda
  • 1/2 tsp salt
  • 1 tsp cinnamon
  • dash or two nutmeg
  • 1/2 cup chopped walnuts
  • 2 individual packets Sugar in the Raw

Preheat the oven to 350 degrees. Grease a loaf pan.

Add the shredded zucchini to a large mixing bowl. Add the oil, cup of sugar, eggs and vanilla and mix well to combine. Add the flour, baking soda, salt, cinnamon, and nutmeg. Fold the dry ingredients into the wet until just combined. Fold in the walnuts. Pour into the prepared loaf pan. Sprinkle the top of the cake with the Sugar in the Raw.

Bake for 50-60minutes until a toothpick inserted comes out clean. Cool for 10 minutes in pan. Remove from pan and let cool completely before slicing.

IMG_2442

Bulgur Vegetable Salad

I feel that people associate Minnesota only with heavy comfort foods. Hot dishes and meat & potatoes. In actuality, gardens are quite prevalent in Minnesota, resulting in many veggie based meals or at least veggie filled side dishes.

In my household, it’s rare to have a vegetarian meal. My guy is a meat & potatoes man & believes veggies are something to be used as a side dish. I, however, have never been a meat & potatoes girl. Don’t get me wrong, I love meat & potatoes. I love them together. But I love all food and vegetables have always been one of those foods. Since meeting me, my guy has probably eaten more vegetables with me than in his entire life before living with me.

I try to come up with tasty ways for him to eat them (as well as myself) even if it is just for side dishes. This isn’t a crazy vegetable dish by any means but it does incorporate the veggies from our garden this year in a way I haven’t made it in years. It’s sort of like a tab(b)ouli or tab(b)ouleh salad – pick your fave spelling – just modified for what I had on hand.

This can be eaten by itself or paired with some sort of meatball or yogurt chicken if you have a meat eater in your household as well.


IMG_1349


 Bulgur Vegetable Salad (makes 4 servings)

  • 1 cup bulgur
  • 2 cups water
  • olive oil
  • lemon juice
  • 1 onion, chopped
  • 1 zucchini, sliced into half moons
  • 1/2 tsp garlic, minced
  • 1 tsp each dried basil & oregano
  • salt & pepper to taste
  • dash onion powder
  • 1/2 a cucumber, chopped
  • 1 cup cherry or grape tomatoes, halved
  • 1/2 cup feta cheese
  1. Place bulgur & water in a small pot. Bring to a boil, reduce heat to a simmer & cover. Cook for 20 minutes or until water is absorbed.
  2. Meanwhile, in a skillet sauté zucchini & onion in a small amount of olive oil until tender & slightly caramelized. Add garlic & cook for 2 minutes more.
  3. Drizzle the cooked bulgur with olive oil & lemon juice. Add the cooked vegetables & spices & stir to combine. Top with the raw vegetables & feta cheese. Drizzle with more olive oil & lemon juice if desired.


Summer of Rhubarb: Pound Cake with Rhubarb Sauce

IMG_2306


In for a penny, in for a pound.

A phrase I am not too familiar with. I am not that type of a person. I don’t have an all or nothing mentality. I am fine with moderation. I am content with not taking high-stakes risks. Although sometimes you do have to take them. There are moments when the world presents you with opportunities which are all or nothing.

That’s what happened to me 2 years ago. I went ice fishing up north with my guy and said that I wanted to move there. He agreed. We wanted to leave the cities, the constant rushing around, the rat-race as they say. I jokingly began looking for jobs and realized that there were opportunities for me as a chemist in this small town in Almost Canada.

Then I got the job offer. Now things were real. It wasn’t just a dream or fantasy any longer. My guy and I had to make a choice. Do we do it? Get up and move? Change everything? Risk losing everything?

For me the risks were not that great. I had a job offer. I could easily pack up and move. My guy, however, had a house and job in the cities. He had to be willing to lose everything. We both knew that it was now or never and decided to go for it. It was time to hit the reset button.

This was easier for me. I accepted the job. I took a pay cut. I cashed out my 401K. I bought a house. I started over. My guy had a lot to lose. He did end up losing his job. And now the prospect of losing his house and credit is very real.

That was a risk he was willing to take. A risk that is becoming reality. Everything that he spent his whole life working for is disappearing.

We both went all in…In for a penny, in for a pound. I cannot thank him enough. I appreciate everything he has done. The reset button for me was fairly quick and painless. For him it has been a slow process and is still on-going. He was willing to lose everything to slow things down and move to Almost Canada with me. To actually enjoy more of life. I know when it is all said and done, by losing all these things we both are gaining so much more.


Pound Cake

  • 1 stick butter, softened
  • 1 1/2 cups granulated sugar
  • 3 eggs
  • 1 1/2 cups all-purpose flour
  • 1/2 tsp salt
  • 1/2 tsp baking powder
  • 1/2 cup whipping cream
  • 1 tsp vanilla

Cream together the butter and sugar until the mixture is light & fluffy (about 3-5 minutes). Mix in the eggs one at a time scraping the sides of the bowl as needed. Add the flour, salt, and baking powder all at once. Mix until combined. Add the whipping cream and mix until just incorporated. Stir in the vanilla. Pour into a buttered & lightly floured loaf pan. Place in a cold oven. Set the oven to 325F and bake for 80 minutes. Remove from the oven and let cool in pan on a wire rack for 10-15 minutes. Remove from pan and let cool completely on a wire rack.

IMG_2305

Rhubarb Sauce

  • 3 cups fresh or frozen rhubarb
  • 1 cup fresh or frozen raspberries
  • 1/2 cup water
  • 1/2 cup granulated sugar
  • 2 tbsp corn starch
  • ginger and/or cinnamon

Place the fruit (I used frozen) and water in a medium saucepan and bring to a boil. Reduce heat and simmer for 5 minutes. Stir together the sugar & corn starch. Stir the mixture into the fruit. Cook for 2-3 minutes. Stir in ginger and/or cinnamon if desired (I did a few dashes of both).

Note that this recipe makes a lot of sauce. Use as a topping for ice cream or in other baked goods such as Oatmeal Rhubarb Bars which is what I did with mine.

Whipped Cream

  • 2 tbsp sugar
  • 1 cup heavy whipping cream
  • 1/2 tsp vanilla

Place bowl and metal whisk in freezer for 10-15 minutes. Place sugar, cream, and vanilla in bowl. Whisk until mixture forms stiff peaks. Use immediately or place in the fridge.

Summer of Rhubarb: Rhubarb-Raspberry Pie


IMG_2271


Memorial Weekend is the kick-off to summer. Fishing, gardening, barbecues, and fruit pies. In Minnesota, rhubarb pies are very common and for me, summer is also about rhubarb. It was a no-brainer that for my Baking Sunday this memorial weekend I decided to make a Rhubarb-Raspberry Pie using some frozen rhubarb that I had from last summer.

What a great way to kick-off the Summer of Rhubarb.

IMG_2275

Rhubarb-Raspberry Pie

  • For the crust… (use store-bought or your favorite recipe. This is my quick go-to cause I always have these ingredients in my pantry)
    • 1 1/4 cups all-pupose flour
    • 1/4 tsp salt
    • 1/3 cup shortening
    • cold water
  • For the filling…
    • 4 cups fresh or frozen rhubarb
    • 2 cups fresh or frozen raspberries
    • 1/2 tsp cinnamon
    • 3/4 cup sugar
    • 1/3 cup flour
  • For the crumb topping…
    • 1/2 cup flour
    • 1/2 cup packed brown sugar
    • 3 tbsp cold butter


Crust: Combine the flour and salt in a medium bowl. Cut in the shortening until the mixture is in pea-size chunks. Add cold water a tablespoon at a time, pushing the moistened dough to the sides. Add enough water until the dough is moist enough to hold a ball shape. Lightly flour a clean surface and roll out the dough to be 1/8 in thick. Line a 9in pie plate with pastry. Crimp edge as desired.

Filling: Stir together the sugar, flour, & cinnamon. Add the fruit. Gently toss until coated (if using frozen fruit let stand for 45 minutes until the fruit is partially thawed but still icy).

Crumb topping: Stir together the flour & sugar in a medium bowl. Cut in the butter until the mixture resembles coarse crumbs.

Assembly: Pour the prepared filling into the pastry lined pie plate. Top with crumb topping. Line edge of pie plate with foil to prevent overbrowning. Bake in a 375F oven for 25 minutes (50 minutes if using frozen fruit). Remove foil and bake for another 30-40 minutes until crust & topping are golden and filling is bubbly). Let cool on a wire rack for at least 2 hrs (this will prevent your pie from running all over the place). Serve with vanilla ice cream if desired.

IMG_2273