Multiple Meals: Red Chard

I’ve mentioned numerous times that my grocery store leaves something to be desired. I cannot get most things I want to cook with even if they are seasonal. A few days ago I drove 2hrs to get some supplies for house renovations as well as groceries. This occasional commute has become a norm for me as of late. It doesn’t really bother me, it is just a way of life now. I ended up buying some chard to cook with as I cannot get any fancy greens in my grocery store. I didn’t know what I would use it for at the time, but I knew I needed it.

On Sunday I spent about 4hrs in the kitchen which is a nice way for me to relax. With all of the ice fishing I have been doing I have not been in the kitchen as often as I would like. It’s hard to juggle hobbies. Anyhow, I knew I needed to use the chard, make French Onion soup as I had way too many onions (thus requiring me to make bread), make lunch & dinner, & bake something (I was leaning towards cookies). It sounds more ambitious than it really was. In the morning I prepped bread for baguettes and planned out my day…

  1. Bake bread
  2. Make lunch
  3. Make soup (to be eaten with dinner & give leftovers for the next day’s lunch)
  4. Bake cookies
  5. Make dinner

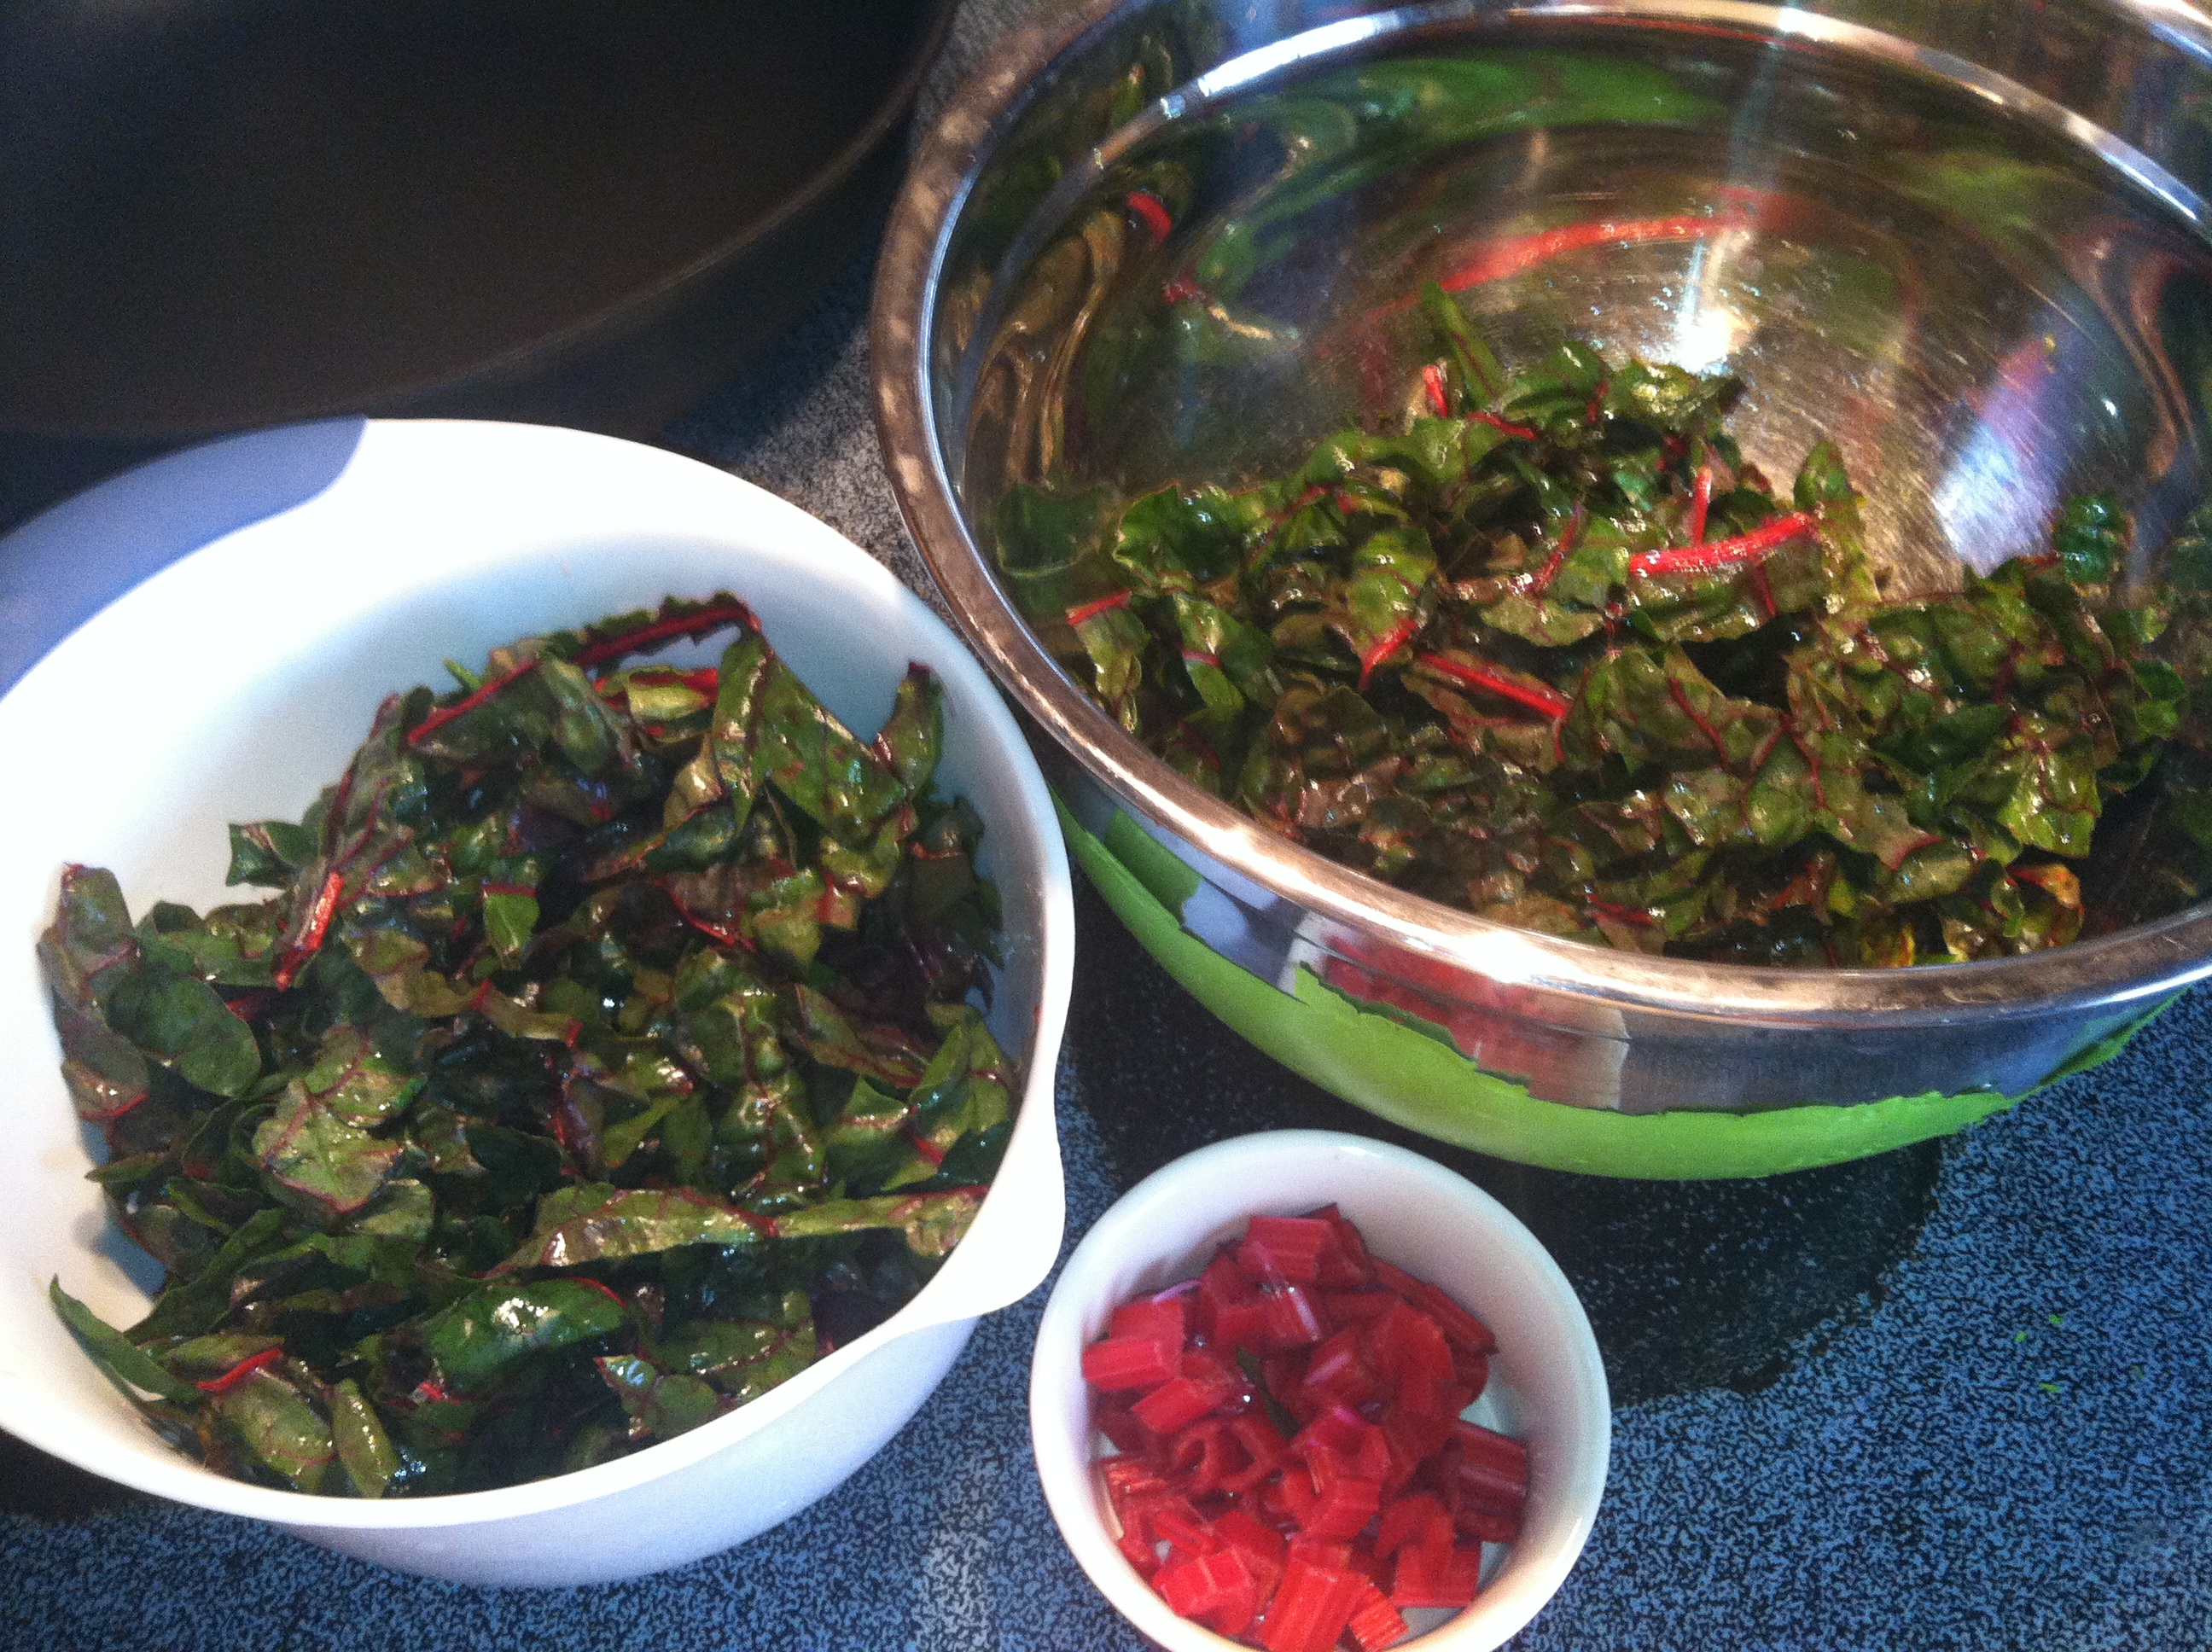
I decided to divvy up the chard into 2 portions – one to be used with lunch & one to be used with dinner (each can serve 2).

IMG_1077

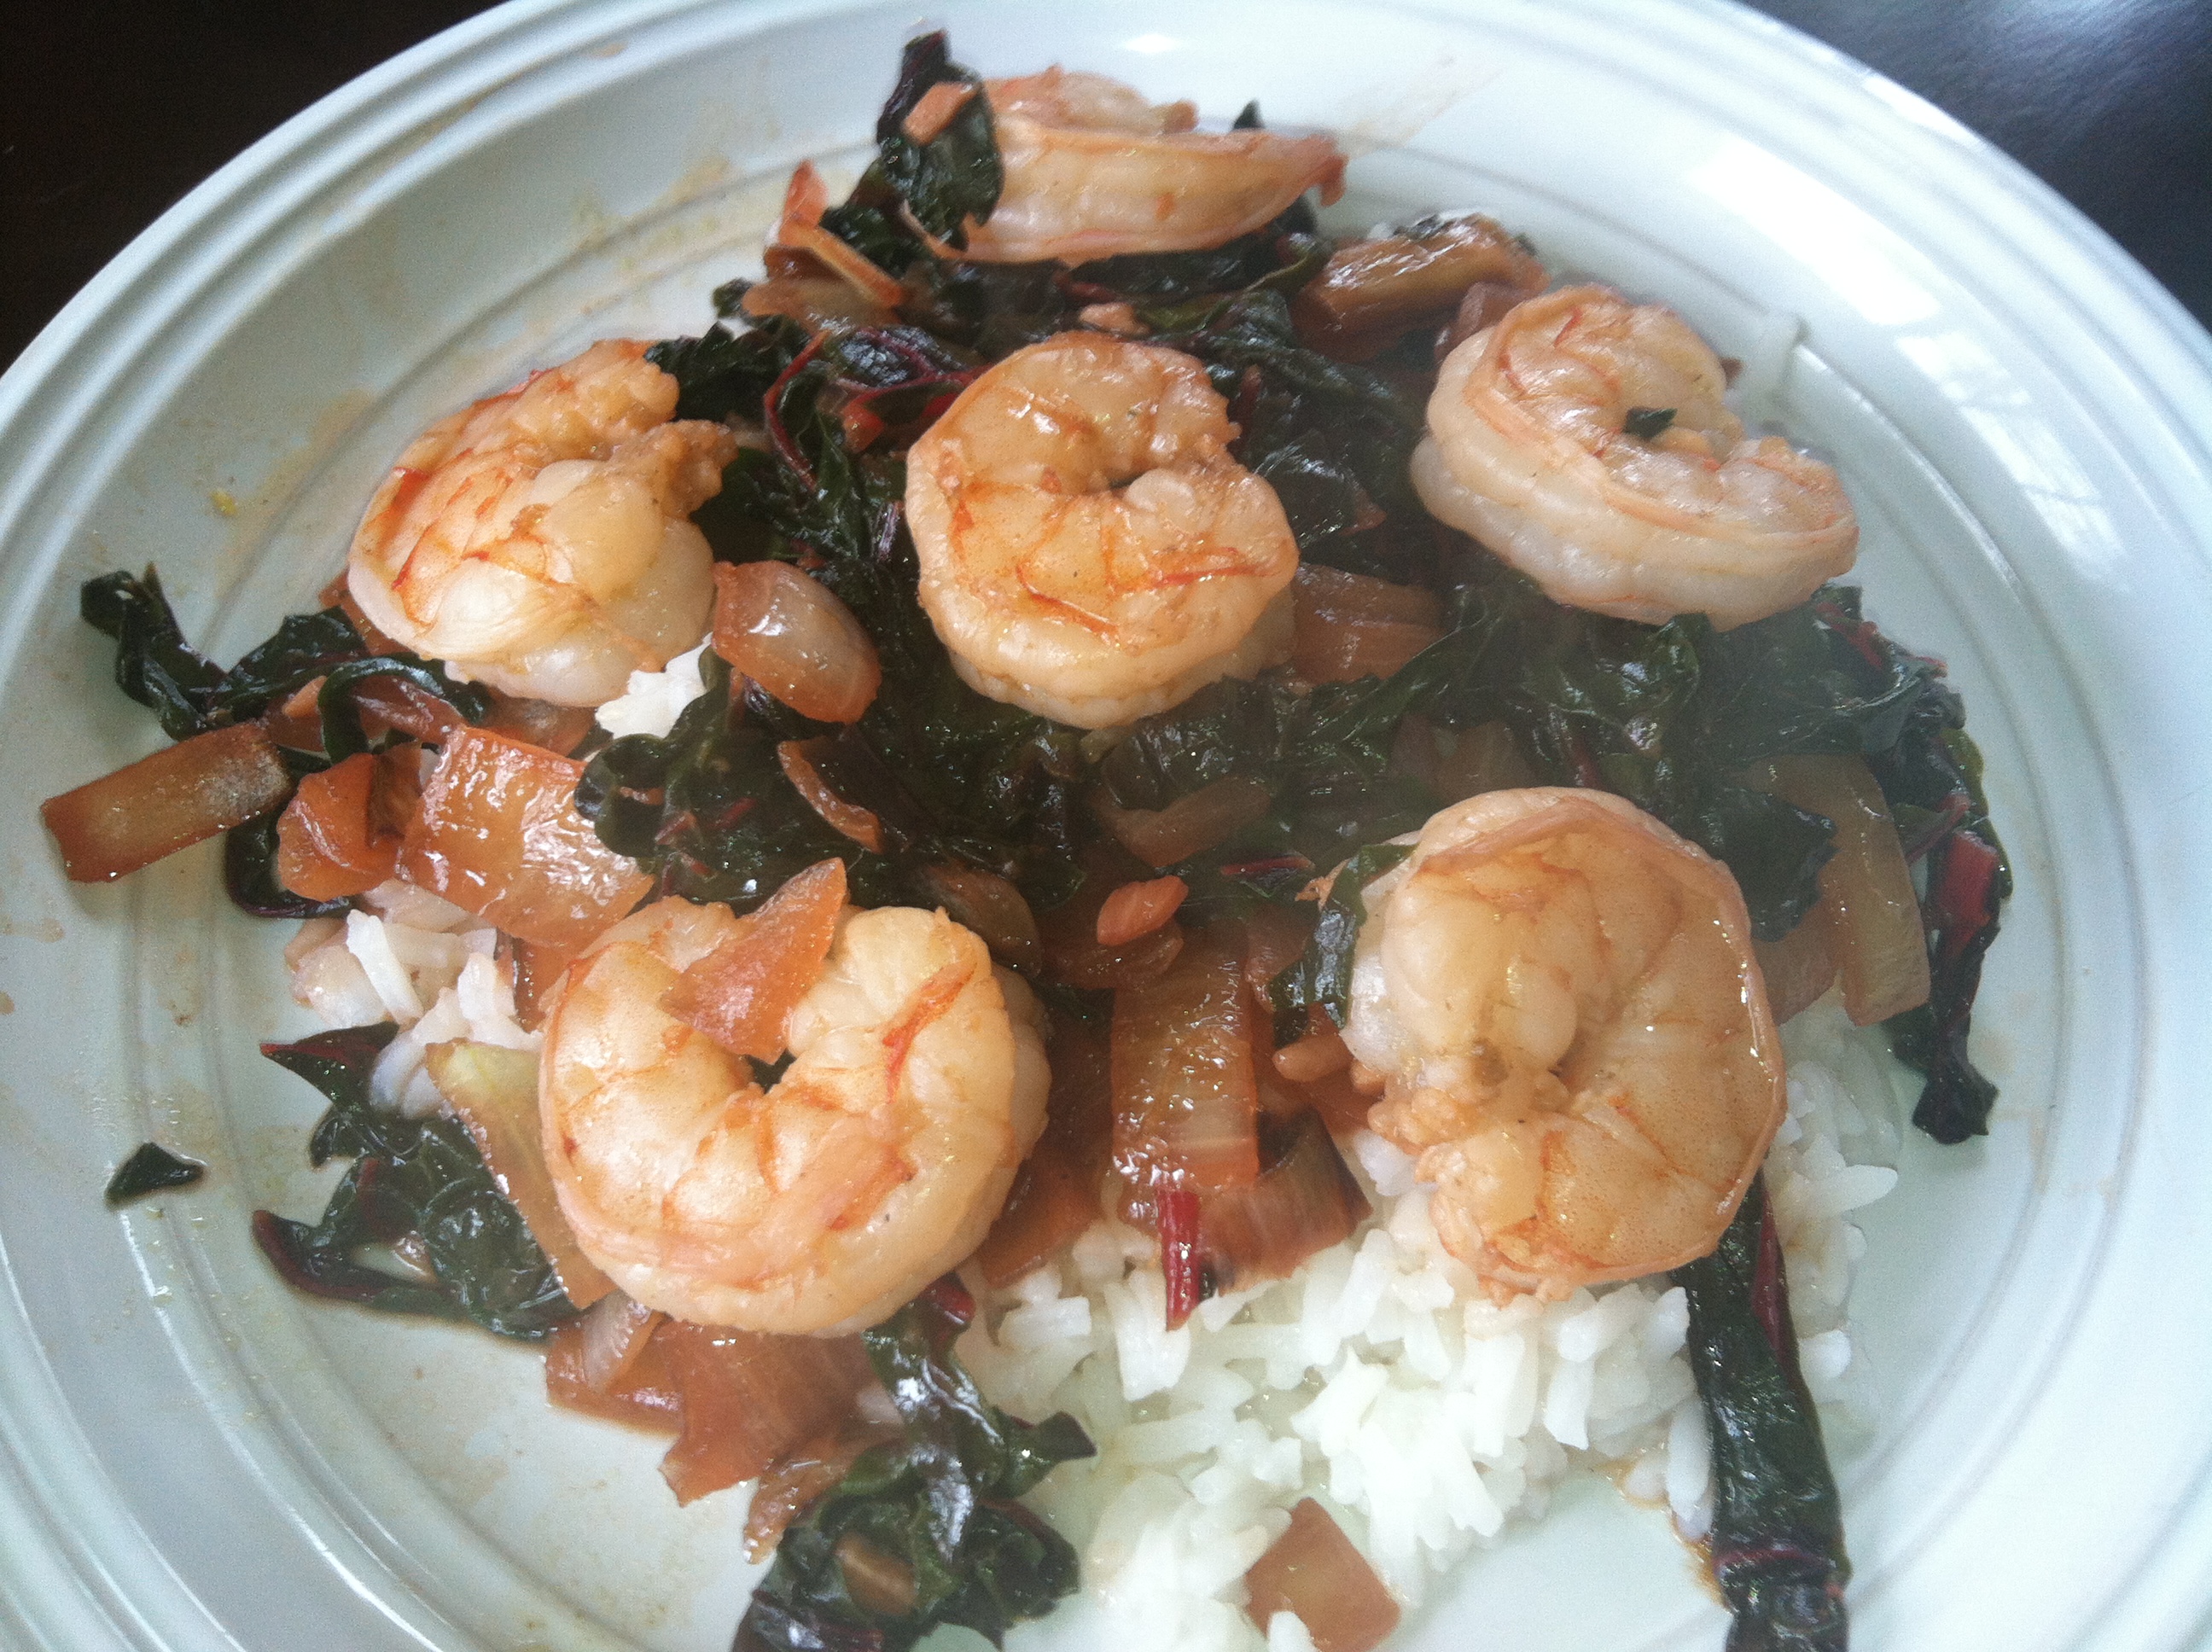
I ended up making Asian Garlic Shrimp & Chard over rice for lunch. Fast, delicious, & healthy.

IMG_1079

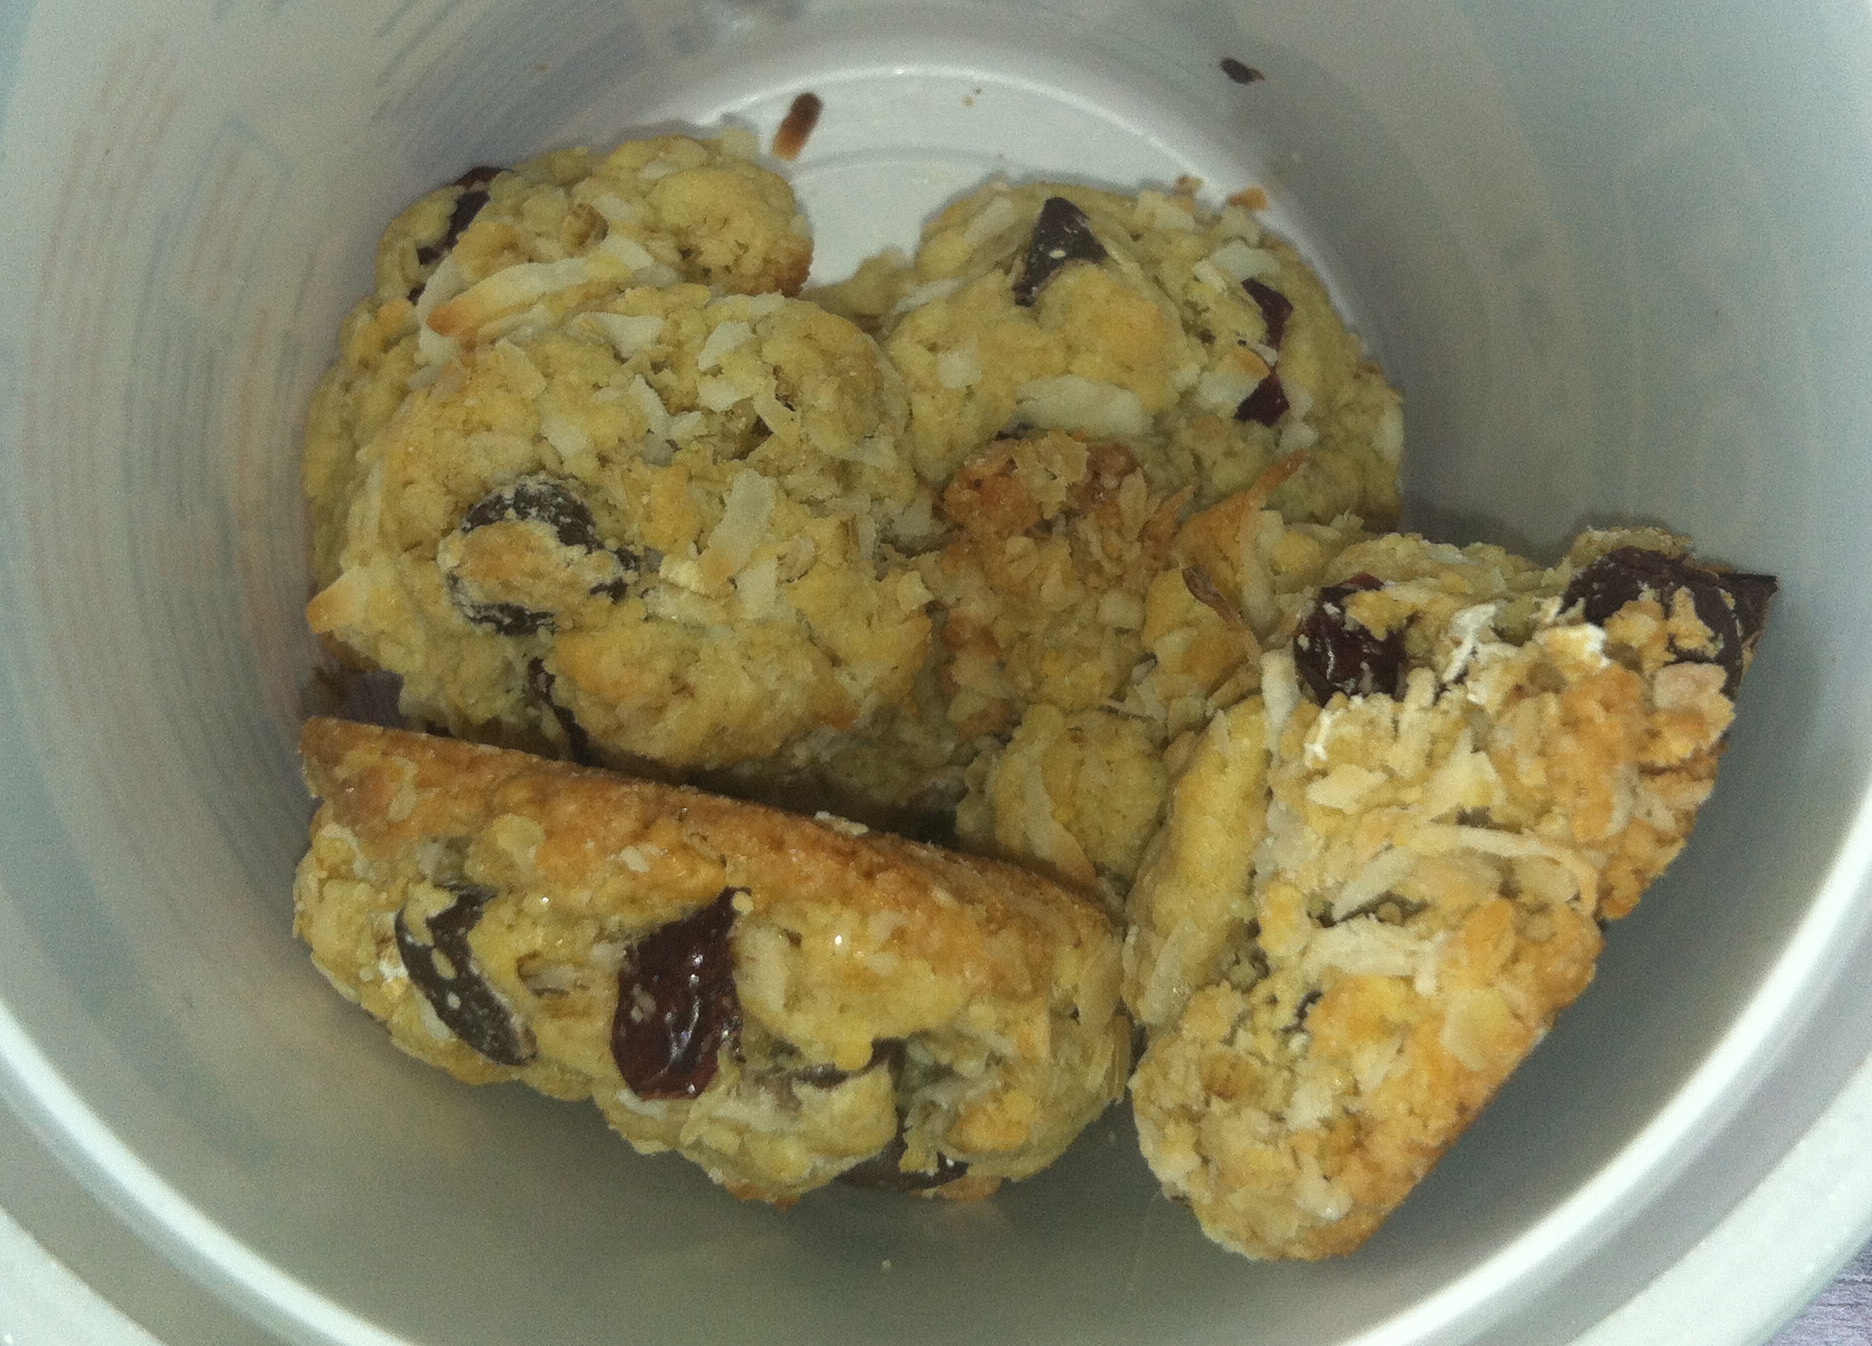
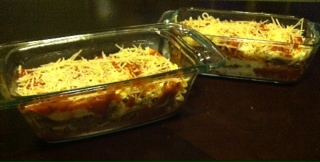
I then proceeded to make French Onion soup. While that was cooking I made cookies which quickly began to disappear.

IMG_1088

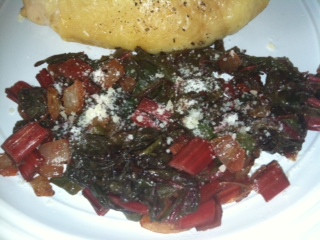
After all of this was completed, I started on dinner. I made lemon-parmesan chard & served it with roasted chicken thighs and some French Onion soup.

chard


Asian Garlic Shrimp & Chard  (Serves 2)

  • olive oil or cooking spray
  • 1/2 bunch red chard, roughly chopped & stems removed
  • 1 onion, chopped
  • 1-2 cloves garlic, minced
  • 2-3 tsp reduced sodium soy sauce
  • 2-3 tsp rice vinegar
  • 1 tsp sesame oil
  • 12-14 uncooked shrimp, deveined & peeled
  • 1 1/2 cup cooked white rice
  1. Mix soy sauce, vinegar, & sesame oil together. Set aside.
  2. Coat a non-stick skillet with olive oil or cooking spray & heat over medium heat.
  3. Sauté onion for 5-10minutes until softened.
  4. Add garlic & sauté for 2 minutes.
  5. Add swiss chard & 1/4 cup water. Sauté until chard is wilted & water has evaporated.
  6. Add shrimp & sauce. Cook for 2minutes per side or until shrimp is cooked through. Serve over cooked white rice with additional soy sauce & hot chili sauce if desired.


Lemon-Parmesan Chard

  • olive oil
  • 1/2 bunch red chard, roughly chopped (chop a few of the stems as well)
  • 1/2 small onion, chopped
  •  2-3 tsp lemon juice, or more to taste
  • parmesan cheese
  1.  Coat a non-stick skillet with olive oil & heat over medium heat.
  2. Sauté onion for 10-20 minutes until softened & caramelized to your liking.
  3. Add the stems of the chard & cook for 3-5minutes until softened.
  4. Add the chard & sauté until wilted. Spritz (or saturate) with lemon juice to your liking.
  5. Top with parmesan cheese & serve with whatever you desire. I served it with roasted chicken.


Multiple Meals: Walleye

If you know me at all you know I go ice fishing and have an abundance of Walleye in my freezer. I try to cook it in a different fashion every week. This week I decided I would bread it & bake it. The problem, however, is that I am cooking for 2 and my vacuum sealed walleye is really for 4 people. Obviously, leftover breaded & baked walleye will not re-heat very well.  That left me with the question on how to prepare all the walleye in a tasty manner & so that it would not go to waste which leads to the next installment of multiple meals.

Making multiple meals with fish seemed daunting. I didn’t want to cook half the fish & leave the other half in the fridge to dry out or lose oils for the next night’s dinner. My first thought was to prepare a Seafood Chowder that could be eaten for lunch but I didn’t have any clam juice or cream of potato soup which is my preferred way of making it. I then thought of other recipes I had been meaning to try & I hadn’t made walleye cakes yet. I thought I could try and make walleye cakes that could be eaten for breakfast with eggs. I figured I would bake the rest of the fillets with my breaded fillets & then I could put them in the fridge for the next day to flake, mix up with all the other walleye cake ingredients, & finally cook them.

Baked Walleye

  • ½ vacuum sealed bag walleye (roughly 4 small fillets or 2 medium fillets). See Walleye Breakfast Cakes below for using the rest of the fillets.
  • 1 egg, beaten
  • Splash of milk
  • Breadcrumbs
  • Mashed potato flakes
  • Grated parmesan cheese
  • Seafood seasoning
  • Seasoned salt
  • Pepper


Preheat the oven to 400F.

Place the egg in a small to medium bowl with the splash of milk.

Place equal parts breadcrumbs, mashed potato flakes, and grated parmesan cheese on a plate or in a bowl. Mix in seafood seasoning, seasoned salt, & pepper to taste.

Dip the fillets in the egg mixture and allow the excess to drip off.

Place the fillets in the breadcrumb mixture & then place on a lightly greased baking sheet.

Bake for 15-20 minutes until the fish flakes apart easily.

Serve with sides of your choice. I served them with roasted carrots & mashed potatoes & gravy.

baked walleye


Walleye Breakfast Cakes

  • ½ vacuum sealed bag walleye (roughly 4 small fillets or 2 medium fillets) previously cooked*
  • 1 egg
  • 2-3tbsp Mayonnaise
  • 1-2tsp Lemon juice
  • 1/4-1/3 cup Breadcrumbs
  • Seafood seasoning
  • Seasoned salt
  • Pepper
  • Oil
  • Eggs served to your preference


*To the half of the fillets for the walleye cakes, place them on the baking sheet with the breaded walleye (recipe above). Lightly season with seafood seasoning & drizzle with cooking wine or olive oil. Cook along with the breaded fillets. Once cooked, place these un-breaded fillets in a medium mixing bowl in the fridge covered with plastic wrap.

Shred the fillets cooked previously in the mixing bowl (the advantage of shredding them the next day is that you get nicely sized walleye chunks).

Add all the ingredients except for the oil & the eggs that you will cook to your preference.

Mix the ingredients & form into patties (makes roughly (4) 3in patties – 2 for each person).

Place a small amount of oil in a skillet over medium to medium-high heat & cook the walleye cakes for 2-3 minutes per side until golden brown & heated through. Place on a paper towel to drain off excess oil.

walleye cakes

Cook eggs to your preference (over easy, poached, etc) and serve over walleye cakes. Drizzle with sweet chili sauce if desired.

walleye with eggs

Multiple Meals: Ground Beef & Italian Sausage

To continue the theme of Meal Planning, I shall share some things I do to make multiple meals. I am usually cooking for 2 while many recipes are for 4 people. I either make the recipe as is and we have leftovers or I decide to make two separate dishes. In this first installment of Multiple Meals, I use a pound of ground beef & a pound of Italian sausage and make 2 different dinners but each can be eaten twice.

The first thing that needs to be done is to combine both meats together & then divide the meat mixture in half (now you have two separate pounds of combined meat). Brown one of the halves of meat with an onion and set aside for prepping two lasagnas. To the other half, we will be making meatballs. One for spaghetti & the other for sandwiches.

Meatballs

Take the half of meat that is for the meatballs (1lb) and add the following:

  • 1 slice milk soaked bread (place a piece of bread on a plate and pour milk over it so that it is saturated all the way through. Squeeze out the excess).
  • 1 clove garlic, minced
  • ¼ tsp each salt & pepper
  • ½ tsp each basil & oregano
  • 1 onion, chopped
  • 1 beaten egg
  • 2-3tbsp parmesan cheese

Take half of this mixture & place in the fridge for the next night’s dinner*

To the other half, form the meatballs by hand (roughly the size of a golf ball) and place on a baking sheet lined with parchment paper. Bake in a 450F oven for 5-8 minutes until browned. Remove from the oven.

Meanwhile, chop an onion & a green pepper and sauté in a large skillet in a small amount of olive oil over medium low heat for about 20-30 minutes until caramelized to your liking. Add a minced clove of garlic and sauté for about 2 minutes. Add 8oz canned tomato sauce, 1/2 tsp. oregano, 1/2 tsp. basil, and salt & pepper to taste. Add the meatballs to the skillet and cook over low heat while covered for 20-30 minutes. Top with parmesan cheese if desired & serve over cooked spaghetti noodles.

The next night you can prepare exactly the same way and serve in a hoagie bun for meatball sandwiches.

meatball

* If desired you can prep all the meatballs and sauce at once if you are having the sandwiches for lunch or if you know you are crunched for time the next day. Just reheat when ready to eat.


Loaf Pan Lasagna

For the lasagna, we will be making two lasagnas (in loaf pans) that serve two each.

  • 1lb meat previously browned with an onion
  • 8 cooked lasagna noodles
  • 16oz ricotta cheese (I used part-skim)
  • 1 egg
  • ¼ tsp pepper
  • ½ tsp each oregano & basil
  • 1.5-2 cups mozzarella
  • 1 26oz jar spaghetti sauce or make your own
  • ¼ cup Parmesan cheese (& more for sprinkling if desired)

Either the day you brown the meat with the onion or the next day after it has been browned prep the lasagnas as follows:

Mix ricotta, egg, seasonings, & 1/4 cup parmesan cheese in a bowl for the filling.

Place approximately 1/4 cup spaghetti sauce on the bottom of each loaf pan. Place two noodles on top of the sauce. Cut or overlap as necessary. Place 1/6 of the ricotta filling on the noodles and spread into a thin layer (approximately 1/3 cup). Sprinkle with mozzarella cheese. Place 1/4 of the browned meat on the filling. Top with more spaghetti sauce. Next place one noodle over the sauce cutting as necessary. Repeat filling, cheese, meat, & sauce layers once. Finally, place one noodle over the sauce and top with the rest of the ricotta filling, mozzarella, and sauce. Sprinkle with parmesan cheese if desired.

Put one in the fridge for night 3 (night 1=spaghetti & meatballs, night 2=meatball sandwiches, night 3=lasagna) and one in the freezer. Cover the one in the fridge with aluminum foil. To the one placed in the freezer make sure to cover with aluminum foil, wrap all the way around in plastic wrap, & wrap again all the way around but with foil. Use within 1-2weeks for ideal flavor.

lasagna


Fridge lasagna: Preheat the oven to 375F. Bake with the foil covering for 40minutes. Remove the cover & continue to bake for 20minutes. Let sit for 5-10 minutes.

Freezer lasagna: Preheat the oven to 375F. Remove extra foil & the plastic. Bake with the foil covering for 1 hour. Remove the cover & continue to bake for 20minutes. Let sit for 5-10 minutes.

Meal Planning in a Small Town

As I have gotten older and circumstances have changed in my life, I have spent more time in the kitchen making dinner. One of my favorite parts of cooking is meal planning. I like spending time each day or sometime during the week to decide what to make for dinner. The key is to have a well stocked pantry of food items and for me, living in more rural areas, having a well stocked freezer.

I did live in a few small towns for awhile but they were 6hrs further south than where I am now. I had access to major grocery stores as well as smaller markets even if they were 15-60minutes away. Living in the “country” I soon discovered having a well stocked freezer was not only easier, but cheaper, as you could buy meats in larger quantities & vacuum seal it into smaller portions.

freezer

As of last November I soon realized how much I was spoiled. Moving up to Almost Canada has made me miss my grocery stores even if they were a little ways away. The grocery stores up here are…how shall I say it…depressing. Everything is limited & everything is expensive. You go with a mindset of what to make and your key ingredients are not to be found. The grocery store 45minutes away is better, but still not very good. The one 2hrs away is better still, but once again, not the same. Seasonal cooking is definitely a concept I have to embrace as well as a constant lack of ingredients even in that season.

So once again I stocked my pantry with canned & boxed goods as well as stocking my freezer with meat portioned out & vacuum sealed.

pantry


I know one day the deep freeze will be stocked as well, although probably with fishing or hunting conquests.  Having numerous supplies now at hand I proceed to go about planning dinners & lunches as needed. Sometimes on a day by day basis and sometimes for the whole week.

Meal planning still gives me enjoyment. I had some misgivings at first since everything was limited, but one has to look at it in a different light. You have to look at it like dieters do. It’s not what you can’t have but rather all the things you can have. With this mindset I set about to make dinners with leftovers if needed for easy lunches the next day all the while trying to vary what I make, use up items that need to be eaten, & try out new things. Some are huge hits & others need some tweaking but it’s fun to see what comes out of the kitchen.

Here is what I came up with for this past week as an example. I started my meal planning on Thursday last week to go through Thursday of this week. Friday is up in the air but I have a leftover prepped lasagna in the freezer for after a day of ice fishing on Saturday.

  • Thursday: Spaghetti & Meatballs (also resulted in leftovers for Fri lunch)
  • Friday: Meatball Sandwiches
  • Saturday: Lasagna
  • Sunday: Mustard Pork Roast w/apples & onions (recipe from my lovely which also produced lunch for Monday)
  • Monday: Salmon & Spaghetti Squash Fritters w/zesty dipping sauce
  • Tuesday: Chicken & Squash chausson/calzone
  • Wednesday: Pork Chops w/zucchini, summer squash, & rutabaga (made in the slow cooker with onion soup mix & broth)
  • Thursday: Skillet Chicken & Chile Rellenos w/corn & tomatoes served over rice

As part of this last weeks meal planning I was able to use some ground meat in the freezer & make numerous dishes out of it. Also, I cooked Salmon for the first time. I made up a recipe that I thought would go with a spaghetti squash fritter recipe I pulled up from the internet. The squash (and spinach) needed to be eaten so I based my meal around that item. A long time ago I learned that meals do not always need to be based around meat. Sometimes you pick a vegetable & then work your meal around that – like for the rellenos recipe. I had two poblano peppers that needed to be eaten & leftover roasted chicken from the chausson recipe, so I combined the two & used pantry items to supplement. In addition, I also try to vary the meat source used in the meals so as not to get sick of any one thing (I’m slowly getting my fishing guide to have some meatless dishes but he still prefers meat in every meal).

With all of these concepts & a well stocked pantry & freezer, I set about meal planning. It’s fun & it’s Zen for me. It relaxes me & excites me. I feel at peace in a way knowing that I will produce (hopefully) delicious meals for myself & others to eat. I also get excited when I try new things or come up with new recipes. Despite living in a small town with not much to choose from, none of that has changed.