Cold Weather, Tropical Muffins

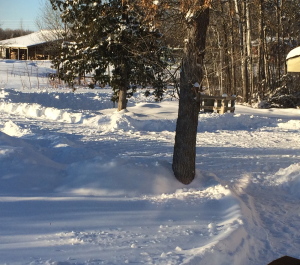
Winter is finally here in Northern Minnesota which I like to refer to as Almost Canada. It has been mild compared to last year when I moved up north. Last year was one of the coldest winters in awhile. This year it has been rather nice in terms of snow and freezing temperatures. But now winter is upon us.

IMG_1898

It snowed 8in the other day and today (Sunday) it is -15 to -30F for actual temperatures but it felt as cold as -50F. Burr. I am not complaining. If anyone should be complaining it is my fishing guide who became an actual fishing guide this year as he needed a job.

He gets up at 4:30 in the morning and many days he actually gets breakfast at work but it isn’t until 7:30 or 8 that he gets to eat. He has certain tasks he has to take care of first, so he needs a little bit of something to get him through the first few hours. That being said, he is not a big eater right away in the morning so he is not getting up to cook himself breakfast. He needs something that he can grab quickly.

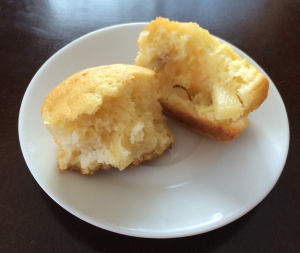
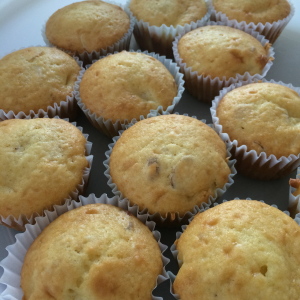
I decided to make muffins. These are individually portioned so he can grab one or two and eat them as needed. The weather outside is terribly cold but these muffins remind you of warmer climates or warmer seasons to come.


Pineapple Muffins (makes 18 muffins or 1 loaf*) adapted from my Peach Bread recipe

2 cups flour
2/3 cup sugar
1 tsp baking powder
1/2 tsp baking soda
1/2 tsp salt
1/3 cup vegetable oil
2 eggs
1/2 cup pineapple juice
1/2 cup milk
1/2 cup to 2/3 cup diced pineapple
1/2 cup sliced almonds


IMG_1903

 
Preheat oven to 350F and grease a muffin tin or line with muffin cups. Mix the first 5 ingredients in a large bowl. Mix the oil, eggs, juice, & milk in a medium bowl. Add the wet ingredients to the dry and mix until just combined. Fold in the pineapple and almonds. Fill the muffin cups 2/3 full. Bake for 20-25 minutes or until a toothpick near the center comes out clean. Cool for 2 minutes in tin. Remove muffins and cool completely on a wire rack.

IMG_1905

*This recipe can also be used as a quick bread. Just pour batter into a greased loaf pan and bake for 50-60minutes or until a toothpick near center comes out clean. Cool for 10 minutes in pan on a wire rack. Remove bread from pan and cool completely on a wire rack before slicing.


Baked Grouse, two ways

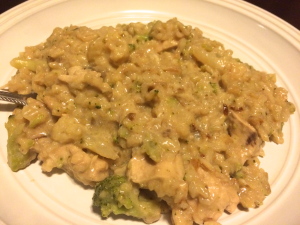
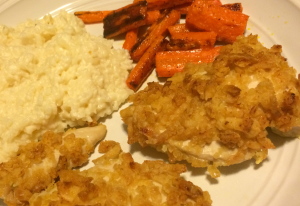
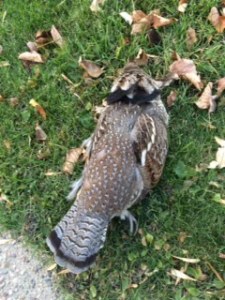
On the last day of My First Deer Hunt I ended up going grouse hunting and managed to come home with 4 grouse which was totally amazing! I had recently made Apricot Glazed Grouse which was delicious but was in the mood for more of a warming fall/winter type dish. I made a casserole the first night which is very easy & comforting. The next night I made an easy breaded grouse & served it with roasted carrots and creamy goat cheese rice. Neither are fancy but both are delicious.

Grouse Casserole (serves 2)

  • 2 grouse, cleaned and cut into bite-sized chunks
  • 1/2 cup rice
  • 1 can cream mushroom soup
  • 10 oz milk
  • 1/2 bag frozen vegetables (I used a broccoli & cauliflower blend)
  • 1/2 dry onion soup packet
  • water, as needed

Mix all ingredients in a medium bowl. Pour into a greased casserole dish. Bake for 75-90 minutes until rice is cooked through stirring every 15 minutes. Add water as necessary.

IMG_1716


Crispy Onion Breaded Grouse (serves 2)

  • 2 grouse, cleaned (keep breasts intact or cut into tender sized strips)
  • 1 egg, beaten
  • frenchs onions
  • 3 large carrots, chopped into bite sized pieces
  • olive oil
  • salt & pepper
  • 1/2 cup rice
  • 1 cup chicken stock
  • 1oz goat cheese

Line two baking sheets with foil. Lightly grease one with cooking spray and set aside. Drizzle 2-3 tsp olive oil over the other baking sheet and also add pinch or two salt & pepper. Add carrots to olive oil tray and gently toss. Place in 400F oven for 20-25minutes.

Place stock and rice into small pot. Bring to a boil & then cover and simmer for 20 minutes until rice is tender. Stir in goat cheese.

Meanwhile, coat grouse in egg and dip into onions. Bake on lightly greased foil lined sheet for 12-17minutes until cooked through.

IMG_1719

My First Deer Hunt

“The movie Bambi used to make me cry and even still I get teary eyed when I watch it.”  

“Do you even want to go hunting?” 
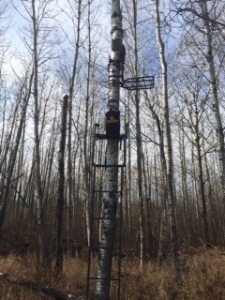
 

Image 4

I was never exposed to hunting growing up. It was not a right of passage for me. No one in my family was a serious hunter that I knew of or at least knew well. I guess my dad used to go duck hunting all the time but this was before I existed. Somehow I ended up with a hunter. I never thought I would go hunting in my life, but here I am, asking my guy to take me.

Let me state that I have no desire to kill animals. I have no antler obsession or need to fill my walls with mounts of “trophies.” I do have a desire to learn new skills & try new things. I only recently started avidly fishing & ice fishing in the last few years. I love it. I love pulling fish out of the water (mainly through the ice) and cooking with what I or my fishing guide caught. I love knowing where my food came from. Maybe hunting could be similar.

I wanted to learn and experience hunting from an academic and skill set standpoint. I wanted to be able to cook with what I harvested. I didn’t know if I could handle hunting. If I could handle taking a life even if it is to provide food for my household. My hunting guide said he didn’t know if I would like it either, “Maybe you will like sitting quietly in a tree for hours. Who knows?” He does not particularly like deer hunting. He is more of a waterfowl hunter. Regardless, I thought I should try. It could be something we do together. It could be something that I might really enjoy. Or maybe I will hate it but at least I would know. With this mindset I set out for my first deer hunt.
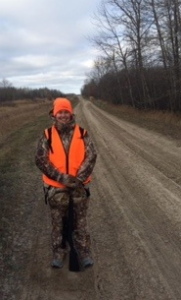
Image 5


This was probably the worst year for me to start hunting. The deer population is, let’s just say, bleak. This could be the worst year in about 20 years for harvesting deer. Very few doe tags were given and with no preference points I set out with a buck only tag. Having also recently moved to Northern Minnesota (aka Almost Canada), we do not know this area very well in terms of hunting, so were at a slight disadvantage. We did find some spots but of course they were on public land. Insert sad faced emoticon here. The weather was also not going to be the best. With very high winds and blistering cold temperatures some of the sessions were bound to be downright miserable.

There were lots of negatives stacking up against me. I went with the mindset that I would most likely not get a deer this year, but I should try and learn as much as I could. I was just hoping to see some deer (obviously still hoping to harvest one).

I made it a point to go as often as I could. I mean I live in God’s Country. I can leave work early and go hunting or go in late, which I did a few times. I could go in the mornings on the weekends, go home for a bit, & go out again in the afternoon. I also wanted to make the most of my investments: rifle, scope, ammo, & gear. Another reason to go out as much as I could.

We actually went out 11 times which I think is awesome. My guy says he has never hunted that much during a season. I said that if I didn’t get a deer it wasn’t going to be because I didn’t try. We ended up seeing a lot of deer sign & a lot of deer including a giant buck. Of course none of the deer were close enough for me to shoot &/or were on private land. Apparently that is what the majority of deer hunting is. Sitting quietly and seeing nothing or seeing some deer but not being able to take shot.

I don’t mind sitting quietly for a few hours. When the weather wasn’t terrible it was actually nice. Sitting in nature is quite soothing. Being able to think or not think and just be. That part of hunting I can handle. My guy even said that those were the coldest sits he had ever done and I had done numerous ones without complaining or wanting to go back home.

In addition to the deer, we ended up seeing lots of grouse during the last few times we went out. The last day (there is an extra weekend up here) when we were pulling out stands, I said I wanted to come back in the afternoon and try to hunt the grouse. As he had just gotten a grouse recently I was anxious to get some more to cook with. If I couldn’t get a deer, maybe I could get some grouse. I did just that.
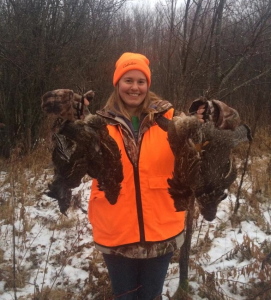
Image 7


My first hunting season turned out to be a success depending on how you look at it. Yes, I am disappointed that I didn’t harvest a deer. I still don’t know if I truly like deer hunting. I know that for me there will be a big difference between killing a grouse versus killing a deer. Will I actually like all aspects of deer hunting? It could be another year or two or who knows how many years before I find out. Maybe I will never find out. My guide says, “Oh please dear…, ” in a tone that only couples have with each other. It still doesn’t mean I am any less disappointed with the lack of a deer. At the same time, I know that I am just lucky that I saw so many deer. I know many people who didn’t see anything.

I also know that one really has to be positive, patient, and persistent not only in hunting but anything else in life. I will have as many opportunities for different types of hunts and more deer hunting in the future. As many as I am willing to do or make happen.

For this deer season I hoped for the best but expected the worst. I think I ended up somewhere in between which is just fine with me.


Apricot Glazed Grouse

I have lived in Minnesota my whole life but recently moved to northern Minnesota, or as I like to say, Almost Canada. The house I bought is on 1.5 acres which isn’t much land but is enough to shoot small critters or birds. Which is exactly what my guy did.

He was eating cereal and looking out the window. He saw a bird in a tree, went & grabbed my .22, and shot it. It was a grouse. It was going to be dinner. I was going to cook it.


IMG_1670


I have eaten grouse once before and if I hadn’t known it was grouse I would have thought it was chicken. There is no wild game flavor in this bird. I decided to make an apricot glazed grouse since I didn’t have to worry about masking a game flavor. I served it with sweet potatoes and roasted broccoli. It was delicious. There are no photos of the dinner, but it looked like glazed chicken with the mentioned sides.

Apricot Glazed Grouse (serves 2)

  • 1-2 grouse, cleaned & cut into bite sized pieces or strips
  • apricot/peach jelly or preserves (I used jalapeno apricot jelly)
  • salt & pepper to taste
  • 1-2 tsp olive oil
  • sides of your choice

Preheat oven to 375F. Line a baking sheet with foil or parchment paper for easy cleanup. Place 2-3 tbsp. jelly in a small bowl. Add salt & pepper to taste. Add 1-2 tsp olive oil. Place the grouse on the baking sheet and coat with jelly mixture. Bake for 10-12 minutes. Glaze the grouse with more of the jelly mixture & broil for 3-5 minutes until grouse is cooked through and glaze is slightly caramelized. Serve with sides of your choice.


Squirrel Chili

IMG_1612


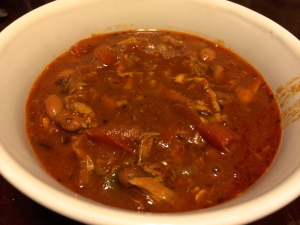
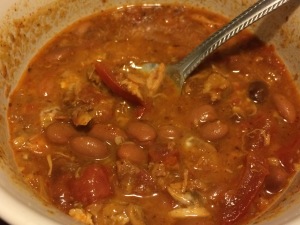
Who doesn’t love chili this time of year? It is the perfect food to come home to from October to March. At least in the mid-west this is true. Not many people want to eat a hot, steaming bowl of chili in July or August, but once the temperature changes, the menu changes. Chili is one of those items on the menu in my household this time of year. My guy, who happens to be a hunter, shot a squirrel in our yard with his bow. Since it was only one squirrel, I decided to make a squirrel & chicken chili. Simple, but delicious.

Squirrel Chili (serves 2)

  • 1 squirrel, skinned, cleaned, & cut into bite-size pieces ( brined for 2-4 hrs)
    • Brine Ingredients (4 cups water, 1/4 cup salt, 1-2 tbsp sugar, dash or two each chili flakes, oregano, & pepper)
  • 1 cup cooked chicken, shredded or cubed (if you have 2 squirrels you can omit the chicken)
  • 2 pieces cooked bacon, crumbled
  • 2-3 tomatoes diced
  • 1 onion, chopped
  • 1 can chili beans, undrained
  • 1/2 cup chunky salsa
  • chili seasoning (1-2 tsp store bought or your favorite blend. I used a combo of chile powder, paprika, cumin, garlic & onion powder, salt & pepper, oregano, & cayenne).
  • olive oil (to coat two skillets)

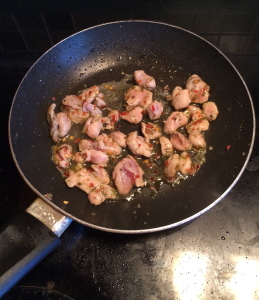
Combine the brining ingredients in a medium bowl. Add the squirrel & keep in the fridge for 2-4 hrs. Once brined, drain the squirrel but do not rinse. In a small skillet heat a small amount of olive oil over medium high heat. Brown the squirrel and place in a crockpot

IMG_1610

Saute a chopped onion in another skillet for 5-10 minutes until softened. Add this to the crockpot with all the other ingredients. Stir to combine. Heat on low for 6-8 hrs (this can also be made on the stove in a heavy duty pot or dutch oven on simmer for 2-4hrs). Serve with cheddar cheese & sour cream if desired.

IMG_1613


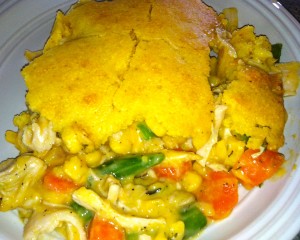
Cornbread Chicken Pot Pie


IMG_1384


I love pot pie. I think it is engrained in my Minnesota upbringing. When winter is half the year you enjoy comfort foods for half the year. The weather has turned rather brisk so pot pies are going to be a reoccurrence for many months to come.

Peas, carrots, potatoes, & chicken in a creamy sauce with a pastry crust is the traditional pot pie eaten by many, but you can really add anything. I love the fact that they are so versatile. You can add basically whatever you want to them depending on what kind of flavors you desire.

The first pot pie I ever made my fishing guide had peas & mushrooms in it. I didn’t know it then, but am constantly reminded now, how he hates peas. His mother even told me that she served him peas as a child and he responded with a question, “Are you made at me?” I guess he has always hated peas and will always hate them (except for pea soup – go figure). Anyhow, he did not enjoy that classic version & I have constantly been adapting pot pies ever since.

This version uses the veggies I had on hand as so many of my recipes do along with chicken and a cornbread crust. It is quite comforting on a brisk autumn day or cold winter night.

Cornbread Chicken Pot Pie (makes 4 servings)

Filling

  • 1 can (10 3/4 oz) Condensed Cream of Chicken Soup
  • 1 can (about 8oz) whole kernel corn, drained
  • large handful fresh green beans, washed, trimmed, & cut into 1 inch pieces (use canned if needed)
  • 2-3 medium carrots, sliced into bite-size pieces
  • 2 cups chicken, cooked & shredded
  • 1/2-3/4tsp thyme
  • pinch salt, pepper, garlic powder & onion powder
  • 1/2 cup cheddar cheese

Cornbread Crust

  • 1 package (about 6.5 oz) corn muffin mix
  • 2 tbsp melted butter
  • 1/3cup milk
  • 1 egg
  1. Preheat oven to 400F.
  2. In a small pot of boiling water add carrots & cook for 10-15 minutes. Add green beans and cook for 3-5 more minutes (if using canned omit this step and combine with the rest of the ingredients in step 3). Drain water.
  3. In a medium bowl combine cooked veggies & all other filling ingredients. Pour into a 2 qt casserole dish.
  4. In a small bowl, combine crust ingredients. Spoon dollops onto the filling in the casserole dish. Bake for 20-25 minutes or until topping is golden brown.

The Return of Baking Sunday 2014

I have longed professed my hatred or severe dislike of football. Instead of suffering throughout the day, I decided to make it my own day where I spend much of my time in the kitchen (usually baking) and doing other things that I enjoy, i.e. watching shows & movies my fishing guide doesn’t enjoy, knitting, sewing, blogging, etc.

As the 2014-2015 season approached he kept asking me if I was excited and I would reply yes. Of course I am excited! I get to spend a whole day doing what I love and he gets to enjoy it as well (the football & the fruits of my labors from the kitchen). In the winter I am out ice fishing and the summer I am out shooting, fishing on open water, and doing misc projects around the house so the time is not as easy to find to spend in the kitchen. Thus, football season/sunday is baking season/sunday and I could not be more thrilled.

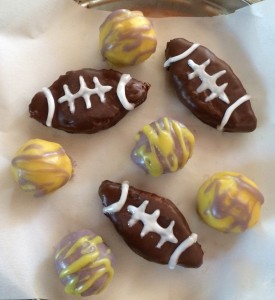
This first Sunday back I made the boys cuban type sandwiches, prepped veggies for my breakfast scrambles for the week, made beef bourguignon for dinner, and I made peanut butter balls. I do a few variations of these treats but this is my original plus the football theme.

There is nothing fantastically awesome about what I accomplished, & my art skills leave something to be desired, but it was fun none the less. Plus, apparently we won the game. I like to think it was my Vikings themed PB Balls that did the trick.


Football themed Peanut Butter Balls (makes approx. 2 dozen)

  • 1 stick butter, softened
  • 3/4 cup peanut butter
  • 2 cups powdered sugar
  • 2/3 cup graham cracker crumbs
  • 1 cup each white & semi-sweet chocolate pieces
  • 2 tbsp shortening
  • 1 tbsp butter
  • milk or yogurt if needed
  • white writing gel
  • assorted food coloring

Line a baking sheet with parchment paper. Mix the butter and peanut butter together in a medium bowl. Add the powdered sugar and graham cracker crumbs. Form into 1in balls and football shapes.

Melt the semi-sweet chocolate and 1/2-1 tbsp shortening to get a fluid melted chocolate (use a double boiler or the microwave on 50% power). Dip the football shapes into the melted chocolate and place on the parchment lined sheet.

Melt the white chocolate and 1-1.5 tbsp. shortening to get a fluid melted chocolate (use a double boiler or the microwave on 50% power). Add butter and yogurt or milk if the chocolate does not become fluid. Divide into two portions. Stir in food coloring that matches your local sports team’s colors (I used purple & gold for the Vikings). Dip the balls into the melted chocolate and place on the parchment lined sheet. Take the spoon you used to stir the melted chocolate and drizzle the the other color over them.

Place the sheet in the fridge to set. Once firm, remove and draw football lines with the white writing gel. Serve to football fans and be praised.

IMG_1489


The 2014 MN State Fair

IMG_1393

It is that time of year. The end of summer and the beginning of fall. This is what the state fair says to me. One would think that going every year and doing the same thing would get old but it doesn’t. Not for me. I people watch, eat, drink, look at animals and go into the agriculture/horticulture building. I do random other things as well…look at the ice castles & farm equipment (I mean, I do live in Minnesota), go to various booths, look at items to be purchased, the list goes on. Somehow this ends up lasting 5-10 hrs. I am not sure where the time goes. This year was no different.

There was nothing really special that happened this year versus every other. I ate my classics…

Corn Dog

IMG_1439IMG_1438


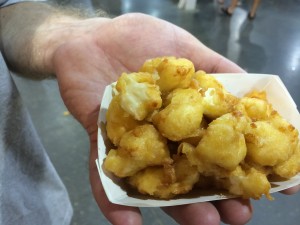
Cheese Curds

IMG_1450

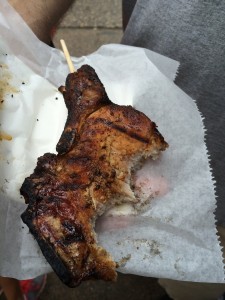
Pork Chop on a Stick

IMG_1441

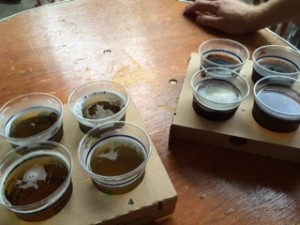
Enjoyed a beer flight (or 2…)

beer flight

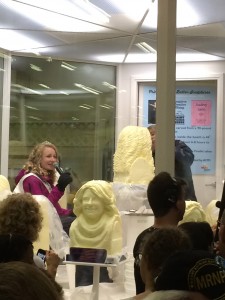
Ice Cream (no photo). Saw Princess Kay become a butter head

IMG_1458

And then I tried some new foods…New to the fair this year or just new to me.

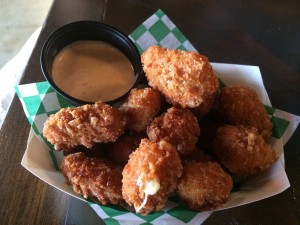
Pretzel Curds (new to the fair this year – 2014. It tasted like regular cheese curds but with a crispy, salty batter. Yum! But I do think I prefer the original in the end).

IMG_1432

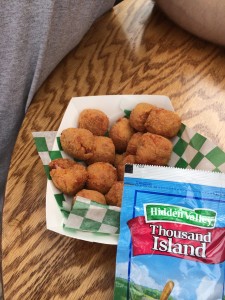
Reuben Bites (new to me)

IMG_1457

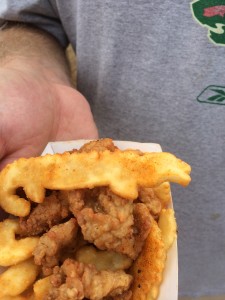
Fried Alligator with alligator shaped fries (New to me. I cannot believe I have never had this. This is a MN State Fair staple).

IMG_1454

I also looked at animals, the plants, flowers, and vegetables. Saw some interesting advertisements…I mean who made this?

IMG_1442

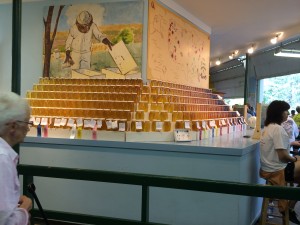
In addition to the flowers, veggies, & veggie art on display in the agriculture/horticulture building, I always look at and try the honey.

IMG_1430

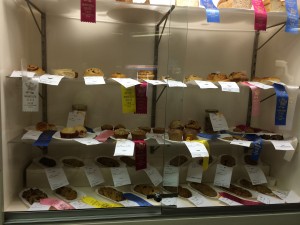
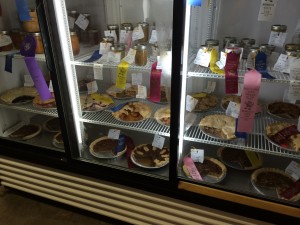
Usually I buy some, but this year I didn’t. I still haven’t even opened my jar from last year. I also look at the ribbons on the baked goods & think maybe one day…

IMG_1422

IMG_1431


Maybe one day I will venture into more contests & win a ribbon.

IMG_1421

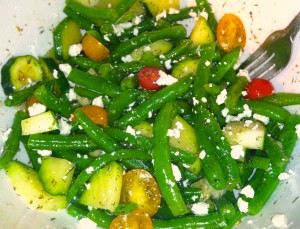
Garden Green Bean Salad

In Minnesota it is quite common to have a  garden. With proper planning, one can grow a variety of vegetables, fruits, and general plants. I have never had a garden before. I have done container gardening with some veggies & herbs in pots but I have never had a real garden. All of that changed this year with my recent move to Almost Canada.  This year we just planted along side our garage where there was already dirt prepared and adequate sun. We might have gotten a little over zealous with the planting as some plants took over some others, but overall I am quite pleased. With the cost of produce being so high way up north I have not been able to eat all the veggies I desire on a daily basis. With summer in full swing, the garden is in full bloom & I have an abundance of vegetables to consume for the time being.

This salad was made with one of our first harvests of green beans, cucumbers, zucchini, and yellow & red cherry tomatoes. It is very refreshing on a summer day. I made it originally just for myself for lunch and my fishing guide took a bite and said to make it again. I made it a second time as a side dish to something I cannot recall. All I remember is eating my heart’s desire of vegetables.

Garden Green Bean Salad (makes 2 side dish portions or 1 lunch portion)

  • 2 cups green beans, washed, trimmed, & cut into various sized pieces
  • 1 small zucchini, sliced into moons & half moons
  • 1/4 cup cucumber, chopped
  • 1/3-1/2 cup cherry or grape tomatoes, halved or quartered
  • 2 tbsp feta cheese
  • 1 tsp olive oil
  • 2 tsp lemon juice
  • pinch salt & pepper
  • 1/2 tsp dried dill
  • 1/4 tsp each dried oregano & basil
  • dash cayenne
  1. Place green beans & zucchini in a skillet. Place enough water to almost cover the vegetables. Bring to a boil & cook for 2-3 minutes or until green beans become a vibrant green color. Drain & run under cold water until cool to the touch.
  2. Meanwhile, combine olive oil, lemon juice, and seasonings in a medium bowl. Add blanched vegetables, cucumber, tomatoes, & feta cheese. Toss to combine.

IMG_1357


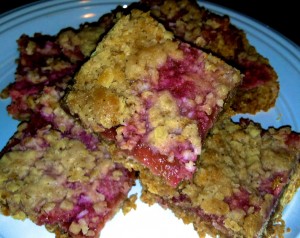
Summer of Rhubarb: Oatmeal Rhubarb Bars

Seeing as how I had leftover Rhubarb Sauce from my Mustard Sage Pork Roast, I knew another dessert was in order. Since I had made coffee cake & a crisp, I decided I would more or less combine the two recipes & make oatmeal bars. These are great! They can be eaten plain or with ice cream. Also, they can be made with whatever filling you desire. Any fruit will do. Use the same amount of sugar for raspberries, but if using peaches, blueberries, or strawberries only use 1/4 cup sugar.

Oatmeal Rhubarb Bars

  • 1 cup all-purpose flour
  • 1 cup quick cooking rolled oats
  • 2/3 cup packed brown sugar
  • 1/4 tsp baking soda
  • few dashes cinnamon
  • dash or two nutmeg
  • dash all-spice
  • dash cloves
  • 1 stick (1/2 cup) butter
  • approx. 2 cups rhubarb sauce (2 cups rhubarb & 1/4 cup water brought to a boil & simmered for 5 minutes. Add 1/3 cup sugar & two tbsp. corn starch & cook for 2 more minutes)

Preheat the oven to 350F. Combine all the ingredients except the butter & rhubarb sauce in to a medium sized bowl & stir to combine. Cut in the butter until the mixture resembles coarse crumbs. Reserve 1/2 cup of this mixture. Press the rest into a 9x9x2in baking pan. Top with rhubarb sauce & sprinkle remaining crumb mixture on top. Bake for 30-35 minutes until the topping is golden brown.

IMG_1343