Summer of Rhubarb: Mustard & Sage Pork Roast with Rhubarb Sauce

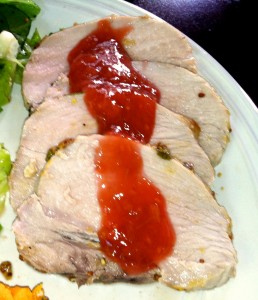
When deciding on how to use my summer supply of rhubarb I knew I wanted to make a sauce. Perhaps for a cheesecake or perhaps for a meat. I decided that it would go nicely with a pork roast.  I love pork roasts. They are so easy & so delicious. This one is a mustard-sage roast as I had fresh sage from my garden. Serve it with sweet potatoes & a salad or some other vegetable of your choice. It’s sort of a fall inspired dish but it will be wonderful no matter when you have it.

Mustard & Sage Pork Roast with Rhubarb Sauce

  • 3-4tbsp whole grain mustard
  • 1/2 tsp minced garlic
  • dash of salt & pepper
  • 1 tbsp fresh sage (hopefully from your garden), chopped. You can sub 1 tsp dried sage if needed.
  • 1.5-2 lb pork roast
  • 2 cups fresh or frozen rhubarb (If frozen let thaw but do not drain off liquid. Also if your rhubarb is on the greener side, add a handful of raspberries for extra color).
  • 1/4 cup water
  • 1/3 cup sugar
  • 2 tbsp corn starch
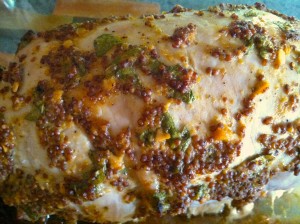
  1. Preheat the oven to 375F. Mix the first 4 ingredients in a small bowl. Coat the roast entirely and place in a shallow baking dish. Roast for 60 minutes & let stand for 10 minutes (covered) before slicing. IMG_1315
  2. Place the rhubarb in a small pot with the water. Bring to a boil & then reduce heat to a simmer and let cook for 5 minutes. Stir the sugar & corn starch together. Add to the rhubarb. Cook for another 2 minutes until thick & bubbly. IMG_1322
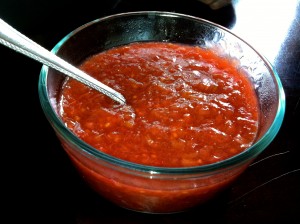
  3. Serve the sauce* with the roast

IMG_1324

*This sauce is almost more of a glaze. I wanted it thick because I knew I would use it for other recipes & this makes too much sauce for just a roast. If you prefer it thinner, use only 1-2 tsp corn starch. Use the leftovers in oatmeal for breakfast, as an ice cream topping, or make a dessert out of it. I made Oatmeal Rhubarb Bars

Summer of Rhubarb: Rhubarb-Raspberry Crisp

IMG_1232

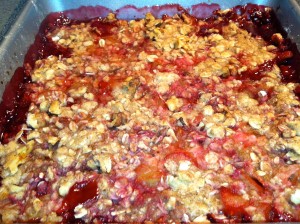
Cobbler, crumble, or crisp? What is the difference? I am still not clear. Depending on who you ask you get different answers. Everyone agrees that a cobbler has a biscuit type topping. A batter dropped in small spoonfuls giving the appearance of a cobbled road. When it comes to crisps & crumbles the answer is not so easy. Some say it depends on whether you live in the US or in Britain. Some say it has to do with whether or not the topping has oats in it. However, people do not agree on which baked good contains the oats. Some say the crumble has the oats while others say the crisps contain the oats. For my purposes, a crisp has a topping of flour, butter, nuts & oats. The oats crisp up while baking, hence the crisp. That is how I learned it so that’s how it shall be for me.

With that in mind, I decided to continue my summer of rhubarb with a crisp. They are so simple & quick. Plus, I had vanilla ice cream in the freezer I wanted to eat up so I thought it was a perfect combination.

Rhubarb-Raspberry Crisp

  • 3 cups fresh or frozen rhubarb
  • 2 cups fresh or frozen raspberries
  • 1/2 cup granulated sugar
  • 1/3 cup all-pupose flour
  • 1/2 cup oats
  • 1/2 cup packed brown sugar
  • 1/4 tsp cinnamon
  • dash or two of nutmeg
  • 1/4 cup cold butter
  • 1/4 cup chopped walnuts
  1. Preheat oven to 375F. Thaw fruit if frozen but do not drain. Place fruit in a 2 qt baking dish. Stir in the granulated sugar.
  2. In a medium bowl, combine flour, oats, brown sugar, & spices. Cut in the butter until mixture resembles coarse crumbs. Stir in the nuts. Sprinkle topping over fruit.
  3. Bake for 30-35 minutes (40 minutes for thawed fruit) or until fruit is tender & topping is golden. Serve warm with ice cream.


IMG_1235

My Man Can Grill

IMG_1170


I love baking & cooking. Most people who know me know this. But what I don’t tell people is how limited I am at certain things. For example, I had never cooked fish until this year. It’s always been so intimidating. Since moving up to Almost Canada I have cooked salmon & it goes without saying, Walleye. Lots of walleye.

One of the other things I have never done is grill. Please, hold all gasps. I realize I am a 30 year old woman from Minnesota (where backyard BBQs are a way of life) who has never grilled. I think it is because my family never grilled when I was a child. I was never exposed to it except for Memorial Day picnics where we grilled at a park.

Luckily, I did end up with a man who can grill. Not just burgers or brats either. Actually, he never grills those things. I think he has grilled burgers once or twice since I’ve known him. When he grills it is an all day experience.

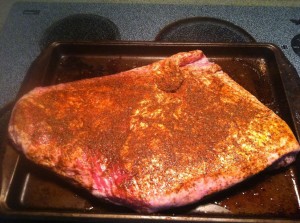
It starts with a plan. Yes, even he meal plans. I usually end up helping with sides & dessert. Then it moves on to a marinade or rub which could be 2-24hrs.

IMG_1174

After that, he starts the grill. Of course it is charcoal, but a good portion of the time there is smoking involved. Apple, cherry, hickory, or mesquite wood are all options depending on the recipe.

IMG_1173

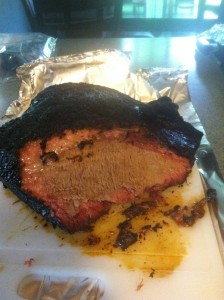
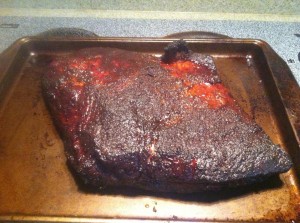
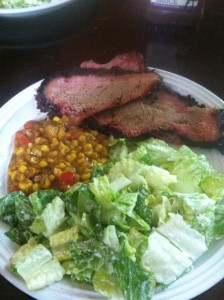
I don’t claim to understand all the aspects of grilling but I do know that the end results are always fantastic. He made the best pulled pork I have ever had in my life a little while ago & most recently he made the best brisket I have ever had which is pictured here.

IMG_1172

 Once done, it is paired with sides & dinner is served.

IMG_1169

Perhaps one day I will try my hand at grilling, but for the moment I am content to let him take care of that aspect of cooking. He does the grilling & I do the baking. It’s the perfect match.

Sunny Summer Strawberry-Cream Cheese Muffins

I have joked with people before about having reverse SADS. I know I don’t really have this but sometimes I feel like I do. I love the winter. I love being active in the winter & doing “wintery” things. Once spring rolls around, I feel let down. Maybe it’s due to the fact that spring in Minnesota is basically non-existent. A muddy, wet, cool climate that prohibits me from ice fishing as well as doing other outdoor activities. Or maybe it’s from the fact that I have always thought of fall as the beginning of the year due to being in school from ages 3-23. Fall, for me, has always felt like a time to start fresh.

With that being said, the reverse SADS only lasts a small amount of time & I always laugh at myself when I feel this quasi-sadness, but it does happen every spring. This year in Almost Canada, the spring sadness came in a bit later due to the season arriving late, but rolled away with what I assume to be summer. Sunny days. Warmish weather. Yard games & shooting my bow in the backyard. It also came with strawberries.

Berries are one of the great advantages of summer. Fresh & seasonally delicious. These muffins will make your days seem bright & sunny or just add to the bright & sunny goodness you are already experiencing. These muffins are cake-like & spongey. Enjoy for breakfast, as a tea-time snack, or heated up with ice-cream for dessert.

Sorry for the lack of photos but they all got eaten & given away before any could be taken.

Strawberry Cream Cheese Muffins (adapted from Raspberry-Cream Cheese Muffins)

  • 2/3 cup (5 ounces) 1/3-less-fat cream cheese, softened
  • 1/3 cup butter, softened
  • 1 1/4 cups sugar
  • 1/2 cup brown sugar, not packed
  • 1 tsp vanilla extract
  • 2 large egg whites
  • 1 large egg
  • 2 cups all-purpose flour
  • 1 tsp baking powder
  • 1/4 teaspoon baking soda
  • 1/2 teaspoon salt
  • 1/2 cup milk with 1/2tsp lemon juice
  • 2 cups fresh strawberries, sliced & diced
  • 1/4 cup finely chopped walnuts
  1. Preheat oven to 350°F.
  2. Combine cream cheese and butter in a large bowl. Beat with a mixer at high speed until well blended. Add sugar; beat until fluffy. Add vanilla, egg whites, and egg; beat well.
  3. Combine flour, baking powder, baking soda, and salt. With mixer on low speed, alternate adding the flour mixture and milk to cream cheese mixture, beginning and ending with flour mixture. Gently fold in strawberries and walnuts.
  4. Place 20 foil cup liners in muffin cups. Spoon batter evenly into liners. Bake for 25 minutes or until a wooden pick inserted in center comes out clean. Remove from pans & cool on a wire rack.


Summer of Rhubarb: Rhubarb-Strawberry Coffee Cake

Here in Minnesota, and many other places as well, summer means rhubarb. Everything rhubarb. I grew up eating the beloved strawberry-rhubarb pie which my grandmother would make every summer using fresh rhubarb from her garden. As I grew older, I realized how amazing & versatile rhubarb can be.

I love all things rhubarb. Pies, crisps & crumbles, tarts, sauces for dessert or for savory dishes. There are so many options for how to use it. When a co-worker asked me if I wanted any rhubarb I jumped at getting as much as I could until I start growing it. She gave me 14 cups which I separated into various quantities & stored in the freezer so I could just pull it out & cook with it when I wanted.

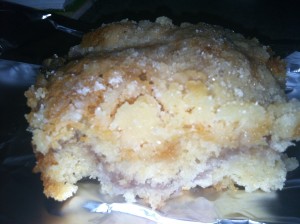
I began my summer of rhubarb on Sunday with a coffee cake from my Better Homes & Gardens cookbook.

Rhubarb-Strawberry Coffee Cake:

  • 3/4 cup fresh or frozen rhubarb cut into 1in pieces
  • 3/4 cup fresh or frozen unsweetened strawberries
  • 1/4 cup water
  • 1/4 cup sugar
  • 2 tbsp cornstarch
  • 1 1/2 cups all-purpose flour
  • 3/4 cup sugar
  • 1/2 tsp baking powder
  • 1/4 tsp baking soda
  • 1/4 cup butter
  • 1 egg, beaten
  • 1/2 cup buttermilk or sour milk (alternatively use 1 tbsp lemon juice & fill with milk to 8oz & let stand 5 minutes)
  • 1 tsp vanilla
  • 1/4 cup all-purpose flour
  • 1/4 cup sugar
  • 2 tbsp butter
  1. For filling, in a medium saucepan combine fruit & water. Bring to  boil. Reduce heat & simmer, covered, for about 5 minutes or until fruit is tender. Combine the 1/4 cup sugar & corn starch. Stir into the fruit. Cook & stir over medium heat until mixture is thickened & bubbly.
  2. In a medium bowl combine the 1 1/2 cups flour, 3/4 cup sugar, baking powder & baking soda. Cut in the 1/4 cup butter until the mixture resembles coarse crumbs. Make a well in the center.
  3. In another bowl combine the egg, buttermilk, & vanilla. Add the egg mixture to the flour mixture & stir until just moistened. Batter will be lumpy.
  4. Spread half the batter into an ungreased 8x8x2in baking pan. Spread filling over batter. Drop remaining batter in small mounds onto filling.
  5. In a small bowl stir together the 1/4 flour & 1/4 sugar. Cut in the 2 tbsp butter until the mixture resembles coarse crumbs. Sprinkle over the coffee cake. Bake in a 350F oven for 40-45minutes or until golden. Serve warm.

IMG_1134

Multiple Meals: Walleye

If you know me at all you know I go ice fishing and have an abundance of Walleye in my freezer. I try to cook it in a different fashion every week. This week I decided I would bread it & bake it. The problem, however, is that I am cooking for 2 and my vacuum sealed walleye is really for 4 people. Obviously, leftover breaded & baked walleye will not re-heat very well.  That left me with the question on how to prepare all the walleye in a tasty manner & so that it would not go to waste which leads to the next installment of multiple meals.

Making multiple meals with fish seemed daunting. I didn’t want to cook half the fish & leave the other half in the fridge to dry out or lose oils for the next night’s dinner. My first thought was to prepare a Seafood Chowder that could be eaten for lunch but I didn’t have any clam juice or cream of potato soup which is my preferred way of making it. I then thought of other recipes I had been meaning to try & I hadn’t made walleye cakes yet. I thought I could try and make walleye cakes that could be eaten for breakfast with eggs. I figured I would bake the rest of the fillets with my breaded fillets & then I could put them in the fridge for the next day to flake, mix up with all the other walleye cake ingredients, & finally cook them.

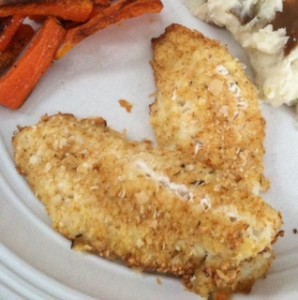
Baked Walleye

  • ½ vacuum sealed bag walleye (roughly 4 small fillets or 2 medium fillets). See Walleye Breakfast Cakes below for using the rest of the fillets.
  • 1 egg, beaten
  • Splash of milk
  • Breadcrumbs
  • Mashed potato flakes
  • Grated parmesan cheese
  • Seafood seasoning
  • Seasoned salt
  • Pepper


Preheat the oven to 400F.

Place the egg in a small to medium bowl with the splash of milk.

Place equal parts breadcrumbs, mashed potato flakes, and grated parmesan cheese on a plate or in a bowl. Mix in seafood seasoning, seasoned salt, & pepper to taste.

Dip the fillets in the egg mixture and allow the excess to drip off.

Place the fillets in the breadcrumb mixture & then place on a lightly greased baking sheet.

Bake for 15-20 minutes until the fish flakes apart easily.

Serve with sides of your choice. I served them with roasted carrots & mashed potatoes & gravy.

baked walleye


Walleye Breakfast Cakes

  • ½ vacuum sealed bag walleye (roughly 4 small fillets or 2 medium fillets) previously cooked*
  • 1 egg
  • 2-3tbsp Mayonnaise
  • 1-2tsp Lemon juice
  • 1/4-1/3 cup Breadcrumbs
  • Seafood seasoning
  • Seasoned salt
  • Pepper
  • Oil
  • Eggs served to your preference


*To the half of the fillets for the walleye cakes, place them on the baking sheet with the breaded walleye (recipe above). Lightly season with seafood seasoning & drizzle with cooking wine or olive oil. Cook along with the breaded fillets. Once cooked, place these un-breaded fillets in a medium mixing bowl in the fridge covered with plastic wrap.

Shred the fillets cooked previously in the mixing bowl (the advantage of shredding them the next day is that you get nicely sized walleye chunks).

Add all the ingredients except for the oil & the eggs that you will cook to your preference.

Mix the ingredients & form into patties (makes roughly (4) 3in patties – 2 for each person).

Place a small amount of oil in a skillet over medium to medium-high heat & cook the walleye cakes for 2-3 minutes per side until golden brown & heated through. Place on a paper towel to drain off excess oil.

walleye cakes

Cook eggs to your preference (over easy, poached, etc) and serve over walleye cakes. Drizzle with sweet chili sauce if desired.

walleye with eggs

Meal Planning in a Small Town

As I have gotten older and circumstances have changed in my life, I have spent more time in the kitchen making dinner. One of my favorite parts of cooking is meal planning. I like spending time each day or sometime during the week to decide what to make for dinner. The key is to have a well stocked pantry of food items and for me, living in more rural areas, having a well stocked freezer.

I did live in a few small towns for awhile but they were 6hrs further south than where I am now. I had access to major grocery stores as well as smaller markets even if they were 15-60minutes away. Living in the “country” I soon discovered having a well stocked freezer was not only easier, but cheaper, as you could buy meats in larger quantities & vacuum seal it into smaller portions.

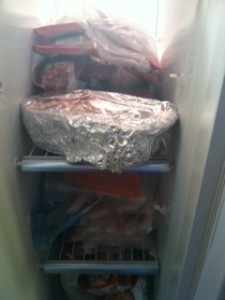
freezer

As of last November I soon realized how much I was spoiled. Moving up to Almost Canada has made me miss my grocery stores even if they were a little ways away. The grocery stores up here are…how shall I say it…depressing. Everything is limited & everything is expensive. You go with a mindset of what to make and your key ingredients are not to be found. The grocery store 45minutes away is better, but still not very good. The one 2hrs away is better still, but once again, not the same. Seasonal cooking is definitely a concept I have to embrace as well as a constant lack of ingredients even in that season.

So once again I stocked my pantry with canned & boxed goods as well as stocking my freezer with meat portioned out & vacuum sealed.

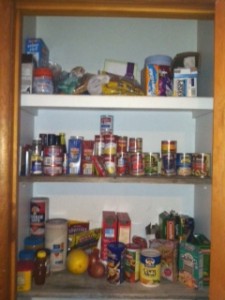
pantry


I know one day the deep freeze will be stocked as well, although probably with fishing or hunting conquests.  Having numerous supplies now at hand I proceed to go about planning dinners & lunches as needed. Sometimes on a day by day basis and sometimes for the whole week.

Meal planning still gives me enjoyment. I had some misgivings at first since everything was limited, but one has to look at it in a different light. You have to look at it like dieters do. It’s not what you can’t have but rather all the things you can have. With this mindset I set about to make dinners with leftovers if needed for easy lunches the next day all the while trying to vary what I make, use up items that need to be eaten, & try out new things. Some are huge hits & others need some tweaking but it’s fun to see what comes out of the kitchen.

Here is what I came up with for this past week as an example. I started my meal planning on Thursday last week to go through Thursday of this week. Friday is up in the air but I have a leftover prepped lasagna in the freezer for after a day of ice fishing on Saturday.

  • Thursday: Spaghetti & Meatballs (also resulted in leftovers for Fri lunch)
  • Friday: Meatball Sandwiches
  • Saturday: Lasagna
  • Sunday: Mustard Pork Roast w/apples & onions (recipe from my lovely which also produced lunch for Monday)
  • Monday: Salmon & Spaghetti Squash Fritters w/zesty dipping sauce
  • Tuesday: Chicken & Squash chausson/calzone
  • Wednesday: Pork Chops w/zucchini, summer squash, & rutabaga (made in the slow cooker with onion soup mix & broth)
  • Thursday: Skillet Chicken & Chile Rellenos w/corn & tomatoes served over rice

As part of this last weeks meal planning I was able to use some ground meat in the freezer & make numerous dishes out of it. Also, I cooked Salmon for the first time. I made up a recipe that I thought would go with a spaghetti squash fritter recipe I pulled up from the internet. The squash (and spinach) needed to be eaten so I based my meal around that item. A long time ago I learned that meals do not always need to be based around meat. Sometimes you pick a vegetable & then work your meal around that – like for the rellenos recipe. I had two poblano peppers that needed to be eaten & leftover roasted chicken from the chausson recipe, so I combined the two & used pantry items to supplement. In addition, I also try to vary the meat source used in the meals so as not to get sick of any one thing (I’m slowly getting my fishing guide to have some meatless dishes but he still prefers meat in every meal).

With all of these concepts & a well stocked pantry & freezer, I set about meal planning. It’s fun & it’s Zen for me. It relaxes me & excites me. I feel at peace in a way knowing that I will produce (hopefully) delicious meals for myself & others to eat. I also get excited when I try new things or come up with new recipes. Despite living in a small town with not much to choose from, none of that has changed.


Winter Love Hot Cocoa

IMG_0966

Someone asked me if I was sick of winter yet. I smiled and said, “No. I love winter.” I proceeded to explain that I am very active in the winter (as I am an avid ice fisherwoman) & that winter up here in Almost Canada is better than it is in central to southern Minnesota. I know you think I am crazy but let me explain.

It snows a lot more in central to southern Minnesota than it does up here. There is also more freezing rain & slush further south. In Almost Canada it may be colder and the snow definitely lasts longer, but the constant snow & slush in the air & on the ground is not the same. I also do not have to drive 1-3hrs one way to get to work & then repeat that commute after work. I know that is the biggest part of loving winter even more since I moved. I drive about 1.5 miles to get to work or any other place in town. It is a very nice change. I also explained this to the person who asked me if I was sick of winter. He smiled & said that he was glad I said that. That it was nice to hear someone positive & say good things about winter.

I think that people here in Almost Canada sometimes forget about the beauty of a small town & what winter has to bring. Almost everyday I hear people say how they are sick of the cold & how winter came early and will probably stay late, etc. I’m not saying I’m thrilled about the -30F for the past two months. Yes, two months. It has been brutally cold, but I still love winter. The cold signifies ice which means fishing. The snow looks beautiful on the lake when you are driving a snowmobile in the morning with the sun coming up or as you stare out of your portable.


IMG_0959

IMG_0962

After a long day of fishing & being out in the cold (especially cold since the heater broke on the way out to the lake), I thought it would be nice to have some hot cocoa and remember why I love winter & this small town.

Hot Cocoa

  • 1/2 cup cocoa powder
  • 1/2 cup granulated sugar
  • 3/4 cup powdered sugar
  • 1 1/4 cup powdered milk
  • 1 tsp corn starch
  • 1/2 tsp salt
  • few dashes cinnamon
  • dash cayenne

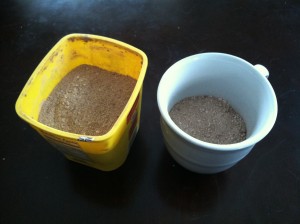
Mix all ingredients in a bowl. Fill mug half full with mix & top with boiling water or milk. Stir, add marshmallows, & enjoy the warming comfort of hot cocoa. Store the rest in an airtight container for the season.

IMG_0965


IMG_0967

(If desired one can add a teaspoon or two of instant espresso or coffee to the individual mugs as well. So good…)

Parmesan Encrusted Walleye with Lettuce Risotto

I mentioned previously that I had lots of Walleye in my freezer that needed to be cooked and that I had to get creative with it. I decided that I was going to think of it as any type of fish that I wanted, so that it could be prepared in any way that I wanted. I needed to let go of all my previous thoughts about how to cook walleye. I decided to try and make more of a gourmet dish. I though I would encrust it with parmesan and then make a nice side to accompany it.

Thus, I ended up with Parmesan Encrusted Walleye & Lettuce Risotto. Neither of these things is new, but I have never made either of them. More importantly, I came up with my own recipes for them. Although I am sure they are similar to other recipes out there (as many recipes are similar to one another), at least I can say they are mine.

For the Walleye…

  • Walleye, approximately 4 fillets fresh or thawed if frozen (enough for 2 people)
  • Flour
  • Salt & pepper
  • 1 egg
  • Milk
  • Breadcrumbs, seasoned
  • Parmesan cheese, finely grated (the kind that comes in a “shaky” container)
  • Olive oil

For the Lettuce Risotto…

  • Olive oil
  • 1 onion, chopped
  • 2/3 cup Arborio rice
  • ¼ head iceberg lettuce or 4oz lettuce, chopped
  • 1 cup chicken stock
  • 2.5-3 cups water
  • 1 tbsp butter
  • 2-4 tbsp freshly grated parmesan cheese

Chop the onion and place in a skillet with a few teaspoons of olive oil. Sauté over medium heat until tender and slightly colored.

Meanwhile get two plates and a bowl for the walleye prep. In one plate, place flour and salt & pepper. Gently mix with a fork. In a bowl, beat 1 egg with a little bit of milk. In the last plate, place equal amounts breadcrumbs & parmesan cheese & mix.

After the onion is tender, add the Arborio rice and stir for 2 minutes until toasted, but not browned.

Add ½ cup chicken stock and stir until most of the liquid has been absorbed.

Add the lettuce and sauté until slightly wilted.

Add the rest of the stock and ½ cup water. Stir until most of the liquid has been absorbed and add ½-1 cup water increments until the rice is al dente*. It should be creamy. Stir in the butter and freshly grated parmesan cheese.

*When you have about ½ cup water left to add to the risotto, prep the walleye. Take the walleye and place in the flour mixture, coating both sides, and shake the excess off. Next, place it in the egg & milk mixture. Finally, place it in the breadcrumbs & parmesan cheese mixture.

Place the coated walleye in a skillet with olive oil and cook over medium to medium high heat for about 2 minutes per side until cooked through and golden brown.

Serve the walleye over the risotto and enjoy.

parm walleye


Getting Creative with Walleye

A few weeks ago my fishing guide took me out ice fishing.  Let me explain how wonderful this is…

We get up and get ready and leave on snowmobiles from the house. We cross the street to reach a ditch and drive for a very short distance to a park with access for us to get on the river/lake. We continue to drive until we find a suitable place to fish and move if necessary. We fish and then drive home. It’s amazing if you ice fish.

We went out fishing and stopped at a point but there were no fish to be found. We moved to another spot a smidge over 5 miles away where my fishing guide was sure there would be fish. The water was a bit too shallow so we moved just a few feet away to where it was deeper. That’s when the action started. It was slow at first but around lunch time the bites were constant and they were all nicely sized fish. We ended up coming home with one shy of our limit but added a perch in there as well to make up for it. I caught the biggest walleye of my life so far…a solid 18 inches.

big walleye

Now what to do with all these fish…

jan 18 fish

Of course for lunch the next day we fried them up in beer batter. A method of eating fish that is always delicious. In the past I have made fish in a bag or en papillote where I got the recipe from Emiglia. I always add onions to the bag when I make this & use olive oil instead as I have that readily available.

Cabillaud en Papillote

I decided to look to her again for guidance as I have never really cooked fish. Almost 30 and never cooked fish. Well now I need to start. I need to get creative as I have lots of walleye and will continue to have lots of walleye to work with. I decided to make blackened walleye. There are no pictures as it was too delicious and I forgot to take them. My fishing guide who has been eating fish his whole life said it was the best walleye he ever had. I messed up and used 1tsp oregano instead of 1/4 but it didn’t matter. The fish was so flavorful! I also served it with rice & sautéed onions and roasted broccoli. The sauce was divine on the rice & onions.

Blackened Fish

As I had just finished a 12 Soups of  Christmas challenge I thought I should attempt a seafood chowder. I used my freshly caught walleye & shrimp that I had in the freezer. I did not have fish stock or clam juice so the next time I make it I would replace the water with one of those items.

Seafood Chowder

  • 1/4lb bacon
  • 1 yellow onion, chopped
  • 3 small to medium carrots, peeled & chopped
  • 2 potatoes, diced
  • 1/4tsp cayenne
  • 1/4tsp salt
  • 1tsp thyme
  • black pepper to taste
  • 16-24oz water
  • 10-12 oz milk
  • 1 can cream of mushroom soup (feel free to use cream of potato or another cream based soup)
  • Walleye, cut into bite sized pieces (perhaps 4 average walleye, I had one vacuumed sealed pack)
  • Shrimp, peeled & deveined (I used about 12-15 medium shrimp)

Cook bacon in large pot until crispy. Remove and set aside. Add onion & carrots to bacon grease and cook until translucent, about 5-10 minutes. Add potatoes and continue to cook until potatoes begin to become softened, about 10 minutes.

Add water and simmer for 20-30 minutes until vegetables are tender. Add more water as needed.

Add the milk while stirring and add the cream of mushroom soup & seasonings. Stir until combined and allow to come back to a simmer. Add the fish and cook for 8minutes. Add the shrimp and cook for 2 minutes more. Crumble the bacon and add to the soup. Serve with French bread or garlic toast.

seafood chowder


Now that I have cooked walleye in a few different ways I am very excited to continue to come up with recipes. I’ve discovered that walleye doesn’t have to be just a beer battered fish and if you get a little creative it can be used in many new & interesting preparations. Stay tuned.