Beer Cozy

IMG_2450

About two years ago I was in the process of buying a house and thus had no money for presents, or rather, not a lot of money for presents. I wanted to buy my guy something special since he had been so good to me during that stressful process.

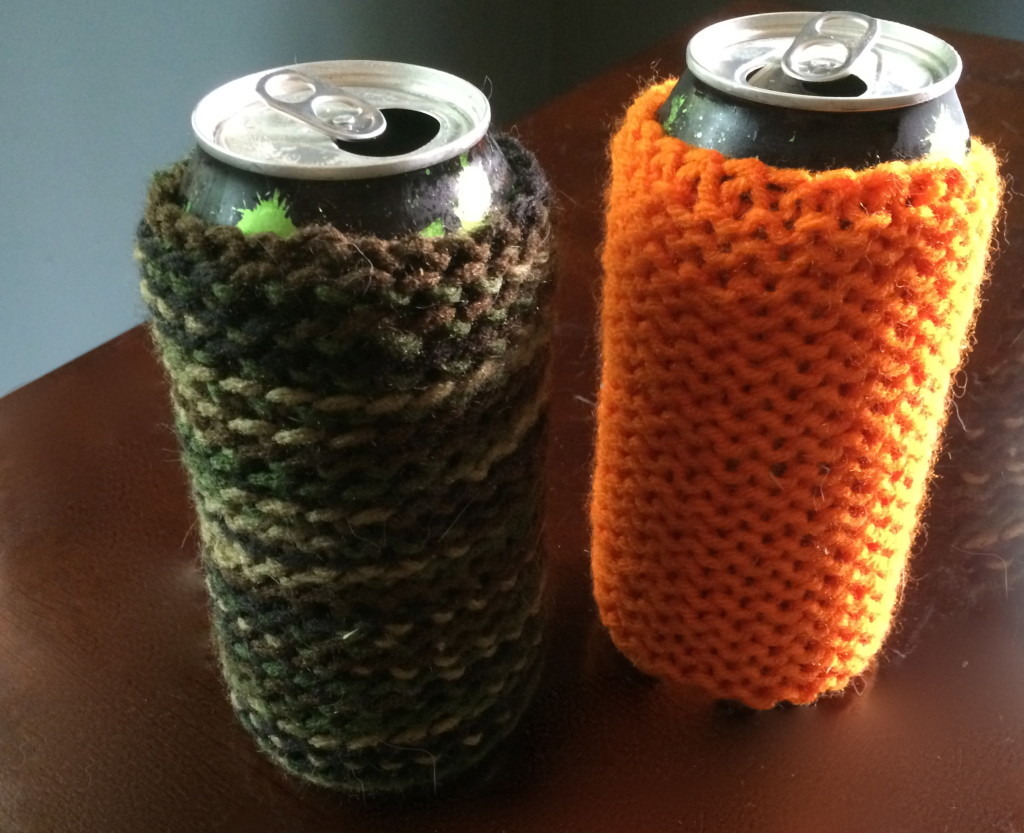
I decided to try and make a gift. I was searching online for homemade gifts which is how I found the idea for a Beer Cozy or Coozie, Koozie, Coosie, or any other spelling you prefer. I thought, I could make that. I didn’t know how to knit in the round at that time, but they don’t have to have a bottom, they could be sleeves. So I figured out the measurements and went to it. Basically you just figure out how big of a rectangle you need (long enough to cover the majority of the can and wide enough to wrap around it) and knit as normal. Once completed you just thread some yard through the edges to cinch it tight.

I bought four different types of yarn so I could make a few. I made two for bottles (or large cans) and two for regular 12oz cans. For the bottles I went with a camo & blaze orange and the cans I made a cozy that resembles a football and did one in the Vikings colors. I am quite pleased with how they turned out. Some fit better than others but overall I think they turned out quite nicely considering I hadn’t knit in a long time.

They don’t get used much during the summer months but now that the weather is cooling down and football season has started, they are actually being put to good use again.

IMG_2551


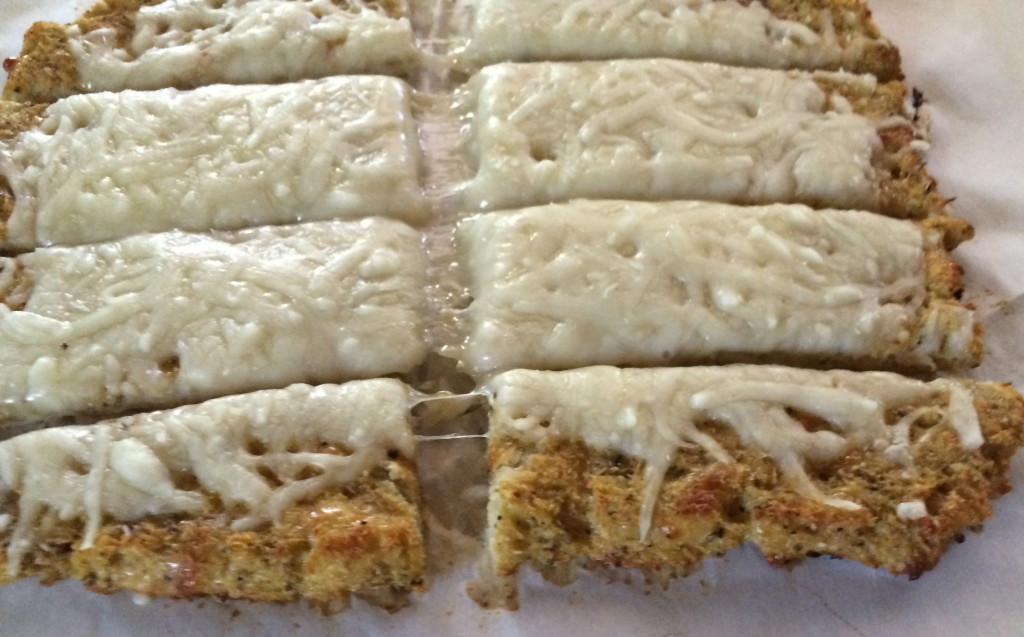
Cauliflower Cheesy Bread


IMG_2391


I’ve mentioned before how I am not allowed to make vegetarian dishes. My fishing guide is a meat & potatoes type of guy. I’ve made a few dishes but those vegetarian meals have to be at lunch. I think he would flip his lid if I tried to make a veggie meal for dinner.

I’ve actually made this cheesy bread for him but it was a side dish to something. He really enjoyed it. He said, “there is no bread in this?” Nope. Just cauliflower vegetable goodness. The best part is you don’t have to spend forever squeezing out the excess moisture from the “dough.”

Since he is driving a boat today, being a real fishing guide for others, I got to make this dish as an entree and eat it myself for lunch. Delicious.

Cauliflower Cheesy Bread (serves 2 as a side dish or 1 as a main dish)

  • 1/2 head cauliflower, cut into chunks
  • 2 eggs
  • 1/4 cup mozzarella cheese
  • 1 tsp basil
  • 1 tsp oregano
  • 1-2 tsp minced garlic
  • salt & pepper, to taste
  • 1/2 cup to 1 cup mozzarella cheese

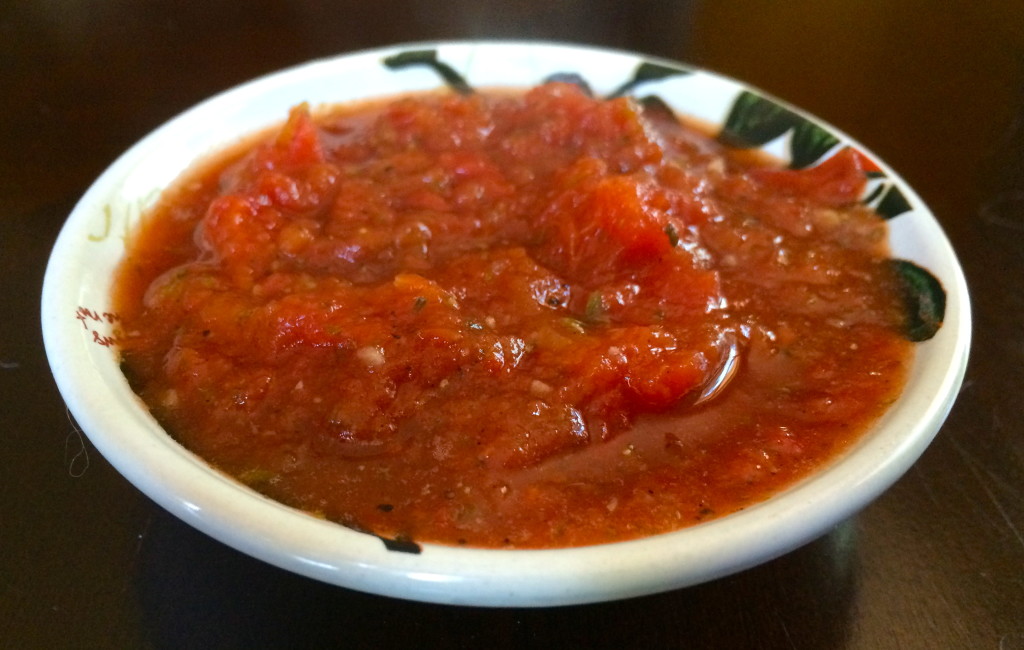
Marinara Sauce: Make your favorite recipe, use store bought, or try this quick go-to…

  • 1/2 can stewed tomatoes
  • pepper to taste
  • 1/2-1 tsp italian seasoning (or equal parts basil & oregano if you prefer)
  • few dashes hot red pepper flakes

Marinara Sauce: Puree tomatoes lightly so that there are still some chunks. Add seasonings. Simmer all ingredients for 15-30minutes.

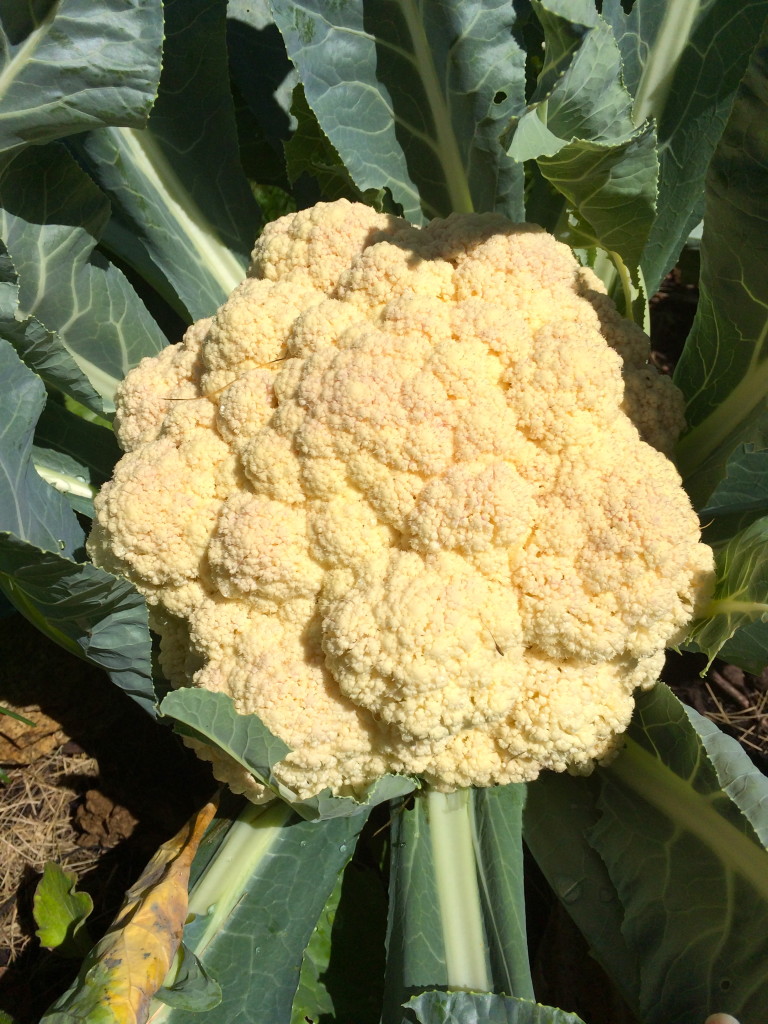
Cauliflower Cheesy Bread: Pick cauliflower from your garden (or just go to the store, but these guys are super easy to grow. I recommend you do so next year).

IMG_2398

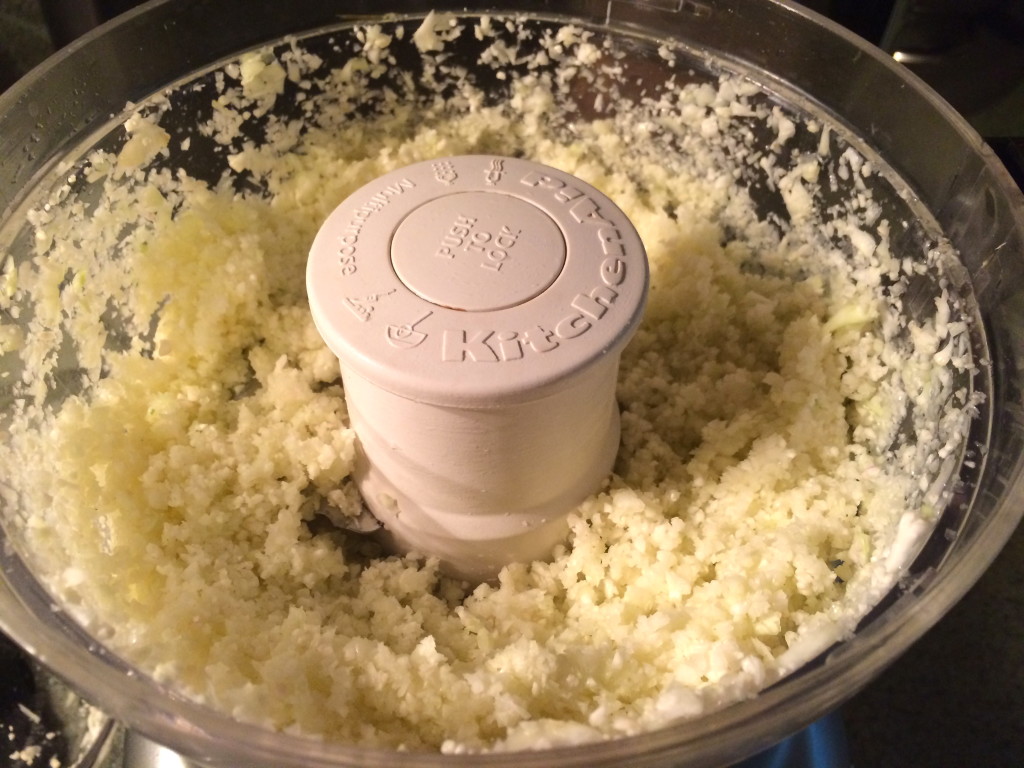
Puree 1/2 head cauliflower that has been cut into chunks in a food processor.

IMG_2380

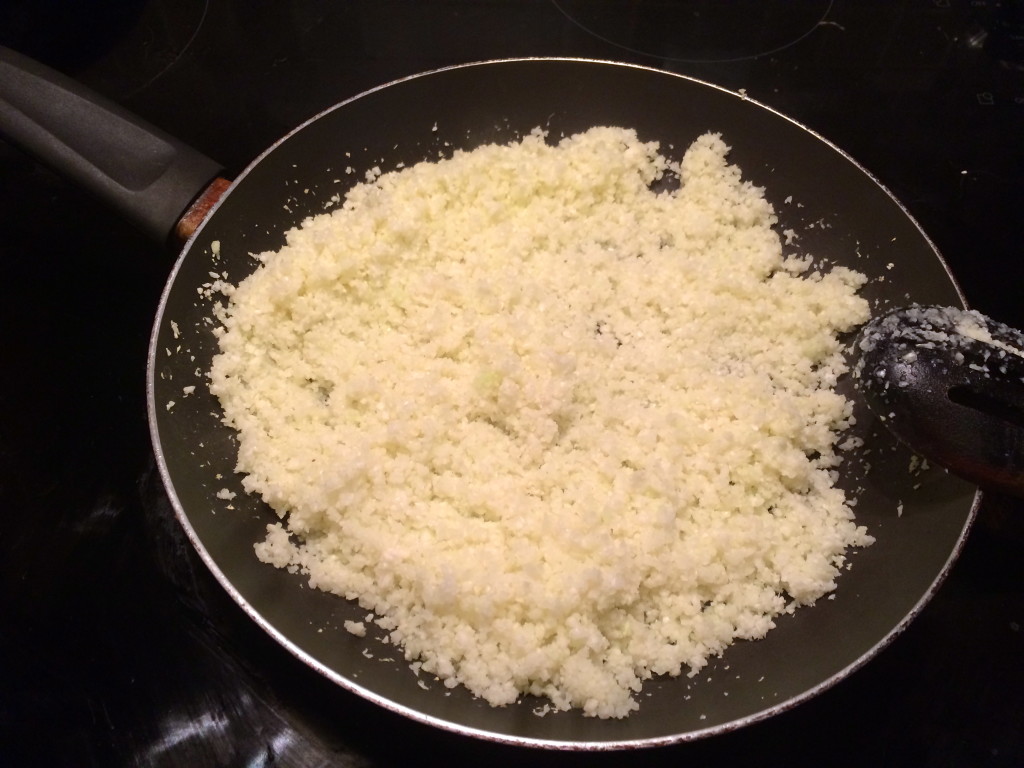
While oven preheats with a baking stone sauté cauliflower in a skillet over medium low to medium heat to release excess moisture and soften the cauliflower.

IMG_2383

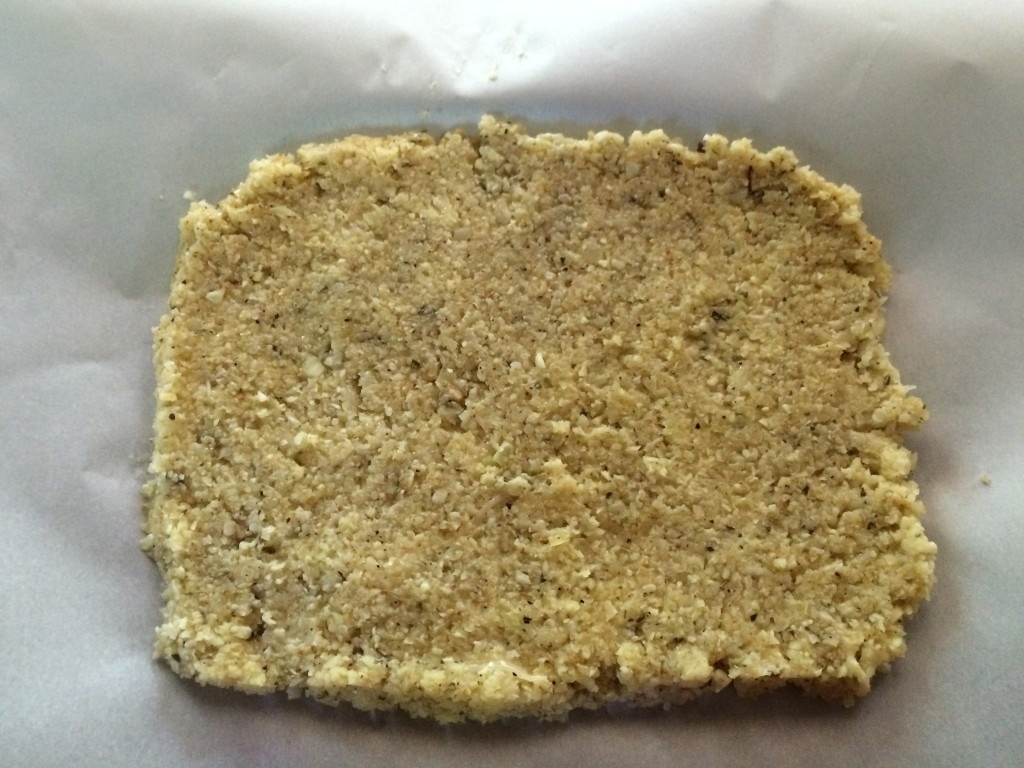
Add to a medium bowl. Add the rest of the ingredients except for the 1/2- 1 cup mozzarella and mix well. Form into a square on a piece of parchment paper.


IMG_2384

Place paper on heat stone. Bake for 20 minutes. Top with cheese. Bake for 5 minutes more. Serve with marinara sauce.

IMG_2391

IMG_2387

Zucchini Bread

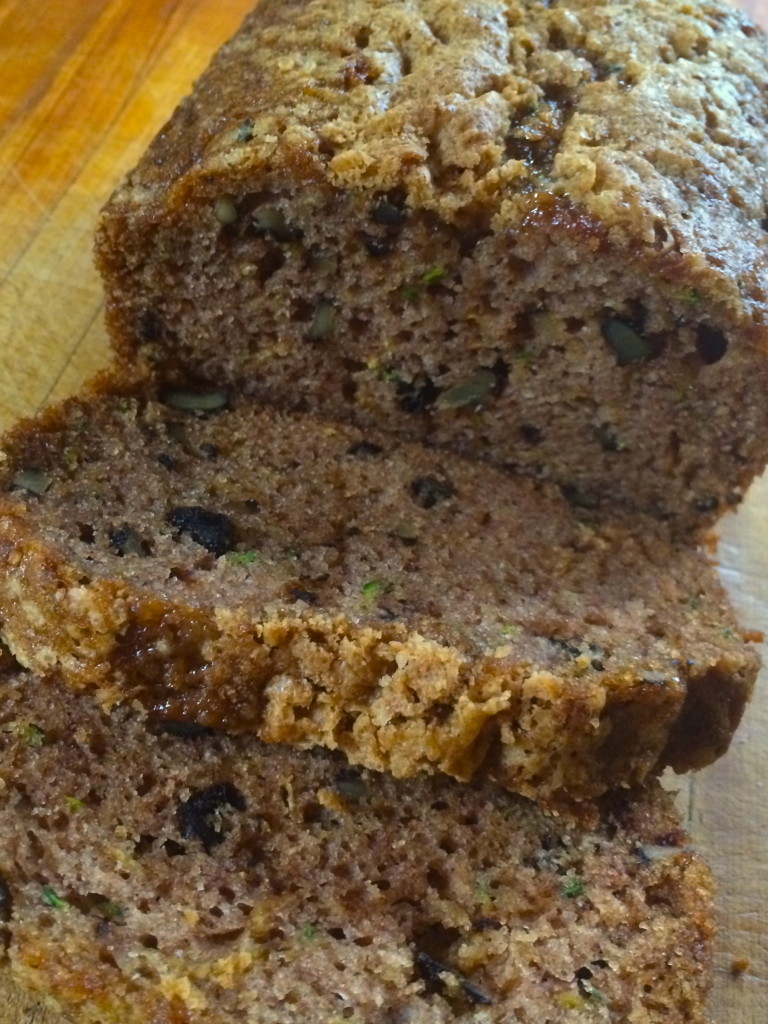
IMG_2442

I love trying to find the best recipe there is for any given item. I performed a Zucchini Bread Battle last year. Both recipes were good but they weren’t good enough. As I had just received some giant zucchini from a co-worker again, I knew another zucchini bread was a necessity. This recipe is perfection. I borrowed the base of the recipe from a friend. Thanks lovely.

Zucchini Bread (adapted from Apple Sparkle Cake)

  • 1 cup shredded zucchini
  • 1/2 cup vegetable oil
  • 1 cup sugar
  • 2 eggs
  • 1 tsp vanilla
  • 1 1/3 cup flour
  • 1 tsp baking soda
  • 1/2 tsp salt
  • 1 tsp cinnamon
  • dash or two nutmeg
  • 1/2 cup chopped walnuts
  • 2 individual packets Sugar in the Raw

Preheat the oven to 350 degrees. Grease a loaf pan.

Add the shredded zucchini to a large mixing bowl. Add the oil, cup of sugar, eggs and vanilla and mix well to combine. Add the flour, baking soda, salt, cinnamon, and nutmeg. Fold the dry ingredients into the wet until just combined. Fold in the walnuts. Pour into the prepared loaf pan. Sprinkle the top of the cake with the Sugar in the Raw.

Bake for 50-60minutes until a toothpick inserted comes out clean. Cool for 10 minutes in pan. Remove from pan and let cool completely before slicing.

IMG_2442

Key Lime Pie


IMG_2351


I love working out. I love how I feel afterwards. I love how it makes my body & mind feel great. I love feeling strong. I also hate working out. Mainly because I hate the concept of working out. I think it stems from being in dance my whole life. I never had to work out. When I was a child I had gym class, played outside, and danced. Let’s be honest, kids don’t need to work out. They are simply very active. I feel that many adults can learn from this.

As I have gotten older I still like being active but I don’t really enjoy most workouts. A problem many people experience. I prefer to take classes or do videos. I like to do things outdoors. I also try to walk to work whenever I can. If I walk to and from work I get over 3.5 miles in. I consider that my “workout” for the day.

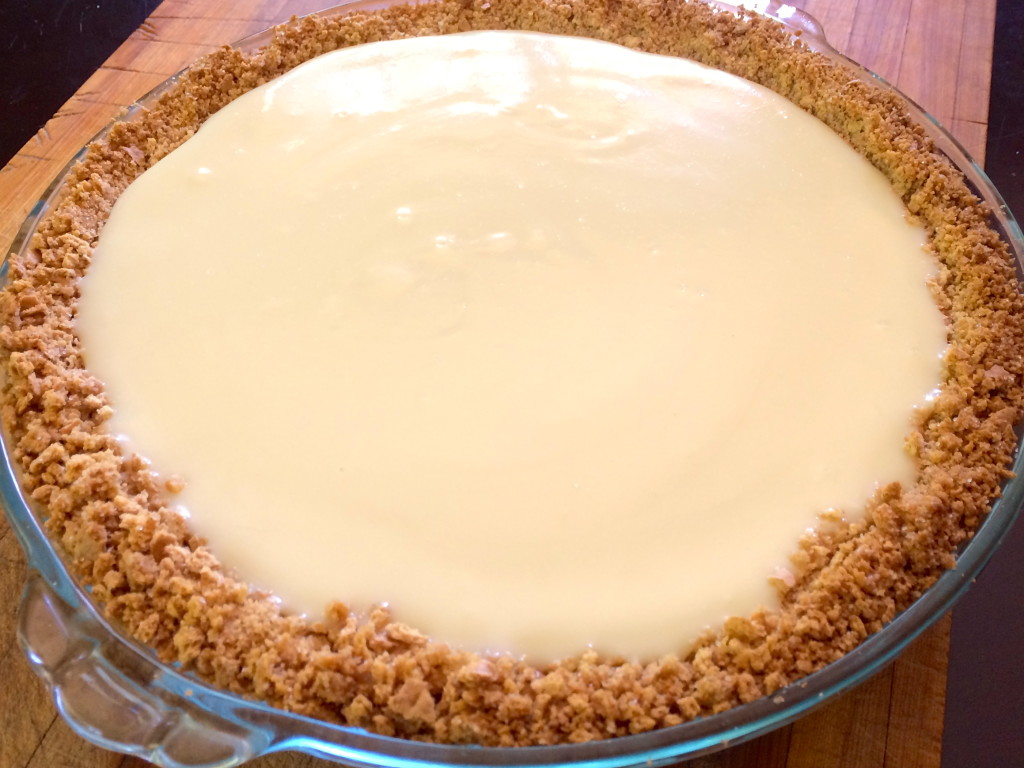
As I was trying to force myself to commit to a workout on Sunday, I thought about just going for a walk instead. I decided to walk into town to get some sweetened condensed milk to make a key lime pie. Workout done. Bonus, I got to bake a pie and then enjoy eating it as well.

Key Lime Pie

Crust

  • 18 graham crackers
  • 1/3 cup butter, melted
  • 1/3 cup sugar

Filling

  • 2 cans sweetened condensed milk
  • 1/2 cup sour cream
  • 3/4 cup lime juice

Crumble graham crackers. Mix in sugar and then melted butter. Press into pie plate. Bake in a 350F oven for 5-8 minutes until golden brown & set. Cool slightly.

Mix filling ingredients together. Pour into crust. Bake for 15-20 minutes or until filling is set.

IMG_2351

Seared Ahi Tuna

IMG_2309


I moved to Almost Canada two years ago this fall. Making the decision was easy but involved a lot of sacrifice. My guy sacrificed everything to move with me. One of the things he gave up was his career as an accountant.

The job opportunities are bleak to say the least where we live. They basically include the company I work for and a lot of dead end jobs. Since he has moved with me he has been on unemployment, worked at a bait/outdoors store, he became an ice fishing guide, & he has been doing lawn care/landscaping.

He often used to talk about how this town was eating him alive. That he didn’t have any chances to succeed.

He ended up pursuing one of the only opportunities here which was becoming a boat captain. Something that is not that easy to do. The application is rather extensive and it takes quite a bit of time & cash. When it came down to it, he made it happen.

He got his Captain’s License!

IMG_2342

I couldn’t be more proud of him. My fishing guide is now a professional fishing guide.

This is something he has talked about for awhile and it is finally a reality. He has even gotten some experience on the lake and has taken people out a few times on his own despite the season being half over.

Even though this has been a long time in the making, and he is thrilled to be able to do this, being on a boat is no walk in the park. It’s hot, it’s windy, people get sick, the fishing is slow & your customers are upset, the list goes on.

Despite the list of negatives this isn’t the worst job in the world & it is a consistent seasonal position. It’s one of the few seasonal opportunities around that actually pays OK & there might be some chances for growth. Life doesn’t always give you the best opportunities but it’s how you deal & what you make of them.

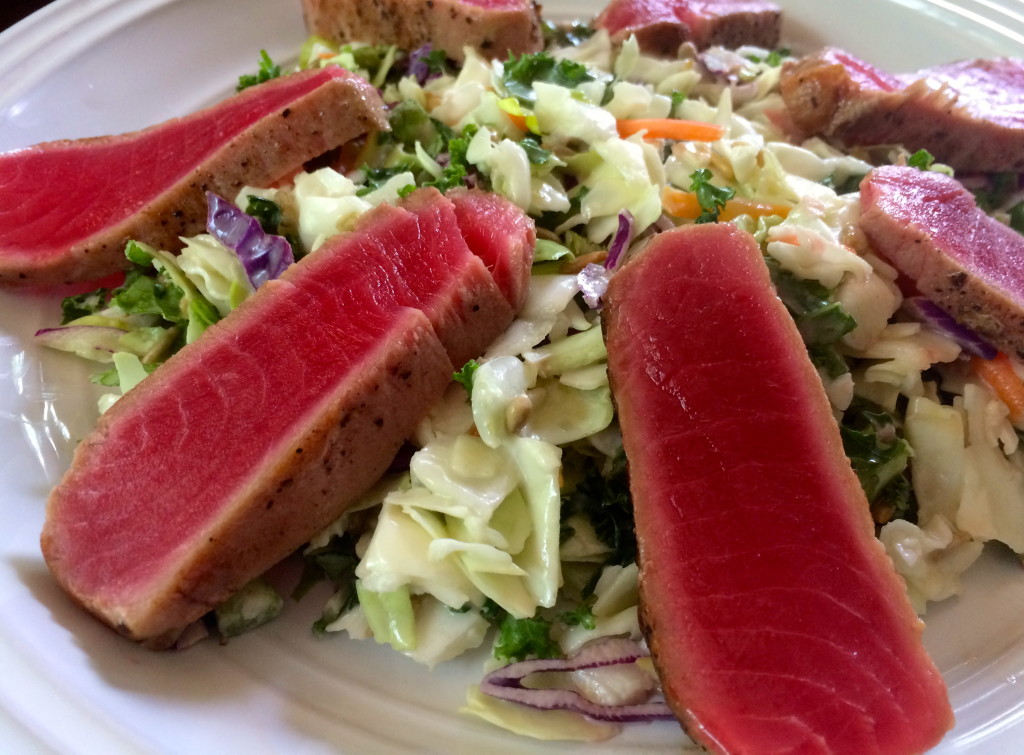
The same is true for grocery shopping in this small town. It’s impossible to get anything here so you have to adapt. I cannot get many items here.  I most certainly cannot get quality sushi, but I can have it overnighted by a company to my door! Sushi grade fish delivered right to me. An opportunity that I simply could not pass up.


Seared Ahi Tuna Salad (serves 2)

  • 11 oz sashimi grade ahi tuna
  • salt & pepper
  • oil
  • salad of your choice (I used a salad kit with sunflower seeds and a citrus onion dressing)

If the tuna is frozen allow it to come to room temperature in the fridge. Do not let it sit on the counter. Cut the tuna into two pieces. Season with salt and pepper. Heat a small amount of olive oil in a skillet and sear the tuna on all sides for 1-2 minutes per side until. Slice and serve over salad of your choice.

IMG_2309

Spicy Pickled Green Beans

IMG_2376

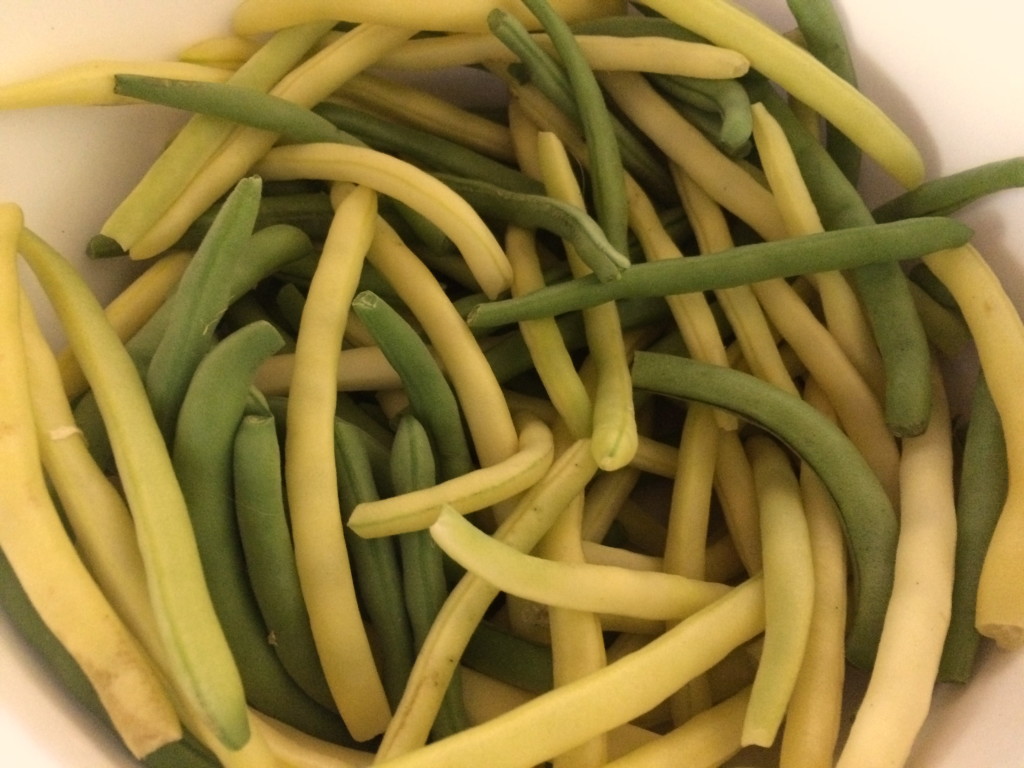
This is my second summer in Almost Canada. My first summer I was able to have a very small garden. This year it has quadrupled in size. I ended up planting green beans & wax beans where my garden was located last year.

IMG_2363

Right now I am trying to deal with a surplus of beans.

IMG_2366

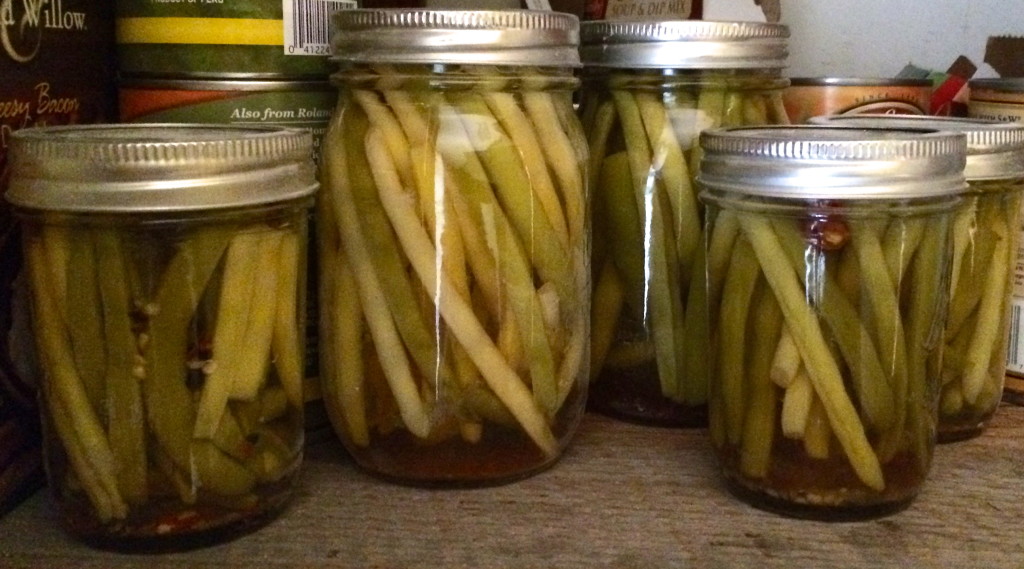
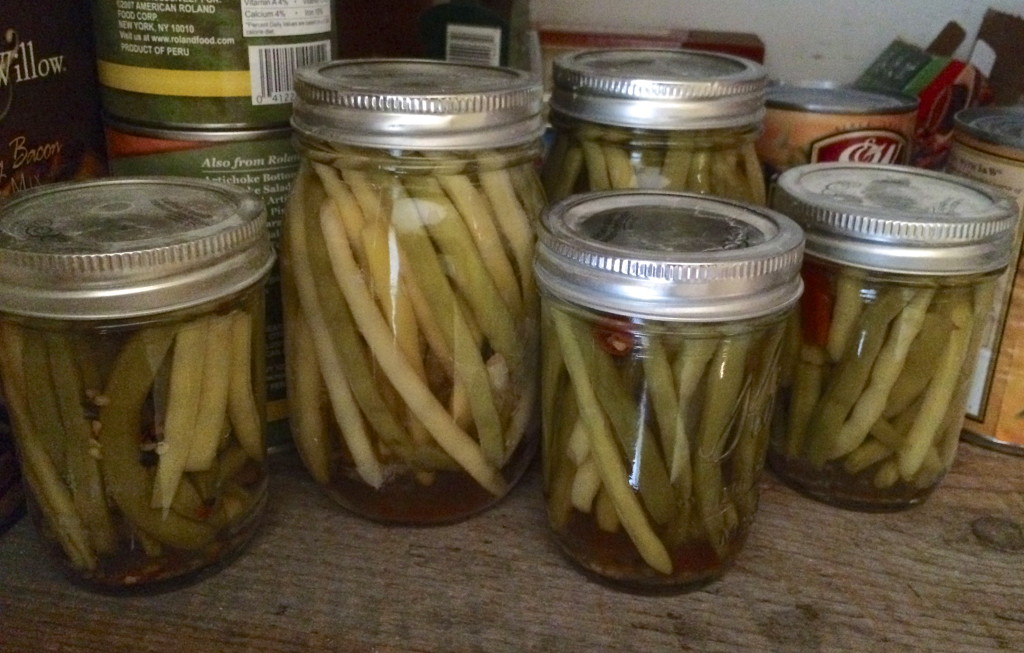
I have eaten them raw, roasted, blanched for salads, and even frozen some for later when my garden is covered in snow. I don’t have a pressure canner or cooker so my canning abilities are basically non-existent (at least for low acid foods like green beans). I decided to try and pickle them. They turned out fantastic. These can be eaten a week after processing and have plenty of flavor or should keep for about one year.

While they are delicious plain, they are amazing in a Bloody Mary.

IMG_2417

Spicy Pickled Green Beans (Recipe is for 2 half pint jars or 1 pint sized jar. Adjust as needed)

  • 1/2 pint or pint sized mason jars & lids
  • fresh garden green beans, trimmed & washed
  • 1/2 cup water
  • 1/2 cup white vinegar
  • 1/2 cup apple cider vinegar
  • 1-2 cloves garlic, peeled & lightly smashed
  • 1 bay leaf
  • 1-2 dried hot peppers (chili, serrano, etc)
  • 1/4-1/2 tsp red pepper flakes
  • 1/4-1/2 tsp whole peppercorns
  • 1/2 tsp salt
  • 1 tsp honey

In a large pot bring enough water to cover jars to a boil. Submerge jars and lids in boiling water and boil for 12 minutes to sterilize (keep pot with water for processing later). Remove jars & lids with tongs. Fill jars with green beans that have been trimmed to the size of the jar (leave at least 1/4 inch space to the top of the jar).

Meanwhile, bring all other ingredients to a boil in a medium pot. Reduce heat and simmer for 5-10 minutes. Remove bay leaf. Poor brine (including garlic & peppers) over green beans in jars. Leave 1/4 inch headspace to the top of the jar. Apply lids and wipe rim clean. Screw metal band on tightly.

Place sealed jars back in the pot of boiling water (make sure jars are submerged at least 2 inches but are not covered). Boil for 10 minutes. Remove with tongs and place in a cool & dark place. Once cool, check to make sure all jars have sealed properly*. Open in as little as 5-7 days or jars will keep for about 1 year when properly stored.

*Note that if a jar does not seal correctly place it in the fridge and use within 2-3 weeks.

IMG_2377

Bulgur Vegetable Salad

I feel that people associate Minnesota only with heavy comfort foods. Hot dishes and meat & potatoes. In actuality, gardens are quite prevalent in Minnesota, resulting in many veggie based meals or at least veggie filled side dishes.

In my household, it’s rare to have a vegetarian meal. My guy is a meat & potatoes man & believes veggies are something to be used as a side dish. I, however, have never been a meat & potatoes girl. Don’t get me wrong, I love meat & potatoes. I love them together. But I love all food and vegetables have always been one of those foods. Since meeting me, my guy has probably eaten more vegetables with me than in his entire life before living with me.

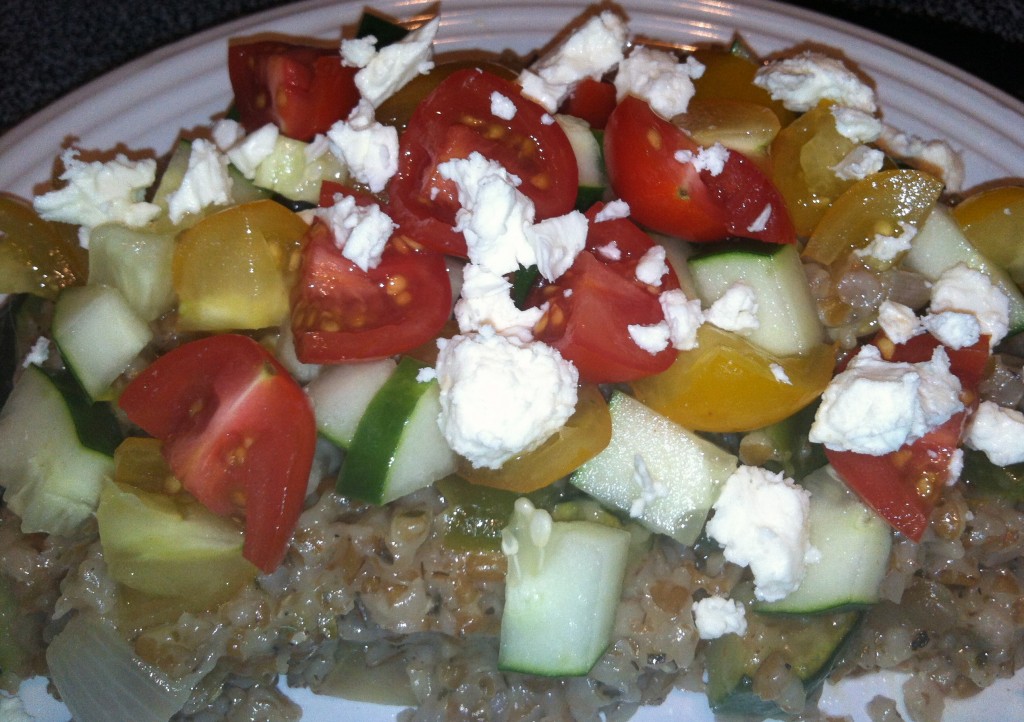
I try to come up with tasty ways for him to eat them (as well as myself) even if it is just for side dishes. This isn’t a crazy vegetable dish by any means but it does incorporate the veggies from our garden this year in a way I haven’t made it in years. It’s sort of like a tab(b)ouli or tab(b)ouleh salad – pick your fave spelling – just modified for what I had on hand.

This can be eaten by itself or paired with some sort of meatball or yogurt chicken if you have a meat eater in your household as well.


IMG_1349


 Bulgur Vegetable Salad (makes 4 servings)

  • 1 cup bulgur
  • 2 cups water
  • olive oil
  • lemon juice
  • 1 onion, chopped
  • 1 zucchini, sliced into half moons
  • 1/2 tsp garlic, minced
  • 1 tsp each dried basil & oregano
  • salt & pepper to taste
  • dash onion powder
  • 1/2 a cucumber, chopped
  • 1 cup cherry or grape tomatoes, halved
  • 1/2 cup feta cheese
  1. Place bulgur & water in a small pot. Bring to a boil, reduce heat to a simmer & cover. Cook for 20 minutes or until water is absorbed.
  2. Meanwhile, in a skillet sauté zucchini & onion in a small amount of olive oil until tender & slightly caramelized. Add garlic & cook for 2 minutes more.
  3. Drizzle the cooked bulgur with olive oil & lemon juice. Add the cooked vegetables & spices & stir to combine. Top with the raw vegetables & feta cheese. Drizzle with more olive oil & lemon juice if desired.


Ricotta Cheese

I like to try new things. This is a true statement although sometimes it doesn’t appear as such. The reason being is that I am also tentative to try new things. It’s not that I am afraid, it is just easier to do things that I already know how to do. For example, I love to bake. I love to bake on Sundays in particular and yet, there are still many baked goods that I have yet to set out and conquer. The same thing is true for making cheese.

I received a cheese making kit for my birthday last year. I soon found out that making hard cheeses was going to be very time consuming. I made yogurt and that was super easy but knew I wanted to make an actual cheese.

I finally decided to make ricotta cheese as it is one of the easiest cheeses to make. You really only need a pot, a thermometer, and some cheesecloth so I didn’t have to worry about numerous steps. It was super easy. I ended up using it for lasagna.

IMG_1911

My next cheese I will attempt is mozzarella. It is another easy cheese to make and it will be a staple in my household with the fresh garden tomatoes that will be in season very soon.

I am trying to get better at baking or making new things. It is a constant work in progress, but as long as I continue to try my hand at new skills & be willing to fail, I think I will be ok.

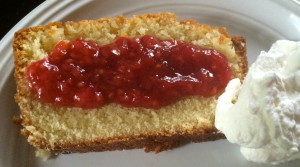
Summer of Rhubarb: Pound Cake with Rhubarb Sauce

IMG_2306


In for a penny, in for a pound.

A phrase I am not too familiar with. I am not that type of a person. I don’t have an all or nothing mentality. I am fine with moderation. I am content with not taking high-stakes risks. Although sometimes you do have to take them. There are moments when the world presents you with opportunities which are all or nothing.

That’s what happened to me 2 years ago. I went ice fishing up north with my guy and said that I wanted to move there. He agreed. We wanted to leave the cities, the constant rushing around, the rat-race as they say. I jokingly began looking for jobs and realized that there were opportunities for me as a chemist in this small town in Almost Canada.

Then I got the job offer. Now things were real. It wasn’t just a dream or fantasy any longer. My guy and I had to make a choice. Do we do it? Get up and move? Change everything? Risk losing everything?

For me the risks were not that great. I had a job offer. I could easily pack up and move. My guy, however, had a house and job in the cities. He had to be willing to lose everything. We both knew that it was now or never and decided to go for it. It was time to hit the reset button.

This was easier for me. I accepted the job. I took a pay cut. I cashed out my 401K. I bought a house. I started over. My guy had a lot to lose. He did end up losing his job. And now the prospect of losing his house and credit is very real.

That was a risk he was willing to take. A risk that is becoming reality. Everything that he spent his whole life working for is disappearing.

We both went all in…In for a penny, in for a pound. I cannot thank him enough. I appreciate everything he has done. The reset button for me was fairly quick and painless. For him it has been a slow process and is still on-going. He was willing to lose everything to slow things down and move to Almost Canada with me. To actually enjoy more of life. I know when it is all said and done, by losing all these things we both are gaining so much more.


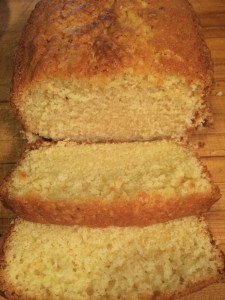
Pound Cake

  • 1 stick butter, softened
  • 1 1/2 cups granulated sugar
  • 3 eggs
  • 1 1/2 cups all-purpose flour
  • 1/2 tsp salt
  • 1/2 tsp baking powder
  • 1/2 cup whipping cream
  • 1 tsp vanilla

Cream together the butter and sugar until the mixture is light & fluffy (about 3-5 minutes). Mix in the eggs one at a time scraping the sides of the bowl as needed. Add the flour, salt, and baking powder all at once. Mix until combined. Add the whipping cream and mix until just incorporated. Stir in the vanilla. Pour into a buttered & lightly floured loaf pan. Place in a cold oven. Set the oven to 325F and bake for 80 minutes. Remove from the oven and let cool in pan on a wire rack for 10-15 minutes. Remove from pan and let cool completely on a wire rack.
IMG_2305

Rhubarb Sauce

  • 3 cups fresh or frozen rhubarb
  • 1 cup fresh or frozen raspberries
  • 1/2 cup water
  • 1/2 cup granulated sugar
  • 2 tbsp corn starch
  • ginger and/or cinnamon

Place the fruit (I used frozen) and water in a medium saucepan and bring to a boil. Reduce heat and simmer for 5 minutes. Stir together the sugar & corn starch. Stir the mixture into the fruit. Cook for 2-3 minutes. Stir in ginger and/or cinnamon if desired (I did a few dashes of both).

Note that this recipe makes a lot of sauce. Use as a topping for ice cream or in other baked goods such as Oatmeal Rhubarb Bars which is what I did with mine.

Whipped Cream

  • 2 tbsp sugar
  • 1 cup heavy whipping cream
  • 1/2 tsp vanilla

Place bowl and metal whisk in freezer for 10-15 minutes. Place sugar, cream, and vanilla in bowl. Whisk until mixture forms stiff peaks. Use immediately or place in the fridge.

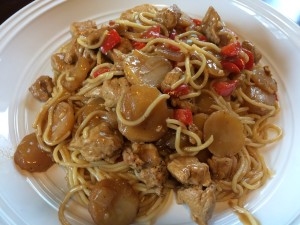
Thai Turkey Noodles


I went turkey hunting for the first time this year and ended up with a turkey! Now the fun of getting to cook with it begins. I had two bags of breast meat and one of dark meat.

IMG_2163

My plan is to turn the dark meat into sausage or jerky. The breast meat was very pink so I decided to actually make a dish with it as I didn’t think it would be too gamey. I came up with Thai Turkey Noodles. It is delicious and if you didn’t know it was made with wild game you would think it was chicken.


Thai Turkey Noodles (serves 2)

  • 4 oz spaghetti noodles, cooked and drained
  • sesame oil
  • 1  turkey breast, cubed
  • 1/2 cup chopped onion
  • 1/2 cup chopped red bell pepper
  • 1 cup water chestnuts, sliced
  • 1 tsp garlic, minced
  • pinch each ginger & red pepper flakes
  • 1 tbsp flour
  • 1.5-2 cups chicken stock
  • 2 tbsp soy sauce
  • 2 tbsp hoisin sauce
  • 1 tbsp oyster sauce
  • green onions, optional

Heat a small amount of sesame oil in a large skillet. Add turkey and cook & stir until just cooked through. Remove from turkey from skillet & set aside.

Add onion, red bell pepper, water chestnuts, garlic, ginger, & red pepper flakes. Sauté for about five minutes until slightly softened. Stir in flour and cook for 1-2 minutes. Whisk in chicken stock. Stir in soy sauce, hoisin sauce, and oyster sauce. Add turkey back to skillet.

Heat to boiling and then cover & reduce heat to simmer. Stir occasionally until mixture is thick and bubbly (add more chicken stock if needed to thin sauce or more  seasonings if desired). Stir in noodles.

Garnish with chopped green onions if desired. Feel proud that you provided this meal.

IMG_2252