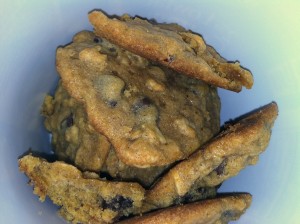
Pumpkin Cookies

IMG_1263


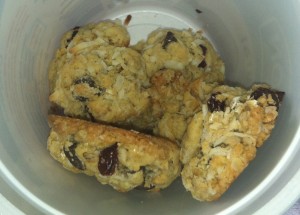
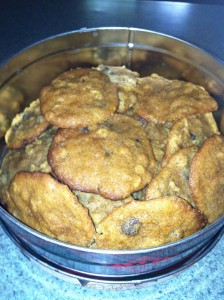
As I had leftover canned pumpkin from the Pumpkin Mac & Cheese I knew a dessert was in order. I have made plenty of breads, cupcakes, and cakes so wanted to try something new and pumpkin cookies were created.

I love cookies. They are probably one of my favorite desserts. They keep well for about a weeks worth of treats & they freeze well for later yumminess. They are also portion controlled which is a good thing if you love sweets.

Pumpkin Cookies (makes about 3 dozen)

  • 2 sticks butter, room temperature
  • 1 cup granulated sugar
  • 1 cup brown sugar, packed
  • 1 cup canned pumpkin
  • 1 egg
  • 1 tsp vanilla extract
  • 2 cups all-purpose flour
  • 1 tsp baking soda
  • 1 1/2 tsp cinnamon
  • pinch each ginger, nutmeg, allspice, & cloves
  • 1/2 tsp salt
  • 1 cup oats
  • 1 cup semi-sweet chocolate hips
  • 1/2 cup dried cranberries
  1. Preheat the oven to 350F. Line 2-3 baking sheets with parchment paper (If you only have one, be sure to rinse the cookie sheet after it has been used to cool it back down before lining it again).
  2. In a large bowl cream the butter & both sugars until light & fluffy. Add the pumpkin, egg, & vanilla and mix until combined.
  3. In a medium bowl mix the flour, baking soda, salt & spices. Slowly add this to the wet ingredients & mix until combined.
  4. Stir in the oats, chocolate chips, & cranberries.
  5. Drop rounded spoonfuls on the baking sheets 2in apart. Bake for 12-14 minutes until tops are golden & edges are starting to set (they will still be very soft & fall apart easily so care must be taken). Remove from the oven and let cool for 5 minutes on the pans. Slide parchment paper with cookies onto a wire rack & let cool completely.
  6. Transfer to containers & eat within a week.

IMG_1260

Friendships & Honey-Vanilla Madeleines

Do you ever wonder how much of what you experience as a child shapes who you become? I think about it constantly. You may not know it at the time but movies, music, books, events, perhaps the smallest encounter, might affect who you become as you get older.

I first noticed it when I bought Edward Scissorhands years ago. I watched this beloved childhood movie as an adult and thought maybe this is a part of the reason why I am who I am. There is the character of the inventor (I’m a chemist) and the mother sells Avon (I sold MaryKay for a brief time).

I know that could be ridiculous but maybe it did affect me. I’m not saying that everything you watch or listen to will make you do things. I watched any horror movie I wanted growing up and I didn’t turn into a murderous monster. I read books geared to adults in elementary school, so much that my teachers would call & ask if it was appropriate for me to be reading such items, to which my mother would reply, “If she has a book she can read it.” I’ve always loved the fact that I was able to watch & read anything. I think that being treated as an adult in certain aspects enhanced my intellect. But I digress. The point is that sometimes I wonder what affected me as a child & shaped my life.

For example, I danced from 3-18yrs old and there was a Chinese restaurant next door. The paper place settings had the Chinese zodiac that told you what animal you were based on the year you were born. I am a rat. I read it every time I went to that restaurant. One thing it said is that Rats seldom have lasting friendships.

I wonder if I got that engrained in my brain which could have affected my friendships throughout life. Because for me it is true. I do seldom have lasting friendships.

My best friend in kindergarten & first grade moved away. One of my only friends in elementary school moved away. In high school I drifted away from my friends for a guy. In college I didn’t live there so I didn’t meet many new people which resulted in no new friends.

I did live in Cannes though for a semester and made some friends there. There was one in particular who I considered to be one of my best friends. We got along well & managed to keep in touch fairly well for a long time. We would Skype each other & Facebook IM one another fairly regularly. We even saw each other every few years with either her traveling to the states or me to Europe.

We don’t talk as much and it has been about 3.5 years since we have seen each other but I still consider her to be a lasting friend. I may not have (m)any friends but I do know I can always call or message her and she will be there. If I do ever go to back to Europe or if she comes to the States I am sure we will get together.

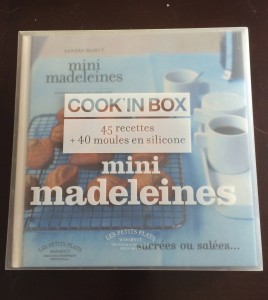
A long time ago in one of our times together, she gave me a cookbook box set.
IMG_1515

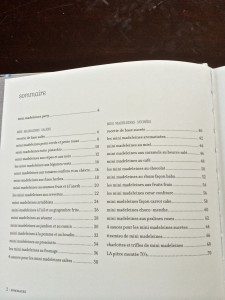
It contains a book with 22 salty & 22 sweet mini madeleine recipes.
IMG_1521

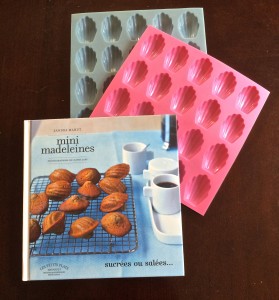
It also came with two silicone molds. I have never used it…until now.
IMG_1518


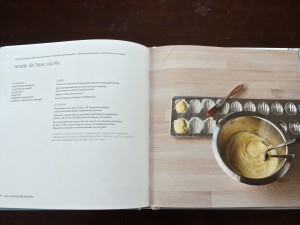
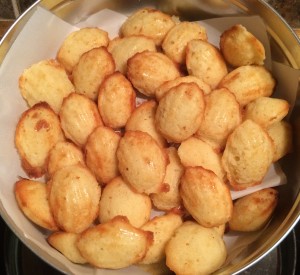
To be fair it got misplaced and then I moved countless times so it was packed up, but up north in Almost Canada, I have lots of time to bake and these will definitely be a recurring baked good in my household. They are so easy & so delicious. The recipe I made was a honey madeleine but I used half the honey and added the seeds from half of a fresh vanilla bean.
IMG_1522

Honey-Vanilla Madeleines (adapted from Mini Madeleines & translated into english) 

  •  1 cup flour
  • 1/2 cup butter, softened
  • 2/3 cup granulated sugar
  • 2 large eggs
  • 2 tbsp milk
  • 2 tsp baking powder
  • 1 tbsp honey
  • 1/2 vanilla bean

Preheat the oven to 425F. Mix the eggs & the sugar until well blended in a medium bowl. Add the flour & baking powder & mix until combined. Mix in the softened butter and milk. Add the honey & the seeds from the half vanilla bean (reserve the bean for another use). Place in the fridge for 30 minutes. Generously grease the molds with butter. Fill them so that they are not overflowing (approx. 1/2-3/4tsp). Bake for 6-8 minutes or until golden brown & cake feels spongey to the touch. Makes about 3 dozen.
IMG_1506


I don’t know if I will make any great friendships as the years go by. By now I have gotten used to having no girlfriends. Sometimes it does sadden me but other days I think it would just be too much work & am content with the way things are. I have always been a very solitary person with a few close friends. While almost all of those close friendships are basically non-existent except for in memory or the occasional communication, I know that if it comes down to it I do have people I can count on. These madeleines remind me of just that.

 

The Return of Baking Sunday 2014

I have longed professed my hatred or severe dislike of football. Instead of suffering throughout the day, I decided to make it my own day where I spend much of my time in the kitchen (usually baking) and doing other things that I enjoy, i.e. watching shows & movies my fishing guide doesn’t enjoy, knitting, sewing, blogging, etc.

As the 2014-2015 season approached he kept asking me if I was excited and I would reply yes. Of course I am excited! I get to spend a whole day doing what I love and he gets to enjoy it as well (the football & the fruits of my labors from the kitchen). In the winter I am out ice fishing and the summer I am out shooting, fishing on open water, and doing misc projects around the house so the time is not as easy to find to spend in the kitchen. Thus, football season/sunday is baking season/sunday and I could not be more thrilled.

This first Sunday back I made the boys cuban type sandwiches, prepped veggies for my breakfast scrambles for the week, made beef bourguignon for dinner, and I made peanut butter balls. I do a few variations of these treats but this is my original plus the football theme.

There is nothing fantastically awesome about what I accomplished, & my art skills leave something to be desired, but it was fun none the less. Plus, apparently we won the game. I like to think it was my Vikings themed PB Balls that did the trick.


Football themed Peanut Butter Balls (makes approx. 2 dozen)

  • 1 stick butter, softened
  • 3/4 cup peanut butter
  • 2 cups powdered sugar
  • 2/3 cup graham cracker crumbs
  • 1 cup each white & semi-sweet chocolate pieces
  • 2 tbsp shortening
  • 1 tbsp butter
  • milk or yogurt if needed
  • white writing gel
  • assorted food coloring

Line a baking sheet with parchment paper. Mix the butter and peanut butter together in a medium bowl. Add the powdered sugar and graham cracker crumbs. Form into 1in balls and football shapes.

Melt the semi-sweet chocolate and 1/2-1 tbsp shortening to get a fluid melted chocolate (use a double boiler or the microwave on 50% power). Dip the football shapes into the melted chocolate and place on the parchment lined sheet.

Melt the white chocolate and 1-1.5 tbsp. shortening to get a fluid melted chocolate (use a double boiler or the microwave on 50% power). Add butter and yogurt or milk if the chocolate does not become fluid. Divide into two portions. Stir in food coloring that matches your local sports team’s colors (I used purple & gold for the Vikings). Dip the balls into the melted chocolate and place on the parchment lined sheet. Take the spoon you used to stir the melted chocolate and drizzle the the other color over them.

Place the sheet in the fridge to set. Once firm, remove and draw football lines with the white writing gel. Serve to football fans and be praised.

IMG_1489


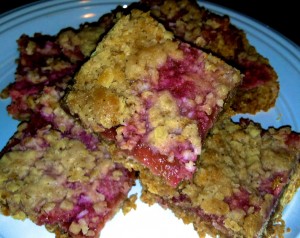
Summer of Rhubarb: Oatmeal Rhubarb Bars

Seeing as how I had leftover Rhubarb Sauce from my Mustard Sage Pork Roast, I knew another dessert was in order. Since I had made coffee cake & a crisp, I decided I would more or less combine the two recipes & make oatmeal bars. These are great! They can be eaten plain or with ice cream. Also, they can be made with whatever filling you desire. Any fruit will do. Use the same amount of sugar for raspberries, but if using peaches, blueberries, or strawberries only use 1/4 cup sugar.

Oatmeal Rhubarb Bars

  • 1 cup all-purpose flour
  • 1 cup quick cooking rolled oats
  • 2/3 cup packed brown sugar
  • 1/4 tsp baking soda
  • few dashes cinnamon
  • dash or two nutmeg
  • dash all-spice
  • dash cloves
  • 1 stick (1/2 cup) butter
  • approx. 2 cups rhubarb sauce (2 cups rhubarb & 1/4 cup water brought to a boil & simmered for 5 minutes. Add 1/3 cup sugar & two tbsp. corn starch & cook for 2 more minutes)

Preheat the oven to 350F. Combine all the ingredients except the butter & rhubarb sauce in to a medium sized bowl & stir to combine. Cut in the butter until the mixture resembles coarse crumbs. Reserve 1/2 cup of this mixture. Press the rest into a 9x9x2in baking pan. Top with rhubarb sauce & sprinkle remaining crumb mixture on top. Bake for 30-35 minutes until the topping is golden brown.

IMG_1343


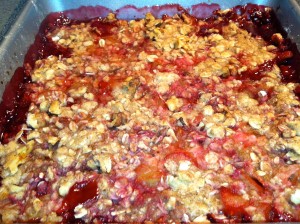
Summer of Rhubarb: Rhubarb-Raspberry Crisp

IMG_1232

Cobbler, crumble, or crisp? What is the difference? I am still not clear. Depending on who you ask you get different answers. Everyone agrees that a cobbler has a biscuit type topping. A batter dropped in small spoonfuls giving the appearance of a cobbled road. When it comes to crisps & crumbles the answer is not so easy. Some say it depends on whether you live in the US or in Britain. Some say it has to do with whether or not the topping has oats in it. However, people do not agree on which baked good contains the oats. Some say the crumble has the oats while others say the crisps contain the oats. For my purposes, a crisp has a topping of flour, butter, nuts & oats. The oats crisp up while baking, hence the crisp. That is how I learned it so that’s how it shall be for me.

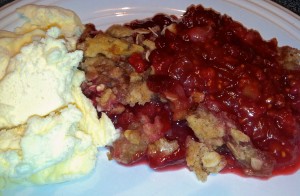
With that in mind, I decided to continue my summer of rhubarb with a crisp. They are so simple & quick. Plus, I had vanilla ice cream in the freezer I wanted to eat up so I thought it was a perfect combination.

Rhubarb-Raspberry Crisp

  • 3 cups fresh or frozen rhubarb
  • 2 cups fresh or frozen raspberries
  • 1/2 cup granulated sugar
  • 1/3 cup all-pupose flour
  • 1/2 cup oats
  • 1/2 cup packed brown sugar
  • 1/4 tsp cinnamon
  • dash or two of nutmeg
  • 1/4 cup cold butter
  • 1/4 cup chopped walnuts
  1. Preheat oven to 375F. Thaw fruit if frozen but do not drain. Place fruit in a 2 qt baking dish. Stir in the granulated sugar.
  2. In a medium bowl, combine flour, oats, brown sugar, & spices. Cut in the butter until mixture resembles coarse crumbs. Stir in the nuts. Sprinkle topping over fruit.
  3. Bake for 30-35 minutes (40 minutes for thawed fruit) or until fruit is tender & topping is golden. Serve warm with ice cream.


IMG_1235

Sunny Summer Strawberry-Cream Cheese Muffins

I have joked with people before about having reverse SADS. I know I don’t really have this but sometimes I feel like I do. I love the winter. I love being active in the winter & doing “wintery” things. Once spring rolls around, I feel let down. Maybe it’s due to the fact that spring in Minnesota is basically non-existent. A muddy, wet, cool climate that prohibits me from ice fishing as well as doing other outdoor activities. Or maybe it’s from the fact that I have always thought of fall as the beginning of the year due to being in school from ages 3-23. Fall, for me, has always felt like a time to start fresh.

With that being said, the reverse SADS only lasts a small amount of time & I always laugh at myself when I feel this quasi-sadness, but it does happen every spring. This year in Almost Canada, the spring sadness came in a bit later due to the season arriving late, but rolled away with what I assume to be summer. Sunny days. Warmish weather. Yard games & shooting my bow in the backyard. It also came with strawberries.

Berries are one of the great advantages of summer. Fresh & seasonally delicious. These muffins will make your days seem bright & sunny or just add to the bright & sunny goodness you are already experiencing. These muffins are cake-like & spongey. Enjoy for breakfast, as a tea-time snack, or heated up with ice-cream for dessert.

Sorry for the lack of photos but they all got eaten & given away before any could be taken.

Strawberry Cream Cheese Muffins (adapted from Raspberry-Cream Cheese Muffins)

  • 2/3 cup (5 ounces) 1/3-less-fat cream cheese, softened
  • 1/3 cup butter, softened
  • 1 1/4 cups sugar
  • 1/2 cup brown sugar, not packed
  • 1 tsp vanilla extract
  • 2 large egg whites
  • 1 large egg
  • 2 cups all-purpose flour
  • 1 tsp baking powder
  • 1/4 teaspoon baking soda
  • 1/2 teaspoon salt
  • 1/2 cup milk with 1/2tsp lemon juice
  • 2 cups fresh strawberries, sliced & diced
  • 1/4 cup finely chopped walnuts
  1. Preheat oven to 350°F.
  2. Combine cream cheese and butter in a large bowl. Beat with a mixer at high speed until well blended. Add sugar; beat until fluffy. Add vanilla, egg whites, and egg; beat well.
  3. Combine flour, baking powder, baking soda, and salt. With mixer on low speed, alternate adding the flour mixture and milk to cream cheese mixture, beginning and ending with flour mixture. Gently fold in strawberries and walnuts.
  4. Place 20 foil cup liners in muffin cups. Spoon batter evenly into liners. Bake for 25 minutes or until a wooden pick inserted in center comes out clean. Remove from pans & cool on a wire rack.


Summer of Rhubarb: Rhubarb-Strawberry Coffee Cake

Here in Minnesota, and many other places as well, summer means rhubarb. Everything rhubarb. I grew up eating the beloved strawberry-rhubarb pie which my grandmother would make every summer using fresh rhubarb from her garden. As I grew older, I realized how amazing & versatile rhubarb can be.

I love all things rhubarb. Pies, crisps & crumbles, tarts, sauces for dessert or for savory dishes. There are so many options for how to use it. When a co-worker asked me if I wanted any rhubarb I jumped at getting as much as I could until I start growing it. She gave me 14 cups which I separated into various quantities & stored in the freezer so I could just pull it out & cook with it when I wanted.

I began my summer of rhubarb on Sunday with a coffee cake from my Better Homes & Gardens cookbook.

Rhubarb-Strawberry Coffee Cake:

  • 3/4 cup fresh or frozen rhubarb cut into 1in pieces
  • 3/4 cup fresh or frozen unsweetened strawberries
  • 1/4 cup water
  • 1/4 cup sugar
  • 2 tbsp cornstarch
  • 1 1/2 cups all-purpose flour
  • 3/4 cup sugar
  • 1/2 tsp baking powder
  • 1/4 tsp baking soda
  • 1/4 cup butter
  • 1 egg, beaten
  • 1/2 cup buttermilk or sour milk (alternatively use 1 tbsp lemon juice & fill with milk to 8oz & let stand 5 minutes)
  • 1 tsp vanilla
  • 1/4 cup all-purpose flour
  • 1/4 cup sugar
  • 2 tbsp butter
  1. For filling, in a medium saucepan combine fruit & water. Bring to  boil. Reduce heat & simmer, covered, for about 5 minutes or until fruit is tender. Combine the 1/4 cup sugar & corn starch. Stir into the fruit. Cook & stir over medium heat until mixture is thickened & bubbly.
  2. In a medium bowl combine the 1 1/2 cups flour, 3/4 cup sugar, baking powder & baking soda. Cut in the 1/4 cup butter until the mixture resembles coarse crumbs. Make a well in the center.
  3. In another bowl combine the egg, buttermilk, & vanilla. Add the egg mixture to the flour mixture & stir until just moistened. Batter will be lumpy.
  4. Spread half the batter into an ungreased 8x8x2in baking pan. Spread filling over batter. Drop remaining batter in small mounds onto filling.
  5. In a small bowl stir together the 1/4 flour & 1/4 sugar. Cut in the 2 tbsp butter until the mixture resembles coarse crumbs. Sprinkle over the coffee cake. Bake in a 350F oven for 40-45minutes or until golden. Serve warm.

IMG_1134

Multiple Meals: Red Chard

I’ve mentioned numerous times that my grocery store leaves something to be desired. I cannot get most things I want to cook with even if they are seasonal. A few days ago I drove 2hrs to get some supplies for house renovations as well as groceries. This occasional commute has become a norm for me as of late. It doesn’t really bother me, it is just a way of life now. I ended up buying some chard to cook with as I cannot get any fancy greens in my grocery store. I didn’t know what I would use it for at the time, but I knew I needed it.

On Sunday I spent about 4hrs in the kitchen which is a nice way for me to relax. With all of the ice fishing I have been doing I have not been in the kitchen as often as I would like. It’s hard to juggle hobbies. Anyhow, I knew I needed to use the chard, make French Onion soup as I had way too many onions (thus requiring me to make bread), make lunch & dinner, & bake something (I was leaning towards cookies). It sounds more ambitious than it really was. In the morning I prepped bread for baguettes and planned out my day…

  1. Bake bread
  2. Make lunch
  3. Make soup (to be eaten with dinner & give leftovers for the next day’s lunch)
  4. Bake cookies
  5. Make dinner

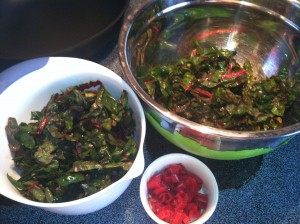
I decided to divvy up the chard into 2 portions – one to be used with lunch & one to be used with dinner (each can serve 2).

IMG_1077

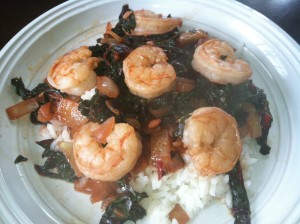
I ended up making Asian Garlic Shrimp & Chard over rice for lunch. Fast, delicious, & healthy.

IMG_1079

I then proceeded to make French Onion soup. While that was cooking I made cookies which quickly began to disappear.

IMG_1088

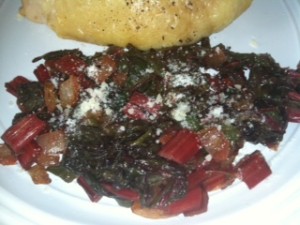
After all of this was completed, I started on dinner. I made lemon-parmesan chard & served it with roasted chicken thighs and some French Onion soup.

chard


Asian Garlic Shrimp & Chard  (Serves 2)

  • olive oil or cooking spray
  • 1/2 bunch red chard, roughly chopped & stems removed
  • 1 onion, chopped
  • 1-2 cloves garlic, minced
  • 2-3 tsp reduced sodium soy sauce
  • 2-3 tsp rice vinegar
  • 1 tsp sesame oil
  • 12-14 uncooked shrimp, deveined & peeled
  • 1 1/2 cup cooked white rice
  1. Mix soy sauce, vinegar, & sesame oil together. Set aside.
  2. Coat a non-stick skillet with olive oil or cooking spray & heat over medium heat.
  3. Sauté onion for 5-10minutes until softened.
  4. Add garlic & sauté for 2 minutes.
  5. Add swiss chard & 1/4 cup water. Sauté until chard is wilted & water has evaporated.
  6. Add shrimp & sauce. Cook for 2minutes per side or until shrimp is cooked through. Serve over cooked white rice with additional soy sauce & hot chili sauce if desired.


Lemon-Parmesan Chard

  • olive oil
  • 1/2 bunch red chard, roughly chopped (chop a few of the stems as well)
  • 1/2 small onion, chopped
  •  2-3 tsp lemon juice, or more to taste
  • parmesan cheese
  1.  Coat a non-stick skillet with olive oil & heat over medium heat.
  2. Sauté onion for 10-20 minutes until softened & caramelized to your liking.
  3. Add the stems of the chard & cook for 3-5minutes until softened.
  4. Add the chard & sauté until wilted. Spritz (or saturate) with lemon juice to your liking.
  5. Top with parmesan cheese & serve with whatever you desire. I served it with roasted chicken.


Breakfast Lasagna

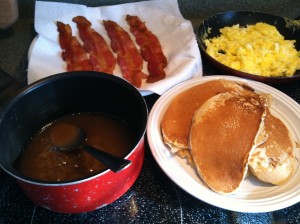
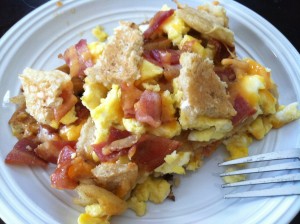
On the weekends, particularly Sunday, I like to have something different for breakfast if possible. Considering all I had was bacon & eggs, I decided I would just make pancakes to go along with that. Nothing special. As I was gathering all my supplies, I thought…why not make it more fun and turn it into Breakfast Lasagna. The pancakes can be the noodles, the bacon & eggs could be the meat, I have cheese, and couldn’t the syrup become some sort of sauce? Yes. Yes. Yes. Thus, Breakfast Lasagna was made. The best part is that you can use whatever you have on hand & make it your own. Sausage, bacon, ham, none of the above? It doesn’t really matter. It’s whatever you feel like throwing together. Here is what I did…

Bacon

  1. Cook 4 slices bacon in a skillet over medium to medium high heat until crispy or preheat the oven to 400F and bake on a foil lined baking sheet for 15-20minutes until crispy. (I always bake my bacon as it turns out more even & is out of the way while I prep other things).
  2. Set bacon on a paper towel lined plate & pour bacon grease into a small pot (if you baked your bacon) or keep in the skillet for later use.

Pancakes (use your own recipe or follow this one)

  • 1/2 cup all-purpose flour
  • 2 tsp sugar
  • 1/2 tsp baking powder
  • 1/8 tsp baking soda
  • 1/8 tsp salt
  • few dashes cinnamon
  • 1 egg white or the whole egg if you desire
  • 1/2 cup buttermilk or sour milk (or 1/2tbsp lemon juice and 1/2 cup milk that stood for 5 minutes)
  • 1/2tsp vanilla extract
  • butter or cooking oil for cooking the pancakes
  1. Combine all the dry ingredients in a medium bowl.
  2. Combine all the wet ingredients in a small bowl.
  3. Add the wet ingredients to the dry ingredients & stir until just combined.
  4. Preheat a skillet over medium heat. Add a small pat of butter to coat the skillet.
  5. Pour batter* into skillet and cook until pancakes are golden brown, turning to second side when they have turned bubbly & the edges are slightly dry. Cook the second side until pancakes are golden brown. Approx. 2min per side.

* Make whatever size pancakes will fit into a small casserole dish or oven safe container so you don’t have to tare them as much. I made oval pancakes.

Scrambled Eggs

  1. Whisk 4 eggs & a few tbsp milk together until smooth.
  2. Pour into a small greased skillet that has been heating over medium heat.
  3. Let sit until edges start to set – approx 1 minute. Using a wooden spoon or a spatula, scrape the sides of the eggs to create large curds. Continue in this manner until the eggs are cooked through. Set aside.

Maple Bechamel

  1. Place the skillet or small pot with reserved bacon grease over medium-low to medium heat.
  2. Add a small pat of butter & stir until almost melted. Add a tbsp flour and stir into bacon-butter mixture.
  3. Add approx. 1/2 cup maple syrup to this and mix constantly until thickened & bubbly. Set aside.

Assembly

IMG_1051

  1. Preheat the oven to 400F if you did not bake your bacon. If you did, keep the oven set at this temperature.
  2. Take a small casserole dish or oven safe container and grease the bottom & sides.
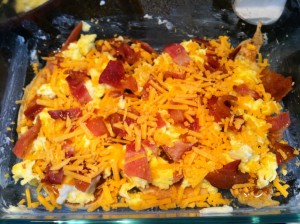
  3. Place a layer of pancakes (approx half the pancakes) on the bottom.
  4. Coat the pancakes with half of the béchamel sauce.
  5. Top with half the eggs.
  6. Crumble the bacon and place half on top. 
  7. Add a small amount (a few tbsp) of cheddar cheese over this.
    IMG_1053
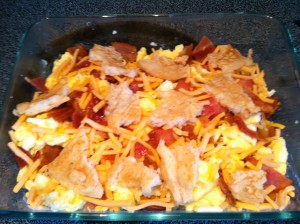
  8. Repeat layers. (I had one pancake leftover so tore it into small pieces & placed it over the top).

IMG_1054

9. Cover with foil and bake for 10min. Remove the foil & bake for 5-10min more.

10. Cut into 2 pieces & serve with additional syrup if desired.

IMG_1058


Raisin Bread: To Yeast or not to Yeast

I have never liked raisins. Not even as a child. I would rather eat nothing than eat raisins. A while back I did a battle of Oatmeal Raisin Cookies and I have been sitting on a bag of raisins ever since. I don’t like them in salads or cookies but on occasion I have eaten Cinnamon Raisin Bread and enjoyed them that way. I decided to try a few different recipes to see if I could begin to use up my supply. I made one bread recipe with yeast & a quick bread recipe (with no yeast).

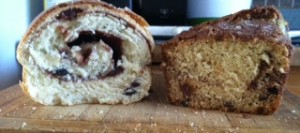
raisin both

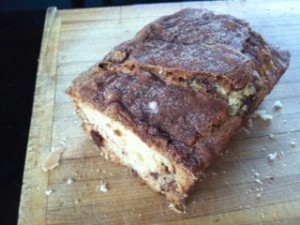
I went with the no yeast recipe first. I love making quick breads. They are so “quick” & easy as the name implies. They almost always turn out delicious & moist which are the two basic criteria for a successful quick bread.

Cinnamon Raisin Quick Bread

  • 2 cups all-purpose flour
  • 1 ½ cups granulated sugar, divided
  • 1 tbsp cinnamon
  • 1 tsp baking soda
  • ½ tsp salt
  • 1 egg
  • 1 cup buttermilk or sour milk (I used 1tbsp lemon juice and enough milk to make 1  cup & let stand for 5 minutes)
  • ¼ cup vegetable oil
  •  1/3  cup raisins
  1. Preheat oven to 350°F. In a medium bowl combine flour, 1 cup sugar, baking soda, and salt.
  2. In a small bowl whisk egg, buttermilk, and oil. Add the wet ingredients to the dry & stir until just combined. Fold in raisins.
  3. Combine cinnamon and remaining sugar; set aside.
  4. Spoon half the batter into a greased loaf pan. Sprinkle with half of the reserved cinnamon-sugar; repeat layers. Cut through batter with a knife to swirl.
  5. Bake 55-65 minutes or until a toothpick inserted in center comes out clean. Cool in pan 10 minutes before removing from pans to wire racks. Let cool completely.

raisin no yeast_2

Cinnamon Raisin Bread

  • ½ cup milk
  • 1/3 cup warm water, approximately 110F
  • 2 ¼ tsp active dry yeast
  • 1 egg
  • ¼ cup butter, softened
  • ¼ cup granulated sugar
  • ¼ tsp salt
  • 1/3 cup raisins
  • 2 cups all-purpose flour plus a few tablespoons (to reach desired consistency)
  • ½ cup granulated sugar
  • 1 tbsp cinnamon
  1. Add warm water to a medium bowl. Stir yeast in water and set aside, about 5-10 minutes.
  2. Meanwhile, warm milk in a small saucepan or microwave until it just starts to bubble. Let cool until lukewarm.
  3. Mix in egg, 1/4 cup sugar, butter, salt and raisins to yeast mixture. Stir in the cooled milk slowly.
  4. Add the flour gradually to make a stiff dough. Knead the dough on a lightly floured surface for a few minutes until smooth.
  5. Grease a large bowl and place the dough inside turning to lightly grease all sides of the dough. Cover loosely with a warm, damp cloth.
  6. Let rise until doubled in size (approximately 2 hrs).
  7. Roll dough out on a lightly floured surface into a large rectangle, approximately 1/2 inch thick.
  8. Moisten the surface of the dough with 1 tablespoon milk.
  9. Mix together ½  cup of sugar & 1 tbsp cinnamon and sprinkle mixture evenly on top of the moistened dough.
  10. Roll the dough tightly (the long way). Tuck under ends and pinch bottom together.
  11. Place a piece of parchment paper inside the loaf pan (for easy removal), grease with butter, and add the loaf. Let rise uncovered for about an hour.
  12. Place in cold oven and set to 350F. Bake for 60minutes until lightly browned and the loaf sounds hollow when tapped.
  13. Cool for 10 minutes in pan.
  14. Remove from the pan and let cool completely.

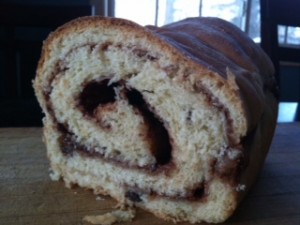
raisin yeast


Results:

Both breads were scrumptious. However…the yeasted bread was exceptional! The texture was what one would expect from a Cinnamon Raisin Bread & it looked more pleasing to the eye as the swirls were very pronounced. The cinnamon swirls were also more sticky compared to the quick bread. When you bit in to the quick bread, it had a sugar-cinnamon crust on top and in the middle, whereas the swirls in the other were slightly crispy & slightly gooey & sticky all at the same time.

Definitely take the time to make the bread with yeast. Also, the recipe can easily be doubled or tripled so you can make many loaves at once and place some in the fridge to bake at a later date. If this is done, once the dough is rolled out and rolled back up with the cinnamon-sugar mixture, cut in half or into thirds depending on how many loaves you are making. Place in the loaf pan with parchment paper and cover loosely. Place in the fridge and use within 1 week. When ready to bake, let stand on the counter or in a cold oven for 1 hour. Proceed to bake as previously directed.