Pumpkin Bacon Mac & Cheese

The season of pumpkin has arrived!! The changing & falling of leaves, brisk fresh air, the list goes on. I am one of those people that loves pumpkin. Pumpkin everything. I cannot help it & nor do I want to. It is delicious. I do eat it year round thanks to the canned goods but I really go crazy in the fall & early winter.

I love it in sweets but do enjoy the savory side of it as well. This is a savory dish & it’s also a souped up Mac & Cheese dish. Mac & Cheese has never been a favorite of mine. I ate the blue box stuff as a kid but didn’t love it. I didn’t realize I liked mac & cheese until I had homemade versions.

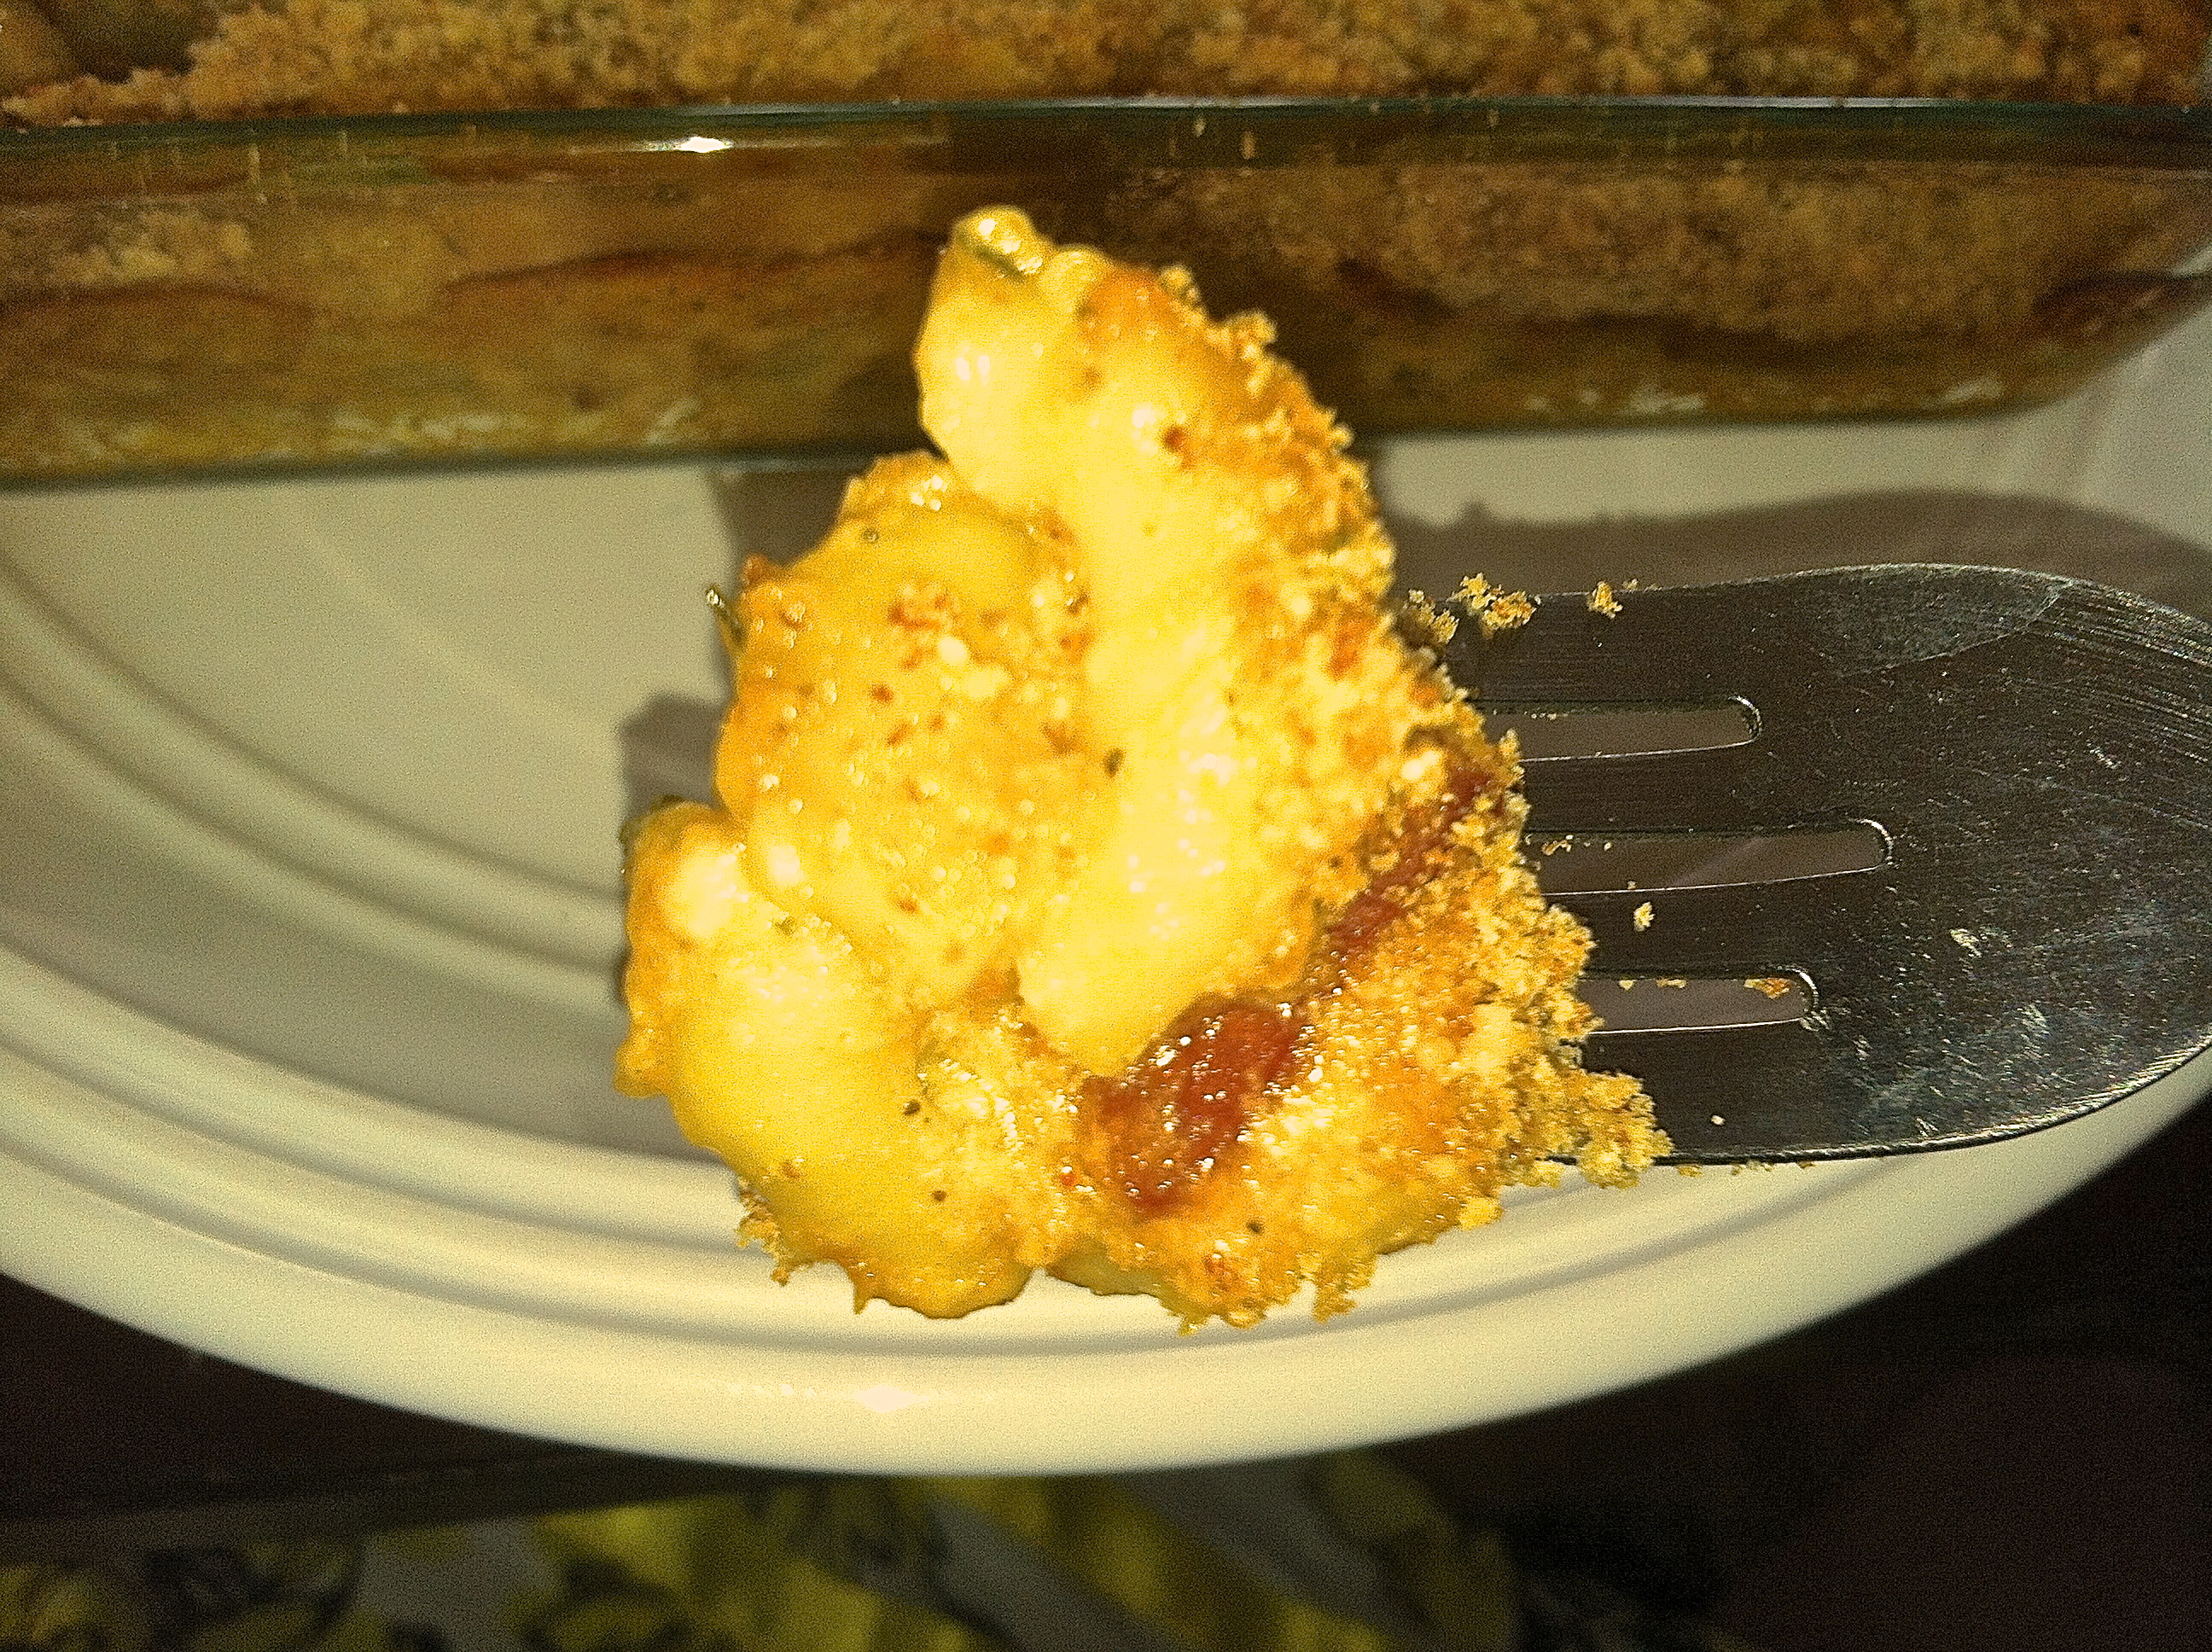
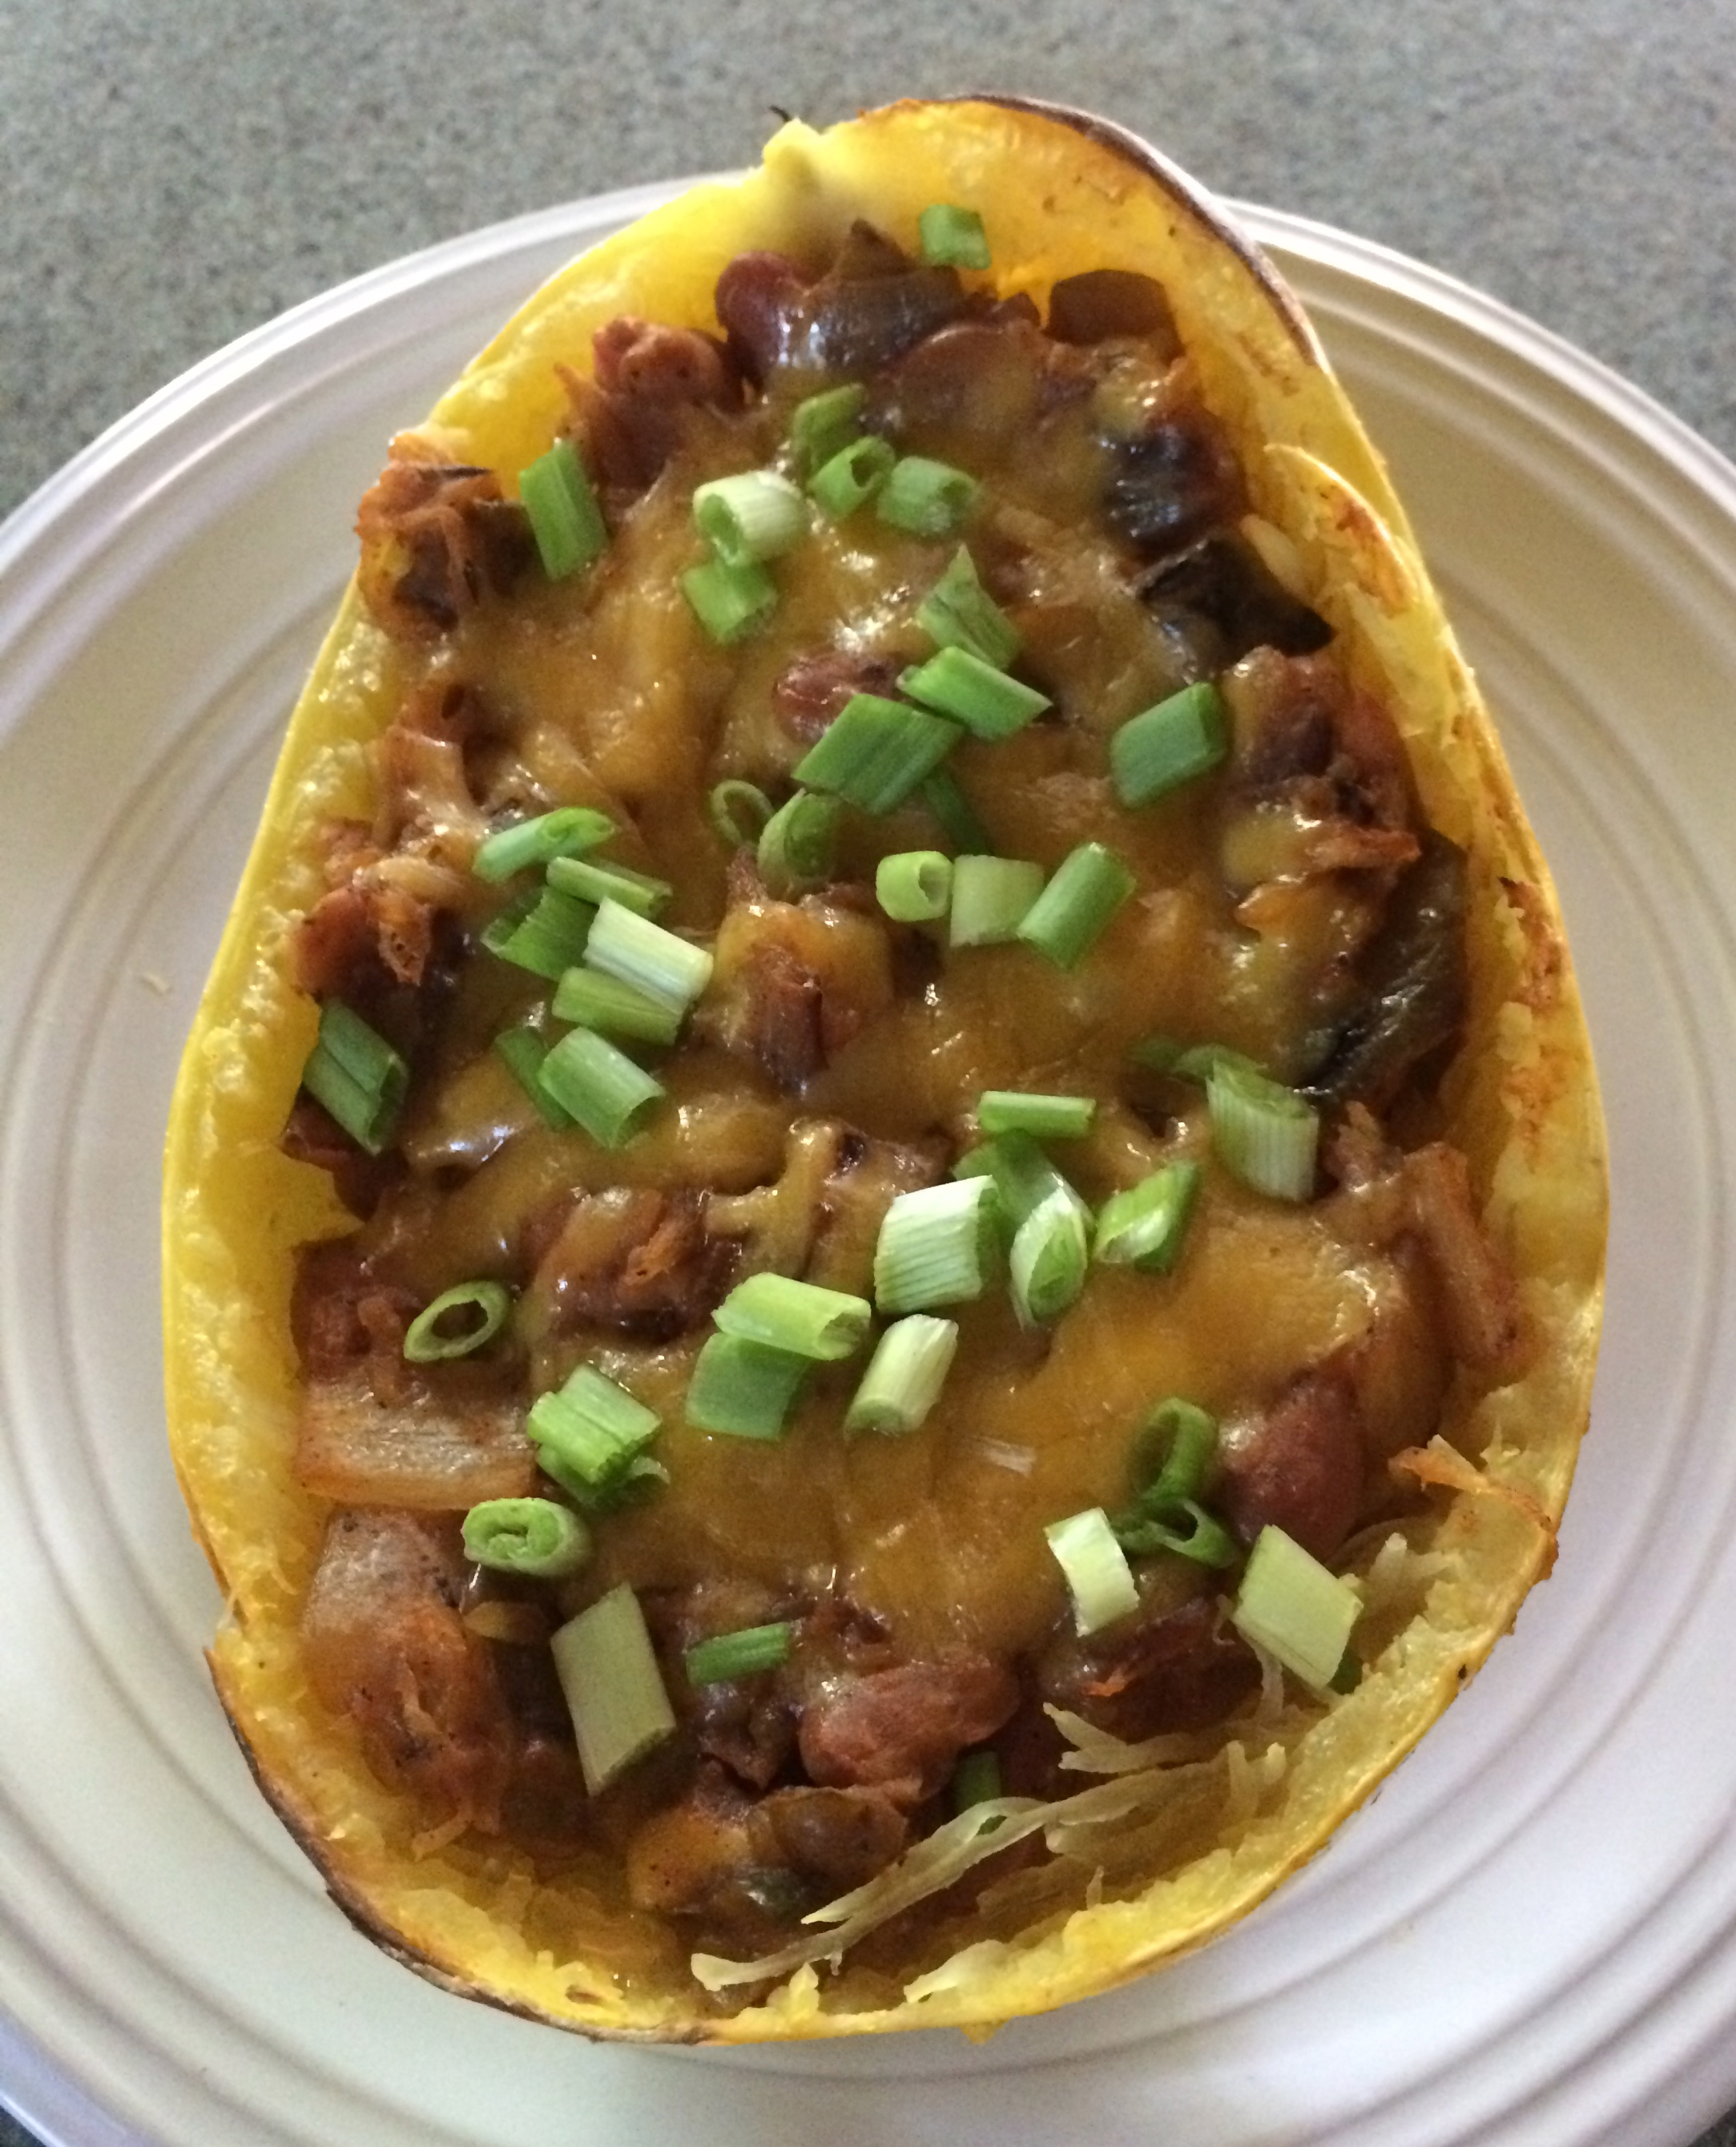
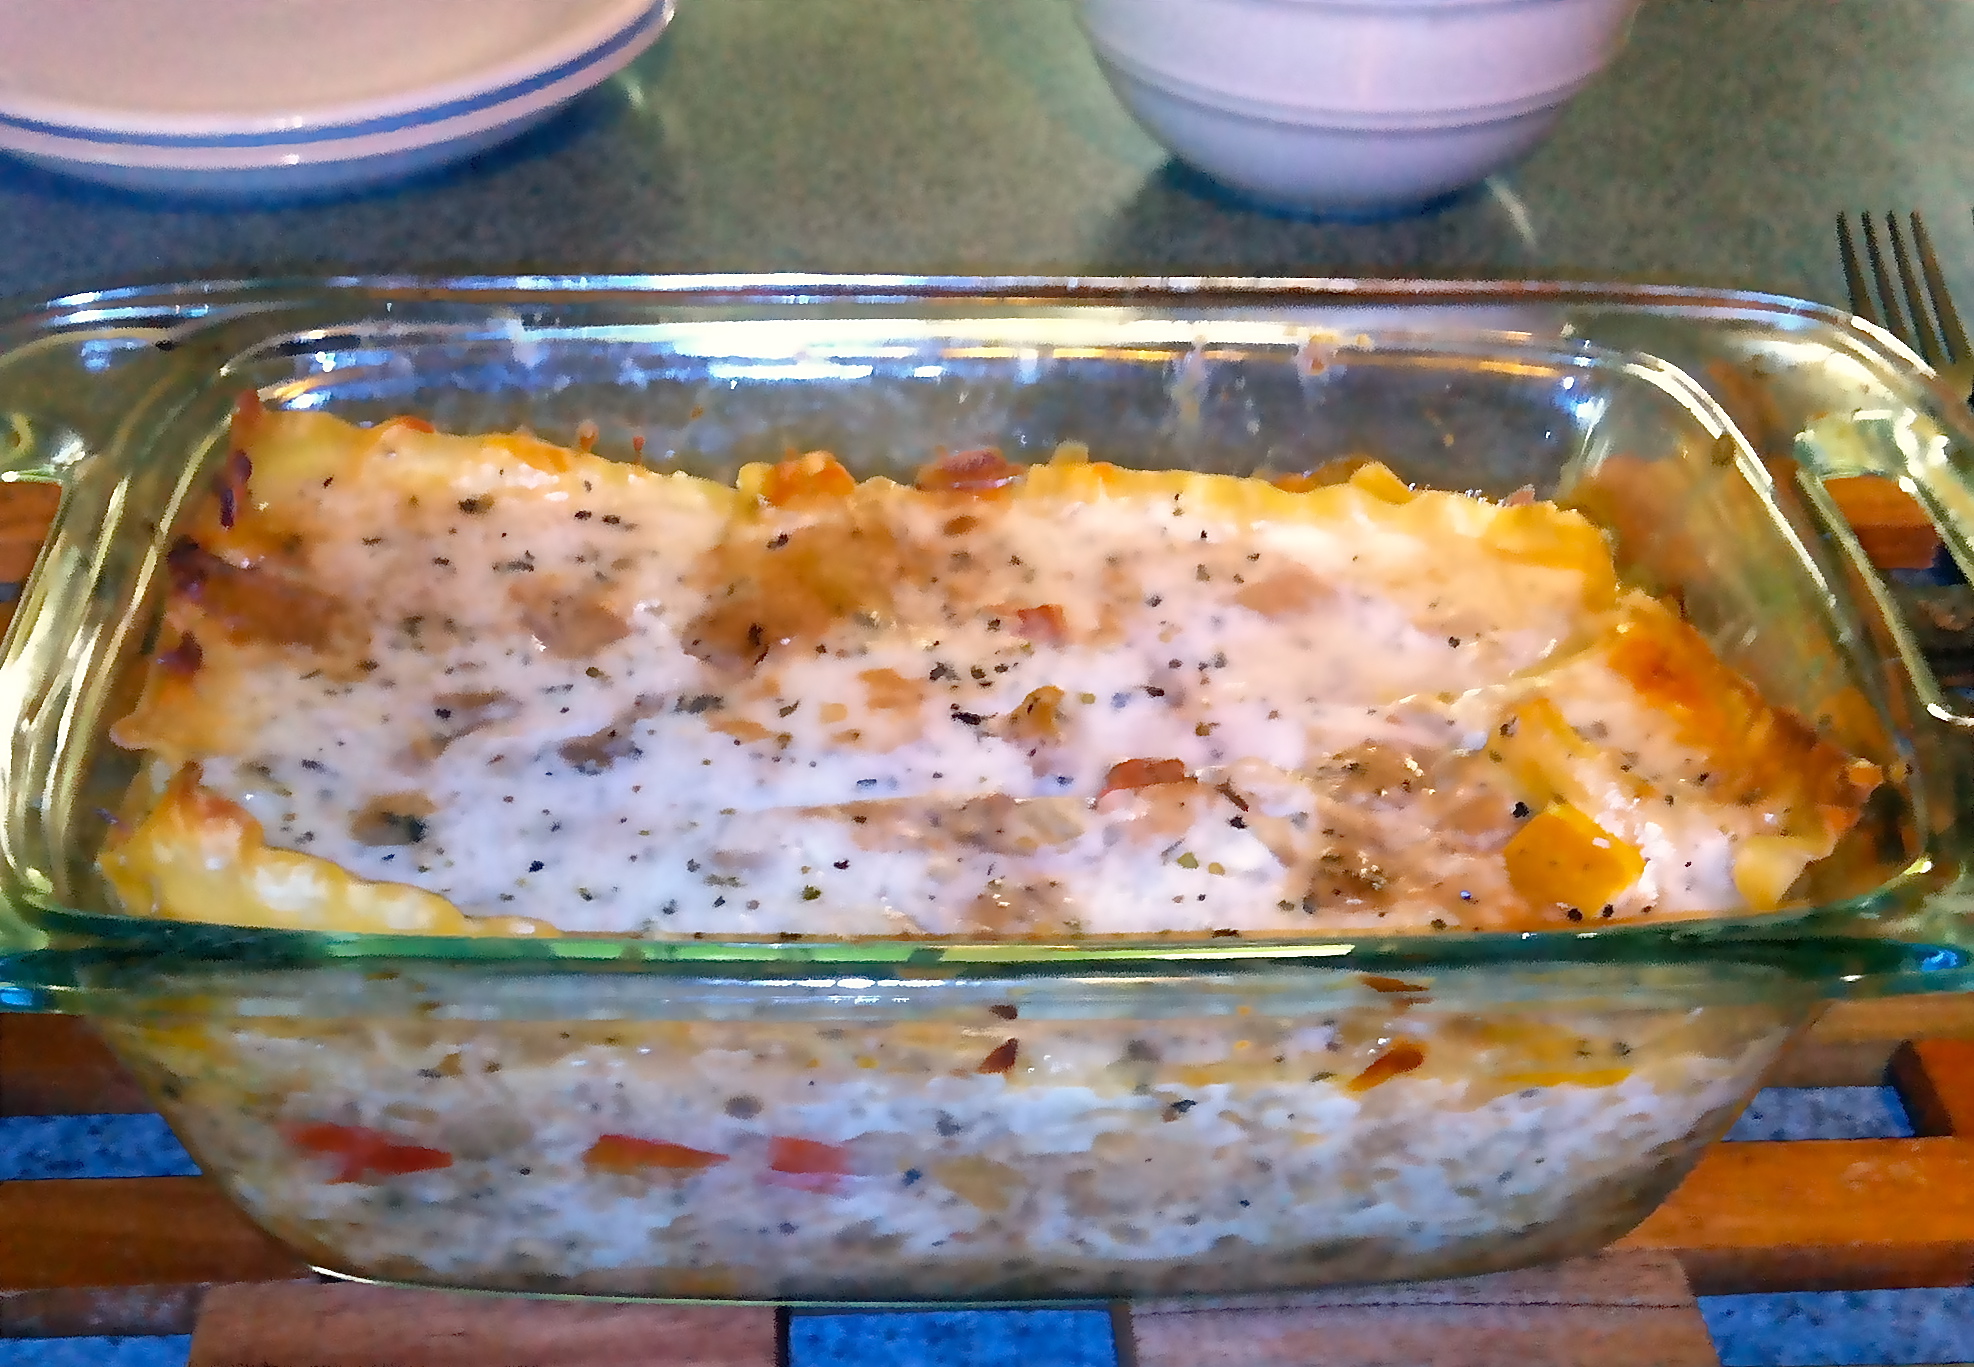
This one is the perfect way to start the pumpkin season. The combination of pumpkin, bacon, & cheese is delicious, satisfying, & comforting. Which are all the things I want on a brisk fall day. With the extra canned pumpkin I made Pumpkin Cookies


Pumpkin Bacon Mac & Cheese (serves 2)

  • 1 cup elbow macaroni
  • 4 slices bacon
  • 2 tbsp butter
  • 2 tbsp flour
  • 2 cups milk
  • 1/2 cup canned pumpkin
  • salt & pepper to taste
  • 1/2 tsp each sage & thyme
  • few dashes garlic powder & cayenne
  • 1/2 cup cheddar cheese
  • 1/4 cup fine bread crumbs
  • 1/4 cup parmesan cheese
  1. Cook the macaroni according to package directions. Drain & set aside.
  2. Meanwhile, in a skillet cook the bacon until crisp. Remove & crumble. Set aside.
  3. Drain off the bacon grease. Add the butter & stir until melted. Add the flour & stir until dissolved. Whisk in the milk & cook until thick & bubbly. Add the pumpkin, spices, and cheddar cheese. Stir until pumpkin is incorporated & the cheese is melted.
  4. Stir in the bacon crumbles and macaroni. Pour into two individual casserole dishes.
  5. In a small bowl combine the bread crumbs & parmesan. Sprinkle over the macaroni. Bake in a 400F oven for 25-30 minutes or until topping is golden & sauce is bubbly.

IMG_1252

Roasted Beets & Goat Cheese

I am a beet lover but I was not into beets as a child. As soon as I had real roasted beets, and none of that Thanksgiving canned junk, I was converted. I think they taste like earthy corn but in a good way if that makes sense.

Almost everyone who eats beets enjoys them with goat cheese. I couldn’t tell you how many beet & goat cheese salads and dishes I have had in the past few years. I even made a dish not that long ago Beet Millet Salad with Goat Cheese that used that cliche combo.

This time around I decided to make some dips. A battle of beets & goat cheese if you will. One which is a blend of beets & goat cheese and one is a goat cheese dip for beet chips. Both are delicious. When summer comes around and you have a garden of beets, or they are just readily available, feel free to add these to your list to make.

Let’s begin with the roasted beet & goat cheese dip.

Roasted Beet *&* Goat Cheese Dip (serves 2 but can easily be doubled)

  • 1 beet
  • 2 oz goat cheese
  • 1/2-1tsp olive oil
  • 2-4 tsp lemon juice
  • few dashes garlic salt, thyme, & oregano
  1. Preheat the oven to 400F. Chop off the ends of the beet & wrap in foil. Bake for 60min or until tender. Remove skins & let cool.
  2. Chop the beat in quarters & puree  in a food processor.
  3. Add the rest of the ingredients & blend to desired consistency (I left mine a bit chunky).
  4. Enjoy with crackers, bread, or veggies.

IMG_1278


The next beet & goat cheese combo is beet chips with a goat cheese dip. Be forewarned, I have not perfected the beet chip. You do really need a mandolin unless you have serious knife skills which I do not. I tried my best to cut them thinly & in a uniform fashion but ended up with some too thick and some in half moon type shapes. The ones that turned out are below. It might not be perfect but it was good enough & the dip will go great with regular potato chips, bread, or fresh veggies of your choice if you are not making beet chips.

Roasted Beet Chips *with* Goat Cheese Dip

  • beets
  • olive oil
  • salt & pepper
  • goat cheese
  • sour cream
  • milk
  • balsamic vinegar
  • garlic salt
  • dill

Preheat oven to 375F. Slice the beets thinly. Coat lightly with olive oil and sprinkle with salt & pepper. Place on a parchment lined baking sheet & place another baking sheet on top. Roast for 20 minutes. Remove top baking sheet and roast for 15-30 minutes longer until beets crisp up & edges curl.

IMG_1524


Mix equal parts goat cheese & sour cream ( I used 1-2 tbsp of each). Add a splash of milk and balsamic vinegar to reach desired dip consistency. Add a pinch of garlic salt & as much dill as desired.

IMG_1526


Serve chips with dip & watch them disappear.

IMG_1528


Be liberal with the dip as it is delightful to your taste buds.

IMG_1527


In terms of a winner, even though my chips did not turn out exactly perfect, the ones that did work were so tasty & the dip is now my new favorite go-to recipe that the beets *with* goat cheese dip is far superior.

Cornbread Chicken Pot Pie


IMG_1384


I love pot pie. I think it is engrained in my Minnesota upbringing. When winter is half the year you enjoy comfort foods for half the year. The weather has turned rather brisk so pot pies are going to be a reoccurrence for many months to come.

Peas, carrots, potatoes, & chicken in a creamy sauce with a pastry crust is the traditional pot pie eaten by many, but you can really add anything. I love the fact that they are so versatile. You can add basically whatever you want to them depending on what kind of flavors you desire.

The first pot pie I ever made my fishing guide had peas & mushrooms in it. I didn’t know it then, but am constantly reminded now, how he hates peas. His mother even told me that she served him peas as a child and he responded with a question, “Are you made at me?” I guess he has always hated peas and will always hate them (except for pea soup – go figure). Anyhow, he did not enjoy that classic version & I have constantly been adapting pot pies ever since.

This version uses the veggies I had on hand as so many of my recipes do along with chicken and a cornbread crust. It is quite comforting on a brisk autumn day or cold winter night.

Cornbread Chicken Pot Pie (makes 4 servings)

Filling

  • 1 can (10 3/4 oz) Condensed Cream of Chicken Soup
  • 1 can (about 8oz) whole kernel corn, drained
  • large handful fresh green beans, washed, trimmed, & cut into 1 inch pieces (use canned if needed)
  • 2-3 medium carrots, sliced into bite-size pieces
  • 2 cups chicken, cooked & shredded
  • 1/2-3/4tsp thyme
  • pinch salt, pepper, garlic powder & onion powder
  • 1/2 cup cheddar cheese

Cornbread Crust

  • 1 package (about 6.5 oz) corn muffin mix
  • 2 tbsp melted butter
  • 1/3cup milk
  • 1 egg
  1. Preheat oven to 400F.
  2. In a small pot of boiling water add carrots & cook for 10-15 minutes. Add green beans and cook for 3-5 more minutes (if using canned omit this step and combine with the rest of the ingredients in step 3). Drain water.
  3. In a medium bowl combine cooked veggies & all other filling ingredients. Pour into a 2 qt casserole dish.
  4. In a small bowl, combine crust ingredients. Spoon dollops onto the filling in the casserole dish. Bake for 20-25 minutes or until topping is golden brown.

Stuffed Spaghetti Squash

As I was trying to think of something to make for lunch the other day I decided I wanted to do something vegetarian & use a spaghetti squash I had in my pantry. Let me start by saying that both those ideas seem crazy when it comes to my fishing (and soon to be hunting) guide. He is a strong meat & potatoes guy (the only time vegetarian dishes are safe is for lunch) and he isn’t too thrilled with that squash in general. I made it once as spaghetti squash fritters (which he enjoyed but not enough for a remake request) and once as Bacon Spaghetti Squash Pasta which I loved, but apparently he thought it was just so-so. Thus, I have a mission to make him enjoy this food.

I figured I could stuff it. After all, it looks like two bowls when you empty it out and I have come across various stuffed squash recipes in the past. So I looked into my pantry and came out with the following recipe. Even my meat & potatoes guy enjoyed this creation. It has plenty inside to make you forget that there isn’t any meat, and the squash isn’t the star, but is a strong contributor to the dish.


Stuffed Spaghetti Squash (serves 2)

  • 1 medium spaghetti squash
  • olive oil
  • 1 small-medium onion, chopped
  • 1 small-medium green pepper, chopped
  • 1 can chili beans, drained but not rinsed
  • 1/2 cup chunky salsa, hotness is your choice
  • 1/2 cup cheddar cheese, shredded

Preheat the oven to 375F. Line a baking dish with foil. Cut the spaghetti squash in half (or have someone do it for you if you are like me). Scoop out the seeds.

IMG_1478

Lightly oil the inside and outside of the squash and place cut-side down on the prepared baking sheet. Bake for 45-60 minutes (adding water if needed to the baking pan for the last 15 minutes to loosen up the flesh). Remove from the oven and let cool slightly. The flesh should flake easily with a fork. Shred all the squash.

IMG_1480


Meanwhile, sauté the onion & green pepper in a small amount of olive oil over medium to medium-low heat until caramelized (about 20-40 minutes depending how low & slow you are cooking). Add the drained chili beans until warmed through. Add the flesh from one squash half. Put the other flesh in a container to be used later. Add the salsa and 1/4 cup cheese (don’t worry about extra seasoning, the beans & salsa provide plenty!)

IMG_1482


Stuff both bowl squash halves and bake for 15 minutes. Top with the rest of the cheddar cheese and bake till melted. Garnish with green onions. Serve with more salsa & sour cream if desired.

IMG_1486


Garden Green Bean Salad

In Minnesota it is quite common to have a  garden. With proper planning, one can grow a variety of vegetables, fruits, and general plants. I have never had a garden before. I have done container gardening with some veggies & herbs in pots but I have never had a real garden. All of that changed this year with my recent move to Almost Canada.  This year we just planted along side our garage where there was already dirt prepared and adequate sun. We might have gotten a little over zealous with the planting as some plants took over some others, but overall I am quite pleased. With the cost of produce being so high way up north I have not been able to eat all the veggies I desire on a daily basis. With summer in full swing, the garden is in full bloom & I have an abundance of vegetables to consume for the time being.

This salad was made with one of our first harvests of green beans, cucumbers, zucchini, and yellow & red cherry tomatoes. It is very refreshing on a summer day. I made it originally just for myself for lunch and my fishing guide took a bite and said to make it again. I made it a second time as a side dish to something I cannot recall. All I remember is eating my heart’s desire of vegetables.

Garden Green Bean Salad (makes 2 side dish portions or 1 lunch portion)

  • 2 cups green beans, washed, trimmed, & cut into various sized pieces
  • 1 small zucchini, sliced into moons & half moons
  • 1/4 cup cucumber, chopped
  • 1/3-1/2 cup cherry or grape tomatoes, halved or quartered
  • 2 tbsp feta cheese
  • 1 tsp olive oil
  • 2 tsp lemon juice
  • pinch salt & pepper
  • 1/2 tsp dried dill
  • 1/4 tsp each dried oregano & basil
  • dash cayenne
  1. Place green beans & zucchini in a skillet. Place enough water to almost cover the vegetables. Bring to a boil & cook for 2-3 minutes or until green beans become a vibrant green color. Drain & run under cold water until cool to the touch.
  2. Meanwhile, combine olive oil, lemon juice, and seasonings in a medium bowl. Add blanched vegetables, cucumber, tomatoes, & feta cheese. Toss to combine.

IMG_1357


Italian Dunkers

My fishing guide asked me what my favorite Italian food was the other day. I sat a moment and realized I didn’t have one. It’s not that I don’t like Italian food, I actually really like it. Pastas, pizzas, risottos, chicken & seafood dishes, biscotti, tiramisu…Ok, maybe my favorite is tiramisu. There is a story there but that can be saved for a later date.

I replied that I didn’t have a favorite. I then asked him what his favorite Italian food was. I knew he had a great response waiting as it was such a random question. He said, Italian Dunkers. Well played. Who didn’t love the Italian Dunkers school lunch? School lunches get a bad rap but there are a few that everyone loves. Italian Dunkers is one of those in my expert opinion. With the approaching start to the new school year this dish was inspired at the perfect time.

I decided to make it with homemade bread & a meat marinara sauce. It turned out to be one of my favorite new things to make. Make it your own with whatever cheese you like or omit the meat from the sauce if you want to go vegetarian.


Italian Dunkers (serves 2, although it should really be 4)

  • 1 small baguette, halved both ways (store bought or see below)
  • 1/2 lb ground beef
  • 1 15oz can tomato sauce
  • 1 tsp each basil & oregano
  • salt & pepper to taste
  • dash onion powder, garlic powder, & cayenne
  • 1 bay leaf
  • head garlic
  • feta cheese
  • mozzarella cheese

If making your own bread:

  • 1 1/2 cups warm water
  • 2 tsp salt
  • 2.5 tsp dry active yeast
  • 3 cups bread flour
  • 1 cup warm water for baking
  1. Add 1.5 cups water to a medium bowl. Stir in salt & yeast. Add flour all at once & stir to combine. Use wet hands if necessary to incorporate all the flour.
  2. Cover loosely and let rise for 2-3 hrs (or let rise in the fridge for 8hrs).
  3. Preheat the oven with a pizza stone to 450F for 20 minutes. Have a shallow pan on another rack that won’t interfere with the rising of the bread. While the oven is preheating, take half of the dough and make a baguette shaped loaf on a lightly floured surface. Repeat with the other half. Let rise for 20 minutes. Brush the tops of the loaves with water and score a few times. Slide onto the heat stone and pour the 1 cup warm water into the shallow baking dish.
  4. Bake for 20-25 minutes to until golden brown and firm.
  5. Remove from the oven and let cool before slicing.

Preparation:

  1.  Peel all the papery skin off of the head of garlic. Chop 1/4in off of the top and drizzle with olive oil. Wrap in foil and roast the garlic in a 400F oven for 30-45minutes. Squeeze out the pulp once cooled slightly.
  2. Meanwhile, brown the meat and drain off excess grease. Add the tomato sauce and seasonings. Cover and simmer for 20-45 minutes. Remove the bay leaf before serving.
  3. Take the cut pieces of baguette and spread the roasted garlic over them. Top with feta & mozzarella cheese. Broil for 2-5 minutes until melted & bubbly. IMG_1363
  4. Serve with the meat sauce.

IMG_1366

Kind of Sort of Huevos Rancheros

I never used to eat breakfast. I hated eating in the morning. When I would go to daycare as a child & eat breakfast, I had already been up for a couple hours so I could choke down some cereal or oatmeal. Once I started feeding myself I relied on liquid breakfasts mainly because food made me feel sick so early in the morning. Eventually I was able to train myself to eat in the morning. I don’t eat huge breakfasts by any means but it is now a whole other meal to come up with recipes. Normally I end up eating the same thing for awhile & then switching it to something else for a bit.

This particular breakfast was completely random for me. I had some leftover millet from a previous meal as well as black beans, tomato sauce, & feta cheese. The millet has a slight corn taste so it replaces corn tortillas from a more traditional Huevos Rancheros. It all flows well together in this Kind Of Sort Of version. Give it a try.

Huevos Rancheros

  • 1/2 cup cooked millet
  • 1/3 cup canned black beans, drained & rinsed
  • 1/3-1/2 cup tomato sauce
  • 1-2 tsp taco seasoning (store bought or see mix here Taco Seasoning)
  • 1-2 tsp hot salsa
  • 1/4 cup feta cheese
  • olive oil
  • 1 egg
  1. Add the cooked millet, beans, & tomato sauce to a skillet with a small amount of olive oil. Stir in the taco seasoning & salsa. Heat through. Sprinkle with feta.
    IMG_1311
  2. In another skillet, cook 1 egg to your preference in a small amount of olive oil (I made mine over easy but any preparation will do). Place the egg over millet mixture. Enjoy.

IMG_1312


Blackened Shrimp over Cheesy Cauliflower Puree

I was watching some food show and someone made spicy shrimp & cheesy grits. I thought it looked so good. I then realized I have never had grits. How this could have happened I do not know. I spent every summer from 4th grade through 12th grade in North Carolina so one would think I would have had them at some point but I cannot seem to recall eating them ever. Since my grocery store is rather bleak here in Almost Canada, I decided to make a cheesy cauliflower puree. I love cauliflower purees. They are so silky & light yet indulgent depending on what you add to them. It goes perfectly with the blackened shrimp. One day I will make grits but until then this will do for now.

Blackened Shrimp over Cheesy Cauliflower Puree (serves 2) (Inspired from some random show)

  • 20 medium uncooked, peeled, & deveined shrimp
  • olive oil
  • seasoning: store bought blackened or Cajun seasoning or mix the following… 
    1 1/2 tsp paprika
    1/2 tsp garlic powder
    1 tsp onion powder
    1 tsp oregano
    1 tsp thyme
    1/4 tsp black pepper
    1/4 tsp crushed red pepper flakes 
  • 1 head cauliflower cut into large pieces
  • 2 tbsp. butter
  • 2-4 tbsp. plain yogurt
  • Pinch onion powder & garlic salt
  • salt & Pepper to taste
  • 1/2 cup shredded cheddar cheese
  1. Bring a pot of water to boil. Add the cauliflower pieces & boil for 10 minutes or until tender. Drain the water.
  2. Once drained, heat a small amount of oil in a skillet. Add the shrimp & 1-2 tsp seasoning. Add salt to taste. Cook for 2-3 minutes per side until opaque & pink.
  3. While cooking the shrimp, mash the cauliflower. Add the butter, yogurt, onion powder, garlic salt, & pepper. Stir until combined. Use an immersi0n blender & puree until your desired consistency. Add the cheese & stir until melted throughout.
  4. Serve the shrimp over the puree.

IMG_1301

White Chicken Lasagna

When I was younger I never cared for lasagna. I attribute this to a few things. I did not care for lots of red sauce at that time. I always thought lasagnas had too much sauce. It was unappealing to look at & I ended up scraping excess away. I also thought they were too cheesy. I love cheese. I have always loved cheese. I eat way too much cheese I am sure, but when it comes to pizzas & lasagnas I believe that less is more. I also don’t know if I ever had a homemade lasagna. They were always frozen aisle lasagnas.

Once I started cooking for myself, I realized I love lasagna. I just like it the way I make it with less sauce & cheese. I also never used to use loaf pans. I would use a normal 8×8 or 9×13 pan. Since I am cooking for 2 almost always, I like using the loaf pans. That way it is always fresh when you pop it in the oven. I also like being able to prep meals ahead of time & lasagna is one of the perfect make ahead meals. With the loaf pans you get one right away and another within a week. As the guy I am cooking for likes red lasagnas I have always made those. I decided to make a white lasagna this time. It is creamy, savory, & a nice change from a traditional red sauced lasagna. It even has his approval.

IMG_1240

White Chicken Lasagna

  • 2 large chicken breasts, cooked and shredded
  • 8 lasagna noodles, cooked
  • 1 1/2 cups cottage cheese
  • 1/2 cup mozzarella cheese
  • 1 egg
  • 1tsp each basil, oregano, pepper
  • few dashes each onion powder & garlic powder
  • 1 diced onion, red pepper, & yellow pepper
  • olive oil
  • 1 tbsp. butter
  • 3 tbsp. flour
  • 1 cup chicken stock
  • 3 cups milk
  • pinch sage, basil, oregano, pepper & salt
  • 1/4 cup mozzarella
  • 1/2-3/4 cup mozzarella cheese
  • parmesan cheese (optional)
  1. Lightly coat a large skillet with olive oil. Sauté the onion & peppers until almost caramelized. Add one tbsp. butter & stir until melted. Add 3 tbsp. flour & stir until dissolved. Add 1 cup chicken stock, 3 cups milk, & pinch each basil, oregano, pepper & salt. Stir often until thickened & bubbly. Add 1/4 cup mozzarella cheese.
  2. Meanwhile, mix egg, cottage cheese, shredded chicken, tsp each basil, oregano, & pepper, few dashes each onion & garlic powder, & 1/2 cup mozzarella cheese in a medium bowl.
  3. Take two loaf pans & place 1/4 cup sauce on the bottoms of each. Place approx. 1.5 noodles (cutting & overlapping as necessary) on sauce. Top each with 1/4 the chicken mixture. Sprinkle a small amount of mozzarella cheese over the chicken. Top with sauce. Repeat layers once ending with last layer of noodles on top. Finally, over the last set of noodles place some more mozzarella & top with remainder of sauce. If desired, top with parmesan cheese. Cover both with foil. Bake immediately, place in the fridge overnight, or place in the freezer for up to a week (if placing in freezer cover with foil, wrap it completely in plastic wrap, & wrap again completely with foil. Remove outer wrap of foil & plastic before baking).
  4. Bake in a 375F oven for 40-45min covered & 15-20 minutes without foil (if frozen add 10-15 minutes to each portion of baking).

IMG_1275

Multiple Meals: Pizza, Lasagna, & Gravy

There is no story behind this post. I simply had too much food that needed to be eaten so it wouldn’t go to waste. Seeing as how I only like to eat the same thing a handful of times, I decided to split it into 3 meals (this also took care of a lot of meal planning for me for the week). Each can serve 2 & you get spare lasagna as well!

Prep for all 3:

  • Brown 1lb ground beef & 1lb hot Italian sausage together. Set aside 1 cup browned meat for gravy.
  • Sauté 2 yellow squash, 2 zucchini & 2 onions together
  • Prepare pizza sauce (mix all together)
    • (1) 6oz can tomato paste
    • 1/3-2/3 cup water (depends on consistency you want for pizza sauce)
    • ¼ olive oil
    • Dash Salt & pepper
    • 2tsp each Basil & oregano
  • Prepare pizza dough (makes 2 – 1 for pizza & 1 for another use within 1 week in the fridge covered loosely):
    • Mix in a large bowl: 1.5 cups warm water, 2 ¼ tsp yeast, 1tsp salt, 2 tsp sugar, ¼ cup olive oil
    • Add 3 cups bread flour using wet hands if needed to incorporate all the flour
    • Cover loosely and let rise for 2-2.5 hrs


Pizza

  • Browned meat
  • Sautéed veggies
  • Pizza sauce
  • Half the dough
  • Mozzarella cheese
    • Preheat oven with pizza stone lightly coated with cornmeal at 450F for 30minutes. Roll out dough on a lightly floured pizza peel to be 1/8in thick.
    • Spoon half the sauce on the dough. Top with light sprinkling of cheese. You should still see the sauce through the cheese
    • Top with browned meat & veggies. Again, be light with toppings.
    • Slide onto stone & bake for 20-25minutes until crust is cooked through.

sausage pizza


Lasagna (Makes 2 lasagnas. Each lasagna serves 2)

  • Browned meat
  • Sautéed veggies
  • Pizza sauce & 15oz can tomato sauce
  • 6-12 cooked lasagna noodles (depending on preference)
  • 1 container part-skim ricotta cheese
  • 1 egg
  • Mozzarella cheese
  • Basil & oregano
    • Mix pizza sauce & tomato sauce together. Add more basil & oregano to taste.
    • Mix egg & ricotta cheese. Add ¼ cup mozzarella cheese to this mixture.
    • Put ~1/4 cup sauce on bottoms of two loaf pans.
    • Cut noodles as necessary to fit pan (about 1-2 noodles per layer & 3 layers total).
    • Add a few tbsp ricotta mixture & spread over noodles. Top with browned meat & veggies. Top with more sauce. Repeat layer again & add some mozzarella cheese over the ricotta blend. For the final layer, use ricotta, mozzarella & sauce only. Cover with foil. Repeat for second lasagna. Bake immediately, after 24hrs in fridge, or within a week in the freezer.
    • If baking immediately, bake for 30 minutes with foil & 15-20 without foil. If baking after storing in the fridge for a day, bake for 40minutes with foil & 15-20 without. If baking from the freezer, bake for 60 minutes with the foil, & 15-20 without.

sausage lasagna


Gravy

  • 1 cup Browned meat
  • 1 cup Milk
  • 1 tbsp Flour
  • Pepper to taste
    • Put browned meat in skillet or pot. Reheat for a few minutes.
    • Add 1 tbsp flour to meat & sauté for 1-2minutes.
    • Add 1 cup milk & cook over medium heat until thickened & bubbly. Add pepper to taste.
    • Serve over biscuits or toasted baguette slices (if all else fails, serve over a slice of toast like I did)


sausage gravy